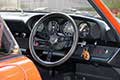

Wot, not another '79 Targa resto thread

Ongoing and archived Porsche (and other marques) restoration threads from DDK members

Moderator: Bootsy

Post Reply
User avatar
PeterK
DDK rules my life!
Posts: 1274
Joined: Mon Sep 01, 2014 3:04 pm
Location: GU51 - Fleet, Hampshire, UK

Re: Wot, not another '79 Targa resto thread

Post by PeterK »

Thought that it was time for an update, although lots of effort doesn’t seem to have produced mega change.

Wifey came back from 3 weeks in NZ, along with elder twin (who was away travelling for 4 months in total). Apparently it is normal to talk to them. Then came Xmas, and apparently you’re supposed to talk to all of the family. Outrageous, but never-the-less, I did manage to escape to the outside man cave on a few occasions.

I wanted to crack on with the front fuse panel, but with the combination of multiple non-standard wires, wires running to fuses not matching the Bentley Manual and a few lost labels, a new approach became increasingly attractive. I drew a pictorial representation of the fuse panel, added details of Bentley's version of wire colours, and where they went to or came from. I then belled out all of the mess in the froot, also known as a set of looms, re-labelling each wire with the fuse number and whether top or bottom row.
Work in progress
Image


I kept finding excuses & distractions, including assembling the rear electrical panel. Here is has been installed, although the CDI box relay and regulator are disconnected, pending live testing.
Image
The blue/green wire hanging out by the rear fuse panel in this photo runs to the 14way connector, but to a terminal that doesn't go anywhere. I stuck it back in the lower fuse - it was easier than trying to rip it out.

I also ran a couple of wires from the engine bay – one connected to the CDI box for a shift light (although I don’t know whether I’ll actually fit one in the dash or console) and the other for rear fog lights. The car came with a fog light switch, but neither front nor rear fog lights. The fog light switch was connected to the fuse panel, but with a wire colour that should have connected the front fog lights to the relay (which I also don’t have).

Then the mess of wires was routed around fuse panel support, ready for the fuse panel itself.
Image


I finally got around to (starting to) wire the fuse panel today.
Image
There are just a couple of wires that I appear to have lost, and the bundled looms need to be routed more neatly to allow the fuse panel to sit comfortably against the inner wing.

My plan is to connect the battery, but via a small fuse. I will then add the fuse for each circuit and test operation.
'79 Targa - restoration now mainly complete & being driven
http://www.ddk-online.com/phpBB2/viewto ... 28&t=59756

and now CIS to EFI
viewtopic.php?t=72921
Gary71
Nurse, I think I need some assistance
Posts: 10730
Joined: Wed Mar 31, 2004 1:27 pm
Location: Cheshire
Contact:

Re: Wot, not another '79 Targa resto thread

Post by Gary71 »

I don’t envy you that job. Such a pain!
911hillclimber
Nurse, I think I need some assistance
Posts: 20690
Joined: Mon Mar 10, 2008 6:26 pm
Location: West Midlands

Re: Wot, not another '79 Targa resto thread

Post by 911hillclimber »

I really hate wiring a car, and that looks horrendous, but has to be done.

Take your time, do it once.
73T 911 Coupe, road/hillclimber 3.2L
Lola t 492 / 3.2 hillclimb racer
Boxster 987 Gen II 2.9
Lightweight_911
Nurse, I think I need some assistance
Posts: 17999
Joined: Wed Nov 12, 2003 10:48 pm
Location: Worcs/W Mids border

Re: Wot, not another '79 Targa resto thread

Post by Lightweight_911 »

PeterK wrote: The blue/green wire hanging out by the rear fuse panel in this photo runs to the 14way connector, but to a terminal that doesn't go anywhere. I stuck it back in the lower fuse - it was easier than trying to rip it out.
There was a 'spare' solid green wire that runs from the 14-pin connector up to behind the dash which was only used in Sporto models (for the Sporto oil warning light) - so it is probably that.

.
Andy

“Adding power makes you faster on the straights;
- subtracting weight makes you faster everywhere”
User avatar
PeterK
DDK rules my life!
Posts: 1274
Joined: Mon Sep 01, 2014 3:04 pm
Location: GU51 - Fleet, Hampshire, UK

Re: Wot, not another '79 Targa resto thread

Post by PeterK »

Could well be, although it's a different colour Andy. I do have a 'spare' green wire behind the clocks, which I had assumed is the same 'historical' Sporto wire (courtesy of my friend Google)

Strange that Porsche save money by removing the pins from the multi-way connector, but don't remove the wire from the loom.
Peter
'79 Targa - restoration now mainly complete & being driven
http://www.ddk-online.com/phpBB2/viewto ... 28&t=59756

and now CIS to EFI
viewtopic.php?t=72921
User avatar
PeterK
DDK rules my life!
Posts: 1274
Joined: Mon Sep 01, 2014 3:04 pm
Location: GU51 - Fleet, Hampshire, UK

Re: Wot, not another '79 Targa resto thread

Post by PeterK »

Managed to sneak another couple of hours in the garage (definitely need to find SWMBO another job :lol:). For a change and as a little rest from wiring, I decided to get back into bodywork. Those with a long memory will remember that the door to front wing gaps were cavernous :roll: .

Firstly, I realised that the rearmost bolts don’t really allow any choice in where the wing sits, just a smidgen up, down, front and back. So clamping this bolt tightly ensured that the wing went on in the same place every time. I also made sure all the door hinge bolts were tightened down.

So, out with the MIG machine, a bit of sparky, sparky and we were moving forwards. I had marked up what I thought need to be added by marking a distance from the edge on some masking tape. Should really have put the masking tape further from the edge. Who’d have known that masking tape burns, and furthermore, once it burns, you can’t read what you’ve written on it :oops: . Anyway, took the wing off, built up the edge, and tried it back on the car.
Image

It starts of quite ugly
Image

.. and sometimes is even worse
Image

… but little by little, weld a bit on, grind some off, repeat a few times and nothing that a thin skim of filler won’t hide. This was partway through, but I couldn't be bothered to go back and get an 'end' shot.
Image


Did I mention tightening down the door hinge bolts a bit more – well this made the door move slightly, so although I thought that the door was sorted previously, a little more attention was needed to the rear edge now.
Image

Gaps are now set to 4mm, although I am tempted to tighten them to 3.5, but I’m sure I can get over that.
Image


Started on t’other side, but tea was calling.


Today was visiting day for the Garage Bitch :cheers: . I’m visiting Mr Jonny of this parish tomorrow, and wanted to take the crank for a polish with his local ‘man’, so the engine had to come apart. As a quick warm up, we removed the lower ball joint of ‘elder’ (14 minutes – it’s important to her) twin’s Fiesta, turned the metal protection ‘thing’ the correct way up (hope it stops swinging in the breeze, touching the disc and whistling now), then put everything back together. Went surprisingly well and quickly. Another cup of coffee and onto the main event. Ages ago I had pulled off 3 cylinders to check, found that I had Alusil cylinders and so ended up with some re-plated and accidentally re-bored to 98mm cylinders, just right for my shiny new 89mm pistons :lol: .
The heads are away for new valve guides and a quick surface dressing, so time to get stuck into the engine ‘proper’.

Got a bit excited and forgot to take many photos, but off came the other 3 piston and cylinders. Then out with the bolts and try to split the casing.
Image

Didn’t want to split, so hunt for missed bolts (found 2)
Image

Still wouldn’t split, so more hunting. Didn’t find any. Break out the manual and count your bolts - all apparently removed. Still, hunt for more bolts but none found. H̶I̶t̶ gently tap casing harder, and finally the halves split.

Say wow at the shiny internal bits. Remove innards, add crank and rods back into casing for safekeeping and transport, and just use 2 nuts to hold halves together.
Image

Forgot to take a photo of empty case, but here’s the oil pump and intermediate shaft to prove it did all come apart
Image

Tried to remove the lower head studs, but having gloriously failed with the two broken ones, gave up - another job for the machine shop methinks :lol:

Oily bits in boot of car ready for further inspection. One main journal has very small scratch / score, but all looks fine for just a quick polish. We’ll see.


Thanks again GB :salute: .
'79 Targa - restoration now mainly complete & being driven
http://www.ddk-online.com/phpBB2/viewto ... 28&t=59756

and now CIS to EFI
viewtopic.php?t=72921
The Garage Bitch
DDK Fanatic
Posts: 63
Joined: Thu Feb 07, 2019 4:37 pm

Re: Wot, not another '79 Targa resto thread

Post by The Garage Bitch »

My pleasure mate

Anyhoo, you know I always enjoy getting down and dirty with you :bounce: :bounce: :bounce:

:lol:
911hillclimber
Nurse, I think I need some assistance
Posts: 20690
Joined: Mon Mar 10, 2008 6:26 pm
Location: West Midlands

Re: Wot, not another '79 Targa resto thread

Post by 911hillclimber »

Ref door gaps
When I did mine all those decades ago, I had a similar problem with the Dansk door skins.

Ended up tack welding a length of 1/8" welding wire to the front edge and then leading it all tight which only needed a tickle with the grinder/file and all was done.

Remember paint can be quite thick...
Make sure the Boss's job is well paid so she can contribute. :blackeye:
73T 911 Coupe, road/hillclimber 3.2L
Lola t 492 / 3.2 hillclimb racer
Boxster 987 Gen II 2.9
User avatar
PeterK
DDK rules my life!
Posts: 1274
Joined: Mon Sep 01, 2014 3:04 pm
Location: GU51 - Fleet, Hampshire, UK

Re: Wot, not another '79 Targa resto thread

Post by PeterK »

Fairly sure that no matter what SWMBO earns, nothing is likely to be coming to a Porsche near me :lol:
'79 Targa - restoration now mainly complete & being driven
http://www.ddk-online.com/phpBB2/viewto ... 28&t=59756

and now CIS to EFI
viewtopic.php?t=72921
Phill

Re: Wot, not another '79 Targa resto thread

Post by Phill »

Looking Fab Peter. Let me know when you are ready to rebuild engine.
That blue green wire you mention is deffo Sporto related. I have it connected to fuse 22 and mine use to be a Sporto. It's also mentioned on the back of the plastic fuse cover.
User avatar
PeterK
DDK rules my life!
Posts: 1274
Joined: Mon Sep 01, 2014 3:04 pm
Location: GU51 - Fleet, Hampshire, UK

Re: Wot, not another '79 Targa resto thread

Post by PeterK »

So oily bits delivered to machine shop – initial estimates are 8 weeks before ready. Yes Phill - not forgotten your interest :bounce: . Garage has (a little) more space now.
Image

Just noticed the manky air tools in the corner :oops: . I was given these, put them in the corner ready to check, clean and either throw or put away. They've only been there for three months - no need to rush these things is there :lol: .

Did a bit more on the front wings, and gaps both sides, front wing to door and door to rear wing looking acceptable. Now need to remove wings, make sure all is smooth (especially on the inside of the panels) and that curves are smooth. After a coat of epoxy primer it will then be time to start checking / filling / sanding the outer panels to make the car a flat as possible.


Also had a play with the brake calipers again. Ordered the half joining seals from the US – apparently the fronts have a spacer and so need 8, seals the rears just need 4. Ordered 16 anyway and just as well – my rear calipers also have spacers !. Quick check that my new discs are the same width (give or take wear on the old ones), and luckily they are.
The drawback (and lesson learned) to checking parts as you remove them and buying replacements as necessary, is that it can take some time before you come to fit them. Some suppliers may not be too accommodating about taking back stock they sold more than a year ago. Better, I think, to note what you need when you dismantle things but to buy just in time for re-assembly.

Anyay, calipers split
Image

I have the special RIBE nut tools and the rear calipers had the M7 variant as expected, but it looks like the bolts in the front calipers had been replaced before – they were allen headed socket bolts. Grade 12 so should be strong enough.
Image
So, all dismantled, put into a box and off to the platers.

Turns out the acid dips don’t always remove all paint, so back home with the calipers, soak them in thinners a good attack of the soft wire brush and off to the platers again.
Image
Bolts will of course be heat treated after plating and passivating.


The Garage Bitch is returning in a couple of weeks, so we'll try fitting front and rear bumpers, etc to ensure all fits before painting.
'79 Targa - restoration now mainly complete & being driven
http://www.ddk-online.com/phpBB2/viewto ... 28&t=59756

and now CIS to EFI
viewtopic.php?t=72921
The Garage Bitch
DDK Fanatic
Posts: 63
Joined: Thu Feb 07, 2019 4:37 pm

Re: Wot, not another '79 Targa resto thread

Post by The Garage Bitch »

PeterK wrote:Fairly sure that no matter what SWMBO earns, nothing is likely to be coming to a Porsche near me :lol:
Knowing the lady in question, lovely though she is, I second that thought :lol:
User avatar
PeterK
DDK rules my life!
Posts: 1274
Joined: Mon Sep 01, 2014 3:04 pm
Location: GU51 - Fleet, Hampshire, UK

Re: Wot, not another '79 Targa resto thread

Post by PeterK »

Righthand front wing removed & edges smoothed / levelled. I'd noticed a couple of minor rust repairs were needed to the mounting flange.
Image

Also, there were a couple of what looked like rust bubbles that I had explored earlier - one, just under the headlight, had a patch previously welded in underneath (a bit of linishing has significantly reduced the amount of filler needed now). Luckily the other 'bubble' was just a paint defect. Given the time spent on the rest of the car, I was resisting the tempation to just blow paint over the top of the wings without stripping.

On the plus side, I have found a few areas where underbody protection / stone chip / whatever was compromised, and small amounts of surface rust had started. On the down side, it has taken ages.


What should I be using to remove the stone chip ?. It took me 6 hours to get to here
Image

The stonechip (a biege colour) was so hard I eventually had to use knotted wire brushes in the angle grinders (used up 2 brushes) and finishing with the crud buster. Even with resharpening the wire wheels on the crud buster every 30 minutes, it would not make much impact on the stone chip.

I couldn't get the big tools into the corners
Image

or underneath the headlight bowl - they needed a lot of fidly cleaning.
Image


Finally, after about another 4 hours, I got to here
Image
That used up a further 2 small wire wheels used in air die grinder and another bigger wire wheel. Not got every last bit of stone chip out of the deepest recesses yet, so a little more time needed. Also need to acquire or make some long-shafted, small diameter wire brushes.

In comparison, it only too 30 minutes with a plastic wheel to strip the outside. There was some thin filler on this wing, and some strange ripples above and in front of the wheel arch - evidence of a minor bump ?
Image

and another 30 minutes to strip inside the headlight bowl. Some dregs of paint around the outside lip, but will need a very narrow wire wheel to get in here.
Image

I was collecting up huge amounts of dust and debris as I went along. An awful lot has gone everywhere (so shelves, tools, lathe, etc will need a bit of a clean up), and even just where I was standing, it's not too tidy :oops:
Image

Tomorrow is another day, but the elephant in the room is the other wing that is still waiting for my attention.
'79 Targa - restoration now mainly complete & being driven
http://www.ddk-online.com/phpBB2/viewto ... 28&t=59756

and now CIS to EFI
viewtopic.php?t=72921
Phill

Re: Wot, not another '79 Targa resto thread

Post by Phill »


Tomorrow is another day, but the elephant in the room is the other wing that is still waiting for my attention.
Take it to the sandblasters!
User avatar
Darren65
Nurse, I think I need some assistance
Posts: 8161
Joined: Mon Dec 13, 2010 10:55 pm
Location: North Wiltshire
Contact:

Re: Wot, not another '79 Targa resto thread

Post by Darren65 »

Sandblasting doesn't work on the stone chip, you need heat and a scraper.......and a long, long time! :?

Looking good Peter 8) :thumbleft:
Post Reply