Page 19 of 20
Re: Project Blue Book
Posted: Sat Oct 21, 2023 6:51 pm
by 911hillclimber
Super impressive, this level of detail must take ages!
Re: Project Blue Book
Posted: Mon Oct 23, 2023 10:36 am
by neilbardsley
Do you have clearance for the rain tray with the 912 air cans on? I thought about adding larger air filters to mine but they will not fit under the rain tray.
Sent from my 22011119UY using Tapatalk
Re: Project Blue Book
Posted: Thu Dec 14, 2023 5:11 pm
by chief
neilbardsley wrote: ↑Mon Oct 23, 2023 10:36 am
Do you have clearance for the rain tray with the 912 air cans on? I thought about adding larger air filters to mine but they will not fit under the rain tray.
Sent from my 22011119UY using Tapatalk
Hi Neil,
I shall not be using the rain tray on this application.
Re: Project Blue Book
Posted: Thu Dec 14, 2023 5:16 pm
by chief
Re: Project Blue Book
Posted: Thu Dec 14, 2023 6:40 pm
by anglophone1
I thought that bench looked familiar! Sam built the type 4 race enigine in my Tango 914 rally car,
Great work - goes like stink- wish the driver was as good!
Re: Project Blue Book
Posted: Mon Dec 18, 2023 2:54 pm
by chief
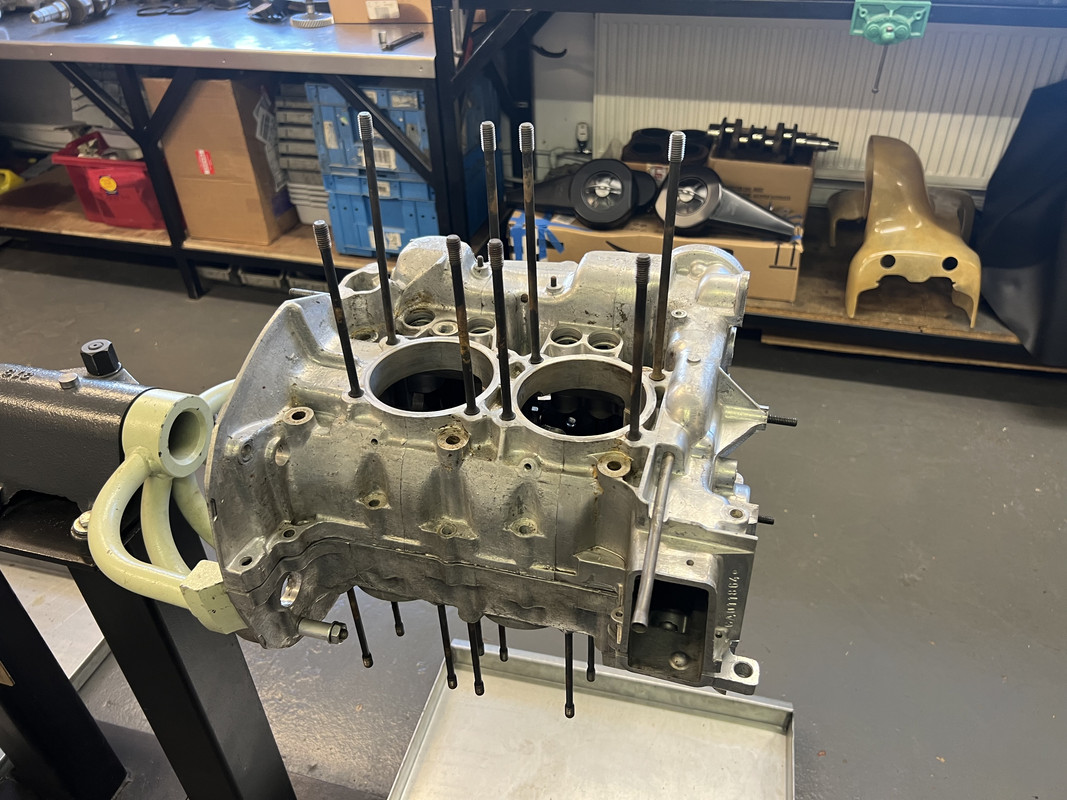
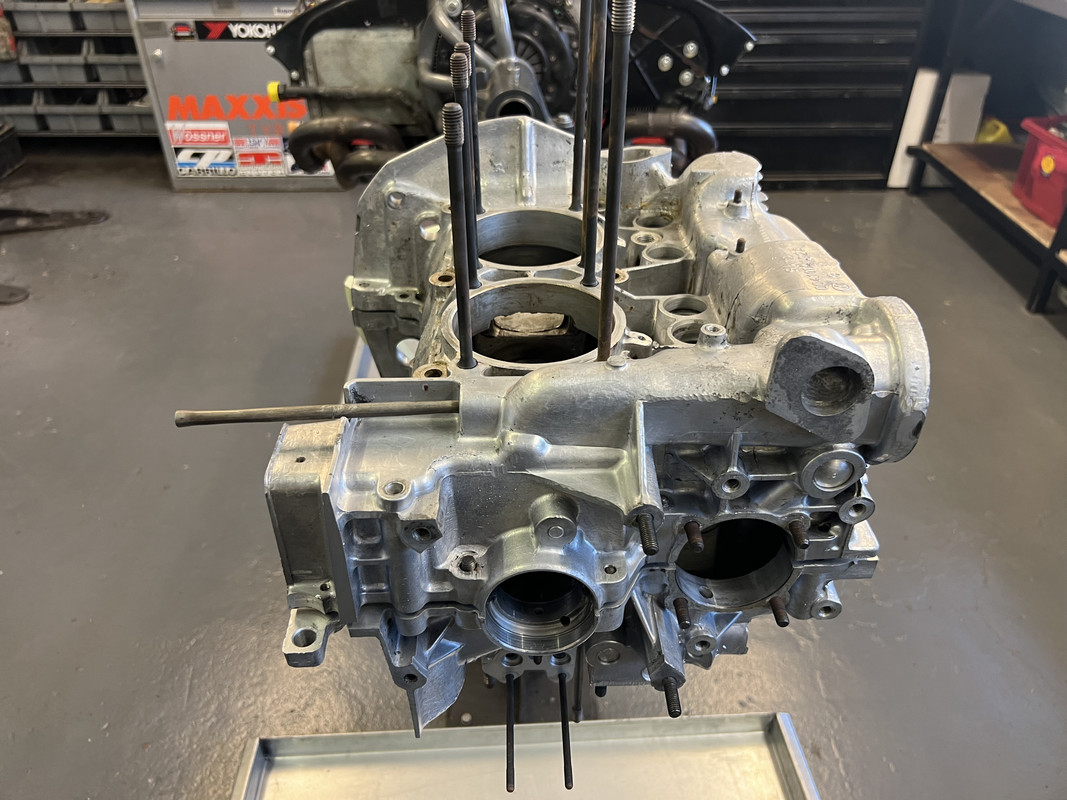
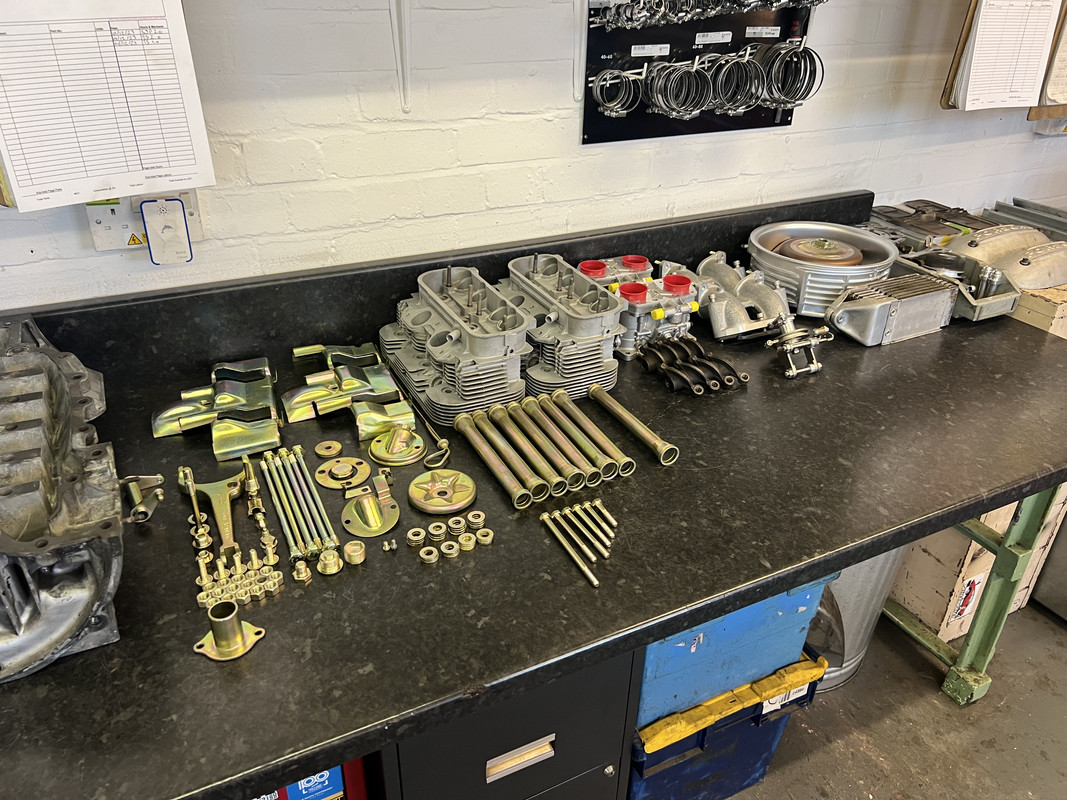
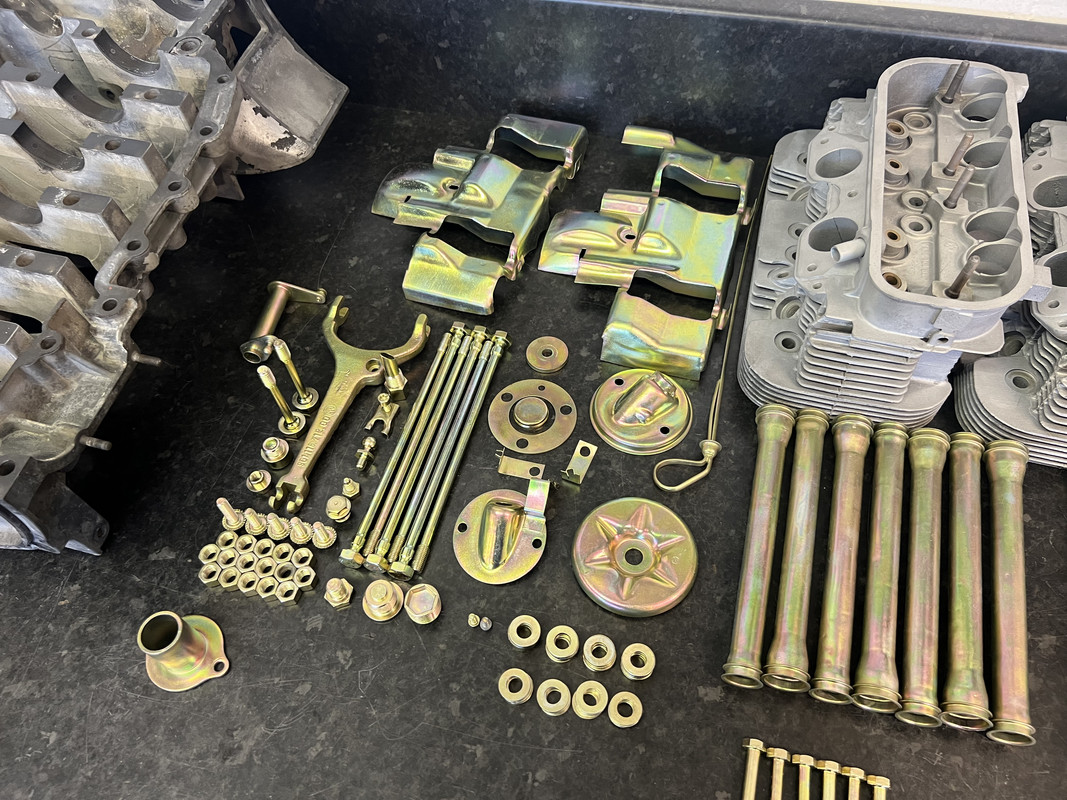
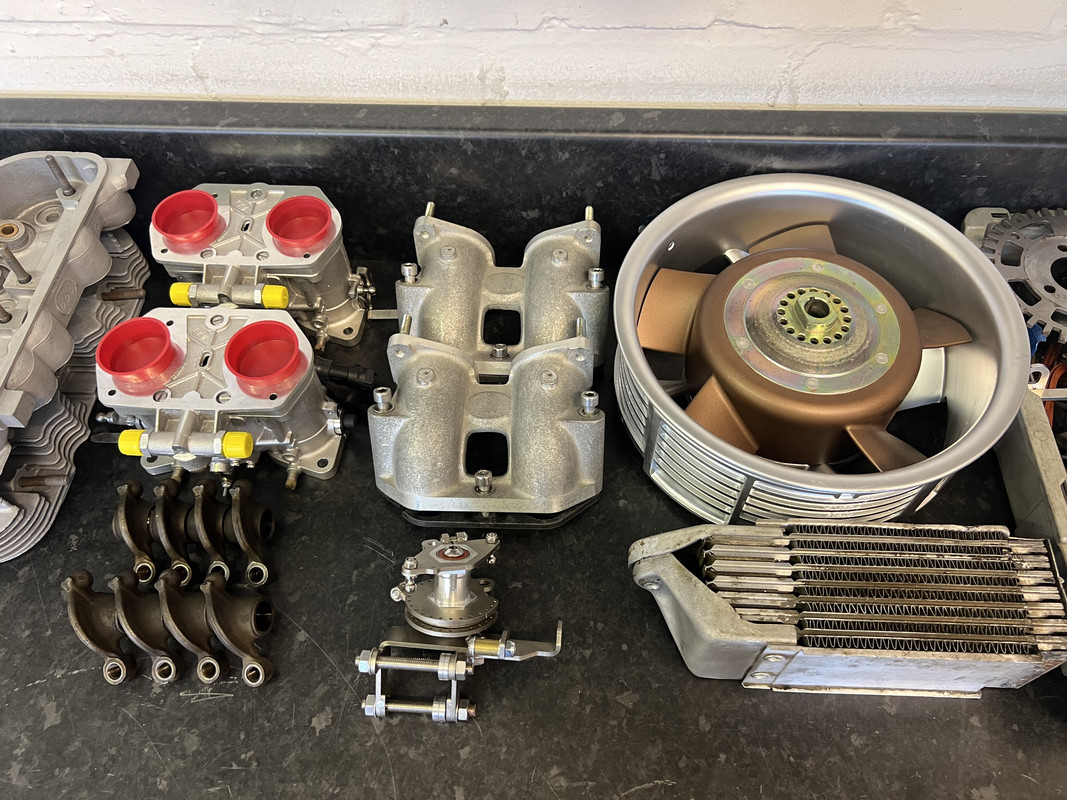
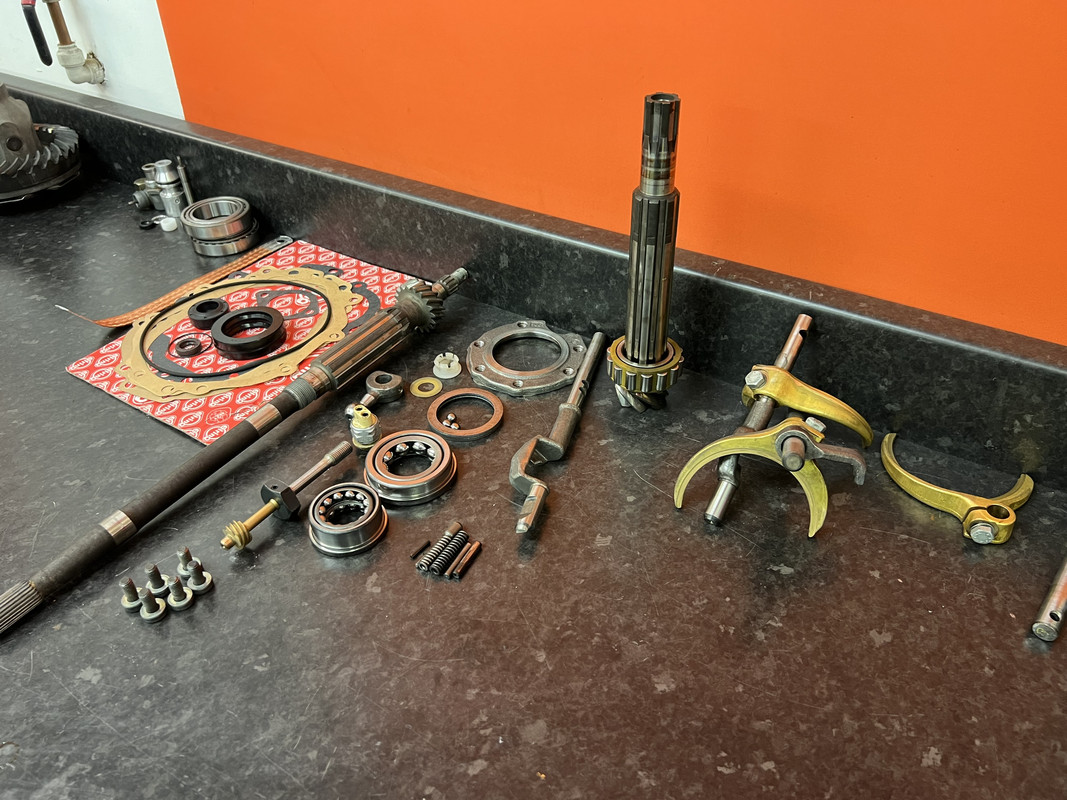
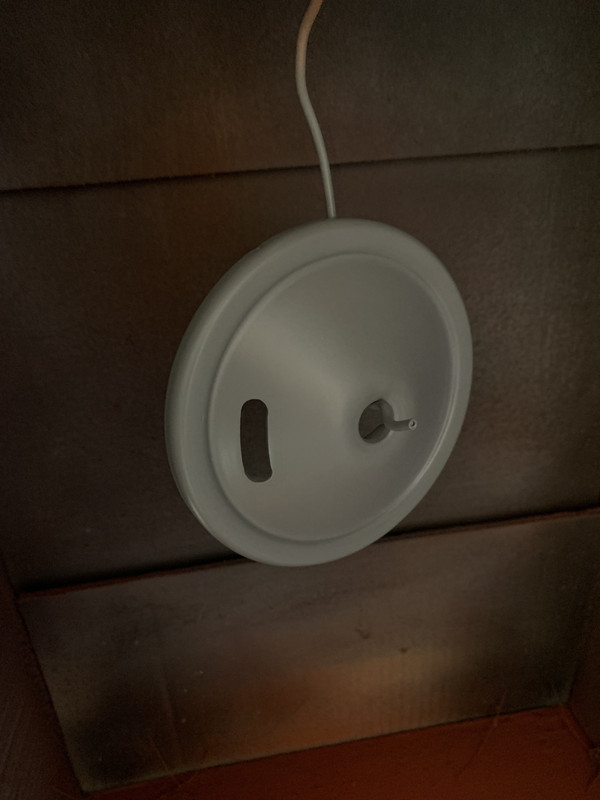
Been quite busy in the workshop this last few days. Some time ago I posted up some images of a lovely 356 oil cannister that I had decided to repurpose into my oil vent and catch tank. Well it was on the back burner with all the other bits and bobs going on. I thought it was well time to finish this off. I have been giving some thought about positioning and how best to utilise it. The fire wall is slanted back to accomodate the lean on the passenger seats. This meant creating something to straighten up the oil can (as we shall refer to it).
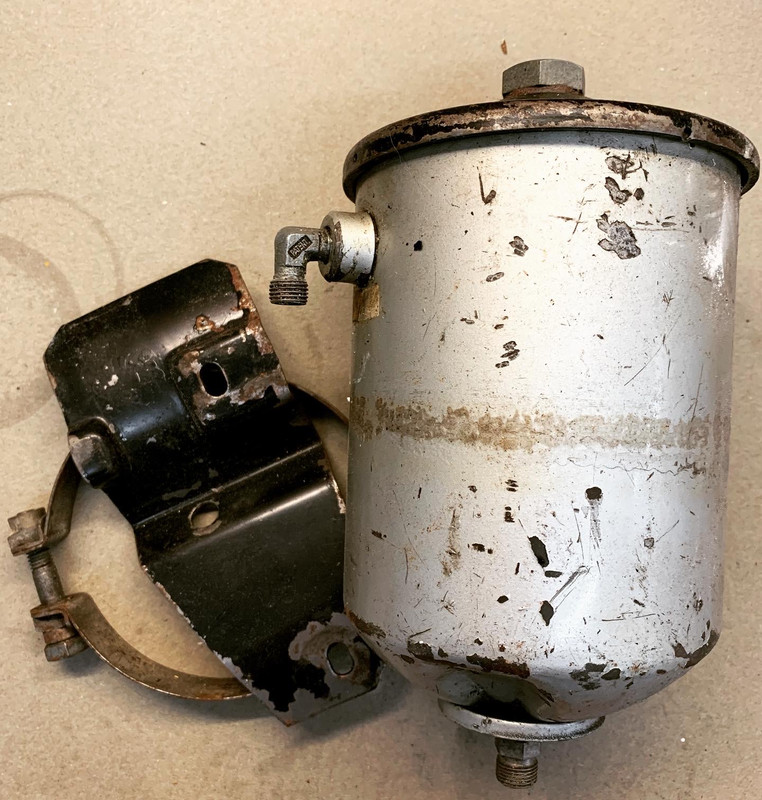
This is what I inherited.
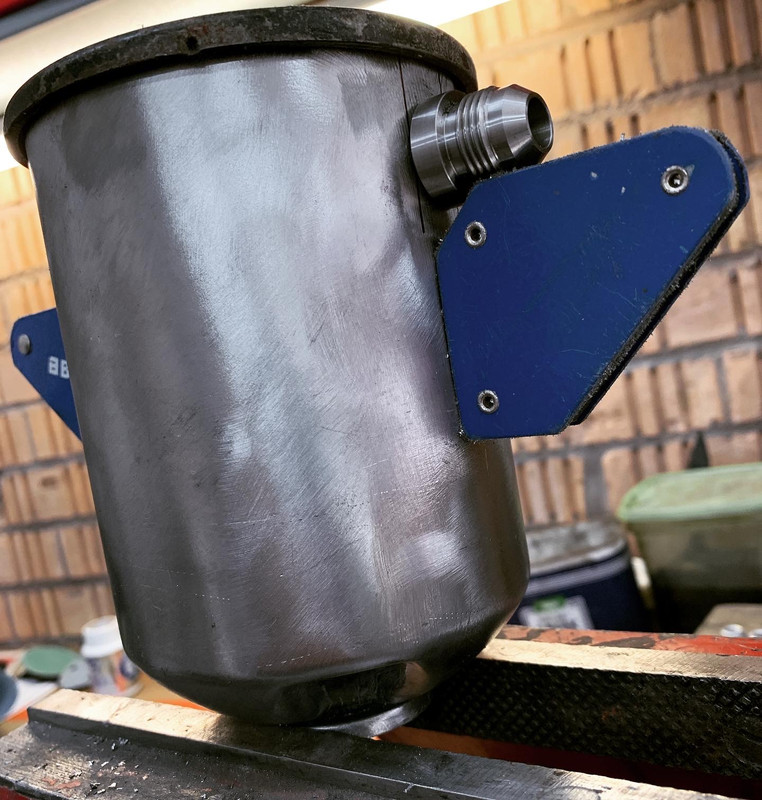
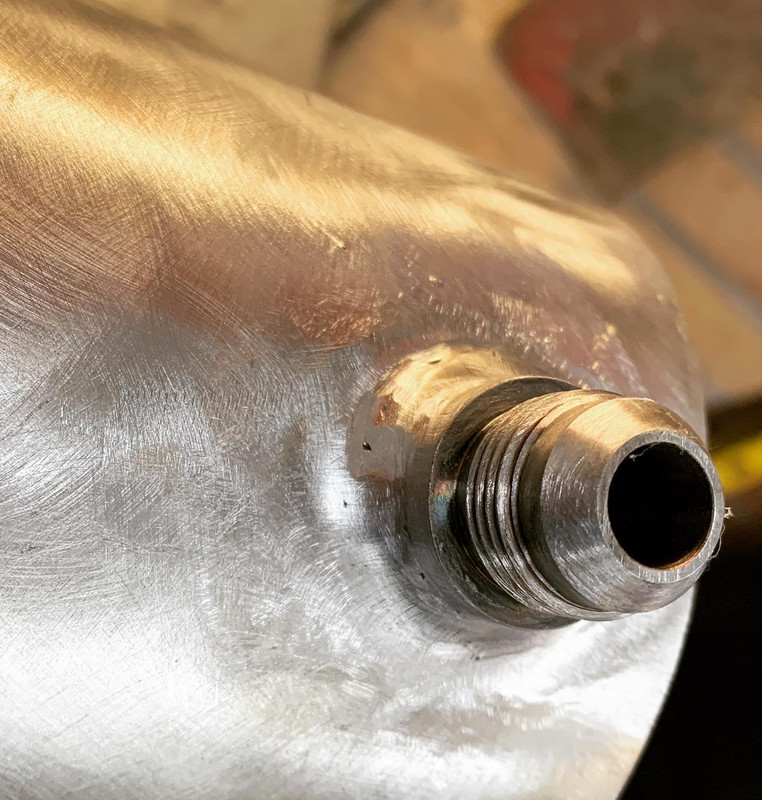

I welded in some AN fittings.
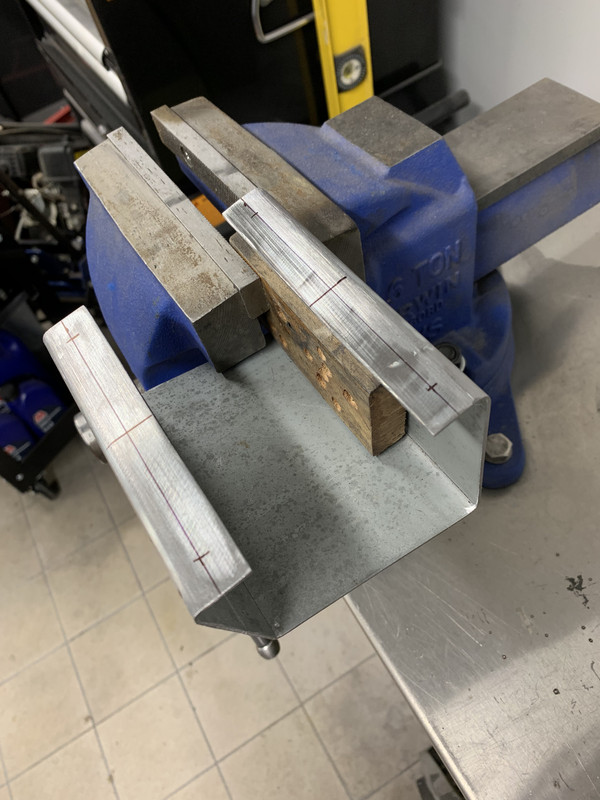
Some measuring and here we go.
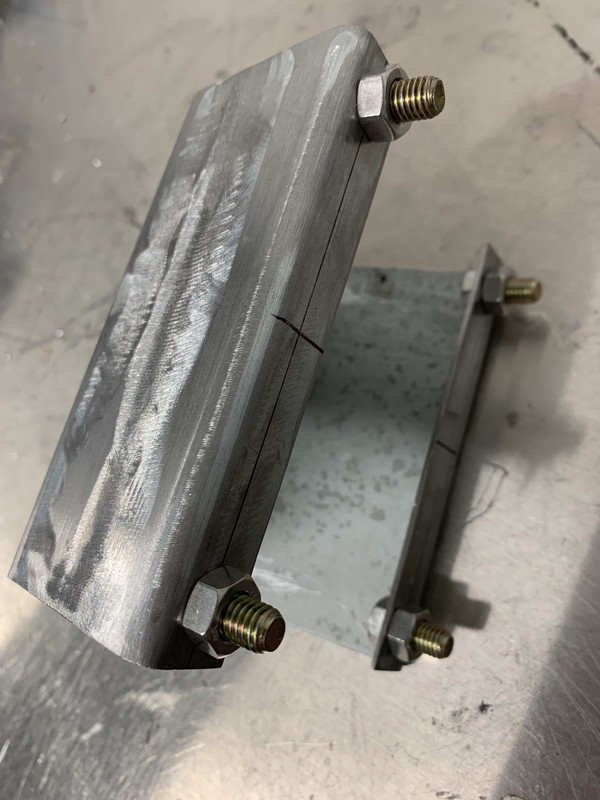
I welded in some studs so I could fit it through the firewall and just spin on nuts from the inside of the car.
I then welded in the sides to creat a nicer looking box.
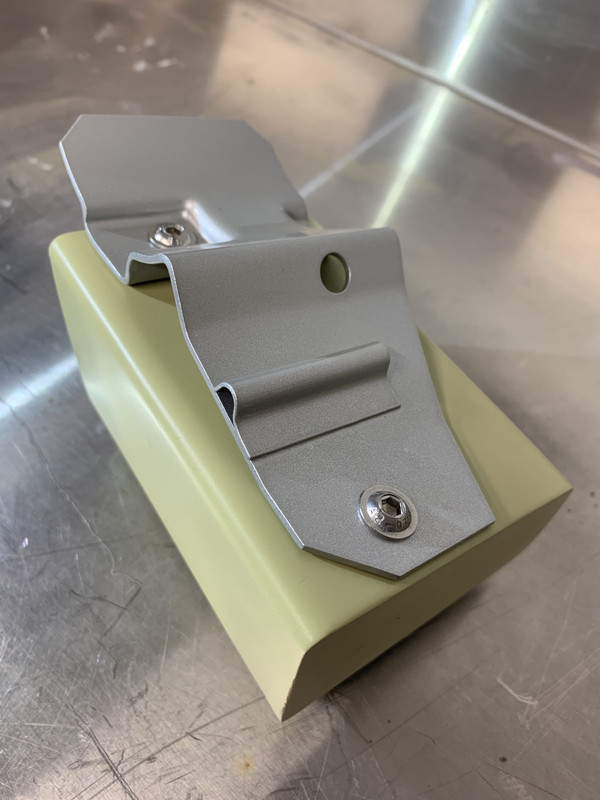
Some holes drilled and nuts welded in for the oil can bracket.
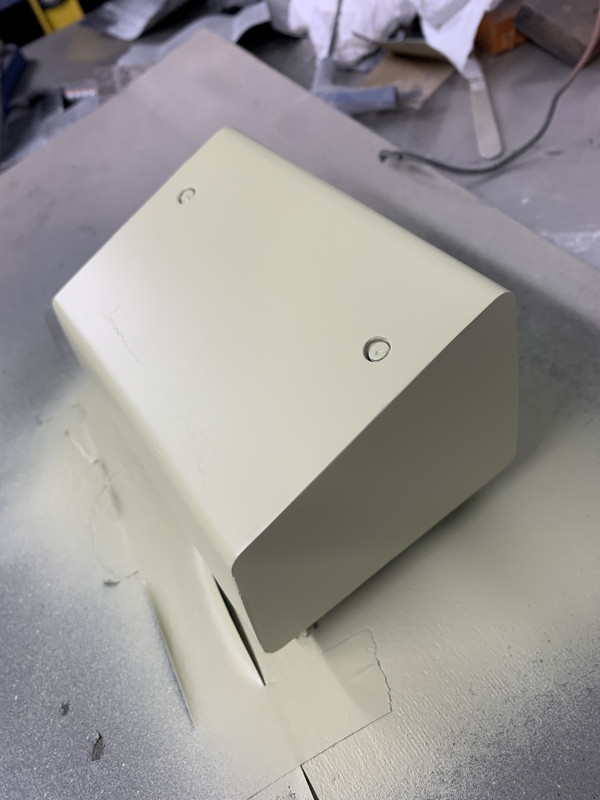
Next was to create a breather in the lid. I did not want to put one other little breather filters on as it would give the game away. It needs to look stock.
Some paint next. Just satin black to sort of blend in.
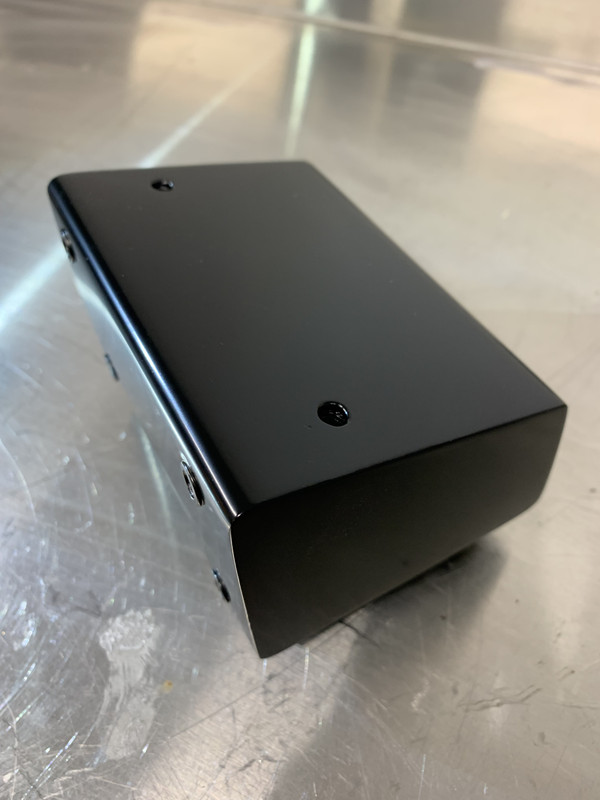
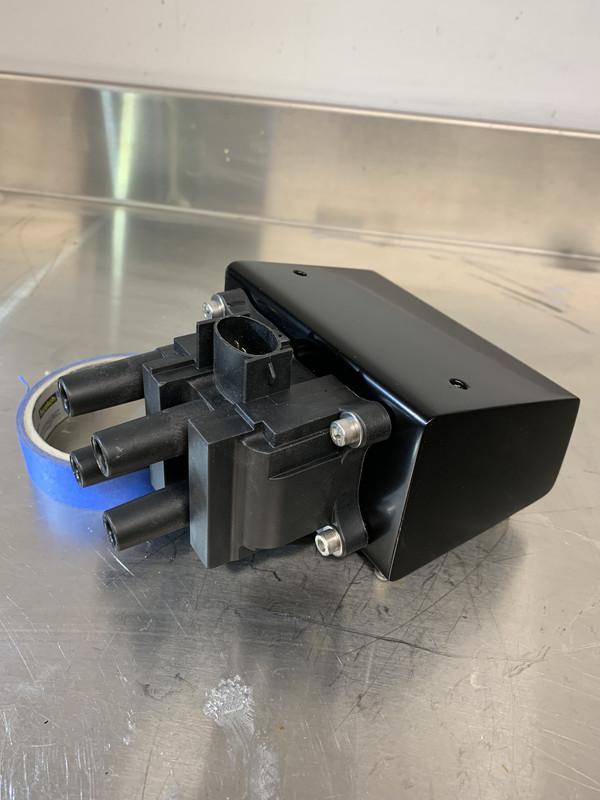
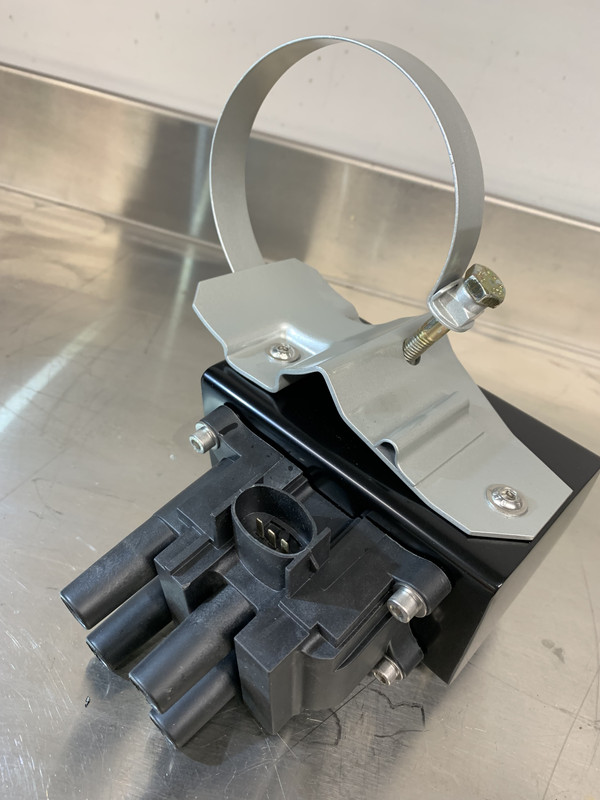
So I thought whilst making this I could maybe hide the coil. As we are going wasted spark and no distributor I needed to hide this modern addition.
Next post will show the can it's self. As they say back after these messages.....
Re: Project Blue Book
Posted: Mon Dec 18, 2023 3:07 pm
by chief
And were are back....
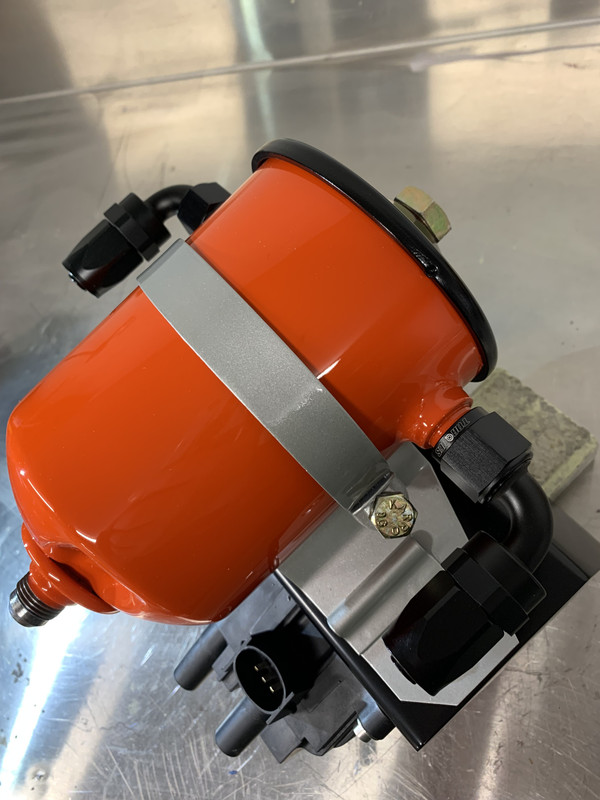
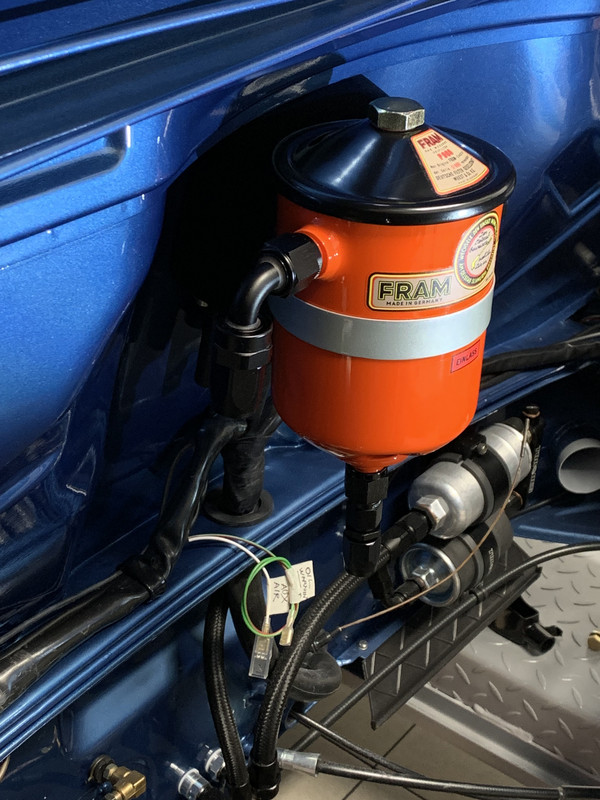
So oil can needed to be orange (not silver).
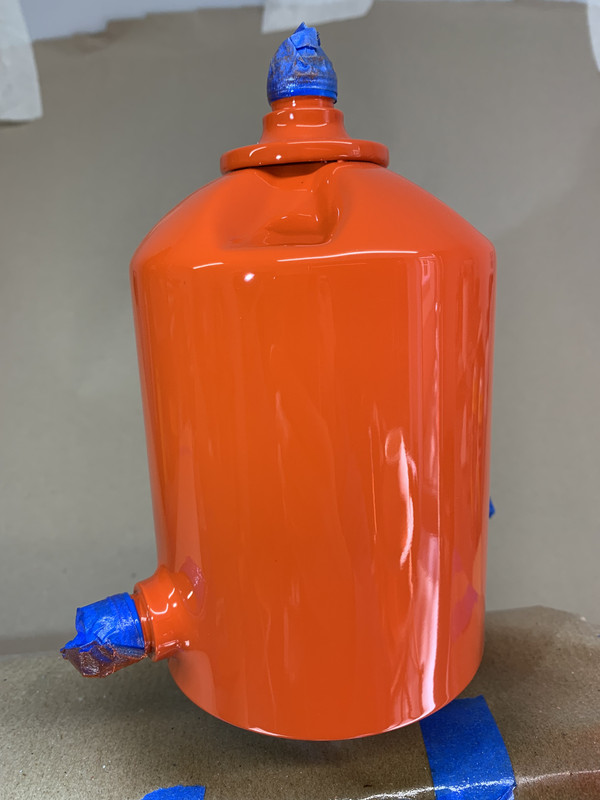
Painted then flatted and clear coated.
This is going to be the first thing you see when the engine lid is popped, so has to be just right.
Ford Carnival Red. Just needs a light flat and polish to finish. New decals have arrived and will go one once it's installed.
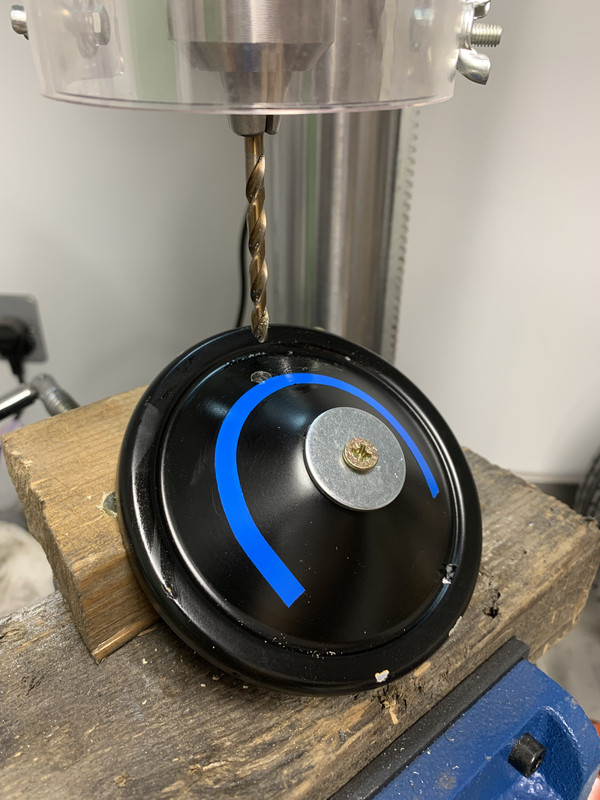
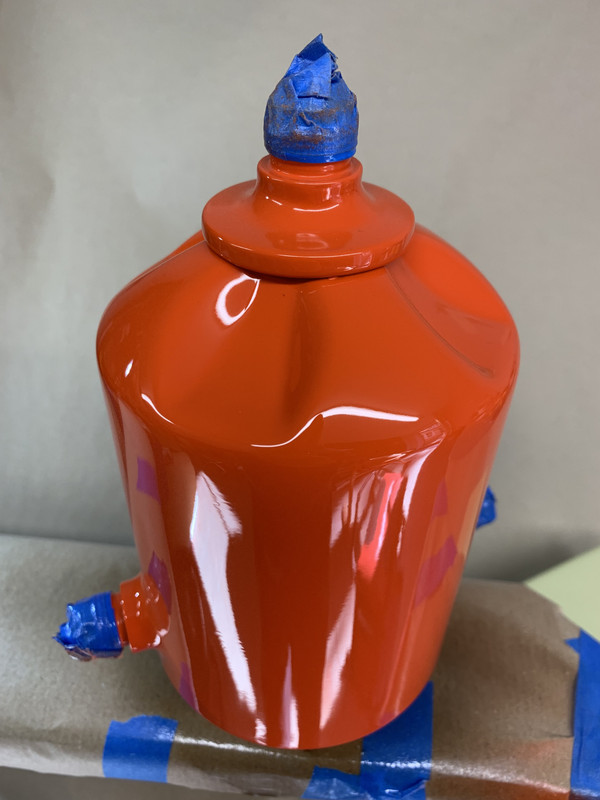
So as I am not running an extrnal filter/ breather I made my own internal one.
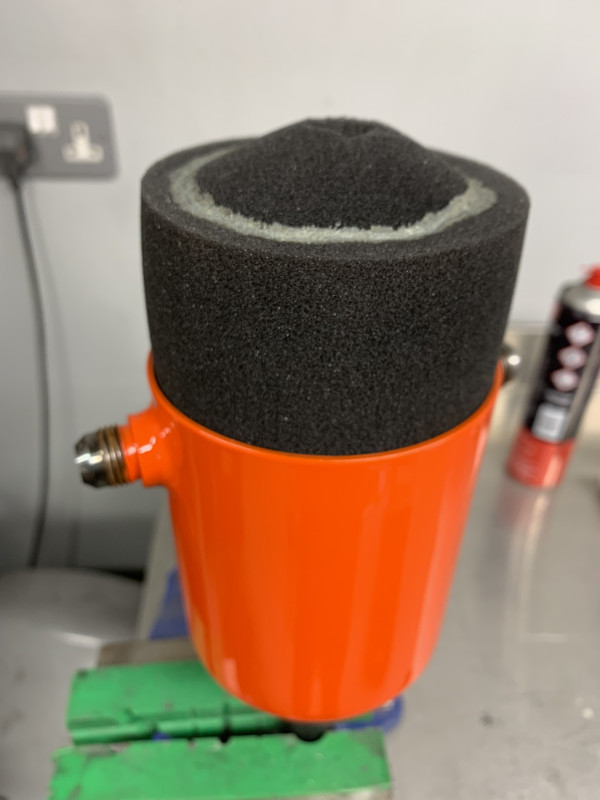
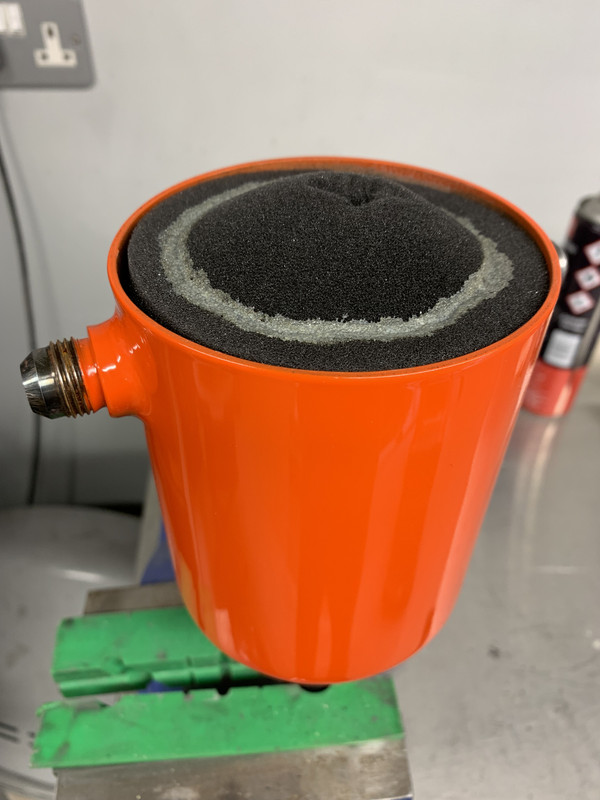
So there you have it. It will filter and breath without looking like a catch can.
And just thrown together to show you kinda what it will look like once finished.
Hopefully as it's viewed from above you won't even see the coil pack, fingers crossed.
Some more later on....
Re: Project Blue Book
Posted: Mon Dec 18, 2023 7:24 pm
by chief
Re: Project Blue Book
Posted: Tue Dec 19, 2023 5:55 am
by sladey
Lovely attention to detail
Re: Project Blue Book
Posted: Tue Dec 19, 2023 7:32 am
by yoda
Just re-read bits of this thread and it’s wonderful. Such attention to details and skills I can only dream of. Please keep the updates coming!
Re: Project Blue Book
Posted: Tue Dec 19, 2023 7:45 am
by KS
How have I missed the majority of this? Great work!
Re: Project Blue Book
Posted: Tue Dec 19, 2023 8:17 am
by Lightweight_911
.
This car just keeps getting better ...

.
Re: Project Blue Book
Posted: Tue Dec 19, 2023 9:25 am
by Bootsy
Another great update
Re: Project Blue Book
Posted: Fri Dec 22, 2023 4:05 pm
by chief
Many thanks all for the positive comments. I really do appreciate them all.
Just to finish off the Oils breather bit.
I fitted everything up and with the silver bracket it just kept drawing the eye to the coil pack which is supposed to be hidden.
On looking back at the original photos I realised that the said bracket should be black.
So back to painting....
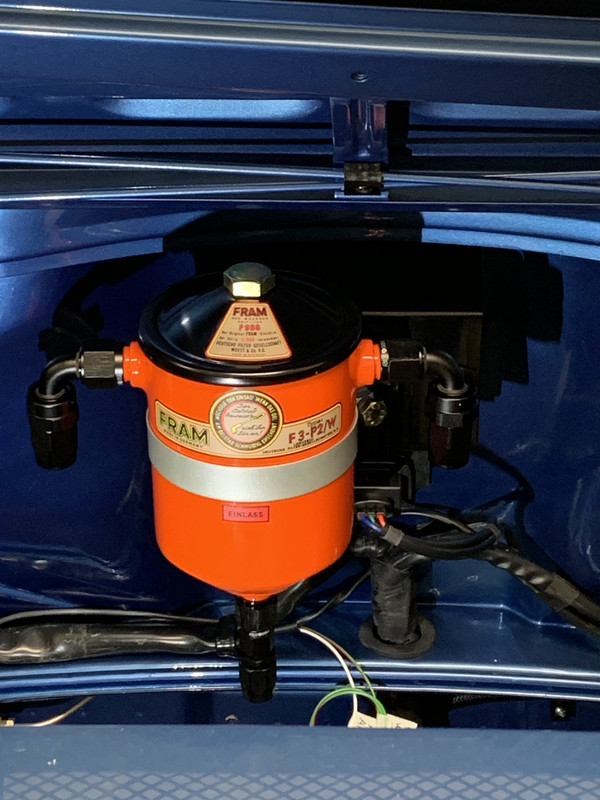
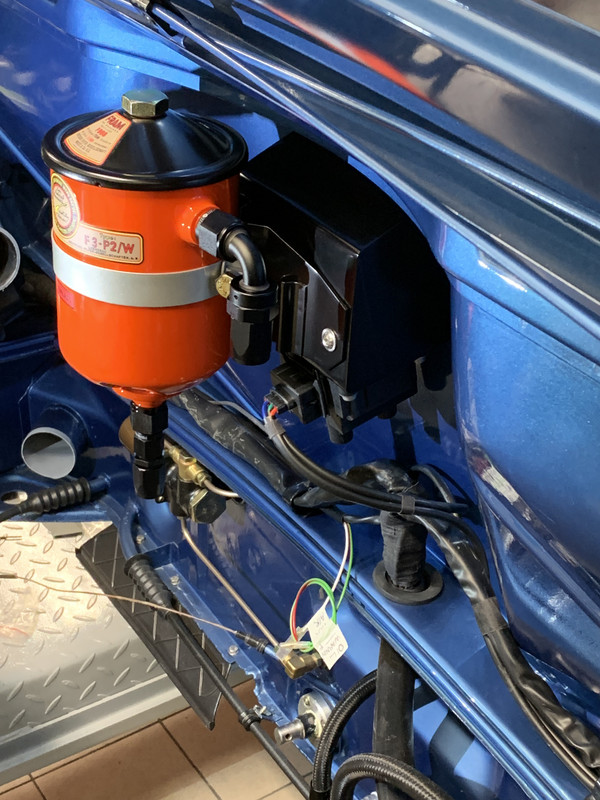
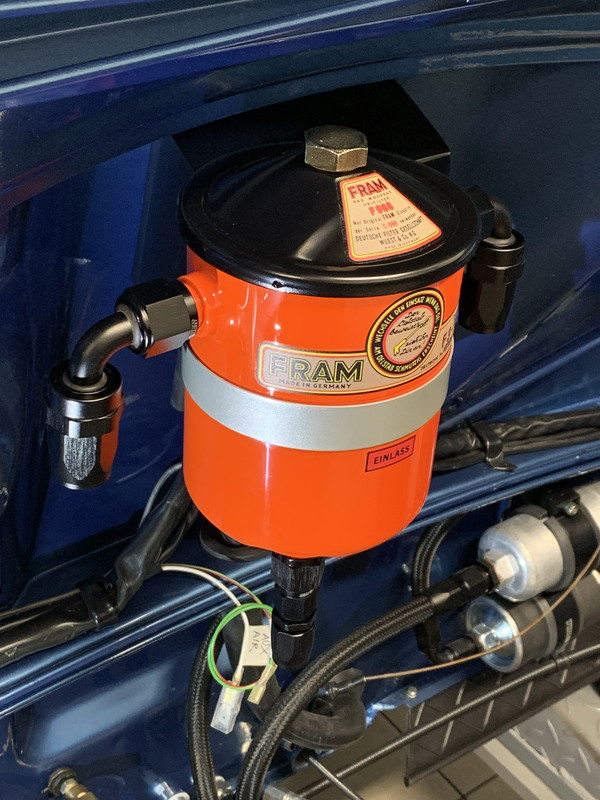
Much better. You really don't look past the orange oil can. I'm pleased with how this came out. Just looks like it should have always been there.
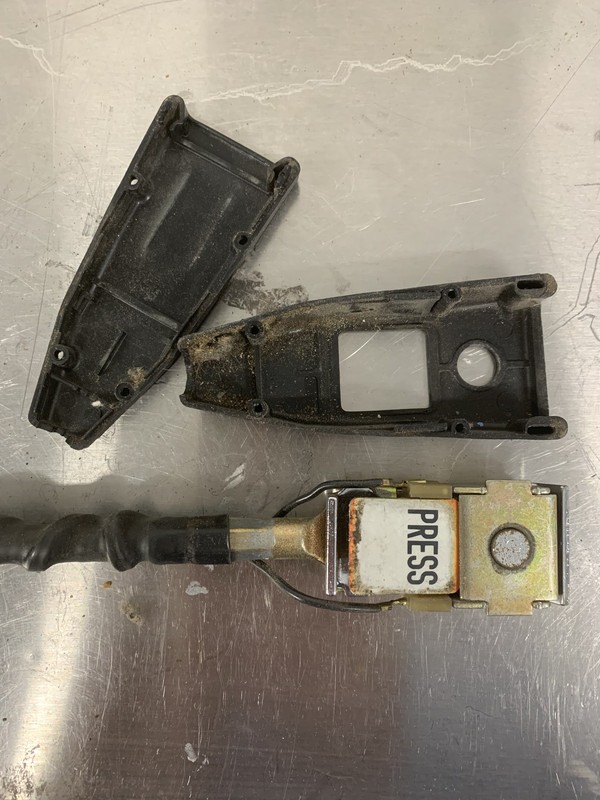
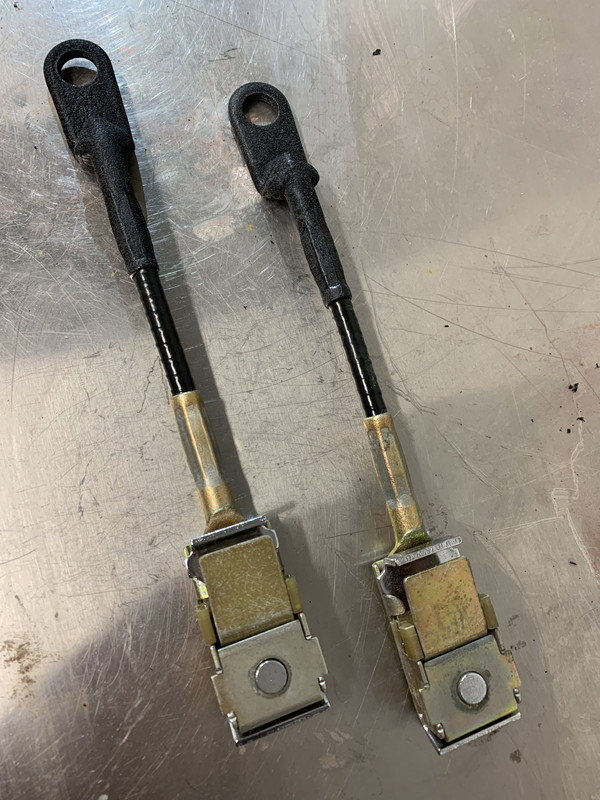
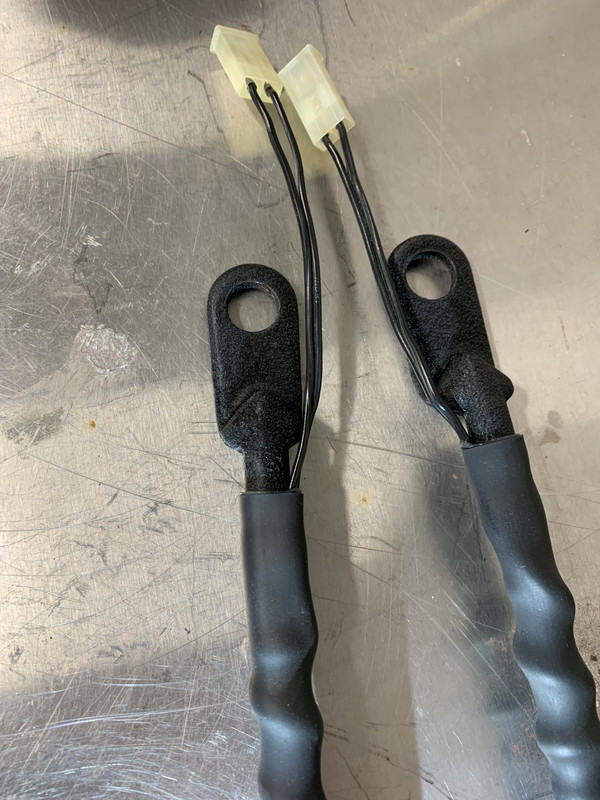
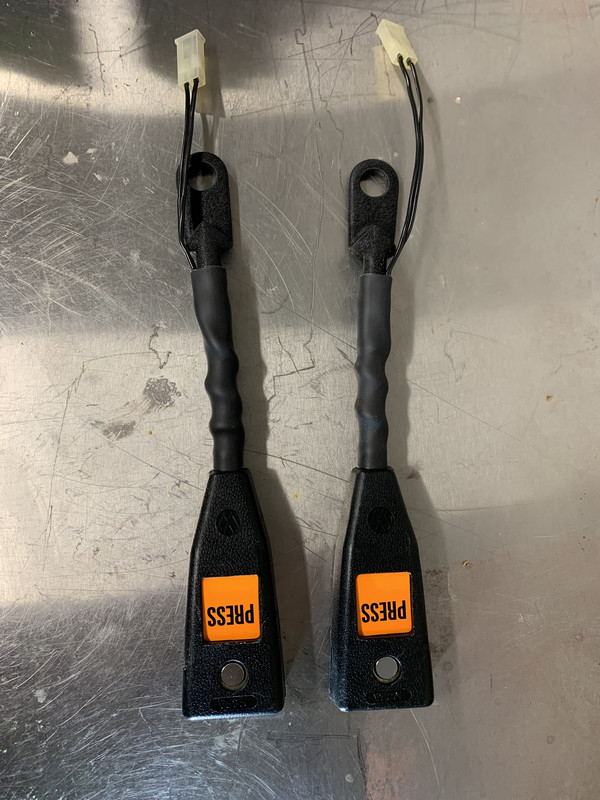
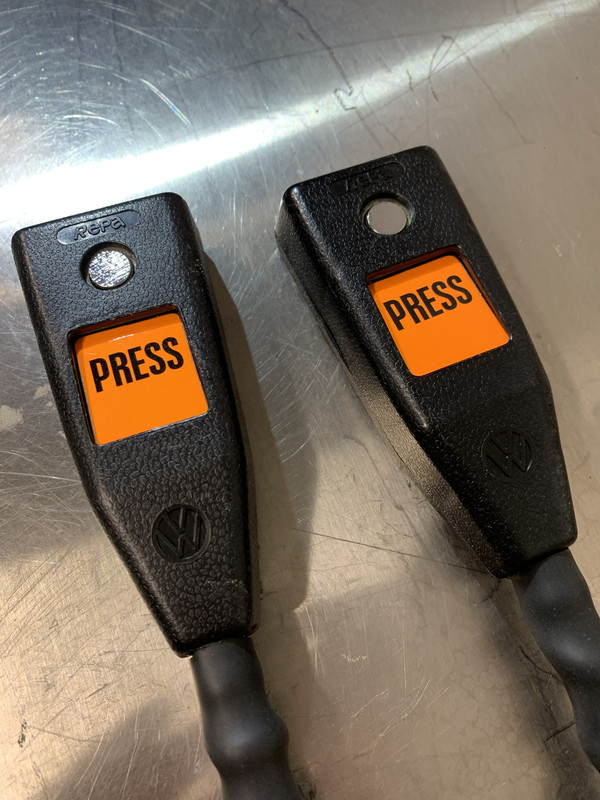
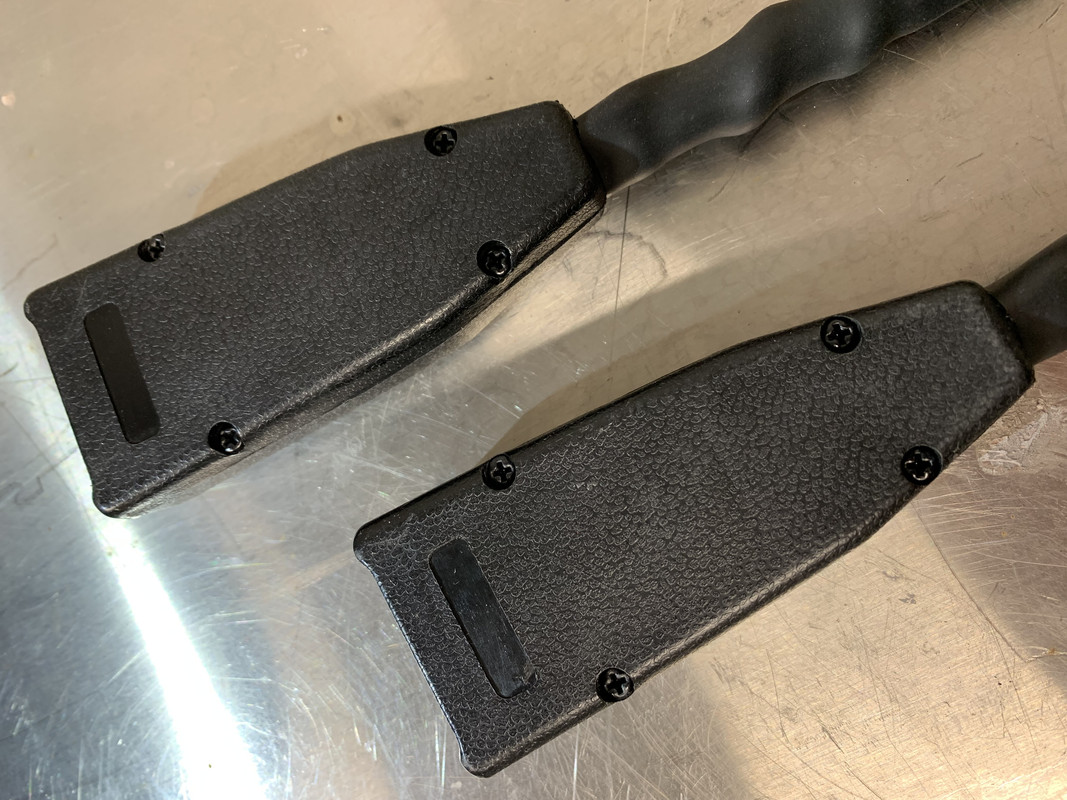
New revisit was to the wiring loom. This time the charging circuit and starter looms. I had left these until I knew how I was going to use the engine mamagement and wasted coil (also I was sick to the back teeth with wires).
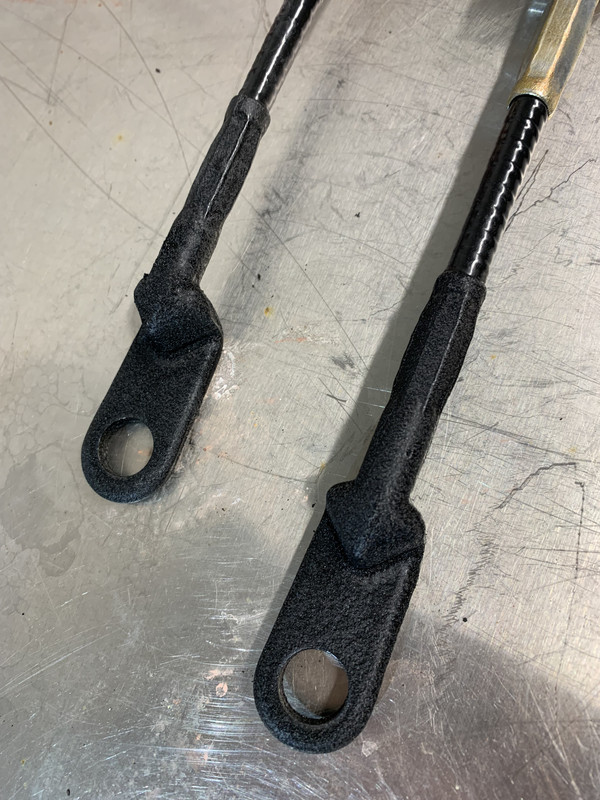
Both looms handle a lot of current, so really were a fire waiting to happen after fifty years of heat and grime. On further investigation I was right. The wiring was so stiff internally and very corroded.
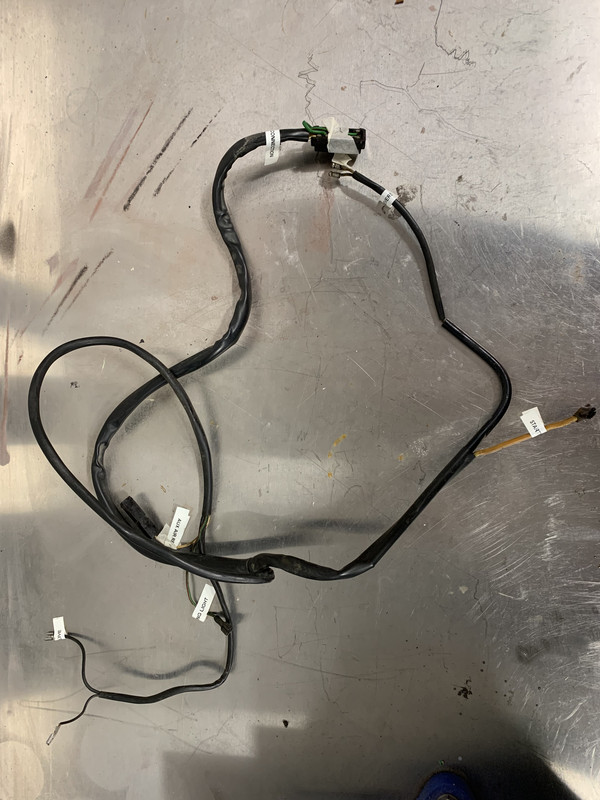
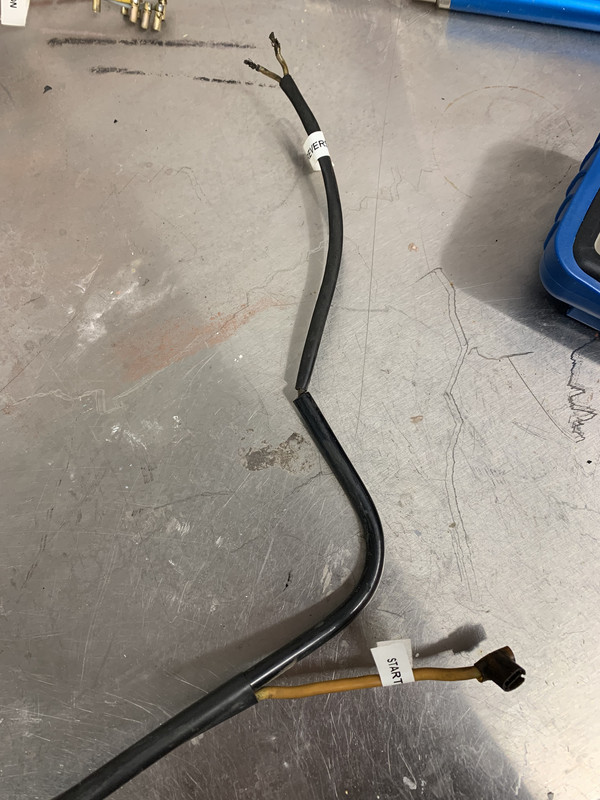

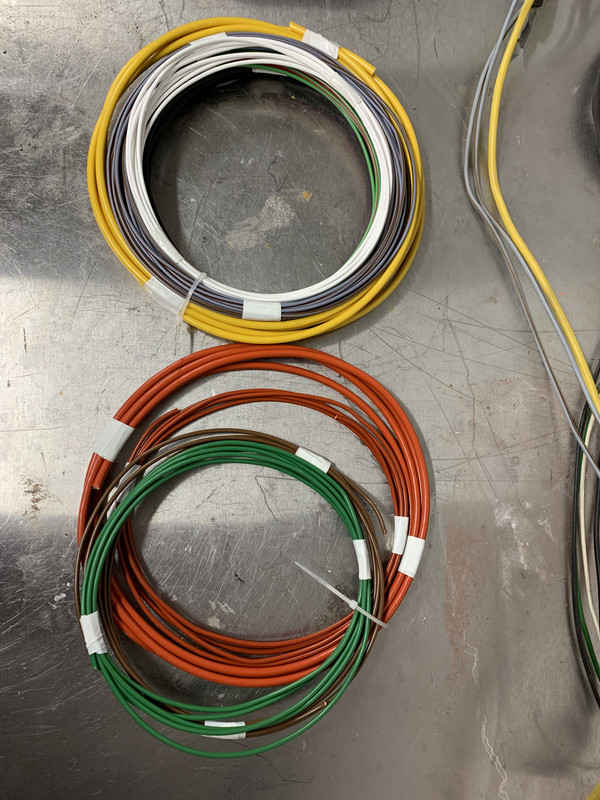
So another trip to the guys at the auto wiring supplies store...
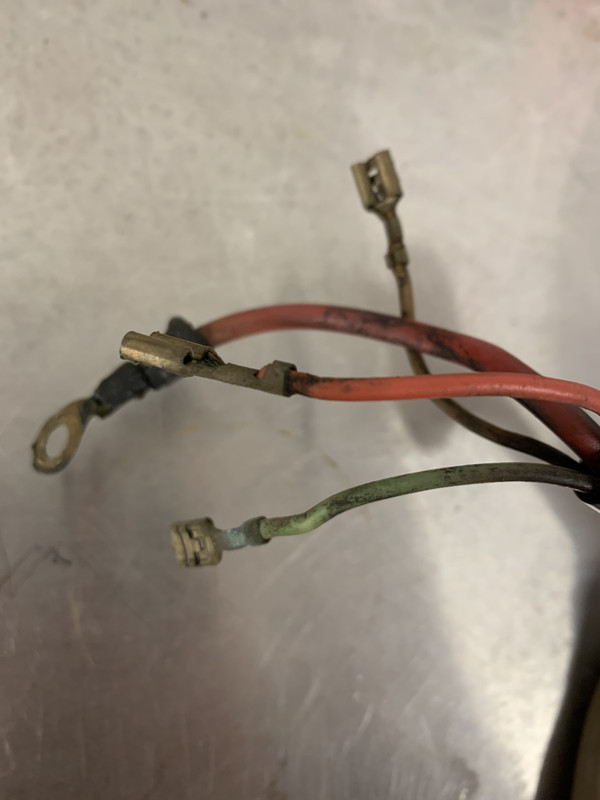
De soldering all these little buggers and reusing with the new wiring caused some colourful language!
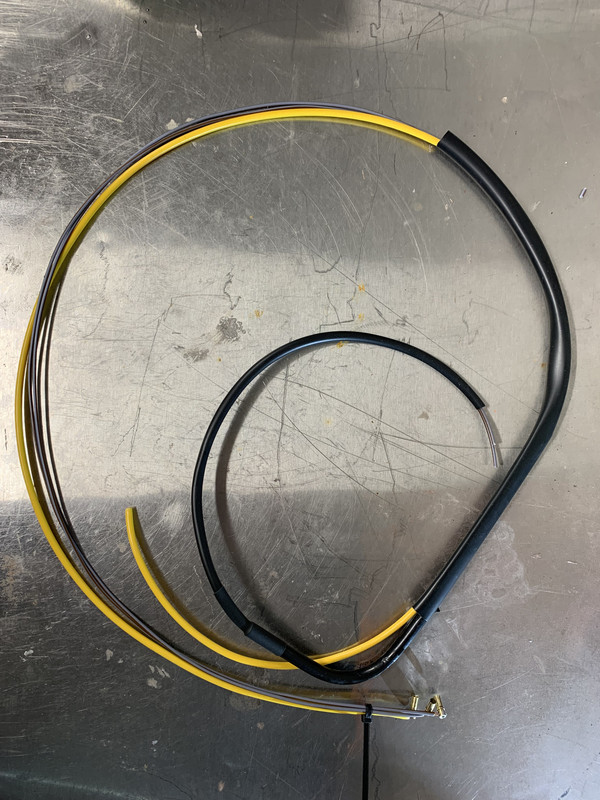
Much better and much safer.
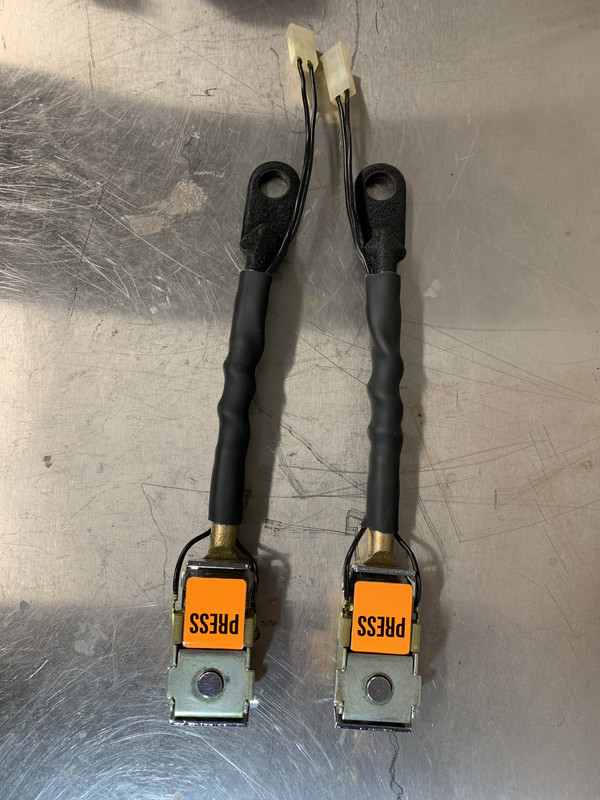
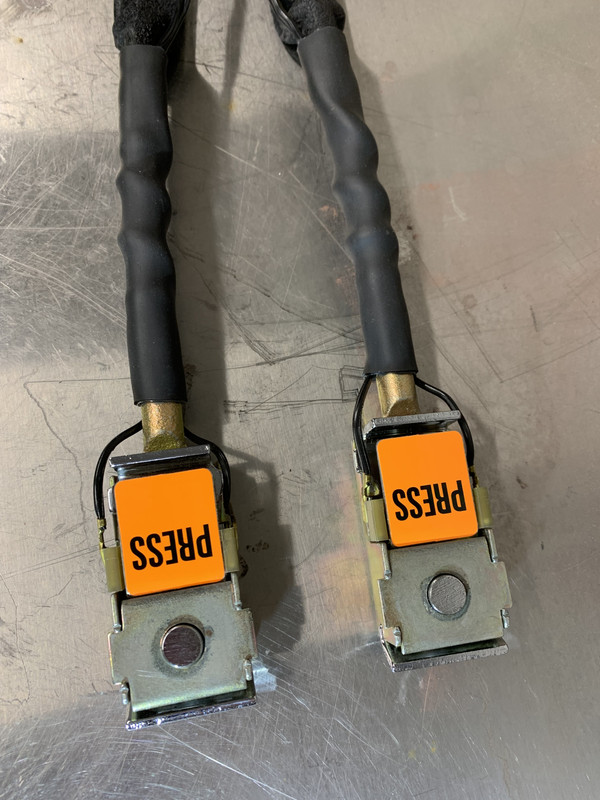
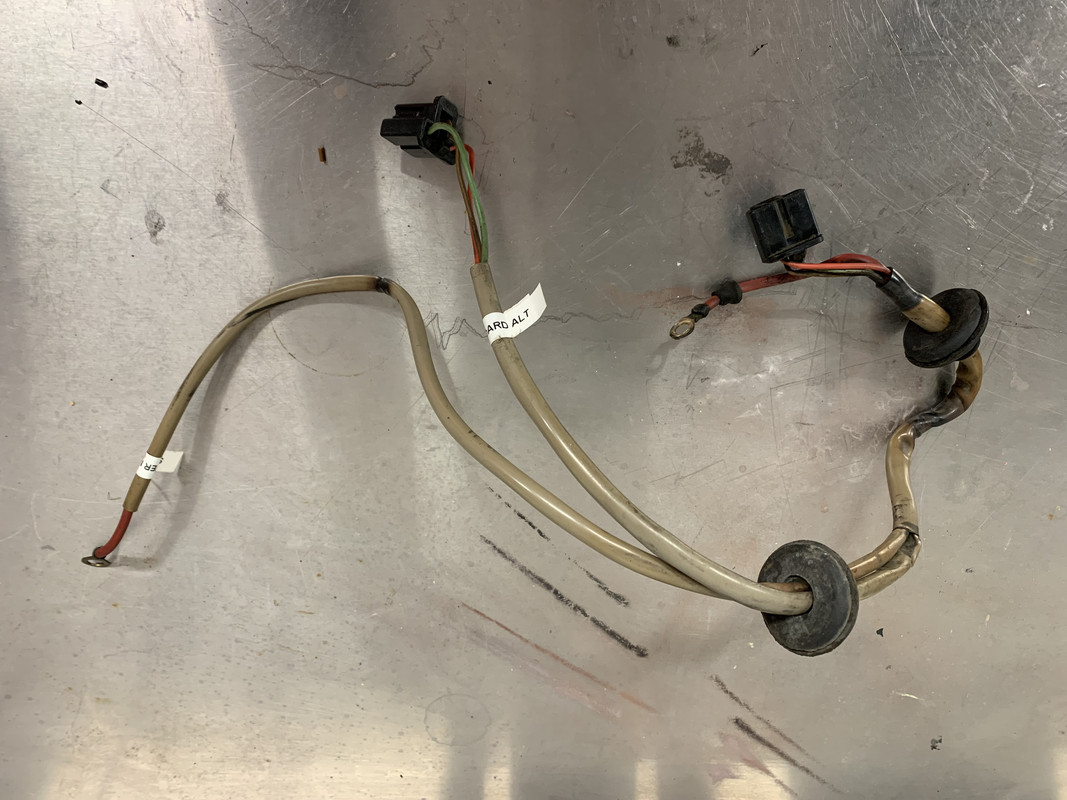
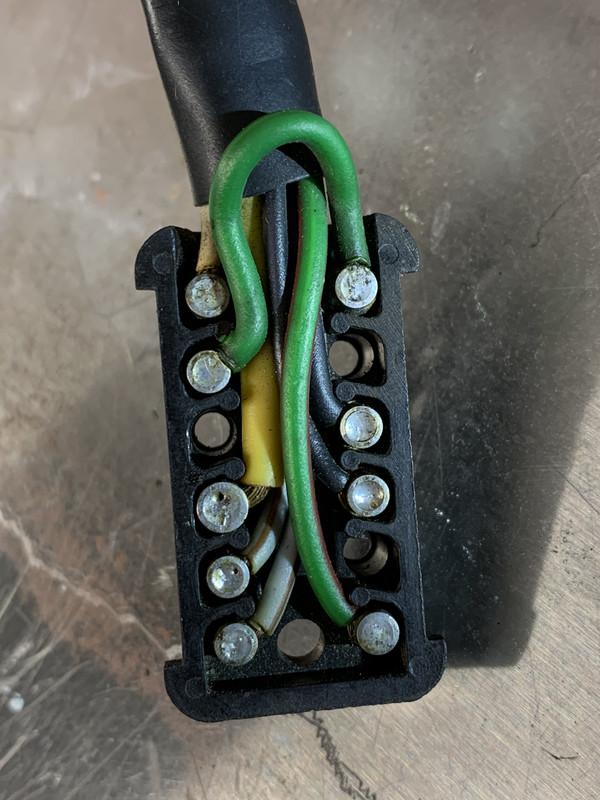
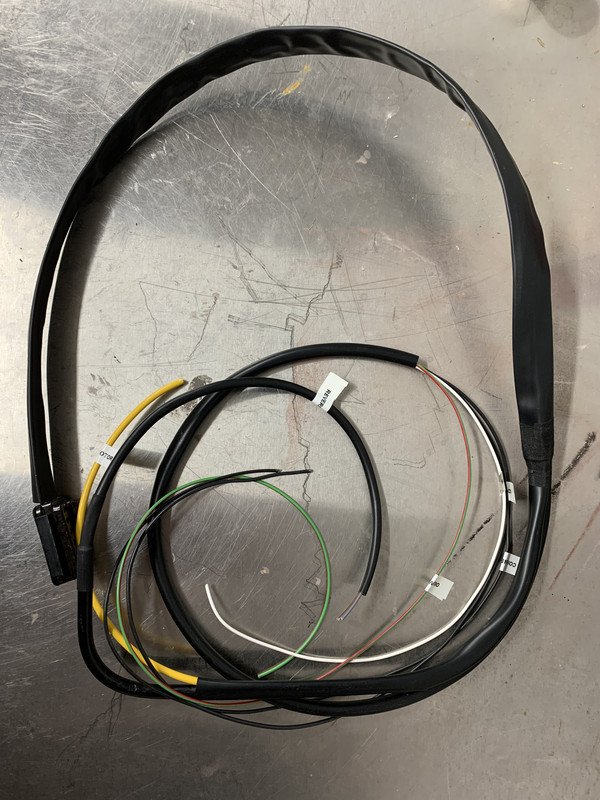
Last image now shows the coil pack wiring. This basically breaks the pack into two sets of two. So I could reuse the coil positive from the Porsche loom and then the RED controls two spark plugs and the same with the BLUE. The centre GREEN is the live feed.
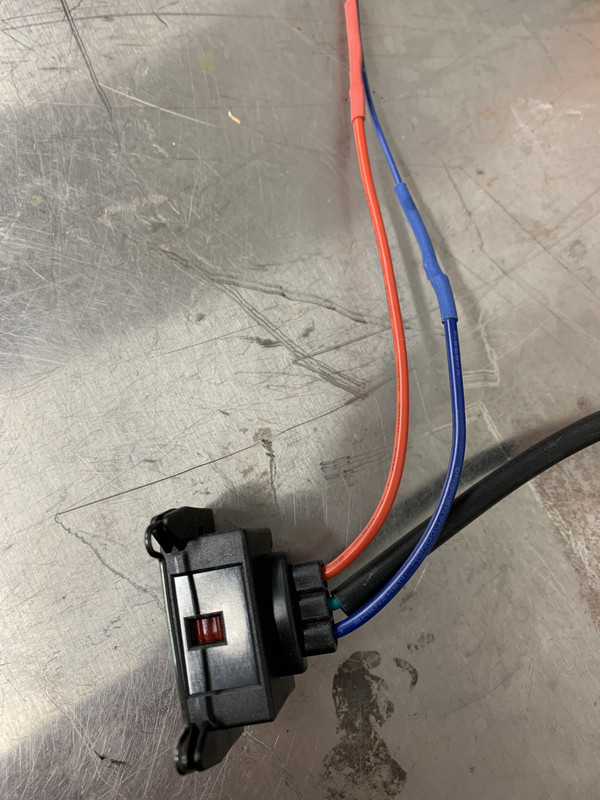
These two then route towards the battery where the ECU will be hidded. They will trigger the coil to fire.
I have finished the wiring to the logic relay under the passenger seat that controls the ignition and the seatbelt warning lights. However I have bypassed the main live to avoid issues in the future, but I wanted to reinstate the wiring just to see how it all worked.
By way of a change of scenery I started fitting the anti drum/ vibration material. I think this is going to take some time and effort!
So that's it from me for now. All have a very, very merry Christmas and enjoy time with family and friends.
Re: Project Blue Book
Posted: Fri Dec 22, 2023 4:38 pm
by 911hillclimber
Great great detail as ever, too much patience!
Picture of that 12 pin plug bought evil memories back, what a bitch to re wire, been there, never again I hope.
Happy Xmas!
(warm enough to go in the garage Boxing Day...)