Page 16 of 20

Re: Project Blue Book

Posted: Mon Apr 25, 2022 8:59 am
by chief
Time to put shiny stuff on :bandit:

Image
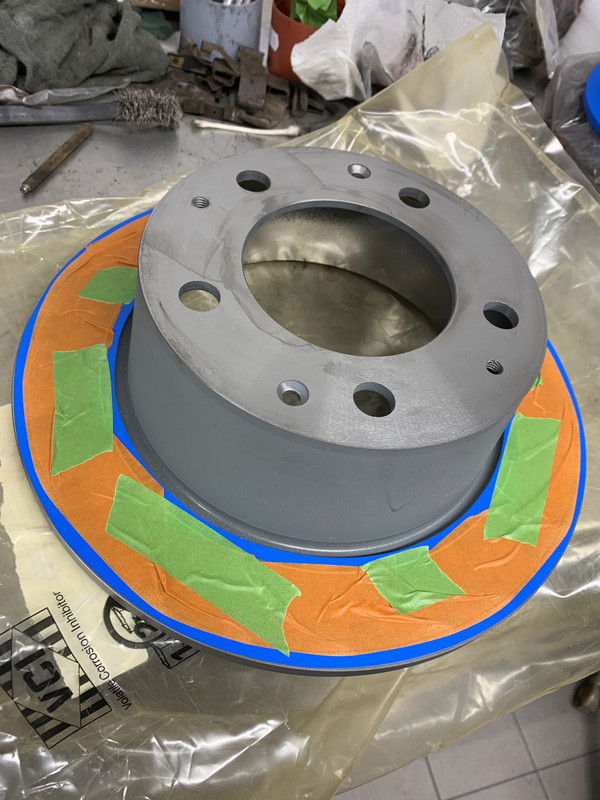
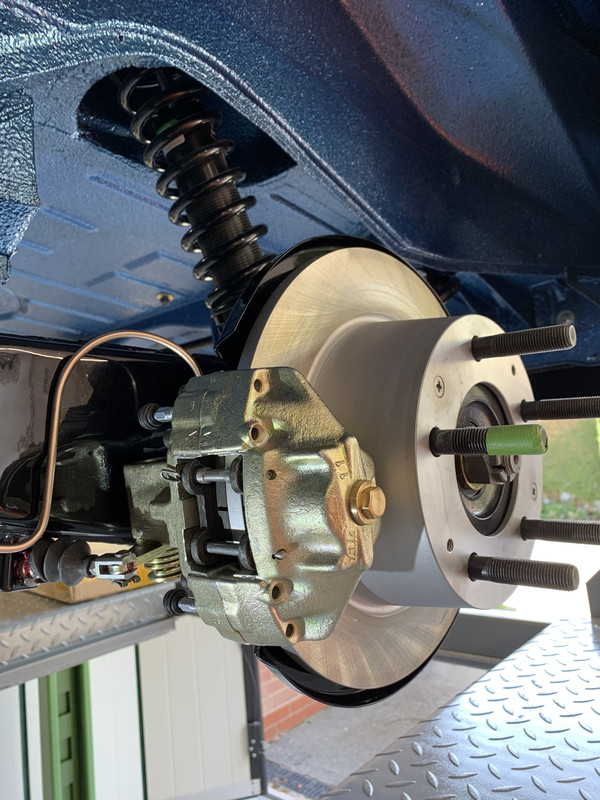
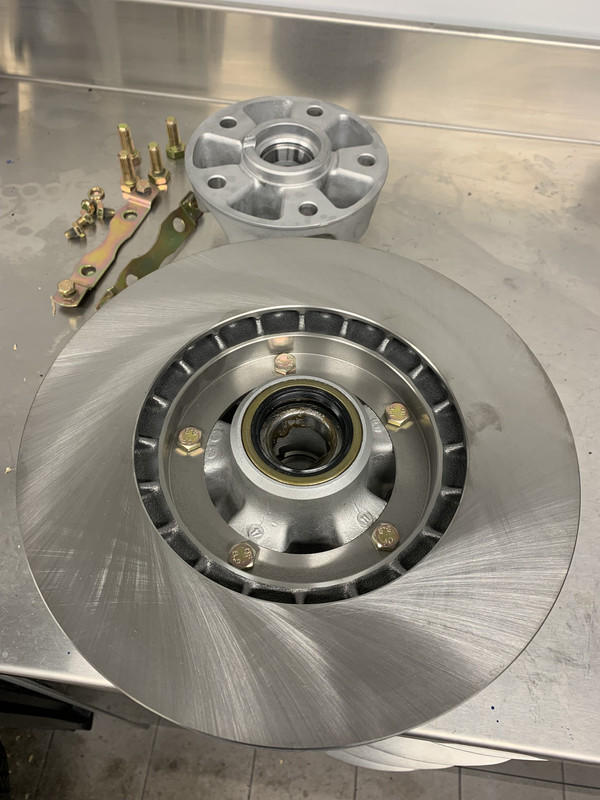
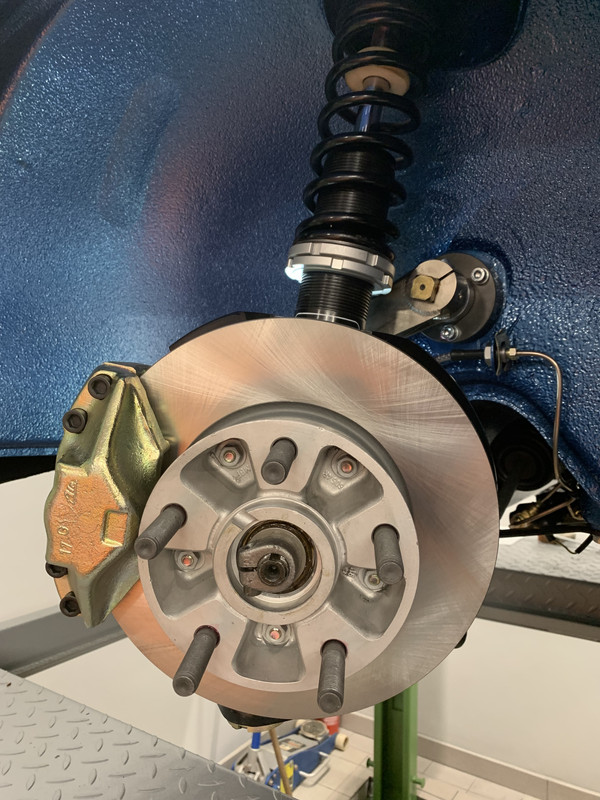
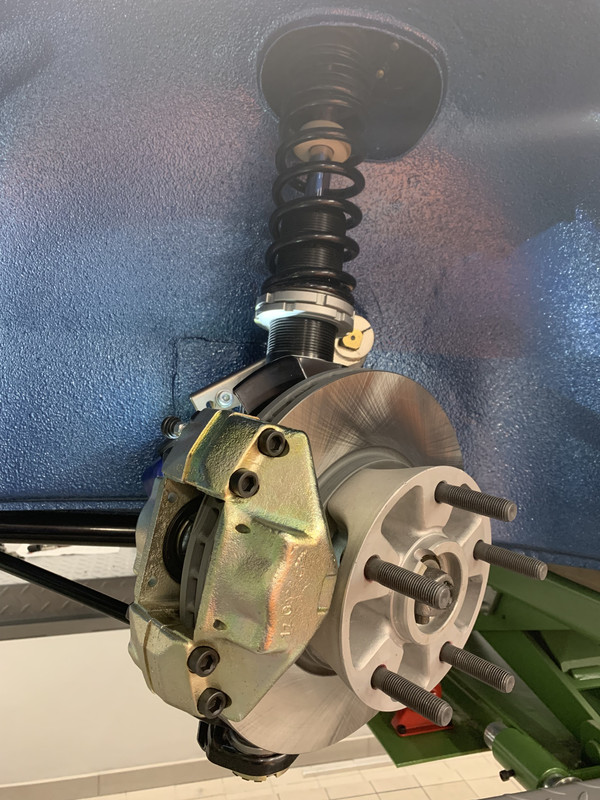
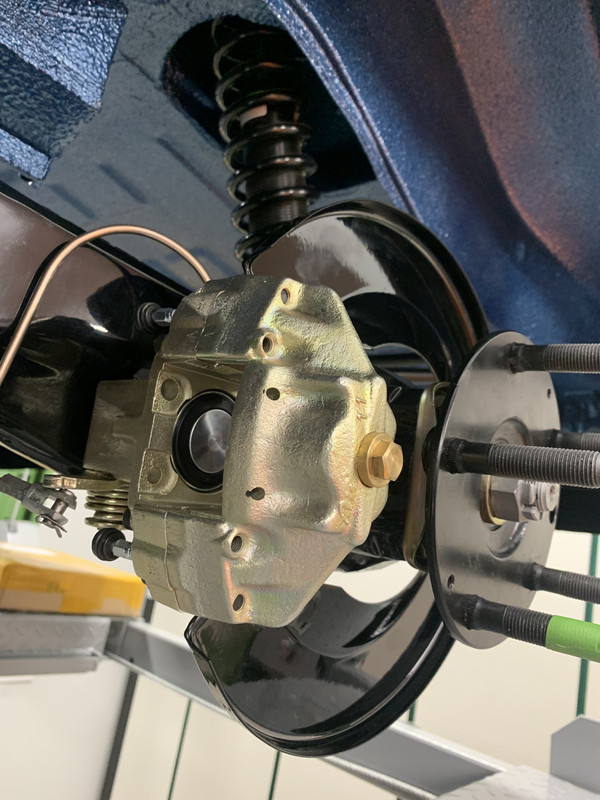
Discs have arrived along with back plates to start the assembly of the finished brake system.
Image
Image
Image
Image
Image
Image
Image
Image
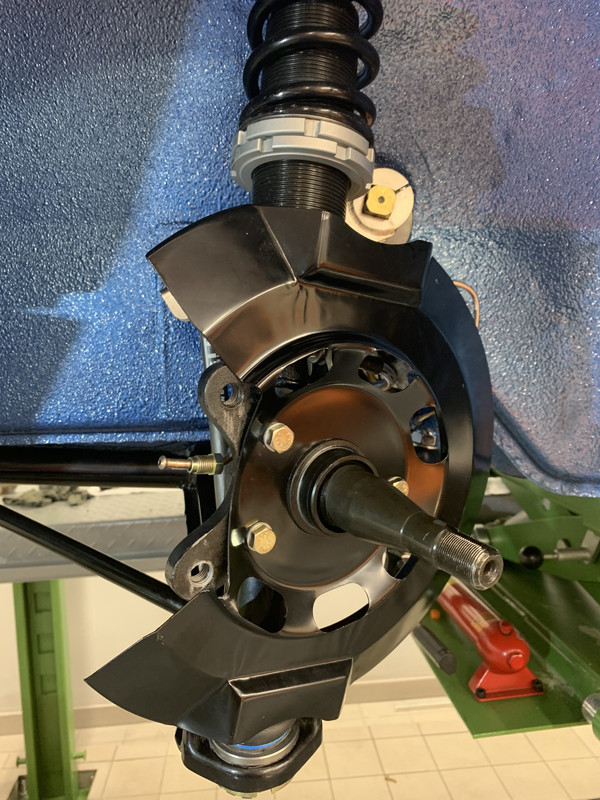
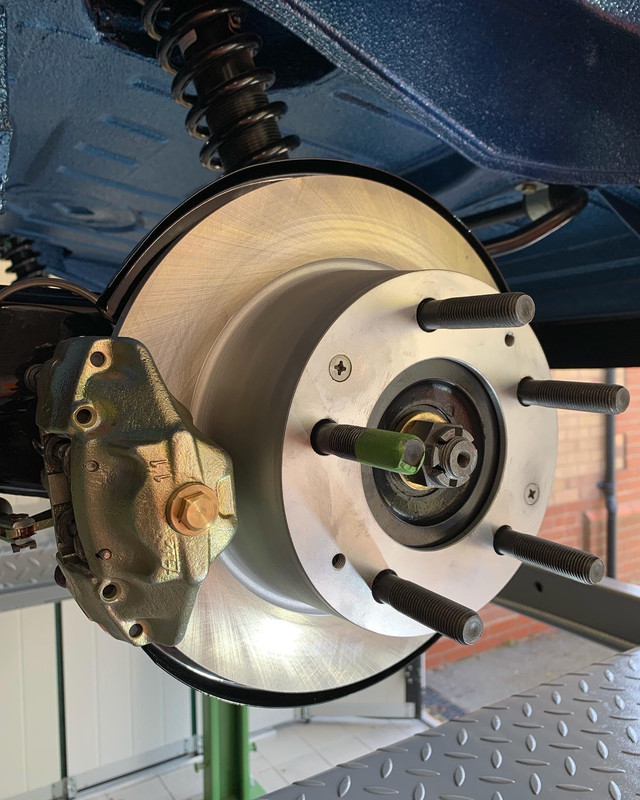
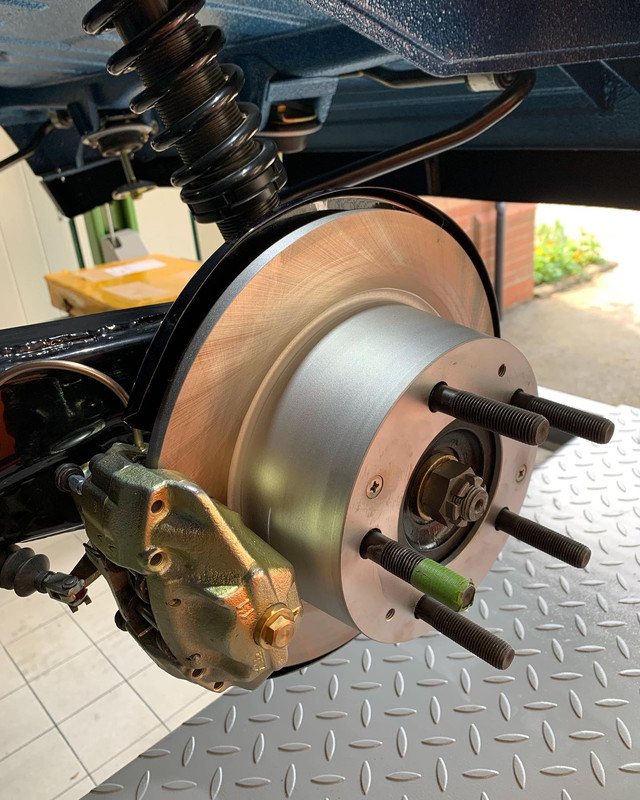
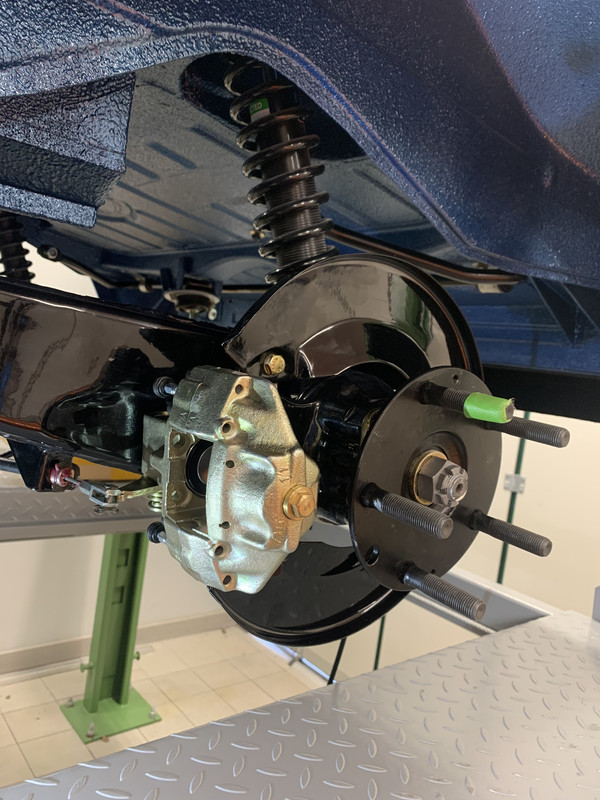
So front buttoned up and onto the rears.
Image
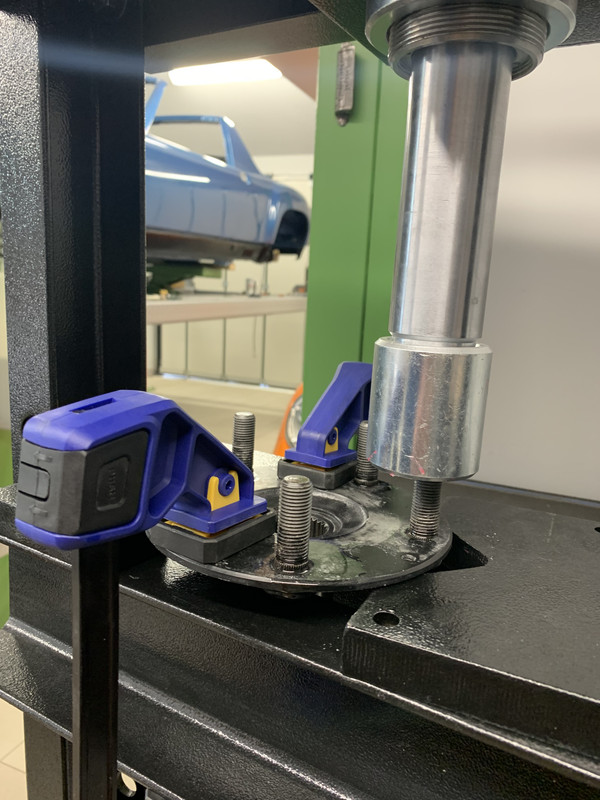
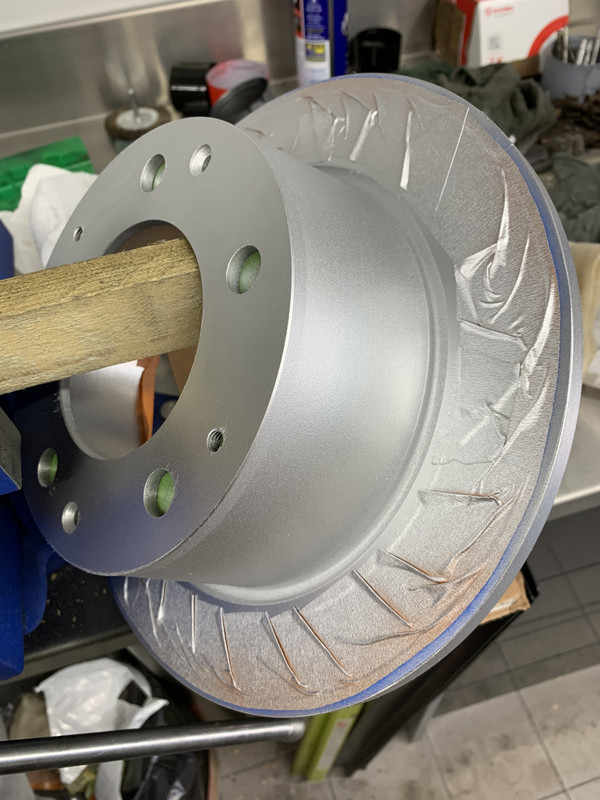
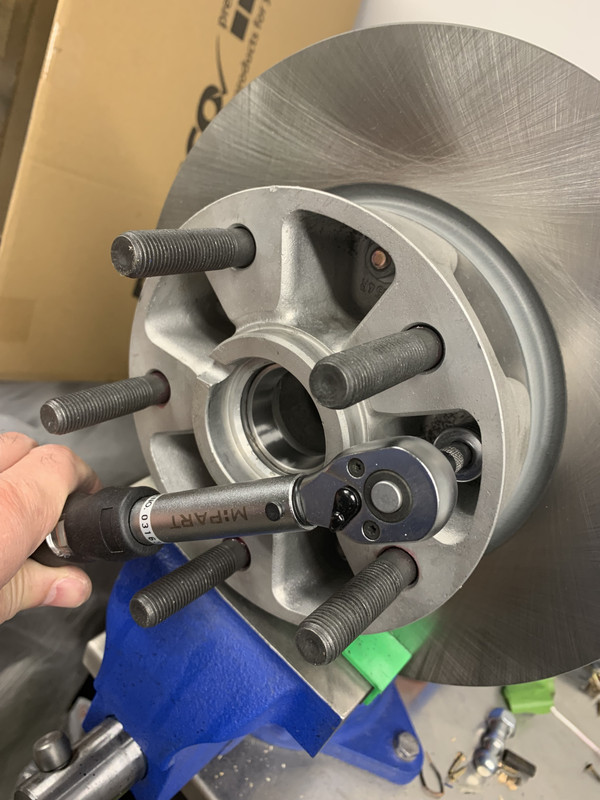
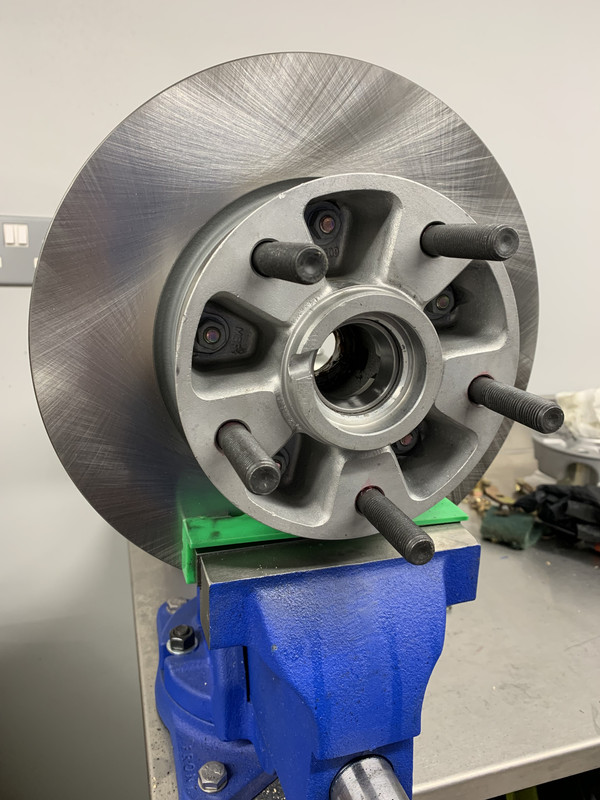
More pressing out of studs for the longer 66mm ones.
Image
Image
Image
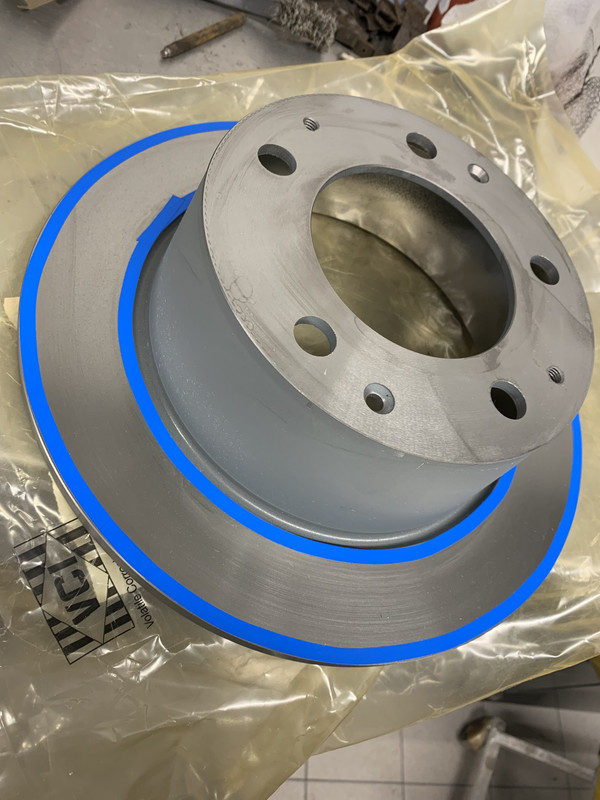
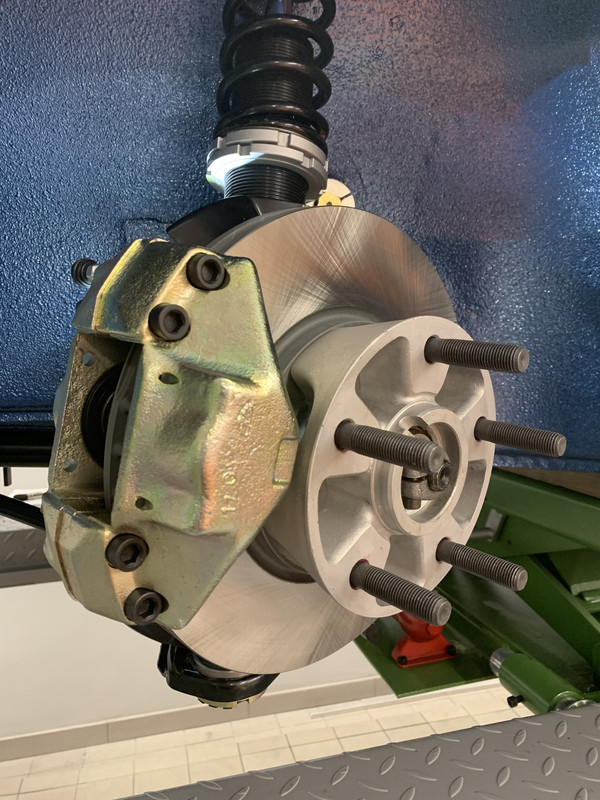
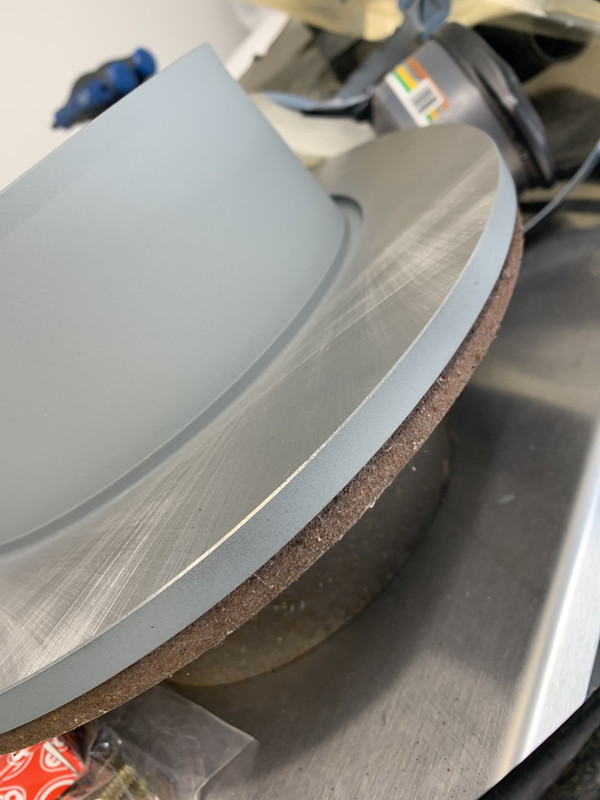
Discs need some machining to suit this application. As I have gone to 5 stud configuration I have had to use the discs off of the 914-6 which ar a bit bigger.
Image
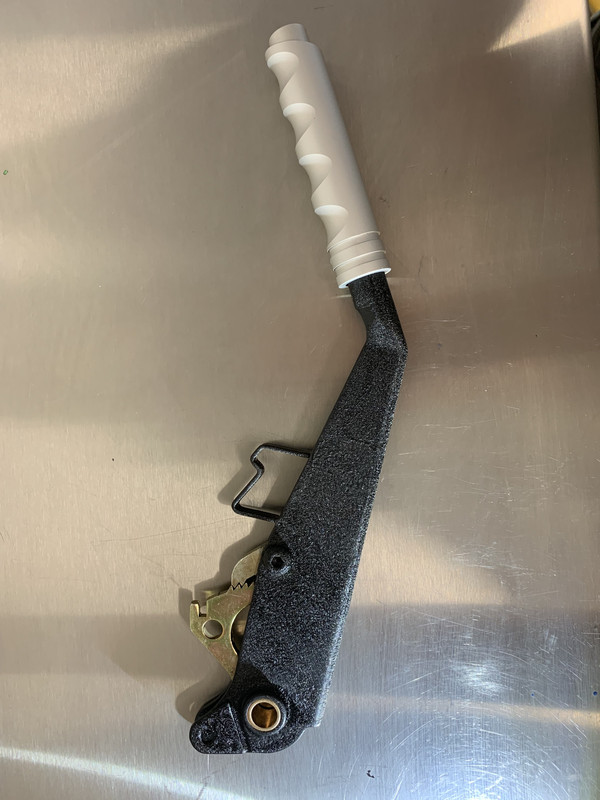
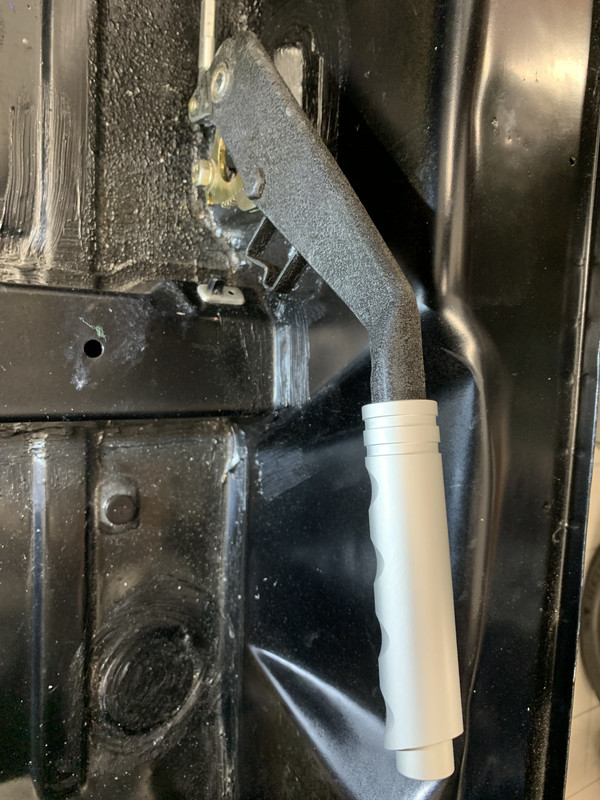
Always keep the old ones. You never know when you might need to refer to them...
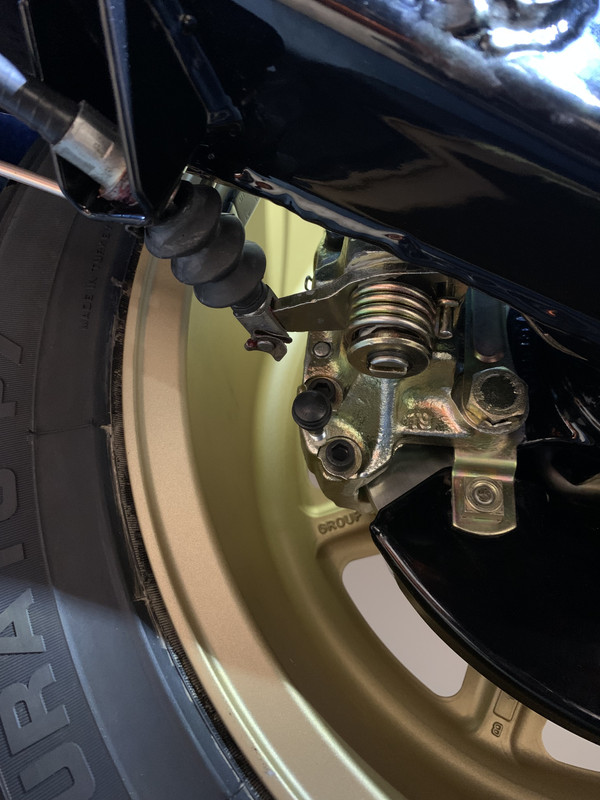
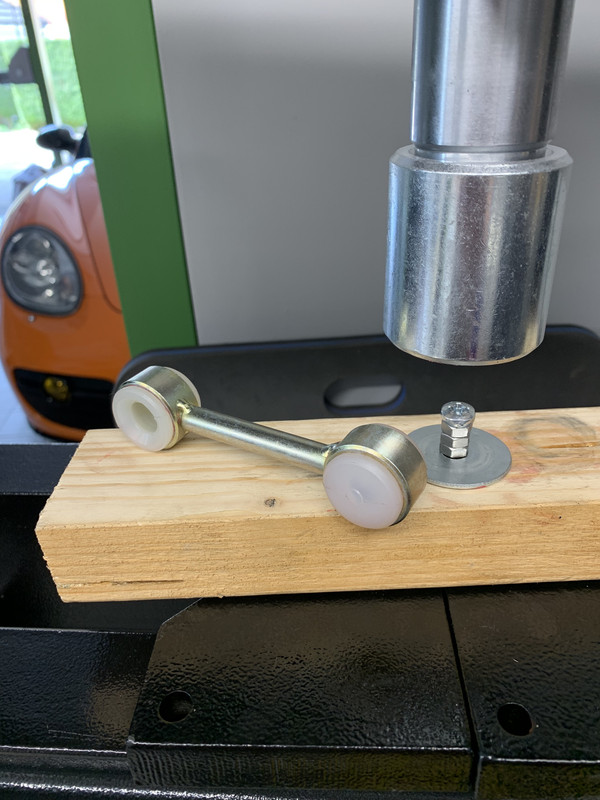
Next job was to install the drop link bushed for the rear anti roll bar. Again the press was very useful!
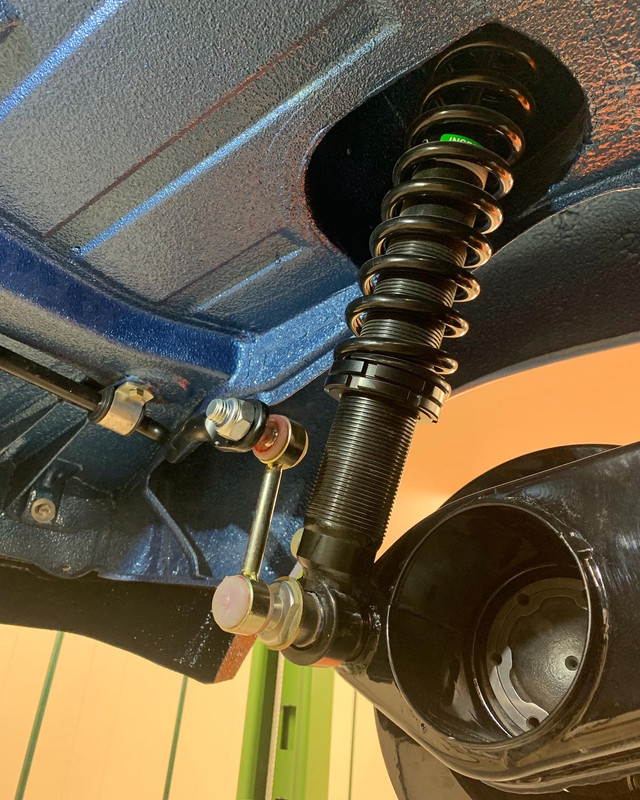
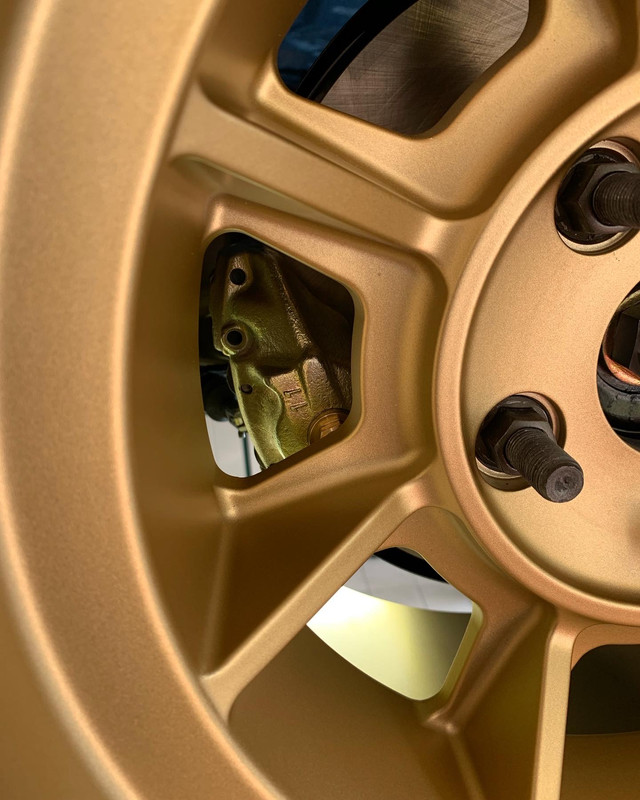
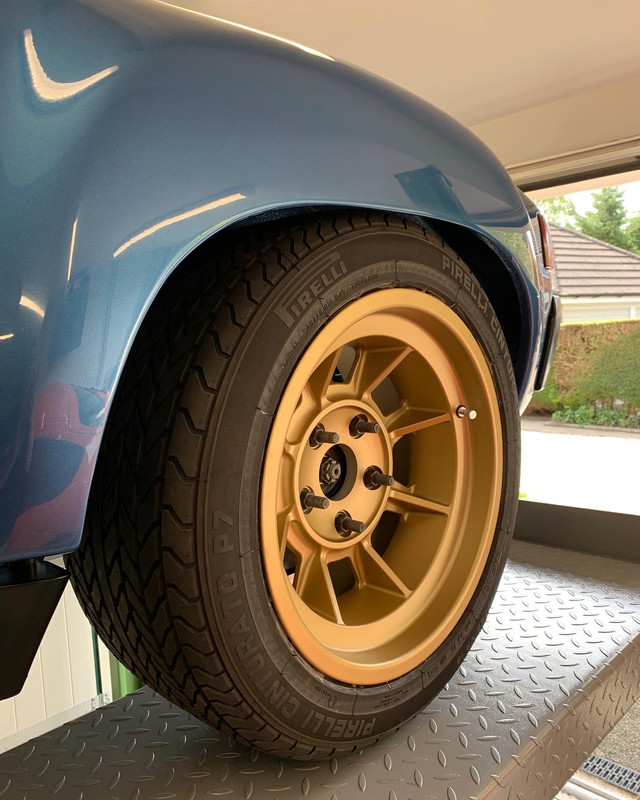
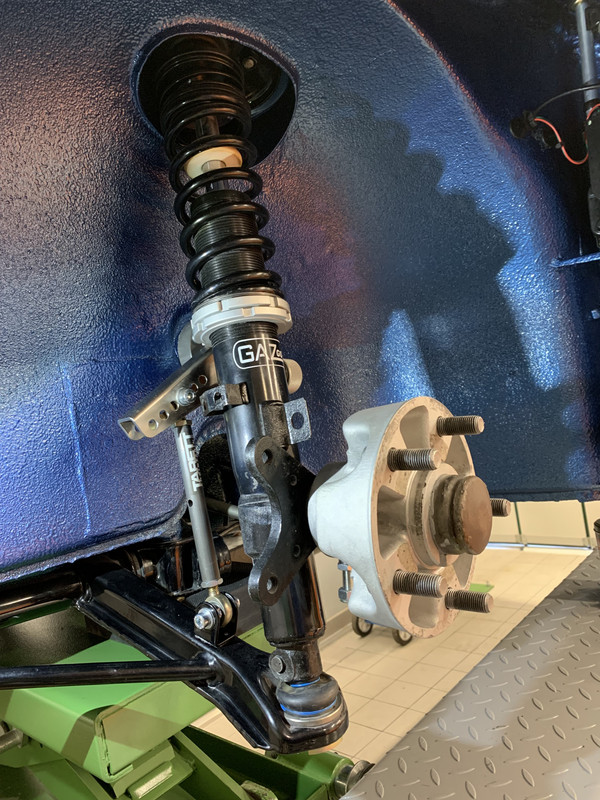
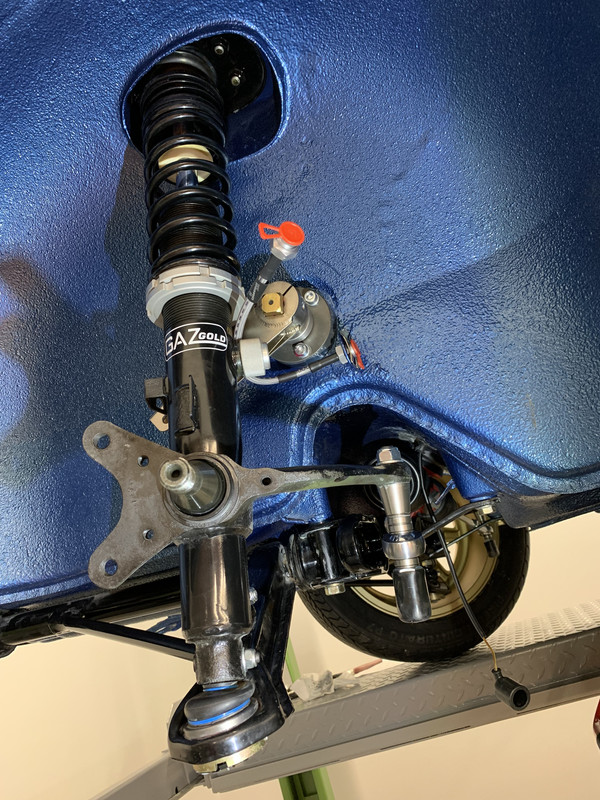
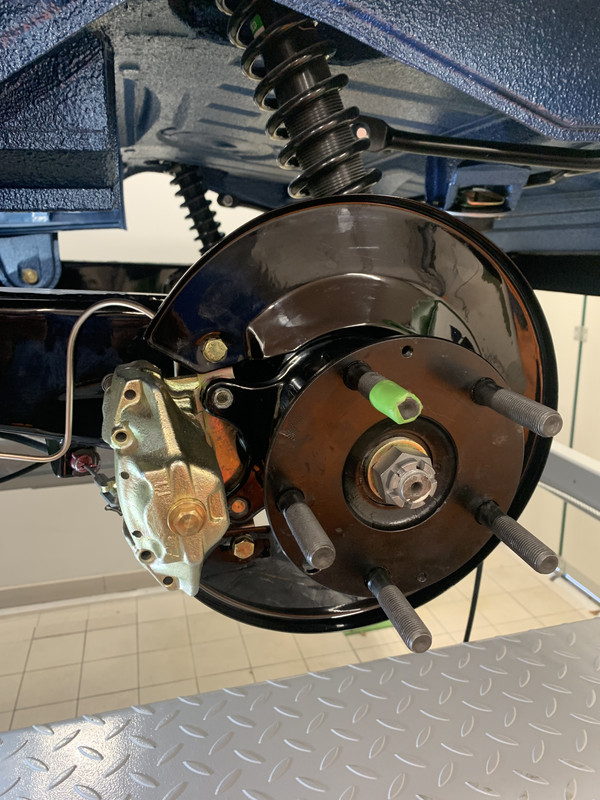
Image
Image
Image
So coming together

Re: Project Blue Book

Posted: Mon Apr 25, 2022 10:25 am
by hot66
looking good :cheers:

Re: Project Blue Book

Posted: Mon Apr 25, 2022 10:59 am
by middlefour1
Great work, looking very smart!!

Re: Project Blue Book

Posted: Tue Apr 26, 2022 8:22 am
by neilbardsley
Very clean. Nice garage too

Sent from my M2004J19C using Tapatalk

Re: Project Blue Book

Posted: Wed Apr 27, 2022 8:39 am
by chief
Thanks fellas. Rear discs now turned down, so fingers crossed that they all fit up correctly.
Had to take a bit of thickness off the hub flange to help fit those big 9's in the back. There should be enough meat left :shock:

Re: Project Blue Book

Posted: Wed May 04, 2022 2:35 pm
by chief
First off. Thank you all the the positive comments, I really appreciate them!

And a BIG Second. A massive "Thank you our kid" to TOBYONE who kindly turned down my rear discs this last week. Just one text and we were off to the races.
I needed to reduce the diameter a tad and reduce the front face of the hub flange by 2mm. These discs are off the 914-6 for the 5 lug wheels as I didn't fancy re-drilling the stud pattern and then reducing the thickness of the disc hub as well. We machined down from 7 to 5mm to give me a little more space for those rather wide 9" rears. He also trued one of the discs as the runout differed from the other. Always looking out for me is our Toby.

Next was to heat paint the hub and disc outer edge.
Image
Image
Image
I left these overnight to cure off.
Image
Image
Image
Image
Image
Image
Image
Handbrake cable attached and then I moved onto setting the pads. This is done by an adjuster at the end of each caliper piston. You remove the protective dust cap and this exposes an adjuster screw and lock nut. A little fine tuning and both sides are the same.
Image

After fitting the brake fluid reservior and heating the plastic pipes to shape them I thought I would take a break and do a bit of refurbing. It just breaks it all up a bit and stops me getting bored...

Image
This is the main fan that blows the heat from the heatexchangers into the cabin. Being a Californian car I don't think it had ever been used. It certainly didn't work when I applied power.
Image
So lots of sanding, cleaning and painting later...
Image
Image
Image
I even painted the screws to to make it pop a bit. It is one of the first things you see when you open the engine cover so needs to look the part.
Image
Image
And here it is running on the bench. I gave up after half an hour of running. I think it works fine.
Image
The black plastic beak shown in the first picture is a work in progress. I have painted it silver but it looked too smooth, so I have been experimenting with applying some texture to it looks more like a pressed metal part. I think i'm almost there with it. I have just matt Lacquered it and will post up next week.
So I just need to fit the front brake pads then I can add fluid and bleed the brakes. This will really feel like progress.
Current parts project is to order some bushes for the Handbrake as the original nylon one dissintigrated years ago. Cintered Bronze ordered which will need a bit of fettling to work. More of this later.
Hope you all enjoyed your Bank Holiday!

Project Blue Book

Posted: Wed May 04, 2022 4:17 pm
by Gary71
Looks brilliant, the position of the wheel in the arch is just perfect :)

Re: Project Blue Book

Posted: Thu May 05, 2022 12:05 pm
by neilbardsley
I repainted the same air blower to go in my 914 but yours looks a lot better. I hope you have a better plastic attachment for the hoses than I do


Sent from my M2004J19C using Tapatalk
Image

Re: Project Blue Book

Posted: Tue May 24, 2022 2:18 pm
by chief
Okay so we're onto the FUEL system. I write it in capitals because it's a bit of a grey area when it come to what to fit and how and where to fit it. I'm lucky that I am using the 911 fan as this removes a big chunk off the front of the engine and therefore provided a bit more space for the tricky stuff.

first off is coming out of the shift rod tunnel. The originals were plastic, yest plastic fuel pipe. Not on my watch...
I have gone for AN (Army/ Navy Fittings) using both AN8 for flow to pump then AN6 for the return to tank and up to the throttle bodies.

Image
Image
Image
Image
I machined up some spacers to bring the fittings out to clear the wiring loom 'snorkel'
Next up was to choose then mount the fuel pump and filter. I found this natty solution which saves pipe therefore less potential leaks.
Image
Image
Image
Image
I found a neat place for it. Drilled and used some crush inserts to be able to bolt it in place. I cut a strip of rubber to sit under the bracket to further reduce noise from vibration.
Next onto how we get from the hot side of the engine to the cool top side whilst making it easy to disconnect in future.
I decided to create a Ali plate with some more bulkhead fittings.
Image
Image
Image
Keeping vintage Porsche I have used cork as a gasket.
Image
Image
Image
Image
Image
Image
You can see here that there will only be short runs of pipe and hopefully neatly out of the way. I shall make these up next weekend when a few more fittings arrive.
I then moved onto the handbrake. I crackle finished this but needed to turn an insert to fit as the nylon one had all but worn through. I used and oil bronze which should last.
Image
Image
Image
Image
Image
All connected up and I can now keep the car safely in place with it's own handbrake and not just the chocks!

Re: Project Blue Book

Posted: Wed May 25, 2022 5:50 am
by sladey
Nice work as usual

Re: Project Blue Book

Posted: Thu May 26, 2022 9:56 am
by Lightweight_911
.

Fantastic attention to detail ... 8)

.

Re: Project Blue Book

Posted: Thu May 26, 2022 9:06 pm
by 23e Heure
Good stuff

Re: Project Blue Book

Posted: Mon Jun 06, 2022 1:25 pm
by chief
Thanks ever so much gents. I appreciate the encouragement.

So lesson in assembling AN- Fittings...

First tape up the pipe to stop it flaring when cut.
Image
I cut the pipe with an angle grinder with a micro thin stainless steel cutting blade. Remember to clean out the pipe as there will be lots of rubber debris in there and we don't need that clogging up the new filter.
Image
Buy a proper set of Ali jaws for the fittings. They will pay for themselves in no time!
Put the end fitting into them and pinch up.
Image
With a twisting action of a few degrees one way the the other (kinda a wiggle left and right) so not to unduly disturb the mesh. Insert the pipe until it can go no further.
Image
Once seated square and right to the end of the fitting carry on with the scary bit.
Image
I then tape the end of the pipe to see if it moves out during the assembly.
Next I use a good quality silicon spray in the end of the pipe and on the fitting, especially the threads.
Image
Image
The threads are very fine, but make sure that you don't cross thread. These fitting are Ali.
Tighten fitting in a smooth constant motion. I again use an Ali spanner designed for this.
Image
And there you go. Check the tape to make sure the pipe has not pushed out at all and you can be pretty confident you now have AN- pipes good for years.
Image
Image

So lets see how they look fitted...
Image
Image
Image
Image
Image
Image
I would add that I blew the pipes out with the compressor before fitting, just to be doubly sure there was not debris left inside.

Onto the inner door assembly now. A work in progress...
Image
All the winder hardware is now install along with locks and seals, so the quarter glass will be next in after some new seals and a little paint and polishing.
Image
Image
Image
Image
So a bit of work to do here. I have got hold of some Borax to polish the glass and remove 50 years of detritus!
I will sort this next weekend hopefully. In the meantime I started cutting the new seals to take a tab that pulls the seal down into the door.
Image
More next time

Re: Project Blue Book

Posted: Sat Jun 11, 2022 7:30 pm
by chief
So today i thought I would tackle a job I have been putting on the back burner for far to long.
The dreaded sail trim and Targa vinly. Now I have to admit I have never done anything quite like this before, so I may have over egged the cake a bit. However I thought i'd take some time and not rush...
Image

Image

Image

Image

After mocking up the pre cut pieces I realised that this was going to be tight. The kit I purchased didn't give a lot of excess, so accuaracy was going to be the order of the day!

Image

Masking up is the key here. Time spent now did indeed pay dividens during the install.

Image

Lots of masking to avoid spray glue getting everwhere.
While I was doing this I set the heating in the garage to 22 degrees which is the optimal working temperature of the adheisive. Almost vest and pants time....

Image

Image

The coverage is key with even coating on both surfaces. I sprayed in each direction both up and down the side to side on both panel and vinyl. Then left to get touch dry, which was pretty quick at 22 degrees!

I cleaned the body work with white spirit first as I have been all over it with greasy fingers. The I used a silicon cleaner on a clean lint free cloth to get rid of any lingering contamination. The I used a fresh tack rag on both car and vinyl.

Image

Image

Image

I used a hard rubber roller and a narrow metal on with fine line tape wrapped around the metal roller so not to mark the vinyl.

Image

Image

Next I masked up what I had already done to avoid over spray of the glue.

Image

Image

Image

Image

Image

Image

Image

Image

Image

So a little trimming once fitted to square all the joints. Although these are covered by trim I thought it best to get it all the same both sides to give the chrome trim a fighting chance.
So I can breath again now and reduce the heating back down to something resembling an British Summer!
So off for a shower and to put the Dinner on and watch a bit of Le Mans 2022.

Re: Project Blue Book

Posted: Sun Jun 12, 2022 7:44 am
by sladey
High quality work again - nice job