Burnt Pig - 356 Pre a Build Thread

Replica owners or enthusiasts are very welcome

Moderator: Bootsy

Robneal
DDK above all
Posts: 197
Joined: Tue Jul 26, 2016 10:26 pm

Re: Burnt Pig - 356 Pre a Build Thread

Post by Robneal »

Got distracted with the dashboard as it has been really quite wet and i only have a tiny single garage and to do any work on the chassis then I really need to roll it on to the drive. But hopefully the weather will improve later this week and I'll get the engine trial fitted and the brakes sorted. Car is now due to go to Speedster Clinic for the body being bonded on at the end of October so I have a few weeks yet to finish the chassis.

Dashboard
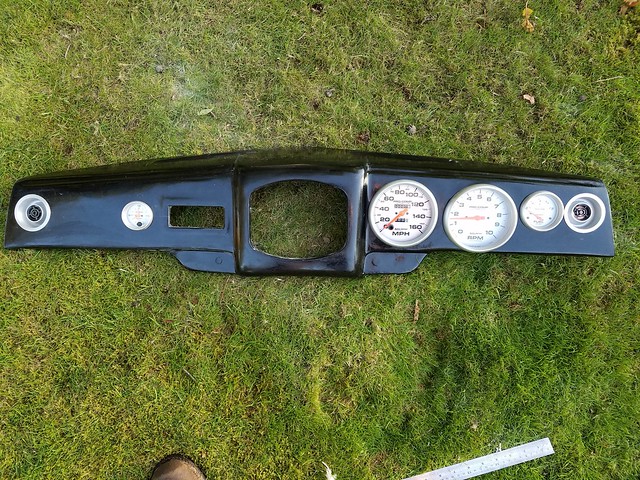
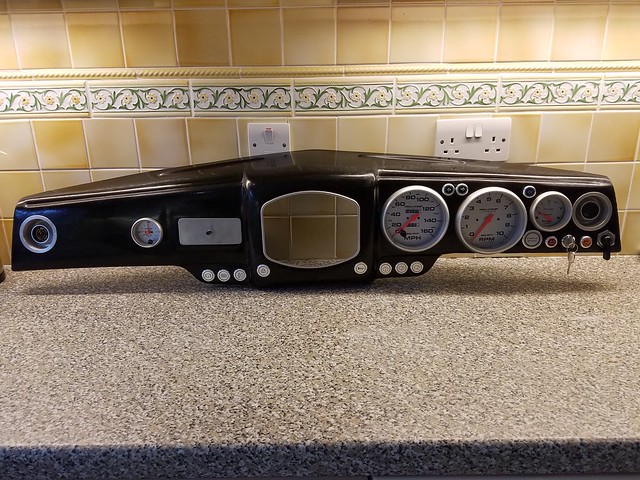
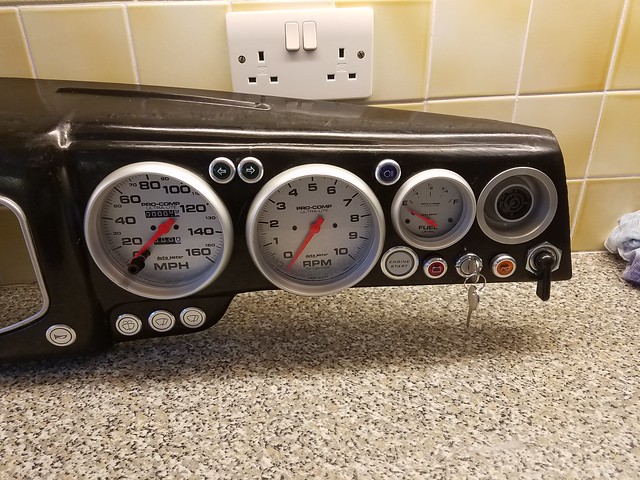
On the dash I started by fitting my oversize Autometer Pro-Comp Ultralight Rev Counter and Speedo gauges as these are a little bigger that the standard gauges I had to make the holes bigger in the dash so I got a marble hole saw of the right size and as these are diamond edged and not toothed like normal hole saws and this made a really good job of enlarging the holes. It was a bit difficult to choose exactly where to place the gauges as the dash is not actually parallel so if you line it up along the bottom then the top look wrong and vica versa, so I ended up placing them where they look right from the top as this is the view I will have from behind the wheel. I also got the rest of the switches and warning lights this morning and have now added these to the dashboard too. I have also got an old beetle ashtray that I am modifying to fit in the dash and have made a new front for it out of stainless and will add an alloy knob when I next get access to a lathe to turn one up. Work still to do on the Dash includes mounting of 3 other Gauges (Oil Pressure, Oil Temperature & Volts) which I will mount in a pod under the main speaker grille. Not sure what is going in there at the moment - maybe just a speaker. I then have to find a way of bonding the ashtray caddy to the dash, but I think I will wait till i decide what goes in the centre as I may make a wood substructure to make the dash more rigid and make this all as one piece.

The Ashtray as came from Beetle
Image

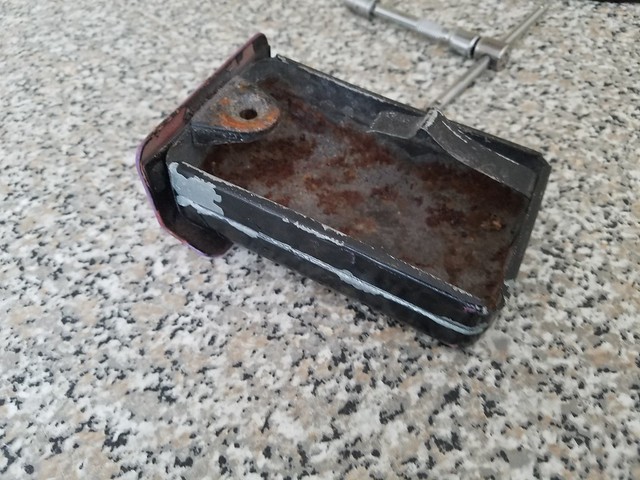
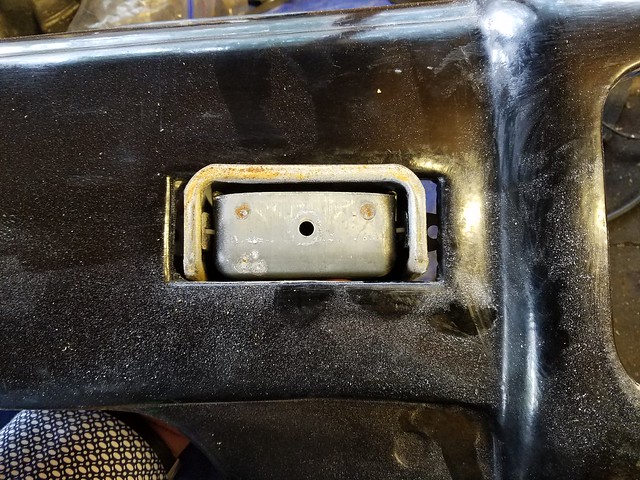
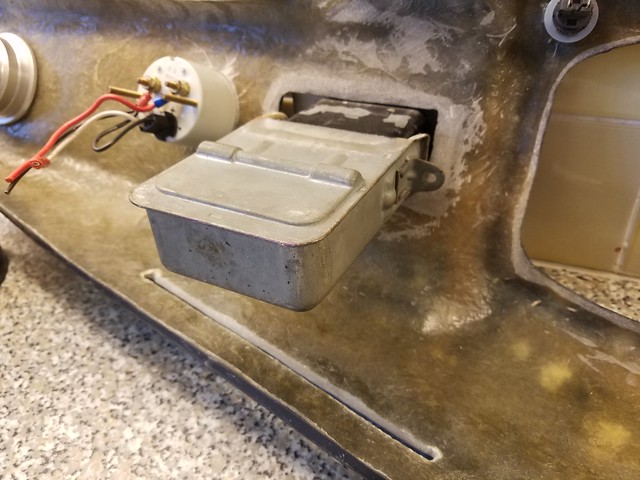
The Ashtray Caddy that needs to be bonded to the dash or at least a mounting fixture needs to be added so that it can be bolted in as per the original beetle dash
Image

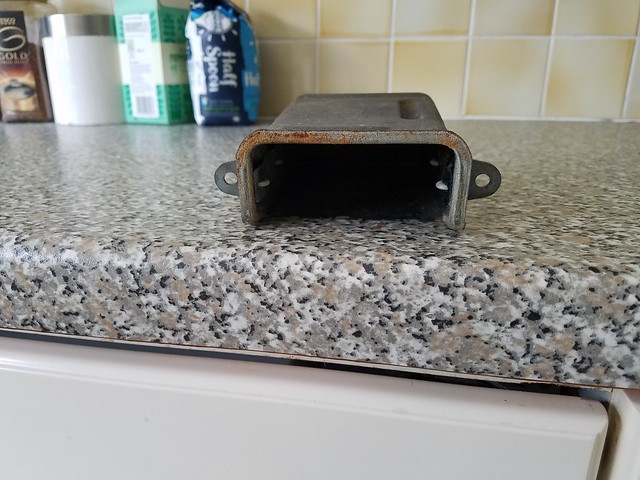
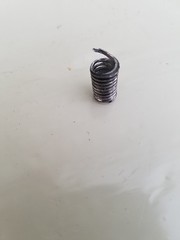
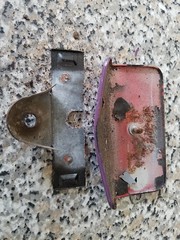
Removed the front panel and the cigarette Stubber
Image

The dash caddy with doorless ashtray offered up to the dash...
Image

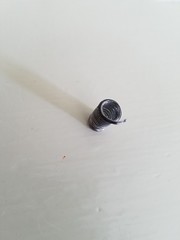
The Ashtray new stainless steel front
Image

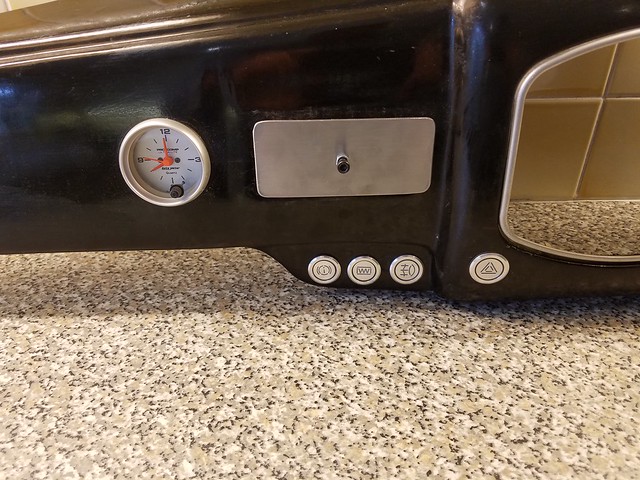
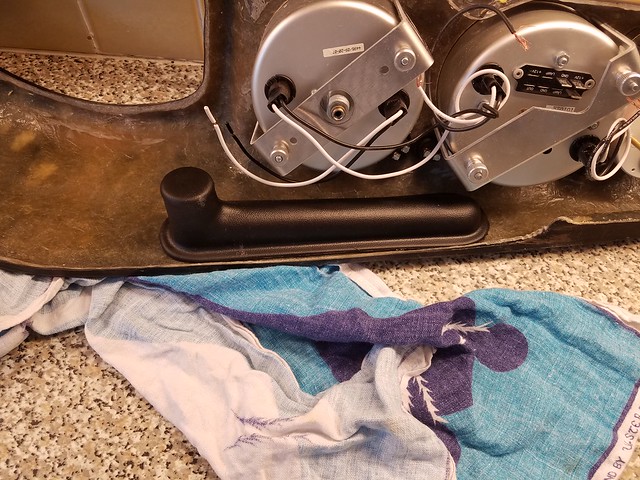
Various Images of the Dash as I added the instruments and switches.
Image

Image

Image

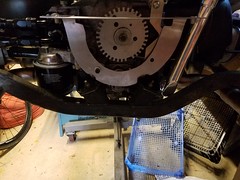
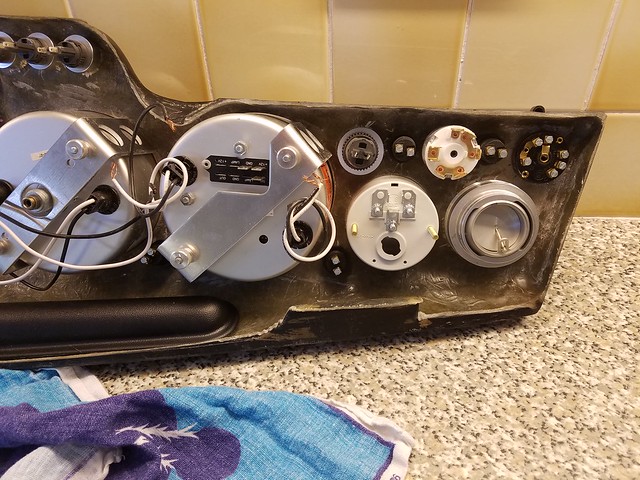
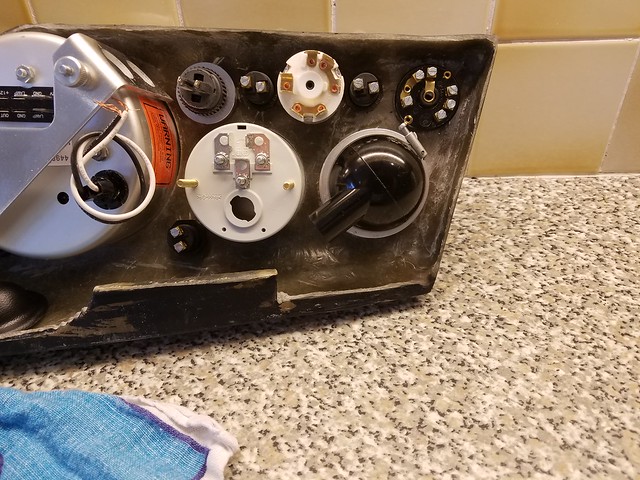
Some images of the back of the dash
Image
Image
Image


Overall I am really pleased with how the dash has turned out and hope that once I have decided what to do with the middle bit then it can be finished off. Will just need Wiring and plumbing then and it is ready to go in.

Heater and Fresh Air
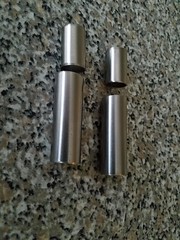
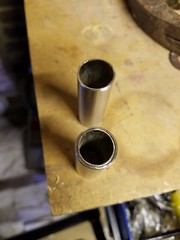
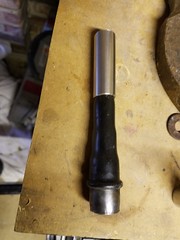
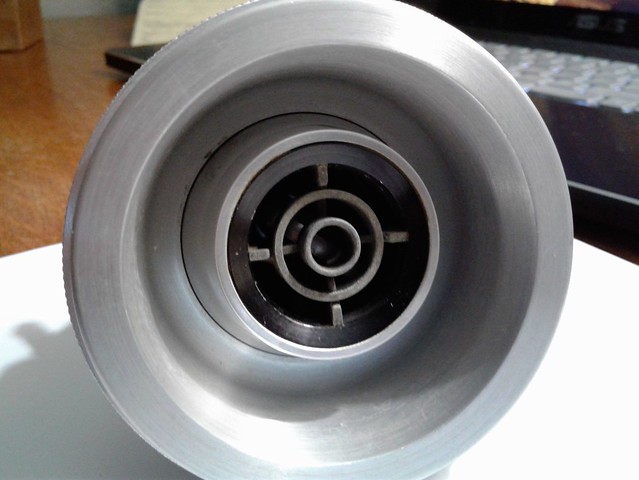
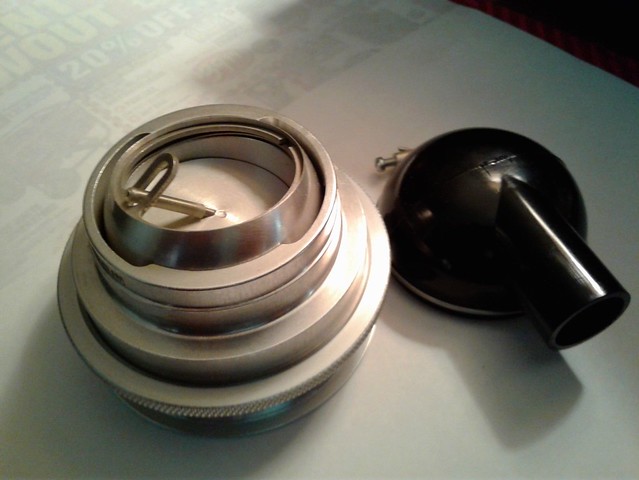
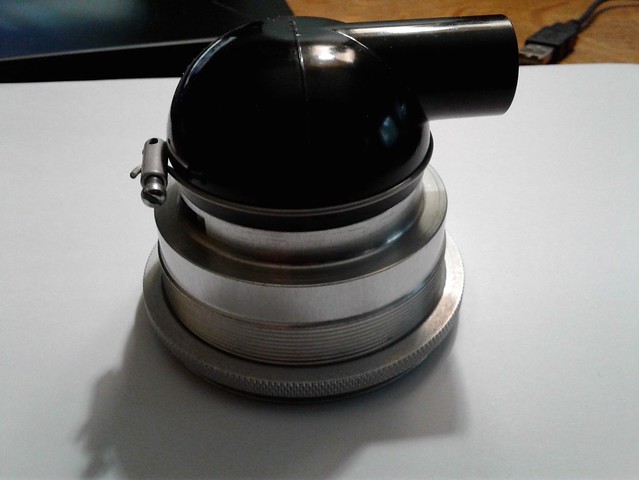
I want to drive my car all year round so am putting fresh air and a water based heating system in the car. I also wanted some Fresh air vents for the dash that looked good and would be IVA friendly too. I found some ex Aircraft new Old stock air vents from the 1980's on EBAY which are made from billet Aluminium and are a lovely bit of engineering. They even come with some air inlets that take 20mm air pipes that I will hook up to the dash plenums and then to the heater.

Air Vents
Image

Image

Image

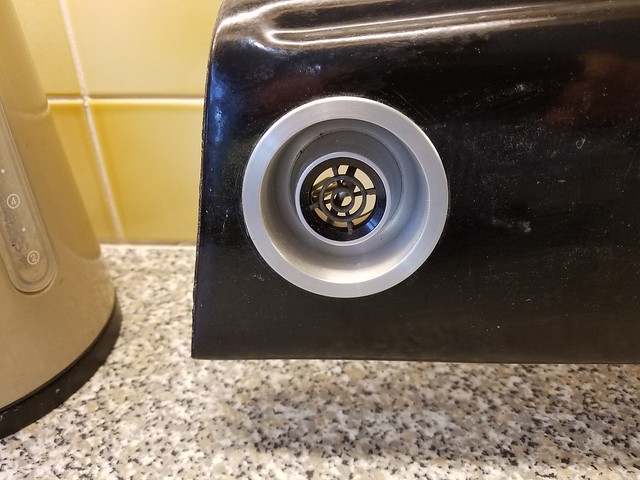
And here they are mounted into a 62mm hole in the dash
Image

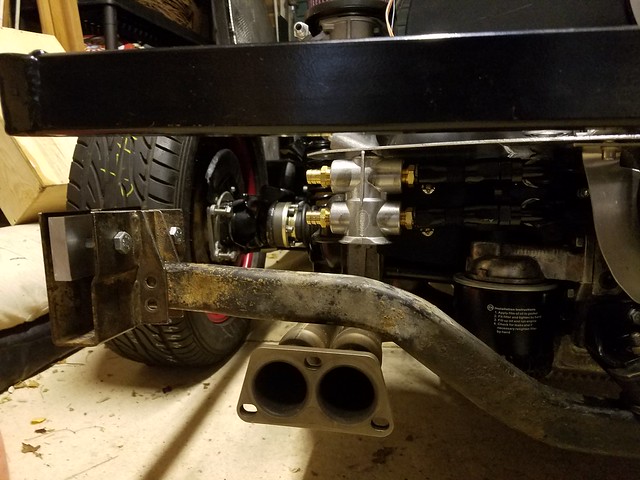
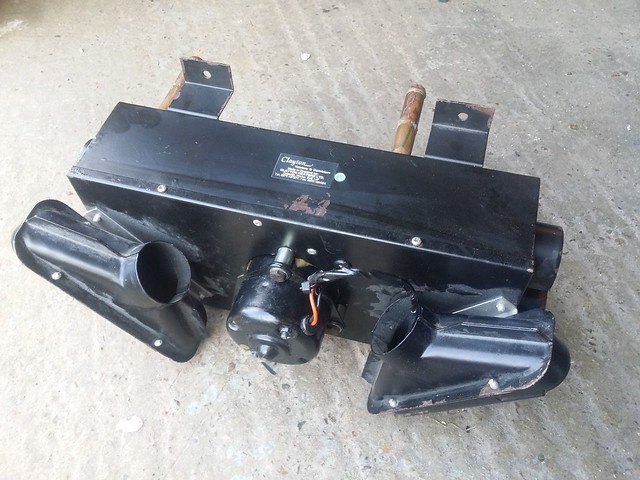
This is the Clayton Water heater that I will mount up behind the dash it comes with a 2 speed fan, and 4 outlets (2 each side) one that will be hooked up to the built in vents you can see in the picture for the cabin and one for the demist vents / fresh air eyeballs. This will be linked to an Eberspacher Hydronic heater that will provide the hot water. I will also be running a mico hot water heater with an original demist tube to handle the rear demist requirements.
Image

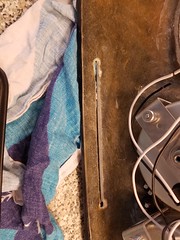
I have cut out the demist slots on top of the dash
Image

You can also see a good image of the ashtray caddy and how I will need to mount it to the dash.
Image

And will bond these kit car Plenums to the underside of the dash to direct the air through the demist slots
Image
Robneal
DDK above all
Posts: 197
Joined: Tue Jul 26, 2016 10:26 pm

Re: Burnt Pig - 356 Pre a Build Thread

Post by Robneal »

A bad day on the pig.....
Well today was dry and I thought I would get on with swapping the rear hubs over and doing a few other jobs on the rolling chassis but all did not go to plan but sitting here with a beer I car reflect on the problems and issues I have uncovered... :roll: :roll: :roll:

Firstly I thought i would swap the brake back plates over as I had got them the wrong way up and on the wrong sides.....when I had got them both off I noticed that the back plates would not fit on the other way up as the recess in the back of the plate would not line up with the bearing carrier on the IRS arms. I consulted Google and it looks like who ever had the brakes before me had machined a 5 mm recess in the back of the 944 backing plates which moves the whole brake assembly further in and then it messes where the bearings sit so they had removed the small lip between the outer bearing and the oil seal. With a bit of grinding I got it to fit into the recess, but as the brakes are now 5 mm further in and the brakes disks/ drums are still in the same place then the parking brake shoes hang over the edge by about 3 mm. The caliper seems to line up Ok though. So I am in a dilemma do I replace the 944 backing plates if I can find some decent ones to replace them with? or do I just live with the parking brake not lining up properly. Or if I have got it completely wrong then then someone tell me what I am doing wrong.....

Once I had got the brakes swapped over (4 hours by the time I had worked out what was going on and made the required modifications) I then thought I would fit the drive shafts - I had bought brand new ones as Machine 7 had a deal on them last year and I got them for little over the price of new CV joints. I filled the CV joints with a ton of grease and then all was well when I bolted the gearbox end up but when I went to bolt the stub axle end up It did not fit as the hole spacing on the Stub axle flange was too wide. I checked and it looks like the person that sold me the Stub axles sold me one standard Bug one and one from a Trecker or some other larger flange car
Have ordered a new stub axle from VW heritage so got to have one sie completely to pieces again to replace the Stub axle.

Lastly i went to remove the supporting plate for the rear engine tin that i had made as it needs 2 small clearancing notches put in it so that I can add a rear engine mounts and a support bar. I had put the bolts in with locktight and bolt was half way out when it snapped off, so another job to do is to drill the stud out......It was just not a good day today

I'll add some photos when I take one side to pieces so you can see what I mean about the strange machining and the consequential brake lining overhang

Next jobs, sort out the snapped stud and finish off the hand brake. so lets hope the weather is good again tomorrow...
Robneal
DDK above all
Posts: 197
Joined: Tue Jul 26, 2016 10:26 pm

Re: Burnt Pig - 356 Pre a Build Thread

Post by Robneal »

Better couple of days on the car and have managed to drill the snapped bolt out - went with the drill and stud extractor method, but as you can see from the photo I was within 0.5 mm of the thread before the Stud extractor would work. Not bad for a bit of hand held precision drilling if I say so myself, just ran a tap down the hole once I got the old stud out and rear tin support is now back where it should be with the clearancing to allow me to get at rear engine mounts.
Image
Image
Image

You will also see I have trial fitted the engine support bar. This will need quite some modification as it is a long way from lining up with the chassis rails, but looking to install the engine this week just so I can line it all up and then decide what modifications I need to make.

Still waiting for the Stainless tube to come through the post to allow me to line up the rear handbrake tubes but hopefully this should be fairly straight forwards.

Hare are the photos of what I was talking about in my previous post where it looks like someone has machined the rear brake plates by 5mm...Really would like peoples opinion if this is likely to be a problem, or am I worrying about nothing. THere is a set of un mollested back plates only on EBAY at the moment So I could get them just to be on the safe side.

Image
Image

Lastly new stub axle turned up from VW heritage so swapped that out and now have the rear drive shafts fully installed.

Image

So this weeks tasks are finalising the handbrake and trial fit the engine....
mdmax72
Put a fork in me, I'm done!
Posts: 1512
Joined: Thu Sep 28, 2006 8:23 pm
Location: midlands u.k

Re: Burnt Pig - 356 Pre a Build Thread

Post by mdmax72 »

Looking good Rob.

The hydronic water heater, don't they only work just to get the water temp up until the engine starts and takes over. Or can you run them continuously??
Rich

DDK Member 0547

Evolving Speedster Build ;-)
Robneal
DDK above all
Posts: 197
Joined: Tue Jul 26, 2016 10:26 pm

Re: Burnt Pig - 356 Pre a Build Thread

Post by Robneal »

mdmax72 wrote:Looking good Rob.

The hydronic water heater, don't they only work just to get the water temp up until the engine starts and takes over. Or can you run them continuously??
In my work I had dealings with Eberspacher (their mobile phone application controller) and their hydronic heaters are like mini central heating boilers and are used for heating many things including trucks (overnight cab heaters) narrow boats and coaches. Although a significant part of their business is now pre heaters for cars, the reality is the core heater is actually common across all functions.
Given the requirements for IVA and my desire to build a year round driver then water based heating is really the only way to go. I found my boiler on eBay, a brand new audi a8 Unit for £80 & have subsequently found a clayton heater for the front which I will plumb in to a.fresh air and recirculating air supplies and for the rear demist requirement I will buy a micro heater for the back linked to an original 356 B defrost tube to blow warm air on to the back screen. There are a couple of articles on the web of people using hydronic heaters for camper vans but I am happy to share my experiences once I get it plumber in.

Sent from my SAMSUNG-SM-G891A using Tapatalk
Robneal
DDK above all
Posts: 197
Joined: Tue Jul 26, 2016 10:26 pm

Re: Burnt Pig - 356 Pre a Build Thread

Post by Robneal »

So some ore progress today and I have finished the handbrake. It was not as easy to complete as hoped but I got there in the end. I Had 2 main issues:
1. As stated before I needed to get teh 944 handbrake tubes to get mated to the Shortened beetle cable. To do this I got 2 x stainless steel tubes, one with an inside diameter of 16mm and one with an outside diameter of 16mm, I then cut two lengths of the smaller tube at 25mm and then inserted this into a 52mm length of the larger tube. The pipes then slipped snuggly over the 944 handbrake tubes and also over the shortened Beetle Cable. Heres some pictures of the parts and then the assembled item

Image
The two tubes before inserting one inside the other

Image
If you look carefully then you can see one tube inserted inside the other one. JUst an interference fit and no load on it so should be fine.

Image
Fitted over the 944 handbrake tubes

Image
Initial installation before realising the outer cable was too long not the best of images, but you can see the handbrake tube, the stainless pipes to line up the cable and the Beetle outer cable slotted in

2. The outer part of the shortened cable was too long and therefore I had to do two things to get the cable to fit. Firstly I cut down the handbrake pipe guides that are part of the chassis by about an inch.

Image
After Shortening

Image
Before Shortening

THen I had to cut about an inch off of the outer cable - luckily the outer cable had a fairly long crimp tube and therefore there was enough material for me to cut off another inch. Bit of a bugger doing it as I couldnt take the inner cable out so had to cut round the outside then angle grind down the length of the bit I wanted to remove without damaging the inner cable in order to be able to remove it.....

Image
THe Extended handbrake outer cable before I cut it down.

Image
The completed handbrake cable.....

Next job is to bolt on the engine ready to sort out the Rear engine support bar....but need to get some mates round to lift the rear of the car over the engine...maybe over the weekend....

Does anyone know why sometimes FLIKR Images are large and other times they are small it does not seem to be Portrait or Landscape related but my pictures are now all coming out small?
Robneal
DDK above all
Posts: 197
Joined: Tue Jul 26, 2016 10:26 pm

Re: Burnt Pig - 356 Pre a Build Thread

Post by Robneal »

So some good news....I now have a new job and start it next Tuesday so on the one hand I'll have an income again, but on the other, I am not going to have the time that I have had, as the new job is London based so means a daily commute. So just a few little updates on the engine support bar that I needed to get to a certain stage before I put the engine in....

There was a problem with the engine support bar in that when it was installed, it fouled on the CSP Oil Filler that I had by about 6-7mm.

Image

So a couple of things to resolve this - Added 3 washers between the Engine mount and the Engine, this gave me 3mm and then I also re-drilled the engine mount with a hole closer to the front to move it forwards so that there is good clearance between the Oil Filler tube and the support bar.

Image

I also had to further clearance the rear tin support plate to get it to miss the engine mount that had moved out a little.

Image

I have also adapted the hangers that hang the engine support bar from the rear chassis rails. I started by cutting off the top part of the hanger that attaches to the chassis rails so they now come up to fiit level with the top of the chassis rails. This image shows how much I cut off the top of the hangers, one cut and one original.

Image

Then I re-drilled the mounting holes that will allow the hangers to be attached to the chassis rails to line up with the centre of the rails.

Image

Then finally I made some spacers up out of 15mm x 40mm Aluminium bar to allow the hangers to match width wise to the Speedster Clinic rear chassis rails.

Image

Heres a picture of how they will mount up in the chassis rails when I know where to mount them.... but need the engine in before I do that as I will need to modify the engine support bar to make it fit.

Image

I have also started work on modifying my steering wheel. THis is one I had on a Hot rod project from 30 years ago and originally came from a Triumph Vitesse. The steering Column on the Vitesse is much smaller so I cut the Splined part out of the wheel and did the same with an aftermarket Mountney steering boss that fitted a Beetle and have now turned the beetle one down to fit inside the Vitesse steering wheel. Now need to get the new centre welded into the steering wheel and turn up a mooneyes style cover for the centre of the wheel - Horn is mounted on the dash so no need for a horn button.

Image

Image

This will be my long term steering wheel but for the short term and to get it through an IVA test I will need to fit a 1302/3 steering wheel - anyone one got a cheap one - any condition is fine as it will only be on it for the IVA test.

Also saw this Photoshopped image on one of the Facebook groups of a Pre A and really love the look.... so may take some of the features and apply them to my car....I particularly like the wrap around bumpers and the way they have a long thin rear number plate just above the bumper and the shine down number plate / reversing light in line with the lights. I am also now sure I will go with blacked out chrome & the colour it also food for thought....

Image
Robneal
DDK above all
Posts: 197
Joined: Tue Jul 26, 2016 10:26 pm

Re: Burnt Pig - 356 Pre a Build Thread

Post by Robneal »

Engine now installed.....
Image

Image

A few images to show how the standard Engine Support Bar lines up and for discussion with Gary on how to modify so it does not interfere with the Engine Bay surround.

Image

Image

Image

Image

Image

Image

In this last picture you can see the engine sealing tin and its relevant position to the Engine Support Bar. My thoughts were to cut the engine support bar at 45 degrees as close to the outer frame rails as possible and then put some vertical bars in place to line them all up.....

Image
Robneal
DDK above all
Posts: 197
Joined: Tue Jul 26, 2016 10:26 pm

Re: Burnt Pig - 356 Pre a Build Thread

Post by Robneal »

OK, Big milestone this weekend as I sent my Rolling Chassis back-up to Speedster Clinic to get the Body put on.
Just a few Pics of it on the back of the trailer ready to go off to Gary's and then one of the body sitting on its shipping pallet.

Image

Image

Image

Image

Image

Gary is fitting the body and then the doors and door frames and the electric window mechanisms as well and also sorting out the steering column, and he is going to sort the Engine stabiliser bar and a few other little bits too.

I also wanted him to fit the windscreens but got a bit of a problem on the glass as I want to IVA my car to make it all legal and that means 'E' glass all round, and at the moment I can't find anywhere that will do me the glass. I have an EMail out to Pilkingtons who claim then can make any glass, but yet to hear back from them, and I am guessing it is going to be very expensive. The only other alternative is to get the glass made in Plexiglass then get it treated and 'E' marked. If anyone has any experience on this sort of thing then please let me know as I am a bit stuck.....

Hoping to get the car back with me end of January, so I really need to drop a few other bits up to Gary and sort the glass ASAP.

I have also ordered some interior door handles (Split screen VAN) that will link up to the IVA compliant Door catches Gary is fitting.
sladey
Nurse, I think I need some assistance
Posts: 8729
Joined: Sat Apr 23, 2005 9:08 pm
Location: Nottingham, UK

Re: Burnt Pig - 356 Pre a Build Thread

Post by sladey »

Cool
The simple things you see are all complicated
I look pretty young but I'm just backdated yeah
Robneal
DDK above all
Posts: 197
Joined: Tue Jul 26, 2016 10:26 pm

Re: Burnt Pig - 356 Pre a Build Thread

Post by Robneal »

OK, a few lessons learned that I thought I would share to help others following a design & build it yourself route...especially if you are like me, not a died in the wool Aircooled nut that knows every part from any VW ever made...

My Car has been at Gary's a couple of weeks now and two problems have come to light....one, the work that RED9 did to the front Chassis is not quite right and Gary has recommended that he re-makes the front sub chassis to fit the RED9 suspension. Gary pointed out 2 problems with the Red9 modifications, one was that where RED9 had cut the original Chassis tubes and reversed them then the bottom ones were not really long enough so there was not really enough material to make a good fix on the bottom. Secondly the steering column where it would have gone through the bulkhead into the body would only just clear the tops of the pedals so would mean that the pedal access would be difficult and i was likely to catch my feet on the steering column. Gary has now ordered some different bent tubes for the front so he can fix the problems with all components in place.

Gary also pointed out that the 944 Hubs that I had bought off of EBAY that had been supposedly modified to run on beetle spindles had the wrong bearing spacing which meant that the front spindle nuts would not go on far enough. Gary is now going to get the hubs machined by LA Engineering so that the bearings sit in the right place, and if they do not end up being any use, luckily I had a spare pair of standard 944 Hubs that he can modify instead.

My fellow Speedster Clinic Coupe builder Chris Holdsworth is kindly dropping a load of extra bits up to Gary on the 21st December that should allow Gary to press on with all of the bits he needs, so the moral of the story is speak to the great and the wise about getting parts modified as there are a lot of people out there that do a job and its Ok but its not really good enough, fortunately I have Gary to help me through the few little bits I have got wrong, but hopefully my mistakes are behind me and the build will be straight forwards from here on....

Oh one last thing, Rich Maxwell (MDMAX) is sorting my 'E' marked PRE A windscreen so if there are any others of you out there that want a PRE A 'E' Marked screen then let Me know and maybe we can get a deal if we all order at the same time....Just the rest of the glass to go now.

A sneaky peak of the body hovering above the chassis

Image
Robneal
DDK above all
Posts: 197
Joined: Tue Jul 26, 2016 10:26 pm

Re: Burnt Pig - 356 Pre a Build Thread

Post by Robneal »

Small update....

Car still at Garys (Speedster Clinic), but have now solved most of the problems with the sourcing of the 'E' marked glass I need for the IVA test.

For the Windscreen I am getting Richard Maxwell to supply me one and he is getting the bent windscreen made, hopefully with a heating element, but not yet 100% confirmed. I am still going to install my Eberspacher Hydronic heating system, but I wont do this prior to the IVA test as the Clayton heater I will be installing has a few sharp edges that are not IVA friendly. The windscreen is going to take up to 10 weeks to produce, so my car's stay at Gary's is going to be slightly extended.

I found a pair of 'E' marked rear pop out windows (glass only) on EBAY that actually came from Roger Bray, they are new so not sure where they come from, but who cares if they are 'E' marked and they will get me through the IVA test. They were £200 for the pair that I didn't think was too bad, and if anyone is after original glass I have a pair of Sekurit windows in immaculate condition with no scratches for £160 if any ones interested.

I met up with a fellow Speedster Clinic Pre A builder, Richard this week in Fareham, and he told me he got his 'E' marked heated rear screen from Parts Wise in the Netherlands. Checked on their website and could only see non heated ones listed, however after a after a few emails apparently all of their rear screens are heated now so if others are looking for a rear heated screen then this is the place to get them from. They are not cheap though and mine was £513 including shipping. They also do 'E' marked rear pop out windows too, but these were nearly £300 for the pair.

This leaves me just the door glass to source....Richard, the fellow Pre A builder gave me a lead on a company in Glasgow that makes flat toughened glass to order mostly for commercial vehicles, so I have emailed them to see what they will charge. I have also sent another email to Pilkington to see if they are willing to help as well as I got no response to my original email to them. I am pretty sure that either way I am going to need an original 356A or pre a Door Glass for them to copy, therefore if any has an original door glass that they would be willing to lend me then let me know else I'll put a help message out on the wider DDK and SAMBA forums to try to find one I can borrow.

In my quest for glass I have found that there is another Kit car manufacturer, Kitman Motors in the USA who are offering a complete glass package with new manufactured pop out window frames, but this is for the 356A and not the Pre A (Windscreen Different), they are also my backstop for the door glass if they can get the glass E marked.

I have also got all the window rubbers and several other parts I need from Sierra Madre in USA who provided a great service. I ordered all the parts on the Friday and with economy delivery they arrived with me in the UK on the following Wednesday, and for some reason no Import duty either - result.

Will post another update when I have solved the door glass saga.....then its drop all of the bits up to Gary for him to fit them all, so realistically it could be end of March before I get my car back.
Robneal
DDK above all
Posts: 197
Joined: Tue Jul 26, 2016 10:26 pm

Re: Burnt Pig - 356 Pre a Build Thread

Post by Robneal »

OK door glass saga now solved.....I managed to purchase a scratched and chipped original door glass from Karmann Konnection for not too much which I picked up yesterday, so I now have an original to make a copy from. I must say for fellow 356 enthusiasts Karmann Konnection is a great place to visit, with a massive array of used parts for sale, some reproduction items and best of all they have outbuilds full of original cars with a 51 Pre A (body bumper) a 30k mile original 356 A and about 3 speedsters, a real Carrera as well as many other old air cooled Porsches. I left there with my tongue on the floor, and a desire to go back and spend a lot longer looking around.

Back to door glass - I now have two companies that are now offering to make me copies of the door glass with the relevant 'E' marking and just waiting for pricing to come back from them before I decide who will make them, I will publish a full list of suppliers and the costs once I have them all settled for all of the glass.

Got a bit of a sneaky picture on Facebook this morning and it looks like they have put the body on my car, only one picture but it got me excited.

Image

One last little update - Not sure if you read back through the blog I have actually got a second set of wheels (the original Porsche racing wheels that look a bit like Centre Lines) but one of the split rim inners had a massive crack in it and I have been unable to find anyone willing to weld and guarantee it so in the end I decided to get a new inner rim made, and I was expecting a massive bill, but the quote was only £115 plus VAT from Image Wheels International so the old one was shipped off to them last week to get a new one made... Here's a picture of the wheel to remind you what they ae like


Image
Robneal
DDK above all
Posts: 197
Joined: Tue Jul 26, 2016 10:26 pm

Re: Burnt Pig - 356 Pre a Build Thread

Post by Robneal »

An afternoon of Rubber, Lube and Wrestling, and before anyone asks, no the missus has not taken up a new sport, I was just fitting new rubbers to the rear quarter lights. Took me a few hours, but rubbers now fitted with new ones on the outside, but lucky enough the inner ones that hold the glass to the frame were fine, so quick clean and a bit of washing-up liquid and they slid in easily. I put new screws in the frames as the originals had all rusted and some of them had to be drilled out. Eventually I will Powder coat these in Satin Black, but not till after it goes through the IVA.
Here is a picture of the new rubbers all nicely fitted......

Image

And another one showing the 'E' Mark on the glass that is all important when IVA'ing a car.

Image

Door Glass is now being made by SGI Glass Ltd who took the Original glass I sent them and are now making IVA compliant Left and Right hand door glass for me. I also did the wider 356 a and Pre A Coupe community a favour as I also sent SGI one of my original quarter window glasses as well and they are producing rear quarter window CAD template so people can just ring up and order new 'E' Marked glass over the phone. The door glass was £99 a pair and the rear quarter windows are £67.20, both plus VAT and carriage, and all with the important IVA compliant 'E' marks. This is the website for those that are also looking for glass, and I know a couple that are already in touch with the guy there to produce their glass too.

http://www.sgi-glass.co.uk/

I also heard back last week that the guy that was going to make my inner wheel for my Centreline style rims and he said that he can not make a replica of the original inner as the original rim had a steel insert that was sandwiched between the two wheel halves. He has had another think and he thinks he will be able to make me an inner that will allow me to use the original outer, but i need to let him know a few measurements before he can be sure....Lead time is 6-8 weeks though.....

Gary is pushing on with the body and he now has the inner door frames attached to the body and has started to sand down the window apertures so the window rubbers should fit OK, still not got the windscreen, although I have confirmed I will be getting a heated one. :brilsmurf: :brilsmurf:

Probably in about 2 weeks time I am up in Solihull for work so will drop off all the other bits with Gary so hope to have some propper exciting Pictures to share then, with the Pig almost looking like a car......
Gary71
Nurse, I think I need some assistance
Posts: 10275
Joined: Wed Mar 31, 2004 1:27 pm
Location: Cheshire
Contact:

Re: Burnt Pig - 356 Pre a Build Thread

Post by Gary71 »

Coming on really well, the glass sounds like a right saga, but one with a good outcome for anyone else trying to do the same.


Sent from my iPhone using Tapatalk
Post Reply