Burnt Pig - 356 Pre a Build Thread

Replica owners or enthusiasts are very welcome

Moderator: Bootsy

Post Reply
Robneal
DDK above all
Posts: 197
Joined: Tue Jul 26, 2016 10:26 pm

Re: Burnt Pig - 356 Pre a Build Thread

Post by Robneal »

mdmax72 wrote:Looking good Rob. When's the Body joining the party.
Hi Rich, It's going to be a while probably up to a year as I have plenty to do now to install all the components I have already into the chassis. I will start with all the mechanicals - gearbox, engine, brakes etc. and then I'll start to look at the eberspacher water heater, initial fit for the seats, oil cooler etc. but i really need to be able to access someone's completed car to take measurements, as I know it's dangerous fitting components without the body in place as the cars are very small there is not a lot of room for error.

So anyone out there with a Speedstar Clinic Coupe that is willing for me to come and take a load of measurements then please let me know.

I also need some time to replenish the bank account for the body phase at its quite expensive when you add up all the glass and other components I need from Gary.
kvinyl
DDK slapper chatter
Posts: 400
Joined: Tue May 26, 2009 11:10 pm
Location: Galway, Ireland

Re: Burnt Pig - 356 Pre a Build Thread

Post by kvinyl »

Looks great, just catching up on this thread now. Some very nice work gone into that chassis :cheers:

I'm running an EFI setup on my Ghia drag car, also using Jenvey TBs but using LS2 coil packs with a Maxx ECU. If you installed a camshaft sensor at the old distributor take-off point you could run fully sequential ignition rather than wasted spark? You can purchase cam sync sensors designed to take the place of the removed distributor for about $150 or you could modify an old distributor with a hall effect sensor to pickup on TDC and save on the cost.
1958 Ghia Lowlight 2.4L FI Supercharged
1959 356A
1968 911 SWB (project)
1993 911 3.6 Turbo
2005 E55 AMG Estate
Robneal
DDK above all
Posts: 197
Joined: Tue Jul 26, 2016 10:26 pm

Re: Burnt Pig - 356 Pre a Build Thread

Post by Robneal »

kvinyl wrote:Looks great, just catching up on this thread now. Some very nice work gone into that chassis :cheers:

I'm running an EFI setup on my Ghia drag car, also using Jenvey TBs but using LS2 coil packs with a Maxx ECU. If you installed a camshaft sensor at the old distributor take-off point you could run fully sequential ignition rather than wasted spark? You can purchase cam sync sensors designed to take the place of the removed distributor for about $150 or you could modify an old distributor with a hall effect sensor to pickup on TDC and save on the cost.
I actually am using a crank trigger Sensor specially made for a type 4 by a guy in the UK that built one for his Speedster then he made a few more to sell on. I have taken some photos of the installation but is not that easy to see. unfortunately the URL where I bought it from is no longer active so I am guessing that he has sold his stock now.

Trigger wheel that is mounted behind the pulley

Image

Image

Pictures of the Sensor mounted behind the pulley and the trigger Wheel

Image

The Emerald K3 ECU I have is a UK ECU that is reasonably easy to set-up and Emerald were kind enough to send me a MAP for a type 4 engine that is almost the same specification as mine so that should get me started andwhen its in a suitable stateI can get it Rolling road set-up at some point later.
Last edited by Robneal on Tue Jul 04, 2017 9:05 am, edited 1 time in total.
Robneal
DDK above all
Posts: 197
Joined: Tue Jul 26, 2016 10:26 pm

Re: Burnt Pig - 356 Pre a Build Thread

Post by Robneal »

Just completed a couple more bits on the Engine....

Firstly I added the Air temperature Sensor to the Air filters, this necessitated getting a new air temperature sensor as the one I had (from a GM) wouldn't fit in the base plate of the air filters out of the way so I bought a much smaller one from Emerald that came with a connector and boot as well and I have neatly slotted into the space between the two throttle tubes on the left hand air filter. It's still a tight fit but invisible when looking at the back of the engine, I even had to file a tiny amount from the throttle body joining bar to get it to fit in.

The Temperature Sensor mounted into the Air FIlter base plate

Image

And from above this is what it looks like from the inside of the air filter

Image

Showing where I had to file a small amount from the joining bar on the throttle body so the sensor and plug would fit in and can be removed without taking everything else to pieces if i ever need to get to it.

Image

And shown here with the plug and boot fitted

Image


I have also painted the Fan Shroud, cylinder tins and Air filters in Satin black....I am quite pleased with the overall look and tidiness of the engine.

Image

Just the fuel lines and rear tinware to do now, but I think I am going to have to swap out the Empi Oil Thermostat as even with no oil pressure its weeping oil from the cir-clip at the bottom that holds the spring in. Unless anyone has any ideas how to seal it effectively???

Will start on the rear suspension set-up tomorrow and try to get that sussed out and get the rear brakes on too.
Robneal
DDK above all
Posts: 197
Joined: Tue Jul 26, 2016 10:26 pm

Re: Burnt Pig - 356 Pre a Build Thread

Post by Robneal »

Right - have moved to Flickr for my photo hosting, and it is sooo much better than Photobucket. Much quicker, no Ads and I managed to re-upload all of my Blog photos, and change all of the tags in my posts to reflect the new photo location in about an hour - but i did have all my blog photos in one place on my PC so it was one easy upload. The key on Flickr seems to be to use Camera Roll then click in to each photo and Right click to copy image address, and paste this in to the IMG bracket thing, this seems to work fine.

One other quirk I have noticed is that the Landscape photos come out much bigger in the blog than the Portrait ones so I think I will mostly be taking Landscape photos in the future. So Photobucket RIP and long live Flickr. Going to enjoy deleting my Photobucket account - what a bunch of numpties - I think they may have put a final nail in their own coffin. :bounce: :bounce: :bounce:

OK back to progress.....

At the weekend I took the rear suspension to pieces and look as to why it seemed to not fit very well....

Upon investigation there were a number of issues:

1. RED9 had not followed the installation instructions that I sent them for the Kafer brace and had managed to get the front and rear brace bars in the wrong way round therefore there was no adjustment in the front bars and barely enough thread to cover the back bars. I swapped these over and all now lines up with plenty of adjustment on all the rods..... I am really very impressed with the Cool Rydes brace bar as it is easy to install, adjusts easily and overall seems to be very well engineered and finished..

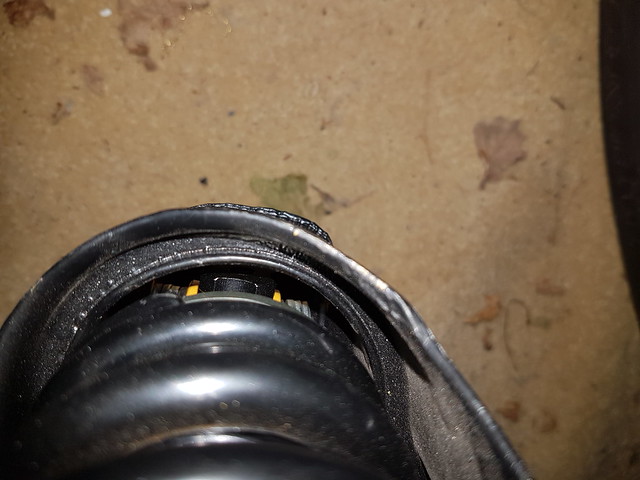
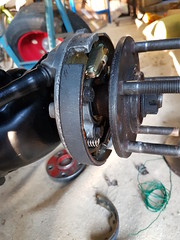
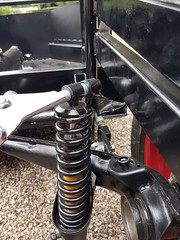
2. A 10mm spacer was required between the top shock mount and the chassis to get the shock to line up in the lower trailing arm assembly so that the coil over sits in the middle and does not hit on any of the lower mounts. But due to the 10mm spacers I have also had to order longer bolts (100mm 1.5 M12) to replace the 80mm that RED9 installed.

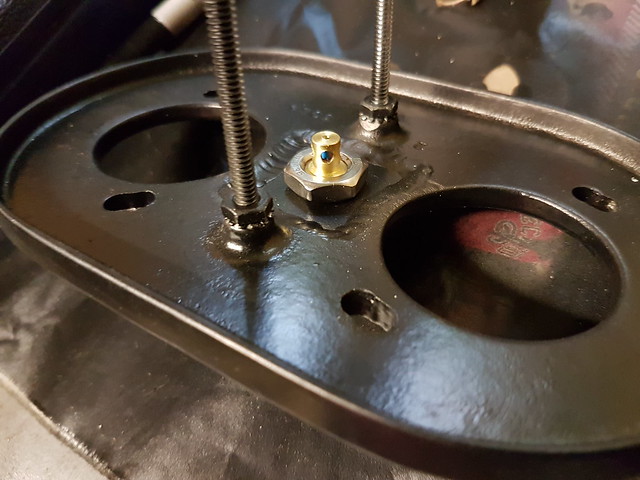
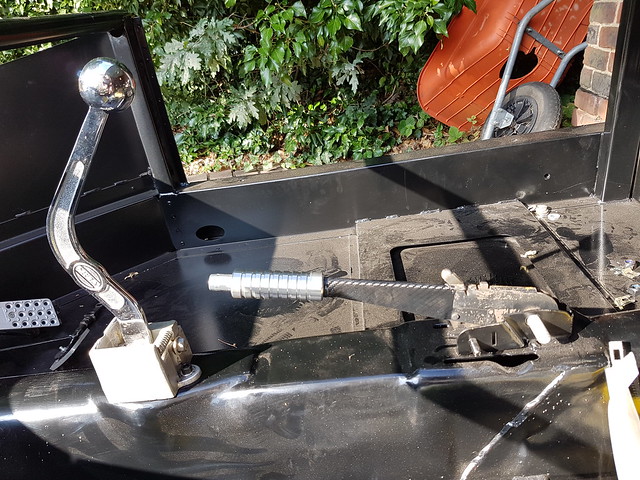
Photo from above shows the 10mm of washers that I have added to space the coil-over into the middle of the lower shock mount

Image

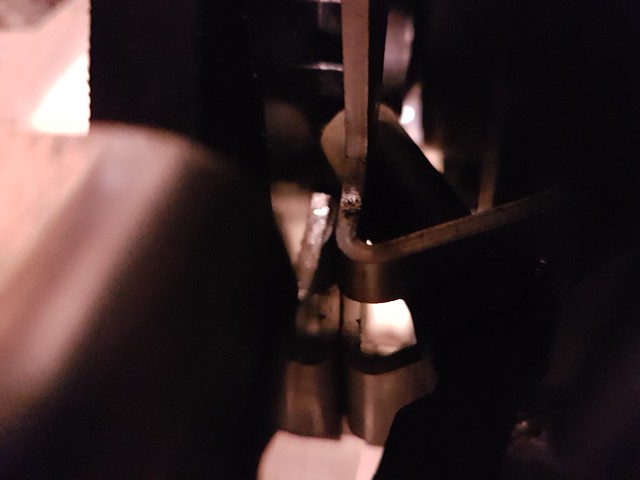
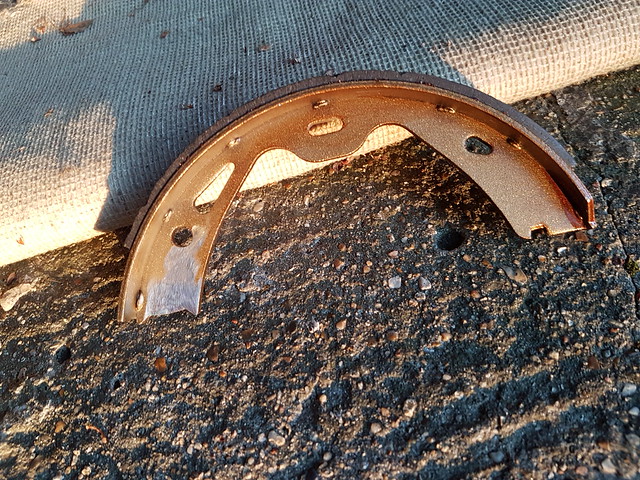
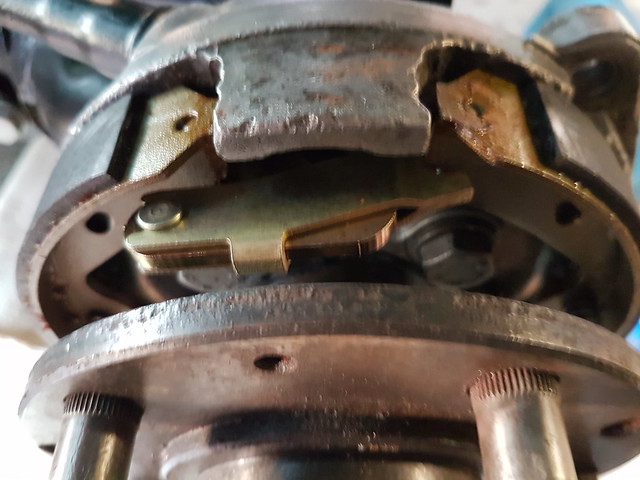
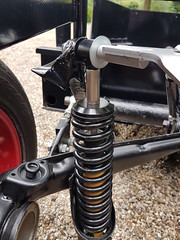
3. The ride height was to high at the rear and upon investigation the RED9 coil-overs have a 2 inch stainless spacer on the top of the coil-over as seen in the picture below. RED9 suggested shorter springs, but I just removed the Spacer as this gives me the same suspension travel and I get 2 inch lower at the rear well worth looking at if you have the shocks with spacers. It was a real pain to remove the spacer and took lots of heat, swearing and a broken allen key before I finally got the spacer removed, the top mount then just bolts directly to the main coil over stem. Photo's below show before and after.

Before Showing Stainless Spacer

Image

After showing the coil-over with the spacer removed.

Image

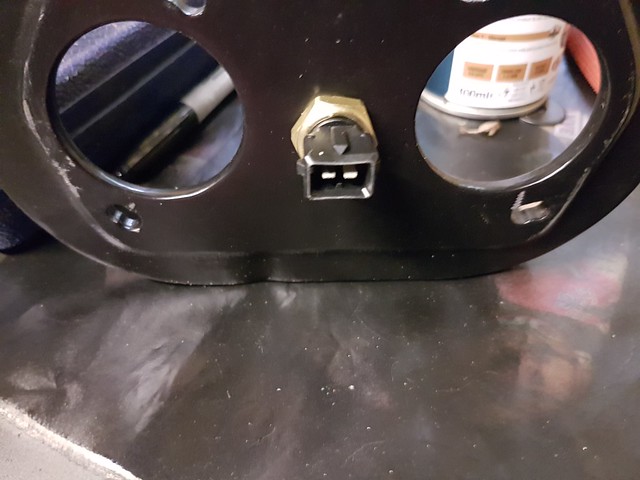
Also this is the spring rating information i have for the installed springs. I will run with these for the moment and see how it drives and only when I have some experience of driving the car will I change them if necessary.

Image

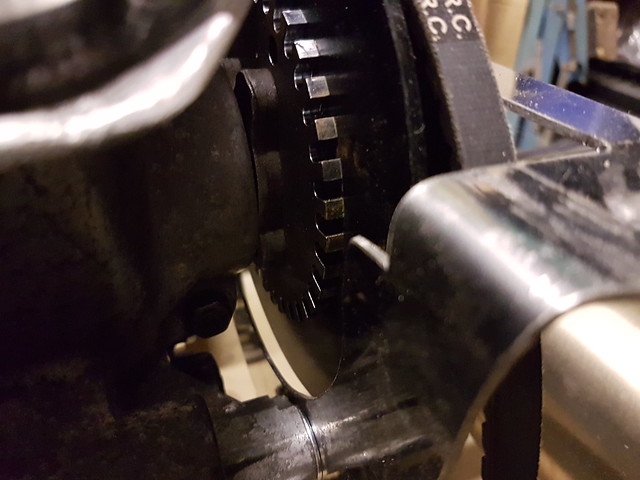
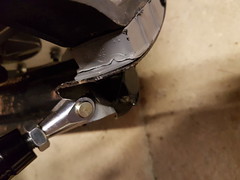
4. The Red9 coil-overs have to be wound up from the bottom by about an inch as if not the adjustment collars and the bottom of the spring foul on the trailing arm lower shock mount.

Image

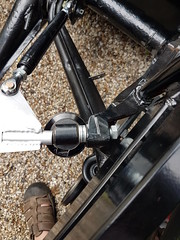
5. Lastly the coil-over adjustment screw is inside the lower shock mount and very difficult, if not impossible to get to for adjustment without removing the coil-over so I think a small hole in the bracket should suffice as there is a flat head screw head on the back of the adjusting thumb wheel that should be adjustable through the hole. I have not drilled the hole yet but the photo shows the issue with the thumb wheel buried in the lower shock mount.

Image
kvinyl
DDK slapper chatter
Posts: 400
Joined: Tue May 26, 2009 11:10 pm
Location: Galway, Ireland

Re: Burnt Pig - 356 Pre a Build Thread

Post by kvinyl »

Robneal wrote:
kvinyl wrote:Looks great, just catching up on this thread now. Some very nice work gone into that chassis :cheers:

I'm running an EFI setup on my Ghia drag car, also using Jenvey TBs but using LS2 coil packs with a Maxx ECU. If you installed a camshaft sensor at the old distributor take-off point you could run fully sequential ignition rather than wasted spark? You can purchase cam sync sensors designed to take the place of the removed distributor for about $150 or you could modify an old distributor with a hall effect sensor to pickup on TDC and save on the cost.
I actually am using a crank trigger Sensor specially made for a type 4 by a guy in the UK that built one for his Speedster then he made a few more to sell on. I have taken some photos of the installation but is not that easy to see. unfortunately the URL where I bought it from is no longer active so I am guessing that he has sold his stock now.
To have fully sequential ignition you need to have a crankshaft trigger sensor AND a camshaft sensor - the camshaft sensor will be used to let the ECU know what part of the cycle the engine is in so that you don't have to fire two cylinders and 'waste' a spark on the one in it's exhaust stroke. Not a major deal really, either will work fine for most applications :)
1958 Ghia Lowlight 2.4L FI Supercharged
1959 356A
1968 911 SWB (project)
1993 911 3.6 Turbo
2005 E55 AMG Estate
User avatar
Spyder-finder
DDK Fanatic
Posts: 90
Joined: Wed Feb 01, 2006 10:40 am
Location: Rochester, England

Re: Burnt Pig - 356 Pre a Build Thread

Post by Spyder-finder »

Unfortunately it is pretty impossible to fit a cam sensor to a flat 4 aircooled VW.
RS60, 550, 356 Speedster, 356 outlaw coupe, KTM RC8 and 1955 Norton Dominator 88

Why tip toe through life only to arrive safely at death!
Bruce M
Me and DDK sitting in a tree! KISSING
Posts: 2768
Joined: Fri Aug 27, 2004 1:07 pm

Re: Burnt Pig - 356 Pre a Build Thread

Post by Bruce M »

Cam trigger.
Replaces the distributer. Would be fairly easy to do a DIY version using an old distributer.


Image
kvinyl
DDK slapper chatter
Posts: 400
Joined: Tue May 26, 2009 11:10 pm
Location: Galway, Ireland

Re: Burnt Pig - 356 Pre a Build Thread

Post by kvinyl »

Here's the modified distributor version i'm running on my engine

Image

Image

Simple 3-wire Hall-effect switch picked up from RS Components, looking for a gap in the rotating metal mass that indicates TDC.

Friend of mine is currently experimenting with fitting a barrell hall-effect switch in the head to look at an exhaust valve, waiting to see how he gets on.
1958 Ghia Lowlight 2.4L FI Supercharged
1959 356A
1968 911 SWB (project)
1993 911 3.6 Turbo
2005 E55 AMG Estate
User avatar
Spyder-finder
DDK Fanatic
Posts: 90
Joined: Wed Feb 01, 2006 10:40 am
Location: Rochester, England

Re: Burnt Pig - 356 Pre a Build Thread

Post by Spyder-finder »

I meant to read directly off the cam. I stand corrected if you can get it to read from the exhaust valve. Very ingenious.
RS60, 550, 356 Speedster, 356 outlaw coupe, KTM RC8 and 1955 Norton Dominator 88

Why tip toe through life only to arrive safely at death!
Bruce M
Me and DDK sitting in a tree! KISSING
Posts: 2768
Joined: Fri Aug 27, 2004 1:07 pm

Re: Burnt Pig - 356 Pre a Build Thread

Post by Bruce M »

I know but the dissy trigger option works just as well and gets around the problem of access to the cam.
Robneal
DDK above all
Posts: 197
Joined: Tue Jul 26, 2016 10:26 pm

Re: Burnt Pig - 356 Pre a Build Thread

Post by Robneal »

So being a little new to ECU's and ignition systems can someone give me a quick run down of what advantages sequential ignition offers over wasted spark?
Robneal
DDK above all
Posts: 197
Joined: Tue Jul 26, 2016 10:26 pm

Re: Burnt Pig - 356 Pre a Build Thread

Post by Robneal »

Hi Just a quick update as i have not had much time for the Pig over the last few weeks as I have been busy on other things....but have just been made redundant from work so after my holiday, I should have a lot more time to progress the build. I also have got a years money so hopefully i should find a job soon then can spend my redundancy on getting the body....but i'm going to be sensible and make sure I have a job secured first.

Anyway todays progress... When fitting the Mendola 6 point brace the bolt on ears that attach at the point where the gearbox crossmember foul on the bent bits of the gearbox crossmember so I had to hacksaw away a small part of the gearbox cross member on e side so it would all bolt up correctly and not restrict any of the pivots in the cross-brace. The shapes I had to cut out of the crossmember were slightly different each side but I think you can see from the pictures what I had to do.

Image

Image

I also trial fitted the gearbox but I am still waiting for the shortened gear linkage from Gary at Speedster Clinic before I can finally fit the box.

Image

Off on my holidays tomorrow for a couple of weeks swill get stuck in to finishing the rolling chassis when I get back
Robneal
DDK above all
Posts: 197
Joined: Tue Jul 26, 2016 10:26 pm

Re: Burnt Pig - 356 Pre a Build Thread

Post by Robneal »

OK back from my holidays and searching hard for a new job but got half a day today on the pig and made some progress,

Gary asked me to mock up the gearbox to get the exact length of the gear rod linkage that he is making so I installed the gearbox and from the centre of the gear linkage connector bar to the centre of the gearbox hole is 820mm. Gary will now be making this when he returns from a few days away. I also noticed that now the gearbox is bolted up at the front, the mounting tabs for the mendola brace mean that I have to elongate the holes on the rear crossmember to get the rear mounts to bolt up. Its just 3mm but its one more task to do on a long list.


I have 2 x gear sticks to choose from and here is the flat 4 one and the refurbished handbrake lever that I tarted up last year before I started my blog. I also have an EMPI one but I will dede later which one to use...

Image

I also started to install the rear 944 brakes, and I have managed to get one side nearly done with not to much trouble, the only issues I had were with the hand brake shoes that run on the inside of the disks and these were new Pagid items but they were too thick for the brake adjusters so i had to grind them down a bit so they would fit.

Image

I have yet to fit the handbrake cable as I a missing the handbrake balance bar and the handbrake pivot pin - ordered these today from VW Heritage and will then set the handbrake up. One question I have is how much do you need to shorten the 944 tubes by to get the shortened handbrake cable to fit? Will do it by measuring when I have all the parts but if someone has a definitive answer then let me know.

Some pictures of the brake assembly

Image

Image

Also added the disks and wheel spacers and calipers that I have already rebuilt and painted

Image

Image

Image

Also trial fitted pedals again which I had already refurbished.

Image

Just the other side to go now...
Bruce M
Me and DDK sitting in a tree! KISSING
Posts: 2768
Joined: Fri Aug 27, 2004 1:07 pm

Re: Burnt Pig - 356 Pre a Build Thread

Post by Bruce M »

That might work just fine.

But the assembly is upside down compared to stock use.
Post Reply