

I havn't seen the thread on the Samba can you post a link as couldn't find it when I did a quick search. My thought process was to stiffen the rear end up and the Mendola seemed like a good design being fully adjustable & bolt in as well. I just want the back end to be strong and secure so I'm more interested in it being easy to install / deinstall than being the strongest thing out there. After all my car is destined for open roads and not a race track so I think the Mendola will suit my needs.
Sent from my SM-G930F using Tapatalk
Burnt Pig - 356 Pre a Build Thread
Moderator: Bootsy
Re: Burnt Pig - 356 Pre a Build Thread
Engine conversion to Fuel Injection Part 1
Right, I have already sung Paul Foreman's praises on the engine build, but now I have it back at home there is some jobs to carry out to get it ready for the car. So these are the list of jobs I have to do on the engine to finish it off ready for when the chassis turns up:
1. Install Oil Thermostat for remote Oil cooler
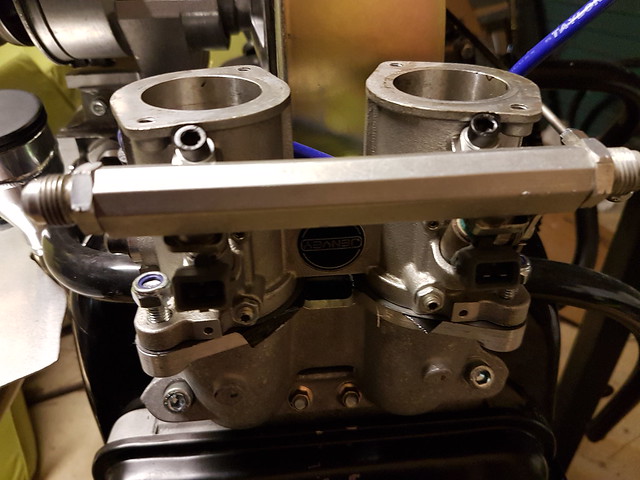
2. Install Throttle Bodies
3. Set-up Carrera Throttle linkage for throttle Bodies
4. Modify Air filters to fit throttle Bodies & install
5. Fit Breather Pipe
6. Make rear sealing tin for engine
7. Fit Coil Pack on rear of Fan housing
8. Modify Pulley fitting to allow fitting of alloy pulley cover
9. Fit Distributor Blanking plug
10. Make plate to cover hole in fan housing
11. Fit Air temperature sensor
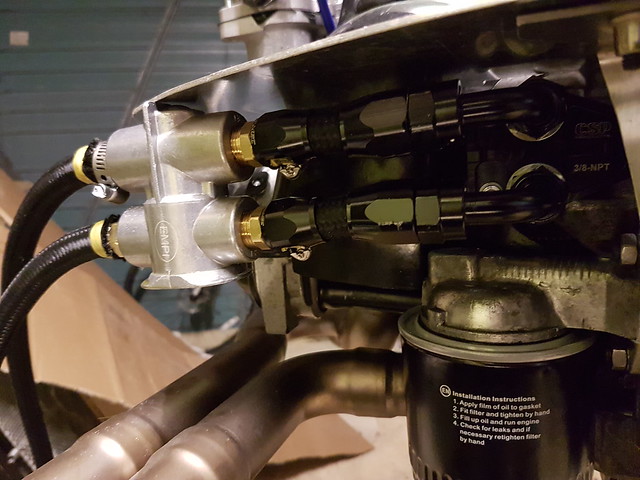
12. Fit fuel lines, & fuel filter to throttle bodies and round back of fan housing
13. Install and secure plug leads
14. Disassemble tinware paint and re-assemble
Progress on Engine conversion list so far:
1. As part of the run-up of the engine Paul ran with an external oil cooler, but I want to run with a thermostat in line to ensure the oil is only pushed through the cooler once the oil in the engine is hot. I have installed an EMPI oil thermostat and plumbed it in right next to the oil take off plate so it should be in an ideal place to ensure the oil in the engine heats up nice and quickly.
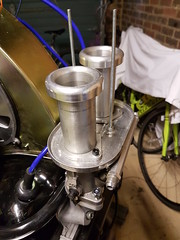
2. The Jenvey throttle bodies are supposed to be a direct IDF replacement, and although they bolt straight on to the inlet manifold, the air filter hole spacing at the top of the throttle body is different to the IDF by about 5mm so I could not go with my original plan of using the Vintage Speed replica 356 air filters as they bolt from the top right through to the base plates and the holes would be in the wrong place and would destroy the look if I were to try to modify them. In the end I saw some nice CB Performance 6" tall IDF filters that look period and I have modified the base plate holes on these to allow them to bolt on to the throttle body top mounts along with the long ram pipes. I also had to use Pico injectors from a Renault Clio Sport to allow for the air filters to bolt directly to the top of the throttle body as standard injectors are too tall.
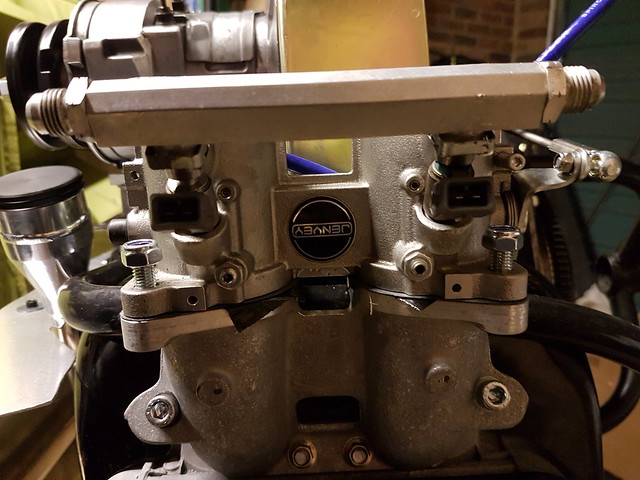
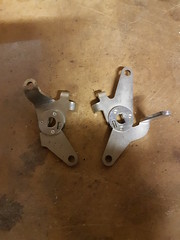
3. Once the throttle bodies were in place I was able to set-up the Vintage Speed Carrera throttle linkage. This was not straight forwards as the actuators that came with the throttle linkage have a different spindle design to the Jenvey's, but luckily I was able to bend the arms of the actuators that came with the throttle bodies to replicate the length of the actuators for the linkage so as to get the right pedal movement - or so I hope. I also had to cut down the actuating rods at both ends to get them to fit.
The one on the right is the unmodified actuator and he one on the left is the bent one that now has the right amount of movement. I couldn't just add another hole as this would have interfered with the throttle stops that are cast into the throttle bodies.
4. The other thing with installing IDF air filters on Jenvey throttle bodies is that IDF's have a centre hole in the air filter base plate to allow you to adjust the carbs, but on throttle bodies this is not there so I needed to fill the holes to stop air entering the air filters from the bottom. I dropped the air filter base plates at a local engineering company who are presently laser cutting some aluminium plates and will then be welding them into the said holes. Pictures to follow on this...
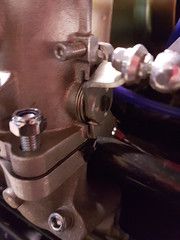
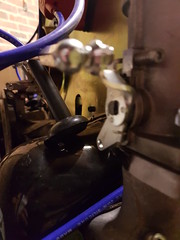
5. I have put a large breather into the side of the engine case just under where the alternator stand is and as you can see from the photos it makes for a very neat installation.

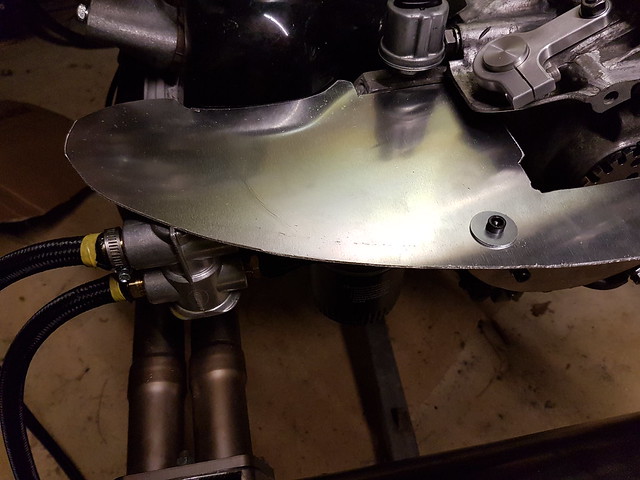
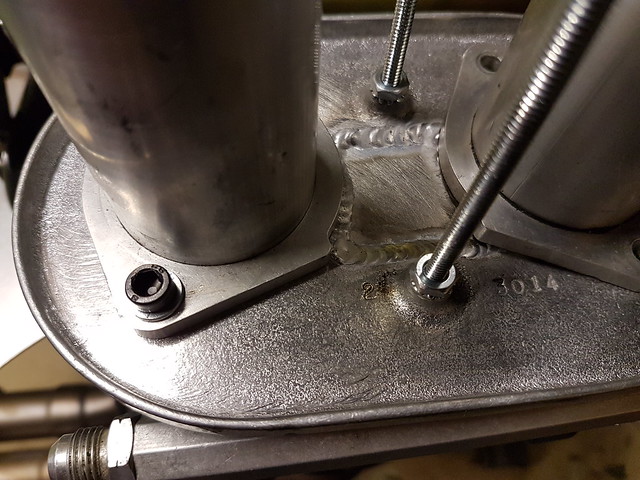
6. When I was picking up the engine from Paul, I took a look at Paul's CSP rear engine tin for fitting a type 4 in a type 1 and worked out that it wouldn't fit my engine properly as the hole for the dipstick tube was out by about 50mm, however I drew round the CSP tin and the mounting bracket and have now made my own. I made the supporting bracket from 2mm Stainless and the tinware plate from 2mm Aluminium modified to fit round my dipstick. This only took about an hour and the materials were only about £20 so saved a few quid on this.
7. To keep the engine bay nice and tidy, I installed the MSD mini coil pack on the rear of the fan housing using Rivnuts. This should keep the spark plug leads out of the way and make for a nice tidy engine bay.

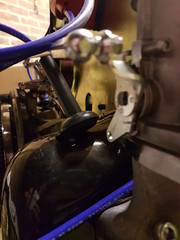
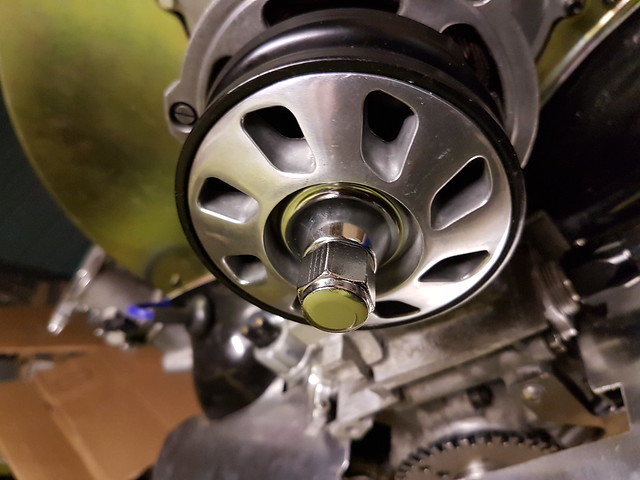
8. With the CSP upright cooling cooling conversion the new alternator top pulley is offset compared to a standard one so the pulley beauty ring that I had to match the fan housing brace would not fit as the sleeved nut was too short to tighten over the pulley and beauty ring. The answer to this was to to get a longer sleeved nut (actually a wheel nut for use with spacers) and then my classic car enthusiast neighbour Saul, slightly bored out the collar and it all fits together nicely now. Just need to polish the fan housing brace to match now.
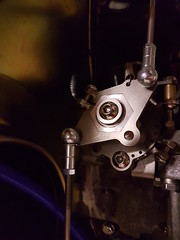
9. Final update on the engine for now is the installation of the Distributor Blanking plug. The plug was again made in my neighbours workshop and installed with an O ring to seal it properly. The rather nice distributor clamp was from the USA which I think you will agree looks pretty good.

Right, I have already sung Paul Foreman's praises on the engine build, but now I have it back at home there is some jobs to carry out to get it ready for the car. So these are the list of jobs I have to do on the engine to finish it off ready for when the chassis turns up:
1. Install Oil Thermostat for remote Oil cooler
2. Install Throttle Bodies
3. Set-up Carrera Throttle linkage for throttle Bodies
4. Modify Air filters to fit throttle Bodies & install
5. Fit Breather Pipe
6. Make rear sealing tin for engine
7. Fit Coil Pack on rear of Fan housing
8. Modify Pulley fitting to allow fitting of alloy pulley cover
9. Fit Distributor Blanking plug
10. Make plate to cover hole in fan housing
11. Fit Air temperature sensor
12. Fit fuel lines, & fuel filter to throttle bodies and round back of fan housing
13. Install and secure plug leads
14. Disassemble tinware paint and re-assemble
Progress on Engine conversion list so far:
1. As part of the run-up of the engine Paul ran with an external oil cooler, but I want to run with a thermostat in line to ensure the oil is only pushed through the cooler once the oil in the engine is hot. I have installed an EMPI oil thermostat and plumbed it in right next to the oil take off plate so it should be in an ideal place to ensure the oil in the engine heats up nice and quickly.
2. The Jenvey throttle bodies are supposed to be a direct IDF replacement, and although they bolt straight on to the inlet manifold, the air filter hole spacing at the top of the throttle body is different to the IDF by about 5mm so I could not go with my original plan of using the Vintage Speed replica 356 air filters as they bolt from the top right through to the base plates and the holes would be in the wrong place and would destroy the look if I were to try to modify them. In the end I saw some nice CB Performance 6" tall IDF filters that look period and I have modified the base plate holes on these to allow them to bolt on to the throttle body top mounts along with the long ram pipes. I also had to use Pico injectors from a Renault Clio Sport to allow for the air filters to bolt directly to the top of the throttle body as standard injectors are too tall.
3. Once the throttle bodies were in place I was able to set-up the Vintage Speed Carrera throttle linkage. This was not straight forwards as the actuators that came with the throttle linkage have a different spindle design to the Jenvey's, but luckily I was able to bend the arms of the actuators that came with the throttle bodies to replicate the length of the actuators for the linkage so as to get the right pedal movement - or so I hope. I also had to cut down the actuating rods at both ends to get them to fit.
The one on the right is the unmodified actuator and he one on the left is the bent one that now has the right amount of movement. I couldn't just add another hole as this would have interfered with the throttle stops that are cast into the throttle bodies.
4. The other thing with installing IDF air filters on Jenvey throttle bodies is that IDF's have a centre hole in the air filter base plate to allow you to adjust the carbs, but on throttle bodies this is not there so I needed to fill the holes to stop air entering the air filters from the bottom. I dropped the air filter base plates at a local engineering company who are presently laser cutting some aluminium plates and will then be welding them into the said holes. Pictures to follow on this...
5. I have put a large breather into the side of the engine case just under where the alternator stand is and as you can see from the photos it makes for a very neat installation.
6. When I was picking up the engine from Paul, I took a look at Paul's CSP rear engine tin for fitting a type 4 in a type 1 and worked out that it wouldn't fit my engine properly as the hole for the dipstick tube was out by about 50mm, however I drew round the CSP tin and the mounting bracket and have now made my own. I made the supporting bracket from 2mm Stainless and the tinware plate from 2mm Aluminium modified to fit round my dipstick. This only took about an hour and the materials were only about £20 so saved a few quid on this.
7. To keep the engine bay nice and tidy, I installed the MSD mini coil pack on the rear of the fan housing using Rivnuts. This should keep the spark plug leads out of the way and make for a nice tidy engine bay.
8. With the CSP upright cooling cooling conversion the new alternator top pulley is offset compared to a standard one so the pulley beauty ring that I had to match the fan housing brace would not fit as the sleeved nut was too short to tighten over the pulley and beauty ring. The answer to this was to to get a longer sleeved nut (actually a wheel nut for use with spacers) and then my classic car enthusiast neighbour Saul, slightly bored out the collar and it all fits together nicely now. Just need to polish the fan housing brace to match now.
9. Final update on the engine for now is the installation of the Distributor Blanking plug. The plug was again made in my neighbours workshop and installed with an O ring to seal it properly. The rather nice distributor clamp was from the USA which I think you will agree looks pretty good.
Last edited by Robneal on Mon Jul 03, 2017 8:41 pm, edited 1 time in total.
Re: Burnt Pig - 356 Pre a Build Thread
Picture of rear Tinware support bracket
Last edited by Robneal on Mon Jul 03, 2017 8:42 pm, edited 1 time in total.
Re: Burnt Pig - 356 Pre a Build Thread
nice work
-
mdmax72
- Put a fork in me, I'm done!
- Posts: 1512
- Joined: Thu Sep 28, 2006 8:23 pm
- Location: midlands u.k
Re: Burnt Pig - 356 Pre a Build Thread
I'll try and find it.
If l remember it correctly, it was to with the fixing point at the shock tower. It needed to be closer to the tower (shock bolt) as possible. From memory the mendola set up was being pointed out it was to far away from that point and would cause the plate to stress. That l understood so l went the CSP route. Anyway I'll have another look for it. It's interesting reading.
Like you said though, the Mendola set up is bolt on we're as the CSP unit is bolt and welded.
Rich
DDK Member 0547
Evolving Speedster Build
DDK Member 0547
Evolving Speedster Build
Re: Burnt Pig - 356 Pre a Build Thread
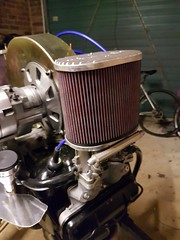
Just a few pictures of the air filters now I have them back from being welded.......
And the engine almost complete now......
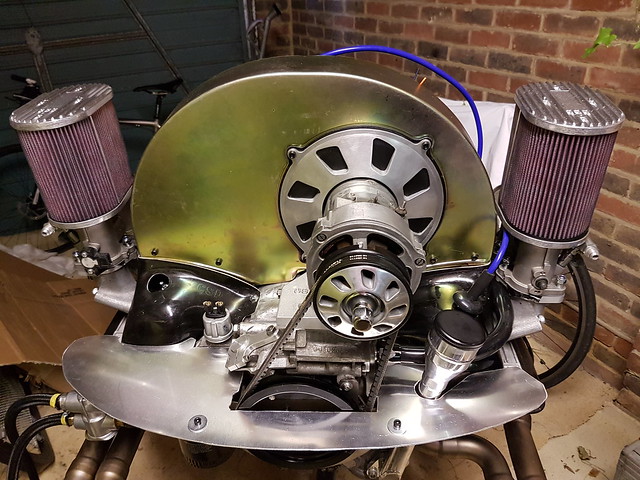
And the engine almost complete now......
Last edited by Robneal on Mon Jul 03, 2017 8:45 pm, edited 1 time in total.
Re: Burnt Pig - 356 Pre a Build Thread
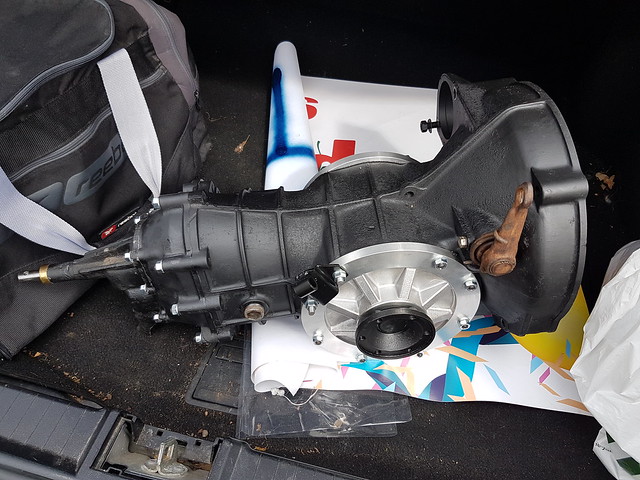
I picked up my gearbox from Bears Motorsport in Birmingham this week. The gearbox was supposed to be in for just a check-over and installation of the Heavy duty side panels and new 3.44 Diff as the gearbox was supposed to be in Good Working Order, however Bears fully re-built the box because of an admin error at their end and were good enough to not make a fuss on the cost when I went to pick it up when they were obviously under water on the build cost. As you can see has come back looking fantastic. There were a few bits missing namely the Thrust bearing and reversing light switch, but I will get new ones to replace these as i got a completely rebuilt gearbox for the price of a refurb. Also they didn't paint the clutch lever which I thought was a bit strange, but I'll give that a quick coat of satin black Hammerite and gearbox will be ready to install.
I have also ordered a single port front tin ware for the engine to help seal the engine into the engine bay and I need this before I sort out the engine bay fuel lines to get the right entry / exit points. I am not sure what to expect I am going to have to do to modify this as although the Type 4 into Type 1 is covered fairly well on many forums, there is little reference to what changes are required on the front tin, so if anyone has any experience of what is required then please let me know or point me in the direction of an article that covers it. I will of course let you know how I get on....
I have also ordered a single port front tin ware for the engine to help seal the engine into the engine bay and I need this before I sort out the engine bay fuel lines to get the right entry / exit points. I am not sure what to expect I am going to have to do to modify this as although the Type 4 into Type 1 is covered fairly well on many forums, there is little reference to what changes are required on the front tin, so if anyone has any experience of what is required then please let me know or point me in the direction of an article that covers it. I will of course let you know how I get on....
Last edited by Robneal on Mon Jul 03, 2017 8:46 pm, edited 1 time in total.
-
mdmax72
- Put a fork in me, I'm done!
- Posts: 1512
- Joined: Thu Sep 28, 2006 8:23 pm
- Location: midlands u.k
Re: Burnt Pig - 356 Pre a Build Thread
Are you referring to the tin that runs across the back (flywheel end) of the engine? Rob
Rich
DDK Member 0547
Evolving Speedster Build
DDK Member 0547
Evolving Speedster Build
Re: Burnt Pig - 356 Pre a Build Thread
Yep that's the one....mdmax72 wrote:Are you referring to the tin that runs across the back (flywheel end) of the engine? Rob
Sent from my SM-G930F using Tapatalk
-
mdmax72
- Put a fork in me, I'm done!
- Posts: 1512
- Joined: Thu Sep 28, 2006 8:23 pm
- Location: midlands u.k
Re: Burnt Pig - 356 Pre a Build Thread
Think you should be ok with the one you ordered. I'll see if l can dig my templates out just for a comparison at least. Why are you running the fuel pipes through that tin anyway. Surely you'd be better to run them up the bulkhead and then come into the engine bay.?
Rich
DDK Member 0547
Evolving Speedster Build
DDK Member 0547
Evolving Speedster Build
Re: Burnt Pig - 356 Pre a Build Thread
I really don't have any experience of VW beetles, but in the research I did on the internet there were a couple of threads on the Samba where people added bulk head connectors through the flywheel engine tin through the original fuel pipe holes in this tin. One had added two for a fuel injected engine. I was going to get the fixed fuel pipes in the engine bay sorted whilst the engine is on the stand and if I added bulk head connectors through the rear tin then this seemed like a good way of making the engine self contained and easy to take in and out. But not having the chassis or body does make this a bit of guess work. So would welcome peoples view on what is practical.
Sent from my SM-G930F using Tapatalk
Sent from my SM-G930F using Tapatalk
-
mdmax72
- Put a fork in me, I'm done!
- Posts: 1512
- Joined: Thu Sep 28, 2006 8:23 pm
- Location: midlands u.k
Re: Burnt Pig - 356 Pre a Build Thread
Can see some logic in that Rob. Just bear in mind access for maintenance whilst planning the engine Bay area. Were your suggesting how easy will it be to get access from both sides of the tin once the engine is in situ. Are you using a hard line fuel pipe or rubber from front to back? Also will you be running a fuel pressure gauge?? Whatever you decide just think about it from all angles and not just what others have done. Sometimes talking to those that have done it would suggest differently if doing it again.
Rich
DDK Member 0547
Evolving Speedster Build
DDK Member 0547
Evolving Speedster Build
Re: Burnt Pig - 356 Pre a Build Thread
Good advice Rich...maybe I'll ask Gary what he does as he should be the expert in this for speedster clinic builds. Want to go hard lines though the spine and hard lines in the engine bay with flexible lines to join them up. Will run a regulator and pressure gauge in the engine bay.mdmax72 wrote:Can see some logic in that Rob. Just bear in mind access for maintenance whilst planning the engine Bay area. Were your suggesting how easy will it be to get access from both sides of the tin once the engine is in situ. Are you using a hard line fuel pipe or rubber from front to back? Also will you be running a fuel pressure gauge?? Whatever you decide just think about it from all angles and not just what others have done. Sometimes talking to those that have done it would suggest differently if doing it again.
Sent from my SM-G930F using Tapatalk
Re: Burnt Pig - 356 Pre a Build Thread
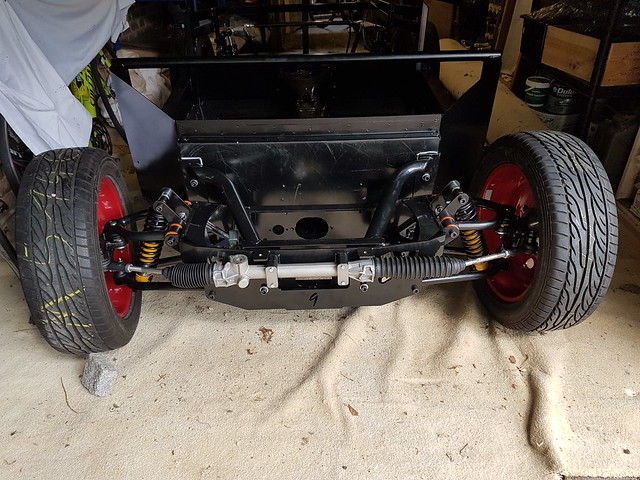
Big day today as picked up my chassis from Red9 at long last......heres loading it on the trailer at Red9 in Doncaster then the 3 hour journey back home to Essex....
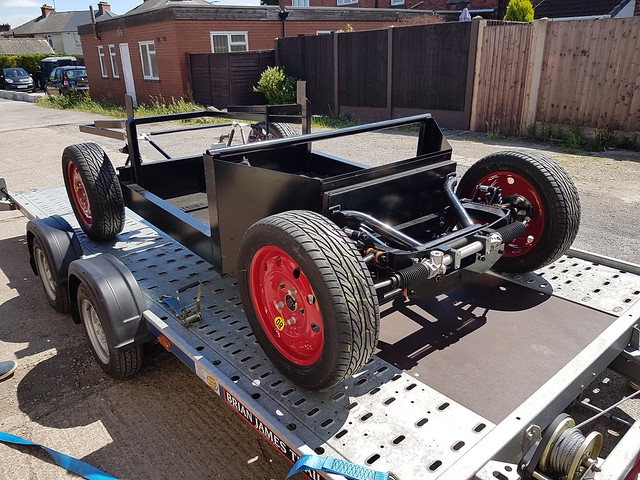
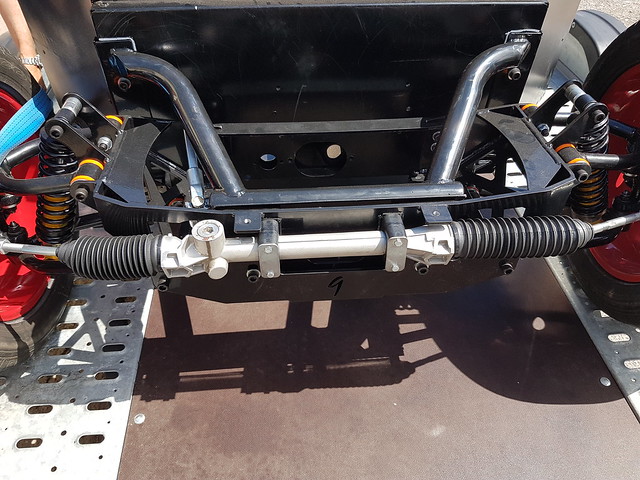
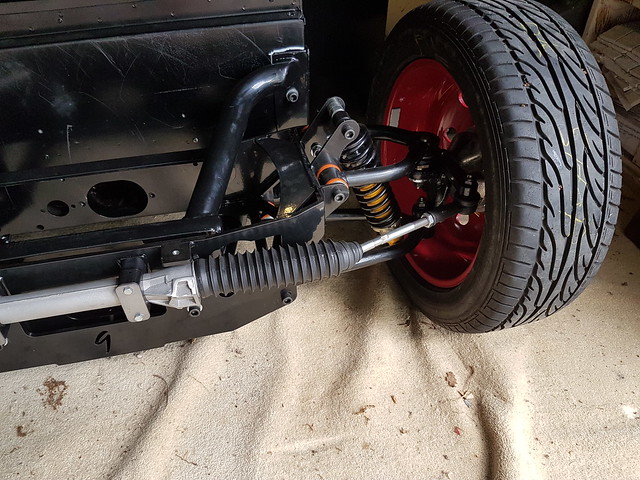
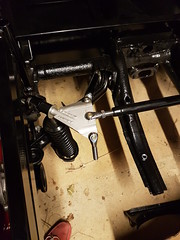
Here are some more pictures of the Work Red9 did to fit the front double wishbone suspension......
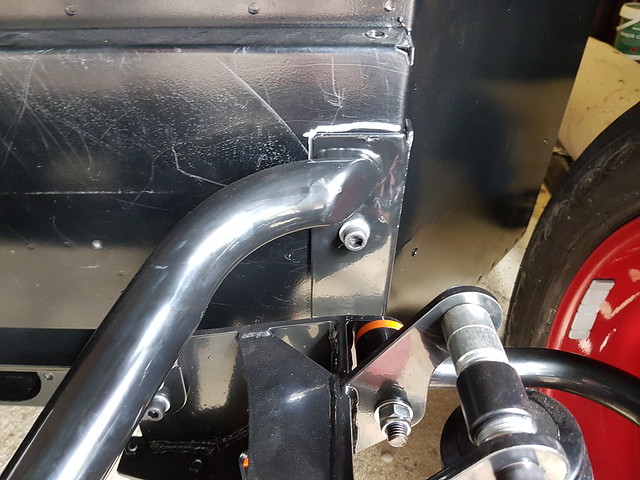
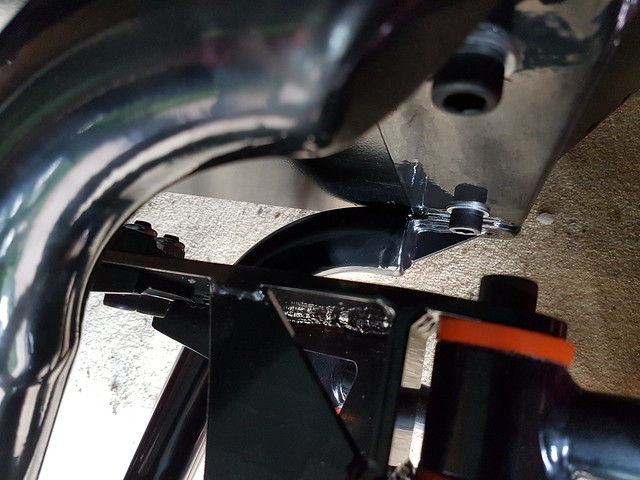
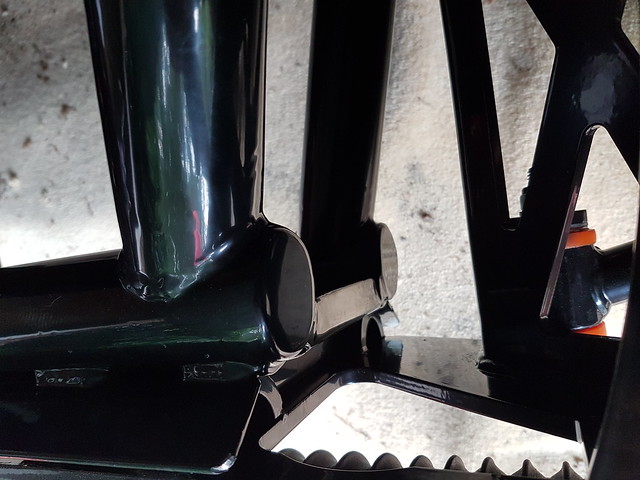
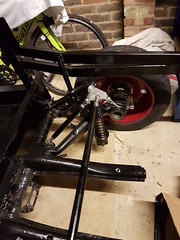
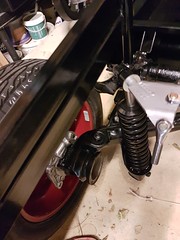
And the rear suspension with the Kool Rydes brace bar partially installed, but needs taking off and adjusting as I don't think it was installed in-line with the installation guide as it does not quite line up correctly and needs a bit of a tweak. Also I think I need shorter springs at the rear, as it has a very much a nose down stance at the moment, but will wait till i get the engineand gearbox in. Red9 have said that they will swap them over when I know what I want.....
Lots to be getting on with now, so best I get busy......
Here are some more pictures of the Work Red9 did to fit the front double wishbone suspension......
And the rear suspension with the Kool Rydes brace bar partially installed, but needs taking off and adjusting as I don't think it was installed in-line with the installation guide as it does not quite line up correctly and needs a bit of a tweak. Also I think I need shorter springs at the rear, as it has a very much a nose down stance at the moment, but will wait till i get the engineand gearbox in. Red9 have said that they will swap them over when I know what I want.....
Lots to be getting on with now, so best I get busy......
Last edited by Robneal on Tue Jul 04, 2017 8:57 am, edited 1 time in total.
-
mdmax72
- Put a fork in me, I'm done!
- Posts: 1512
- Joined: Thu Sep 28, 2006 8:23 pm
- Location: midlands u.k
Re: Burnt Pig - 356 Pre a Build Thread
Looking good Rob. When's the Body joining the party.
Rich
DDK Member 0547
Evolving Speedster Build
DDK Member 0547
Evolving Speedster Build