

H-Gs Project 356
Moderator: Bootsy
Re: H-Gs Project 356
Got a better idea dont go IVA 
Re: H-Gs Project 356
What's happening with your Speedster Ian ?
Re: H-Gs Project 356
I was asked the very same question not long ago! Long answer short, I have had an enthusiasm hiccup which I can now put down to winter blues and a few technical challenges regarding IVA etc.
Now the weather is good and after chatting with a few people on here, the enthusiasm has built again as I now have some pretty defined milestones. It took someone stating the obvious that the car can be driven once it's IVA'd and that it can also be driven (and therefore enjoyed) between the second build and spraying for me to realise that I don't have to wait for a shiny finished car to able to enjoy it. Once it's IVA'd it becomes a rolling build. Stupid I know, but you become blind to some of the simplest things!
No real work has happen recently other than to fit the door lock mechanisms and door handles; I'm next going to be looking at finishing the doors so that they are functioning.
I've been busy buying in a few more rubber seals etc so I can crack on with the front end, so I hope to be posting some more progress pics up soon.
Just a quick word of thanks to mdmax72 for his visit a couple of weeks ago to collect the screens. Unbeknow to me at the time, he traveled down in his 356 and a long evening was spent comparing notes and providing reassurance that IVA isn't something to be so concerned about.
-
mdmax72
- Put a fork in me, I'm done!
- Posts: 1512
- Joined: Thu Sep 28, 2006 8:23 pm
- Location: midlands u.k
Re: H-Gs Project 356
No problem Ian. Was a good evening. Now crack on with the car.
Rich
DDK Member 0547
Evolving Speedster Build
DDK Member 0547
Evolving Speedster Build
Re: H-Gs Project 356
Quick update - the car is of to a show tomorrow and I've taken next week off work and intend to spend pretty much all of it in the Man Cave 'reconnecting' with Mr 356. Look up for some new updates next week.
Re: H-Gs Project 356
Just take one job at at time ....
Re: H-Gs Project 356
I took a week off work and headed into the cave - here is what happened:
Well, day one of the week off and after a slow start to the day I focussed on getting the engine cover fitted properly. I originally got the hole in the wrong place so had to elongate the hole so that I cajoled get the hinge positioned so that the lid would open correctly without catching the bodywork. I tacked a spacer plate onto the hinge that is bonded into the bodywork to keep things central.

Not the most exciting update, but it's one job ticked off the 'todo' list. Tomorrow, I'm going to see if I can get the latch mechanism fitted and working.
Well, day one of the week off and after a slow start to the day I focussed on getting the engine cover fitted properly. I originally got the hole in the wrong place so had to elongate the hole so that I cajoled get the hinge positioned so that the lid would open correctly without catching the bodywork. I tacked a spacer plate onto the hinge that is bonded into the bodywork to keep things central.
Not the most exciting update, but it's one job ticked off the 'todo' list. Tomorrow, I'm going to see if I can get the latch mechanism fitted and working.
Re: H-Gs Project 356
It's been a while but thesis the first time that I have had to upload pics etc and sit down to update the thread. Here goes:
After sorting out the hinges and getting the engine cover to fit and open how I wanted (new pics uploaded above), I worked on fitting the latch for it to keep things secure. I originally looked at fitting the engine lid element of the latch from inside the lid, first drilling a large hole and passing the bar through it. It didn't look right when bolted up and I felt that once there was paint on the car it would look even worse
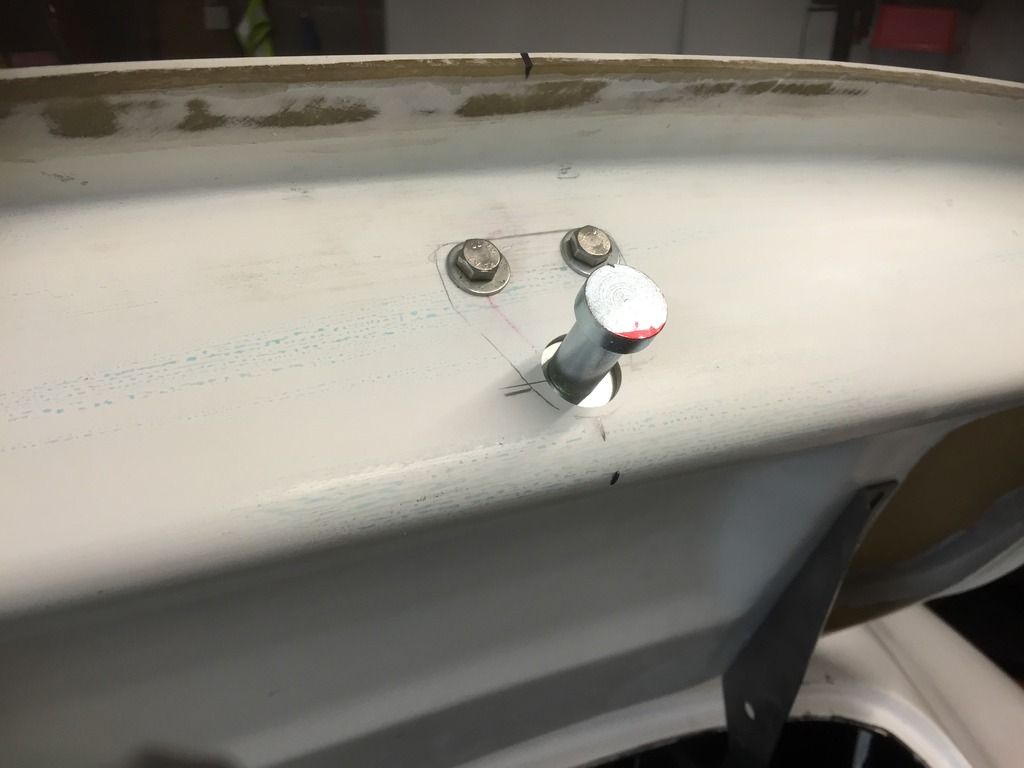
I was also a bit unhappy with the overall security go the latch so I decided that I would fit another bolt so that it was more secure. To cover the hole I had already drilled in the engine lid, I made a spreader out of sheet aluminium and added a penny washer.
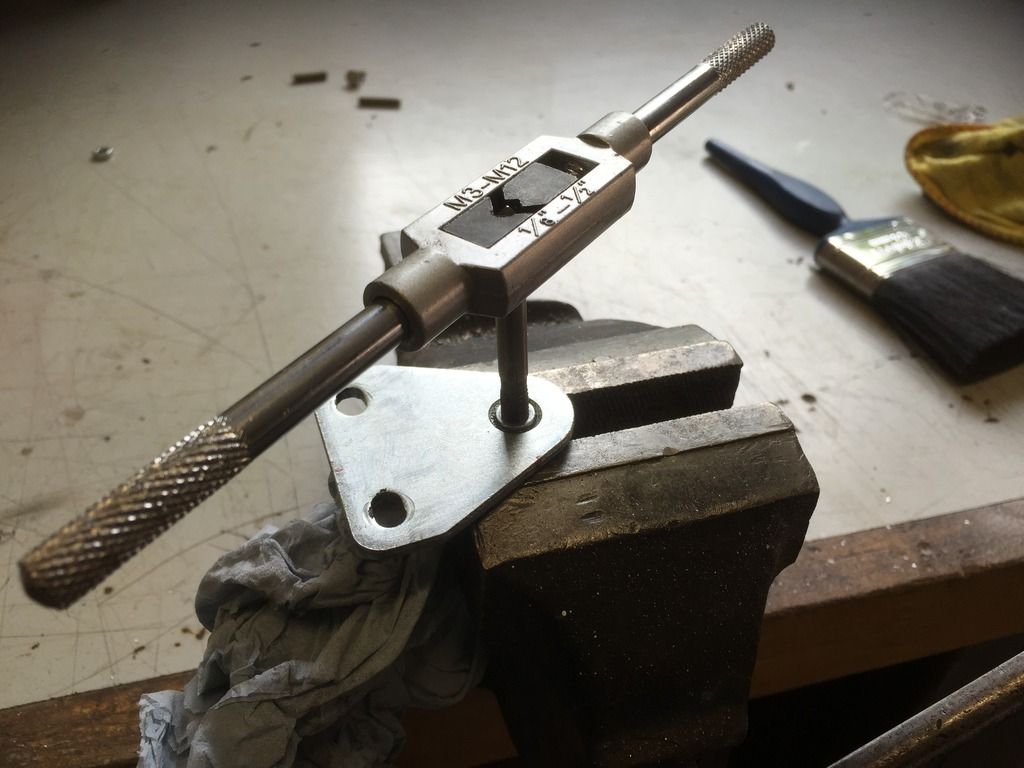
So that the new bolt screws directly into the catch so I drilled and tapped an M6 thread into it
I then bolted everything into place and ending up with this.
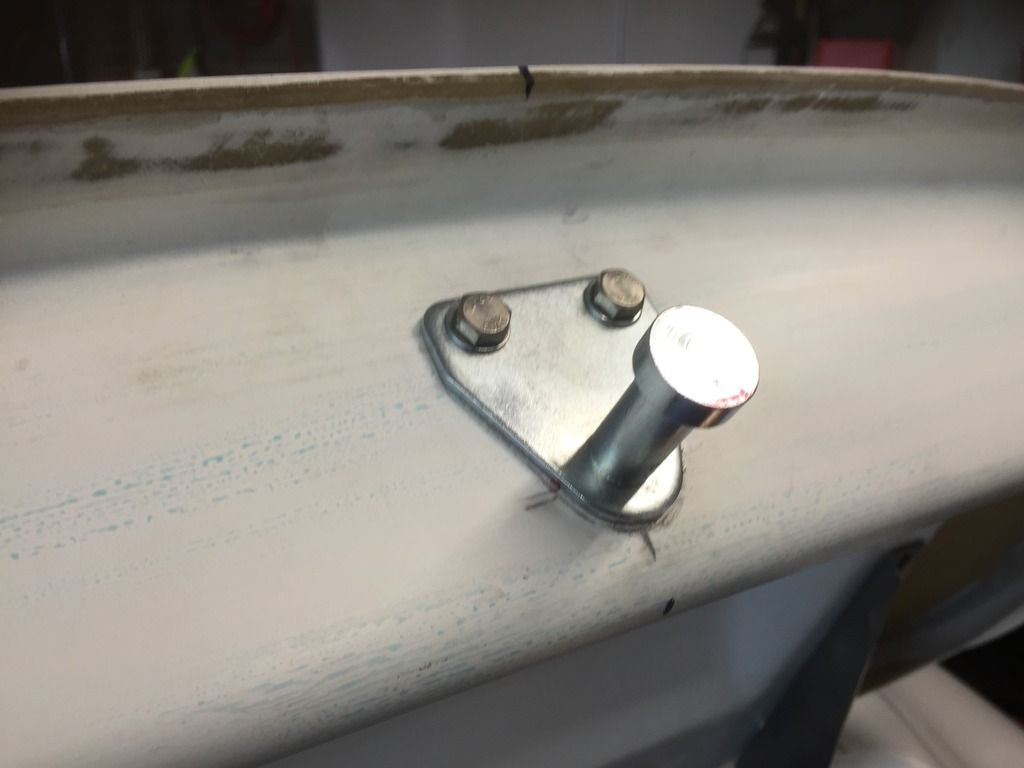
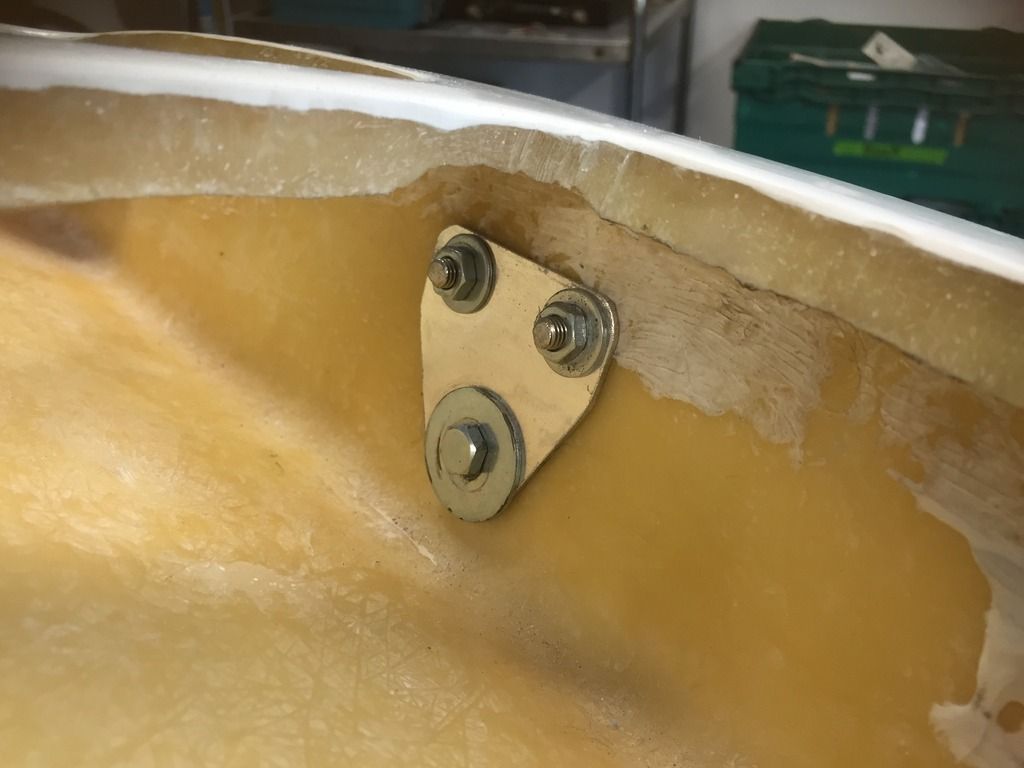
I'm much happier with the look and the catch is a lot more secure. The bolts and washers will be replaced with Stainless at a later date.
Attention turned to the other part of the latch. To get the position correct, it was a case of closing the engine lid (which is spaced up using bluetac so that it doesn't close to far) and then putting the lock into place. A chalk pen to mark the first hole and then drilled and fitted using an M6 nut and blot. In this way, I can fine-tune the positioning before drilling the remaining holes and fitting the lock.
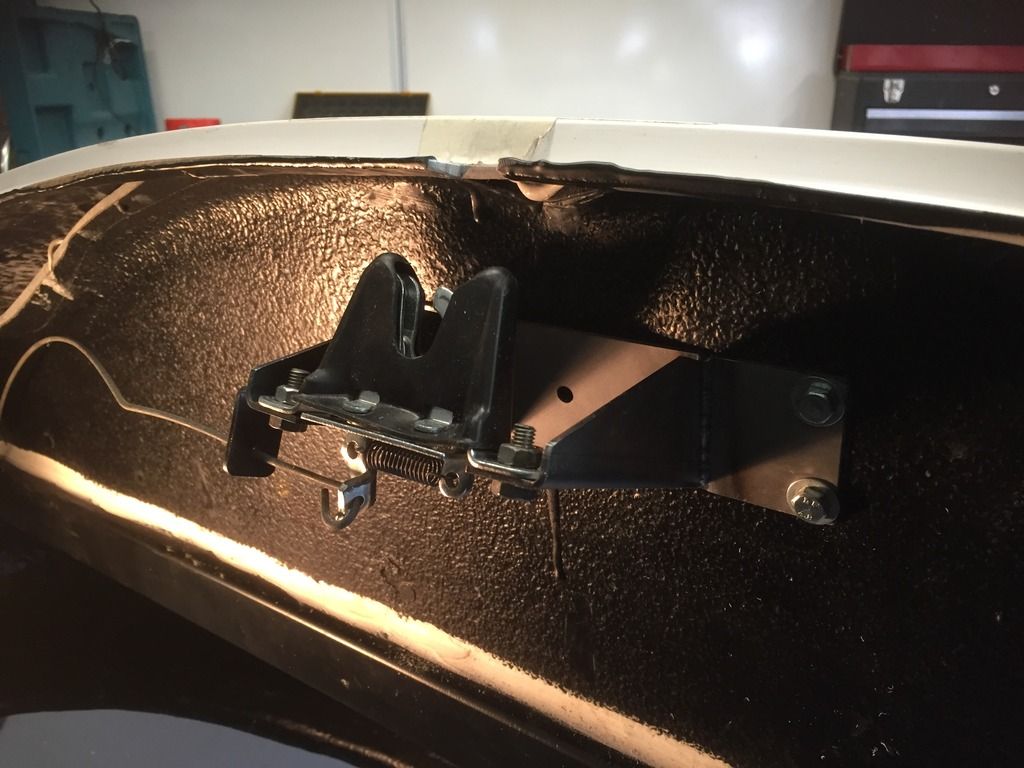
The release cable I have is incorrect so while wait for the correct one to arrive, I have just used some heavy gauge wire so that I can open the engine lid if it gets closed properly.
So apart from fitting the cable, the engine lid is now in place opens and closes properly and will latch correctly.
After sorting out the hinges and getting the engine cover to fit and open how I wanted (new pics uploaded above), I worked on fitting the latch for it to keep things secure. I originally looked at fitting the engine lid element of the latch from inside the lid, first drilling a large hole and passing the bar through it. It didn't look right when bolted up and I felt that once there was paint on the car it would look even worse
I was also a bit unhappy with the overall security go the latch so I decided that I would fit another bolt so that it was more secure. To cover the hole I had already drilled in the engine lid, I made a spreader out of sheet aluminium and added a penny washer.
So that the new bolt screws directly into the catch so I drilled and tapped an M6 thread into it
I then bolted everything into place and ending up with this.
I'm much happier with the look and the catch is a lot more secure. The bolts and washers will be replaced with Stainless at a later date.
Attention turned to the other part of the latch. To get the position correct, it was a case of closing the engine lid (which is spaced up using bluetac so that it doesn't close to far) and then putting the lock into place. A chalk pen to mark the first hole and then drilled and fitted using an M6 nut and blot. In this way, I can fine-tune the positioning before drilling the remaining holes and fitting the lock.
The release cable I have is incorrect so while wait for the correct one to arrive, I have just used some heavy gauge wire so that I can open the engine lid if it gets closed properly.
So apart from fitting the cable, the engine lid is now in place opens and closes properly and will latch correctly.
Re: H-Gs Project 356
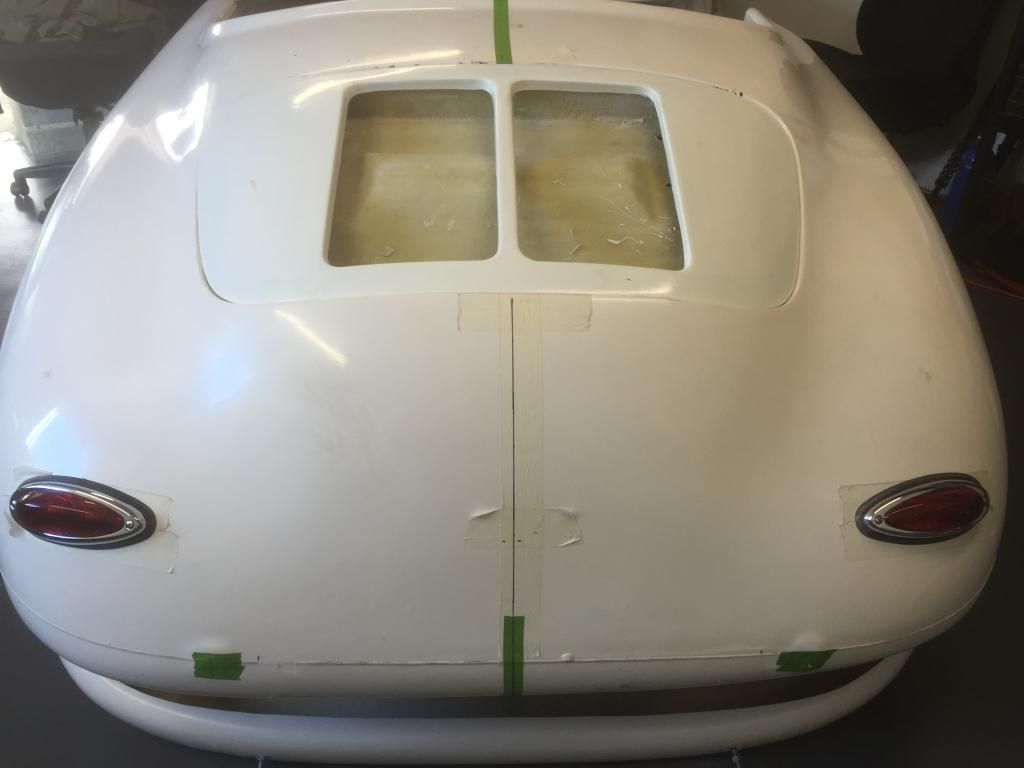
Staying at the back I fitted the reflectors. I would have thought that this would have been a straight forward case of drill hole, bolt up but......
Marking out where to fit them took me some time especially as I could not find any measurements on the interweb. In the end I found a clear picture of the rear of a 356 and then using various references I took a SWAG (Scientific Wide Arsed Guess). A bit more time with the trusty laser level, masking tape and drill and I got to a point where I was happy to add a few more perforations to the body shell.
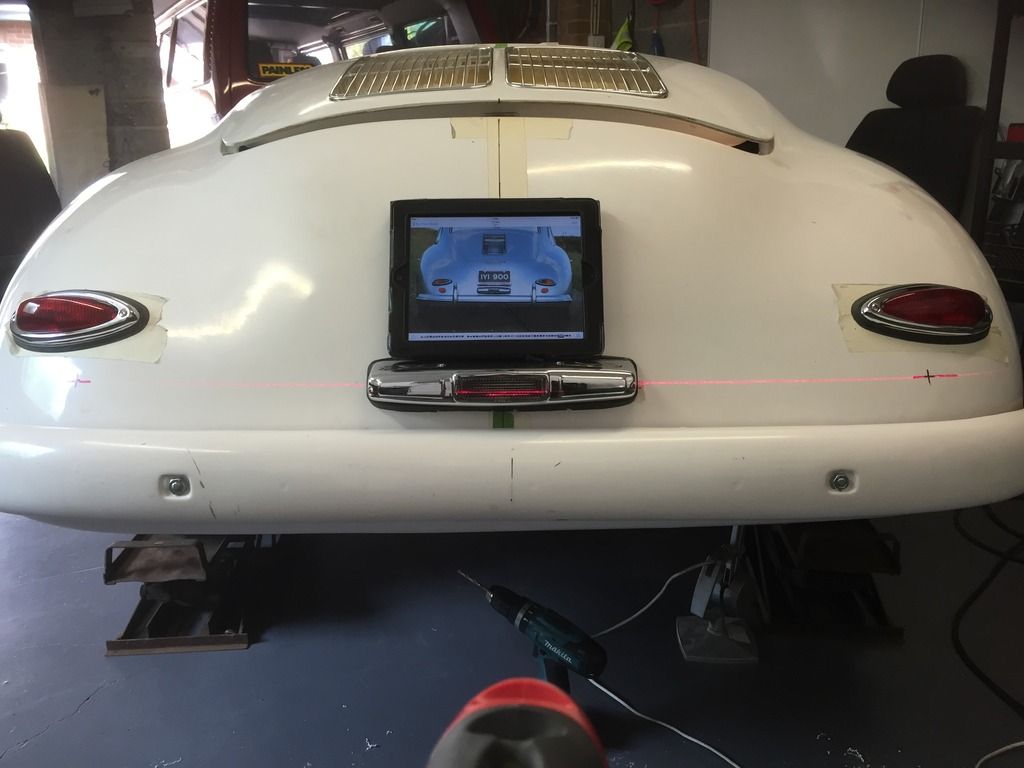
Due the slight changes in the dimensions of the back end (they are slightly wider to accept the beetle rear axle I understand) the angle of the sleeves won't allow that the reflectors to face rearwards properly. A relatively easy fix spending time with the belt sander to alter the angle of the sleeve until I got everything to fit ok.
Despite a bit of SWAG work I am happy with the final positioning.
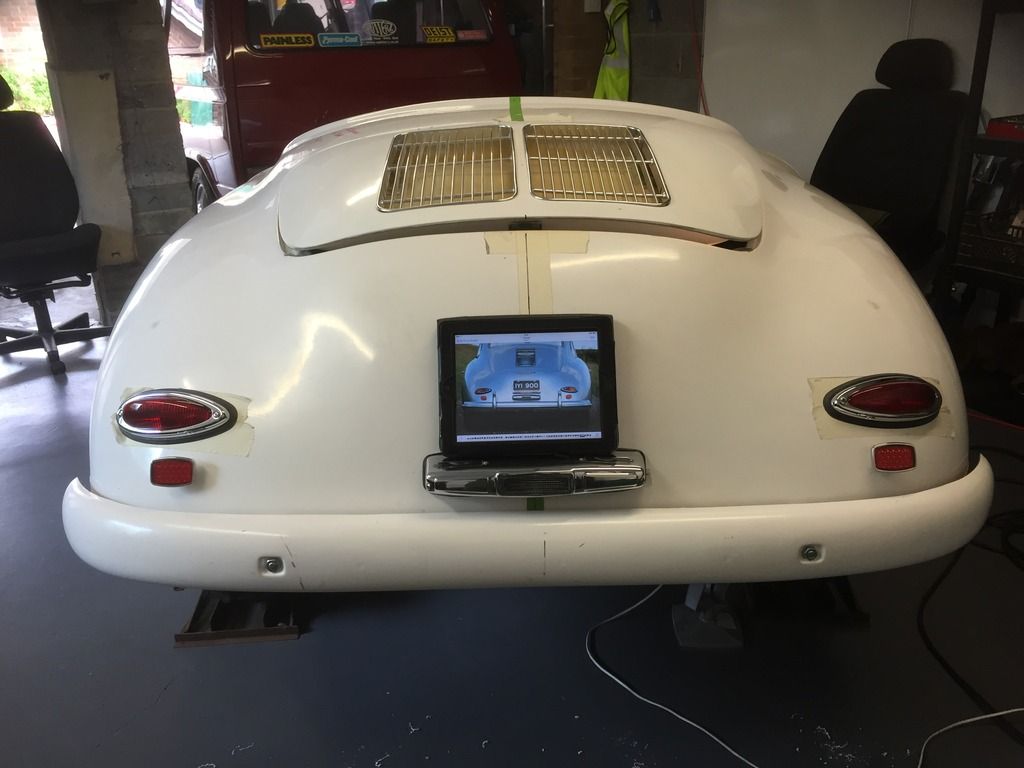
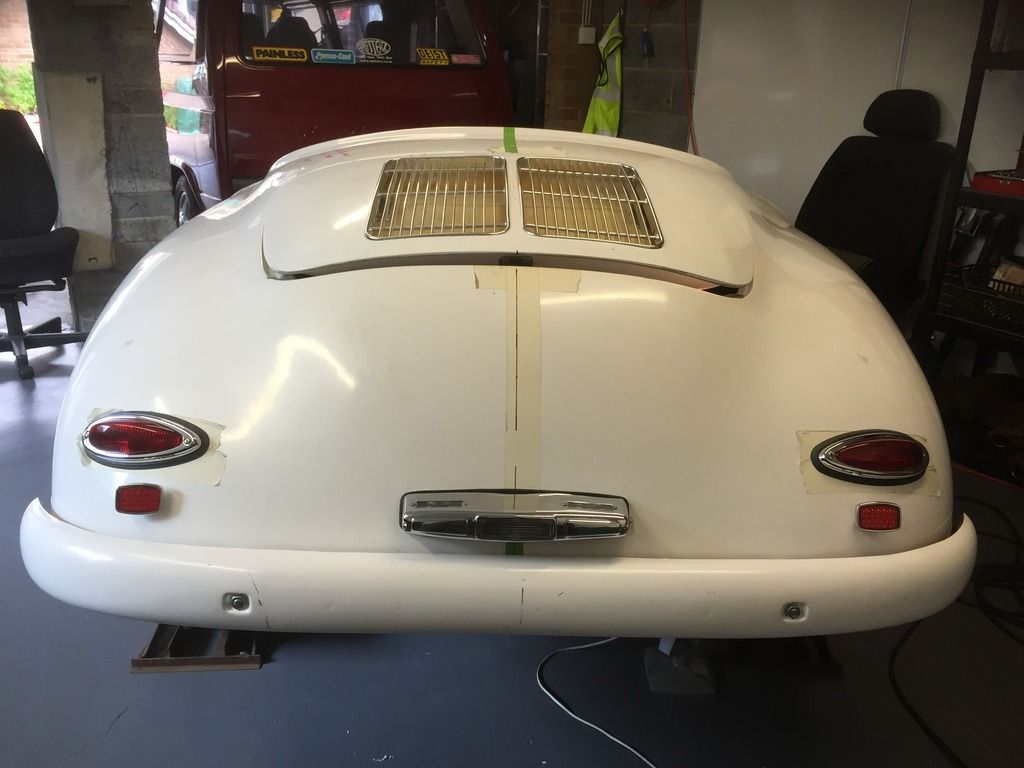
To finish at the back end, I also drilled and fitted 5 additional M6 nuts and bolts around the rear valance to help secure that rear bumper - no pics as pretty dull!
I think that externally, we can safely say that the rear of the car is about complete.
Marking out where to fit them took me some time especially as I could not find any measurements on the interweb. In the end I found a clear picture of the rear of a 356 and then using various references I took a SWAG (Scientific Wide Arsed Guess). A bit more time with the trusty laser level, masking tape and drill and I got to a point where I was happy to add a few more perforations to the body shell.
Due the slight changes in the dimensions of the back end (they are slightly wider to accept the beetle rear axle I understand) the angle of the sleeves won't allow that the reflectors to face rearwards properly. A relatively easy fix spending time with the belt sander to alter the angle of the sleeve until I got everything to fit ok.
Despite a bit of SWAG work I am happy with the final positioning.
To finish at the back end, I also drilled and fitted 5 additional M6 nuts and bolts around the rear valance to help secure that rear bumper - no pics as pretty dull!
I think that externally, we can safely say that the rear of the car is about complete.
Re: H-Gs Project 356
A bit out of sequence, I have fitted the door locks and they now work when you press the button on the door handle. I didn't take any pics, but as I will be revisiting this again soon to fit another set of door locks, I will take a few pics and post then. It should also include fitting the catch to the B-pillar so will be a more complete post.
If you look at the last pic of the complete rear end, you shod be able to make out the latch mechanisms in place.
That was short update :D
If you look at the last pic of the complete rear end, you shod be able to make out the latch mechanisms in place.
That was short update :D
Re: H-Gs Project 356
On to the front and a bit of lead-in before I get to matters at hand.
On the Tuesday I travelled up to near Alton Towers to return a visit to Rich (mdmax72) who popped down a few weeks earlier to collect my windscreens. Over a few coffees we spent some time chatting about the challenges we are having to secure some heated screens, my build and also about the amazing fuel tank he has fitted to his car. Rich was in the process of building a second tank for a a fellow 356 replica owner, Ian, who Rich informed me, unfortunately passed away; I understand he was well known on this forum and I regret that I never had the opportunity to speak with him. I hope that people don't find this insensitive but I have taken a shine to Rich's fuel tank I am now in discussion about the possibility of finishing off what Ian had started and working with Rich to complete the tank and using it in my car.
We have all seen mdmax72's avatar so should know how great this tank looks when fitted, but for those like me who's reading glasses aren't up to the job of seeing it in all of it's glory, here is what it should look like when finished -
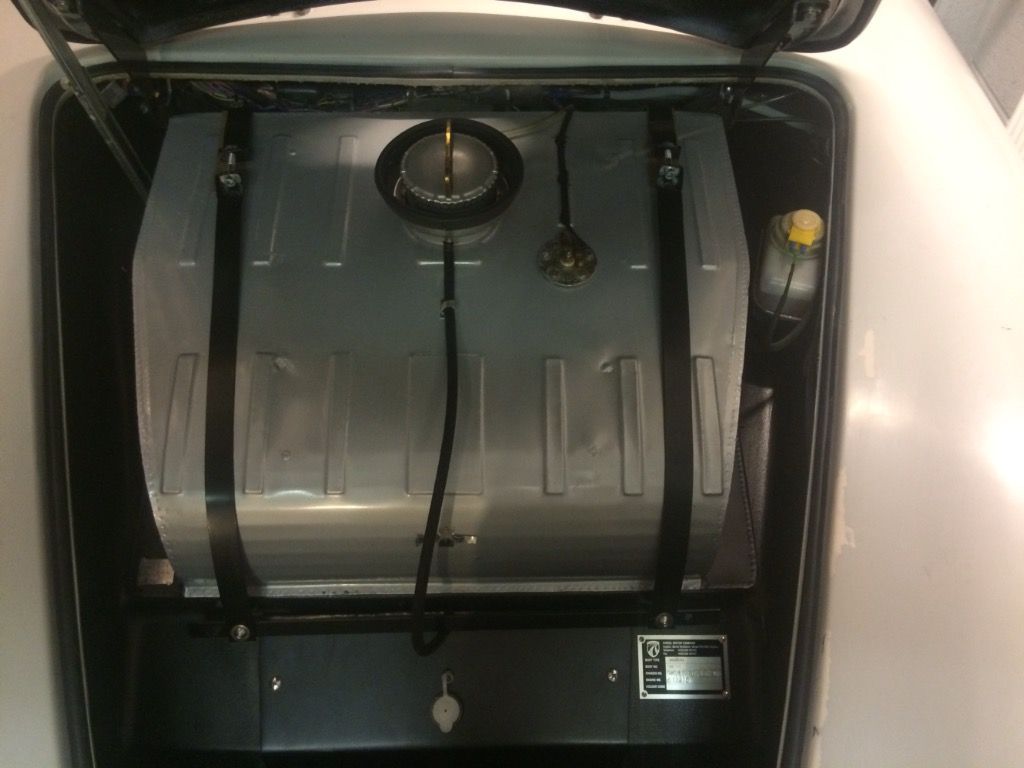
Rich kindly allowed me to bring the tank back with me to try for size and make sure that ti would fit underneath the bonnet. After easing the tank opening in the bodywork a bit, this is the first fit.
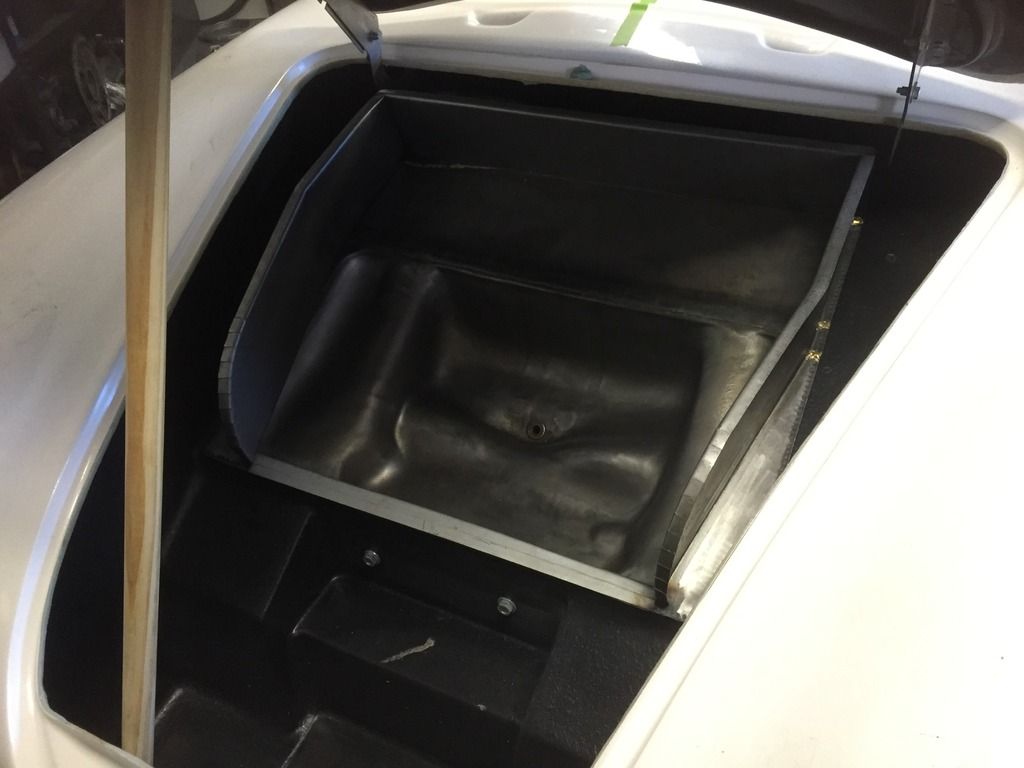
Not bad I think. I next made sure that we had space underneath the bonnet when its closed by putting some bluebook towers along the edge and then measuring th ehieght of the towers after closing the bonnet.
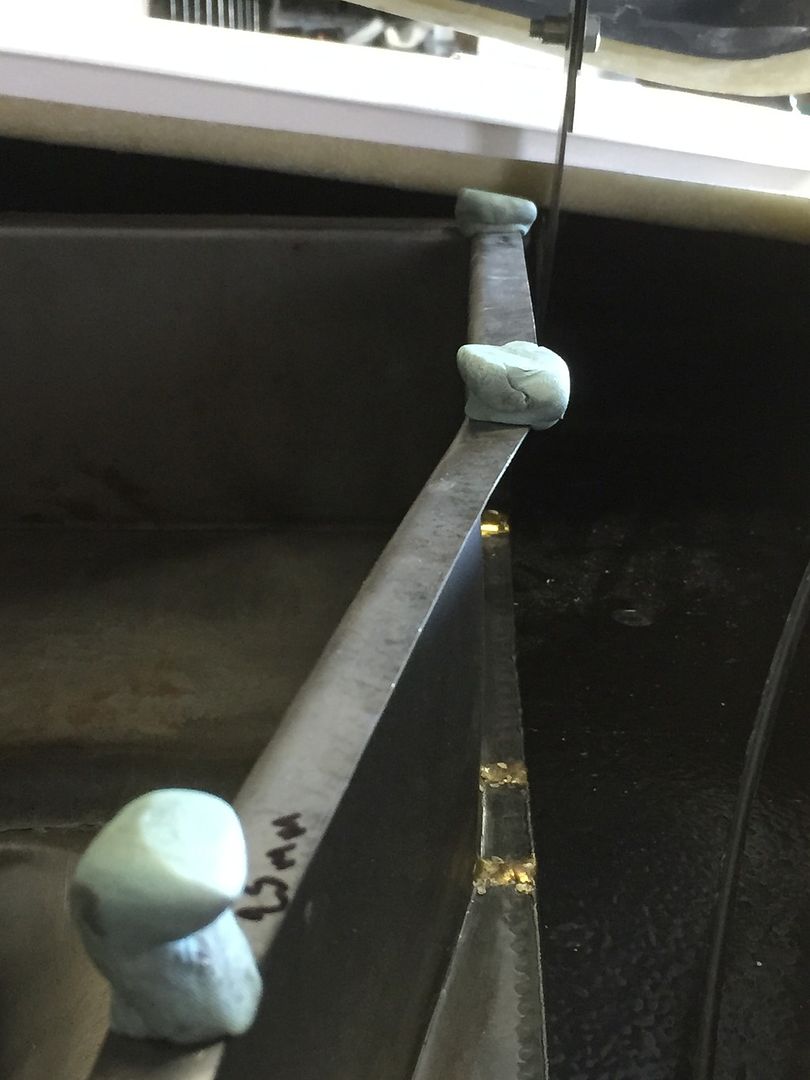

I'm pretty confident that we will have enough room to work with. This tank will end up with me making one of the most dramatic cuts in the car - a massive hole in the bonnet! That said, I can, if required, get a new bonnet much more easily than trying to fill in a large hole in the wing.
There will be a lot of work involved to get this setup through the IVA test but following the discussions I have had, I believe that there is a work around to get this setup fitted and through the test; that said, only time will tell!!
Next - bonnet catches.
On the Tuesday I travelled up to near Alton Towers to return a visit to Rich (mdmax72) who popped down a few weeks earlier to collect my windscreens. Over a few coffees we spent some time chatting about the challenges we are having to secure some heated screens, my build and also about the amazing fuel tank he has fitted to his car. Rich was in the process of building a second tank for a a fellow 356 replica owner, Ian, who Rich informed me, unfortunately passed away; I understand he was well known on this forum and I regret that I never had the opportunity to speak with him. I hope that people don't find this insensitive but I have taken a shine to Rich's fuel tank I am now in discussion about the possibility of finishing off what Ian had started and working with Rich to complete the tank and using it in my car.
We have all seen mdmax72's avatar so should know how great this tank looks when fitted, but for those like me who's reading glasses aren't up to the job of seeing it in all of it's glory, here is what it should look like when finished -
Rich kindly allowed me to bring the tank back with me to try for size and make sure that ti would fit underneath the bonnet. After easing the tank opening in the bodywork a bit, this is the first fit.
Not bad I think. I next made sure that we had space underneath the bonnet when its closed by putting some bluebook towers along the edge and then measuring th ehieght of the towers after closing the bonnet.
I'm pretty confident that we will have enough room to work with. This tank will end up with me making one of the most dramatic cuts in the car - a massive hole in the bonnet! That said, I can, if required, get a new bonnet much more easily than trying to fill in a large hole in the wing.
There will be a lot of work involved to get this setup through the IVA test but following the discussions I have had, I believe that there is a work around to get this setup fitted and through the test; that said, only time will tell!!
Next - bonnet catches.
Re: H-Gs Project 356
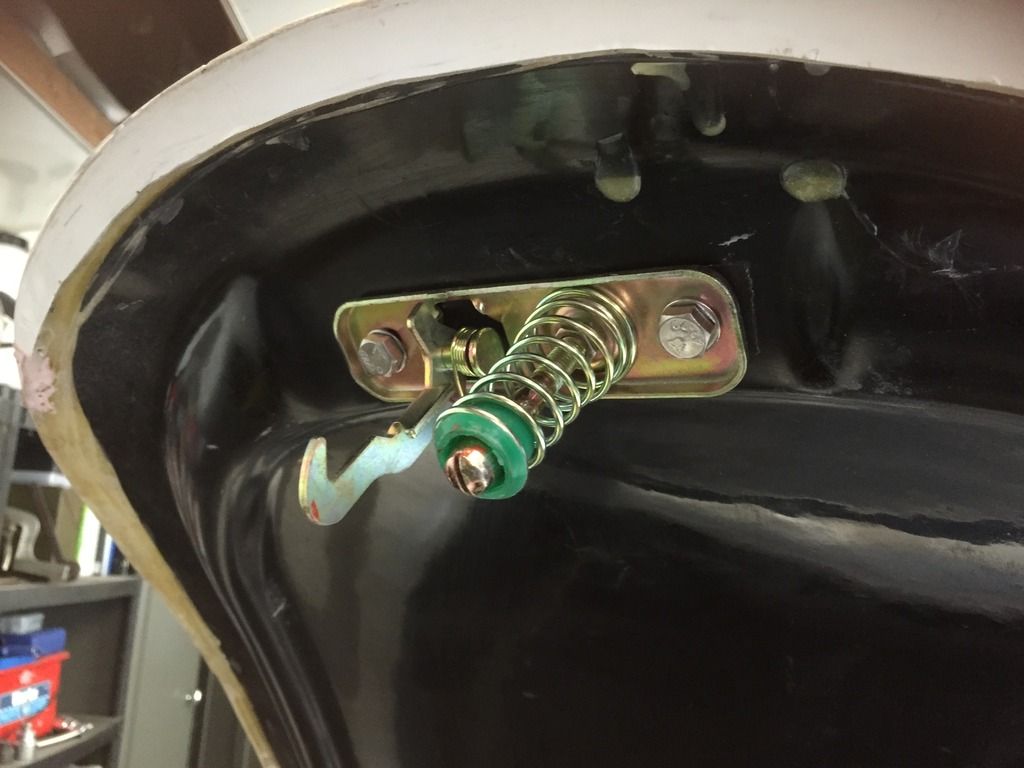
So while not without a bit of head scratching, this turned out to be one of the easiest tasks this week.
The holes and threads are bonded into the bonnet as part of the laying up process so it was s simple case of bolting the spring catch and safety catch into place.
With this in place I could measure up the slam panel to get the release mechanism in place. Mindful that it would be nigh on impossible to get into the area should it all lock, I made sure that fuel tank was out and the release cable in place before doing anything!
I did install this from underneath the slam panel and I think that it makes for a very neat install.

With that in place and working as I wanted (minimal adjustment required ) i looked to find a place for the release handle inside the car. It needed to be somewhere relatively secure and definitely out of sight to provide a modicum of security for any stuff that's in the 'boot'. So without revealing the exact location, I did find somewhere convenient and unless you know where it is and what you are looking for, it's unlikely that you will find it that easily (put it this way, I have had someone try find it and even when they were given directions they could not see it :D ).
I will secure the cable along with the loom when I get around to fitting that.
I'm not sure if video works, but lets try:
[video]http://vid1239.photobucket.com/albums/f ... vashio.mp4[/video]
Woohoo - successfully uploaded my first video clip.
I still need to fit a bonnet stay so for now a spare broom handle will have to suffice.
Bonnet - done.
The holes and threads are bonded into the bonnet as part of the laying up process so it was s simple case of bolting the spring catch and safety catch into place.
With this in place I could measure up the slam panel to get the release mechanism in place. Mindful that it would be nigh on impossible to get into the area should it all lock, I made sure that fuel tank was out and the release cable in place before doing anything!
I did install this from underneath the slam panel and I think that it makes for a very neat install.
With that in place and working as I wanted (minimal adjustment required
I will secure the cable along with the loom when I get around to fitting that.
I'm not sure if video works, but lets try:
[video]http://vid1239.photobucket.com/albums/f ... vashio.mp4[/video]
Woohoo - successfully uploaded my first video clip.
I still need to fit a bonnet stay so for now a spare broom handle will have to suffice.
Bonnet - done.
Last edited by H-G on Sun Aug 09, 2015 8:08 pm, edited 1 time in total.
Re: H-Gs Project 356
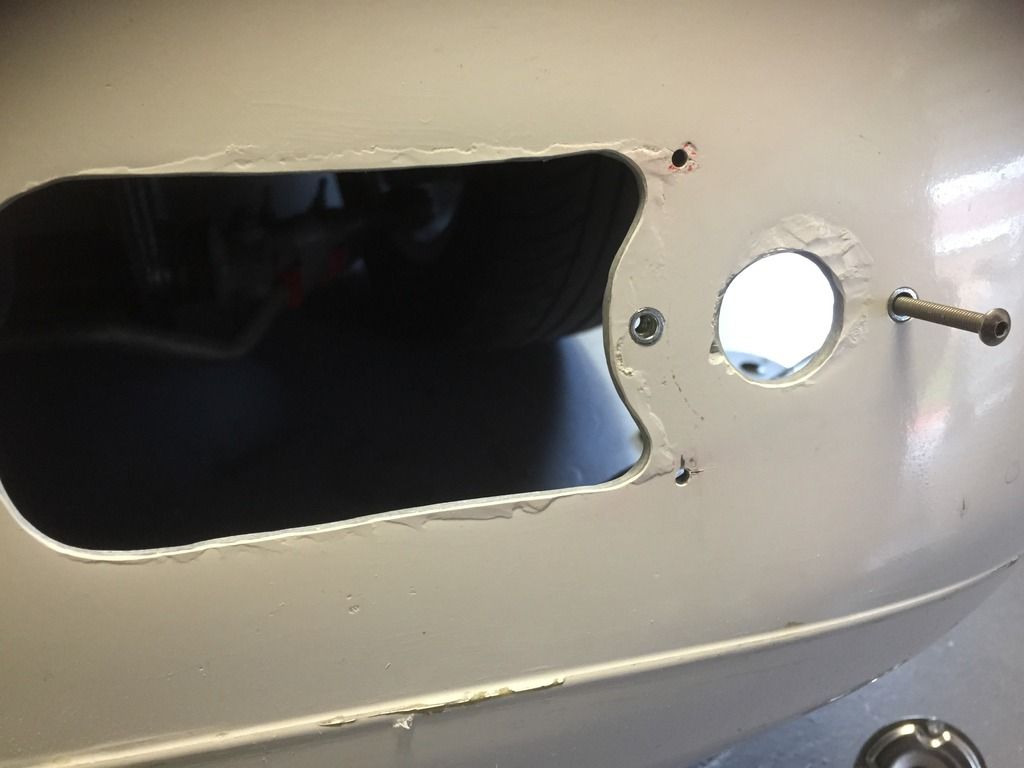
Starting at the front of the car it's time to look at the horn grills and indicators.
Again the trusty laser level came out and we had to revert to a VSWAG (Very Scientific... you get it!) As the old was taken from an original car there are imperfections in the gelcoat showing where the indicators need to go. Using these as an initial guide, the headlight screw holes and a pair of engineering dividers, I made sure that the holes for each grill were level with each other and the same distance from the headlight screw as the datum point. Drilling the 3 holes for the grill allowed me to push them into place and then draw around the grill opening so that they would recess into he body properly. Once this had been done, I could fit the rubbers and mark out for the indicators. The resulting effort with a drill and a rotary file left me with these holes in the front panel.

Because the body work is thicker than the original metal cars Gary provide a set of longer studs to fit.

It's little touches like that which led me to buy my replica from him.
I could have just used a nut and bolt to fit the indicators, but I'm sure that you are all beginning to realise that there's the simple way and then theres H-G's way! I opened the holes slightly and installed rivnuts so that the indicators can simply be crewed into place.
With all the cutting, filing and rivnutting complete, I could fit the grills and indicators.
Another job ticked off the list.
Headlights are ongoing, however I have a small, but perfectly formed group of supporters and assistants who track to the cave regularly and help out. One of these has now been given his own, very specific task to undertake. It goes back to doing things the simple way or H-G's way. The simple way would be to just rivet a small bracket to hang the headlights from at the top of the headlight bowl; H-G's way is to replicate the slightly raise ring the protrudes from the headlight bowl which directs any rain around the bowl and help to provide some additional lateral support to the headlight. TMCL is now int he process of making templates to form an insert which he will then fit to the bowl. This will do a few things:
1. Continue the H-G way of doing stuff!
2. Provide the correct look for the car (when the headlights have been removed for whatever reason)!
3. Help prevent the headlight bowls filling with water if driven in the rain and/or when being washed.
4. Allow me to create a cleaner line around the headlight bowls when it comes to paint prep.
I will provide these updates idc.
Next up was the task that completely change the look of the project and lets me proclaim that I am now working on a Porsche 356.
Again the trusty laser level came out and we had to revert to a VSWAG (Very Scientific... you get it!) As the old was taken from an original car there are imperfections in the gelcoat showing where the indicators need to go. Using these as an initial guide, the headlight screw holes and a pair of engineering dividers, I made sure that the holes for each grill were level with each other and the same distance from the headlight screw as the datum point. Drilling the 3 holes for the grill allowed me to push them into place and then draw around the grill opening so that they would recess into he body properly. Once this had been done, I could fit the rubbers and mark out for the indicators. The resulting effort with a drill and a rotary file left me with these holes in the front panel.
Because the body work is thicker than the original metal cars Gary provide a set of longer studs to fit.
It's little touches like that which led me to buy my replica from him.
I could have just used a nut and bolt to fit the indicators, but I'm sure that you are all beginning to realise that there's the simple way and then theres H-G's way! I opened the holes slightly and installed rivnuts so that the indicators can simply be crewed into place.
With all the cutting, filing and rivnutting complete, I could fit the grills and indicators.
Another job ticked off the list.
Headlights are ongoing, however I have a small, but perfectly formed group of supporters and assistants who track to the cave regularly and help out. One of these has now been given his own, very specific task to undertake. It goes back to doing things the simple way or H-G's way. The simple way would be to just rivet a small bracket to hang the headlights from at the top of the headlight bowl; H-G's way is to replicate the slightly raise ring the protrudes from the headlight bowl which directs any rain around the bowl and help to provide some additional lateral support to the headlight. TMCL is now int he process of making templates to form an insert which he will then fit to the bowl. This will do a few things:
1. Continue the H-G way of doing stuff!
2. Provide the correct look for the car (when the headlights have been removed for whatever reason)!
3. Help prevent the headlight bowls filling with water if driven in the rain and/or when being washed.
4. Allow me to create a cleaner line around the headlight bowls when it comes to paint prep.
I will provide these updates idc.
Next up was the task that completely change the look of the project and lets me proclaim that I am now working on a Porsche 356.
Re: H-Gs Project 356
Last update for this session - Windscreen.
I started by trying to fit the glass into the frame - should be straight forward, but I have to say that after about 4 hours of try, i gave up! Instead I've used a little of the excess rubber to allow me to fit the glass into the frame and fit it to the car.
A lot of measuring, marking, checking, measuring, checking and measuring again before out came the trusty drill and two hole were drilled at the top of the A pillars. To my relief the frame slide straight in and was central. With the lower screen rubber inlace, I could see that we will end up with a good fit.
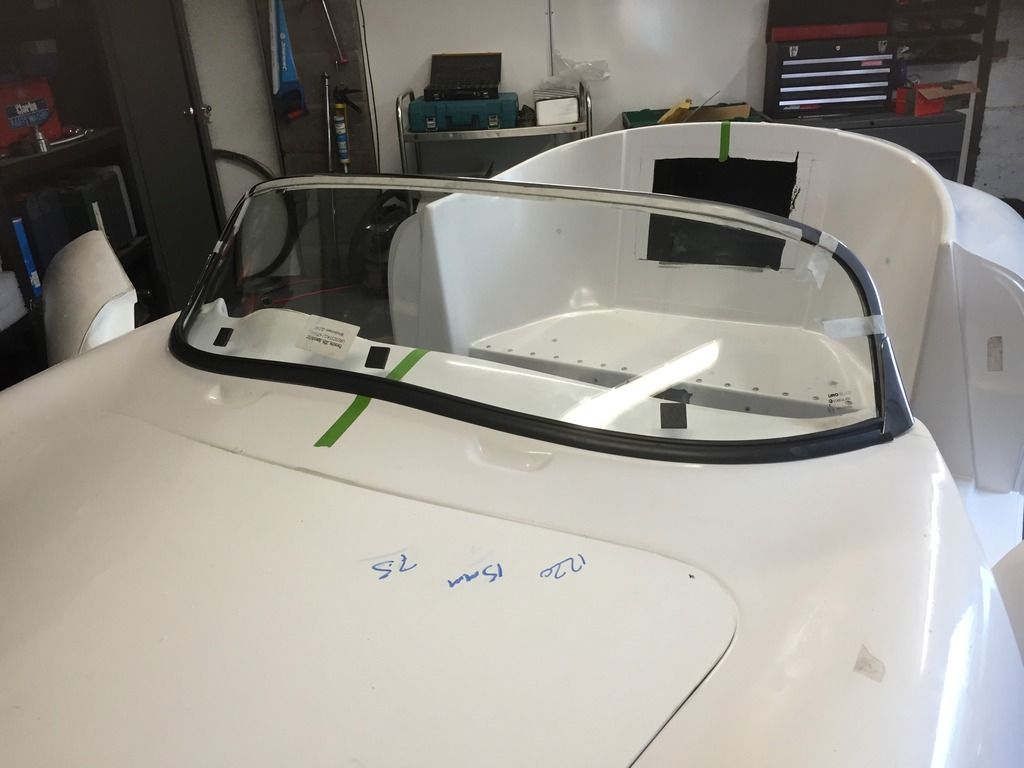
We do have a bit of a challenge where the screen meets the A pillars so I have had to spend some time re-profiling these areas to get a better fit.
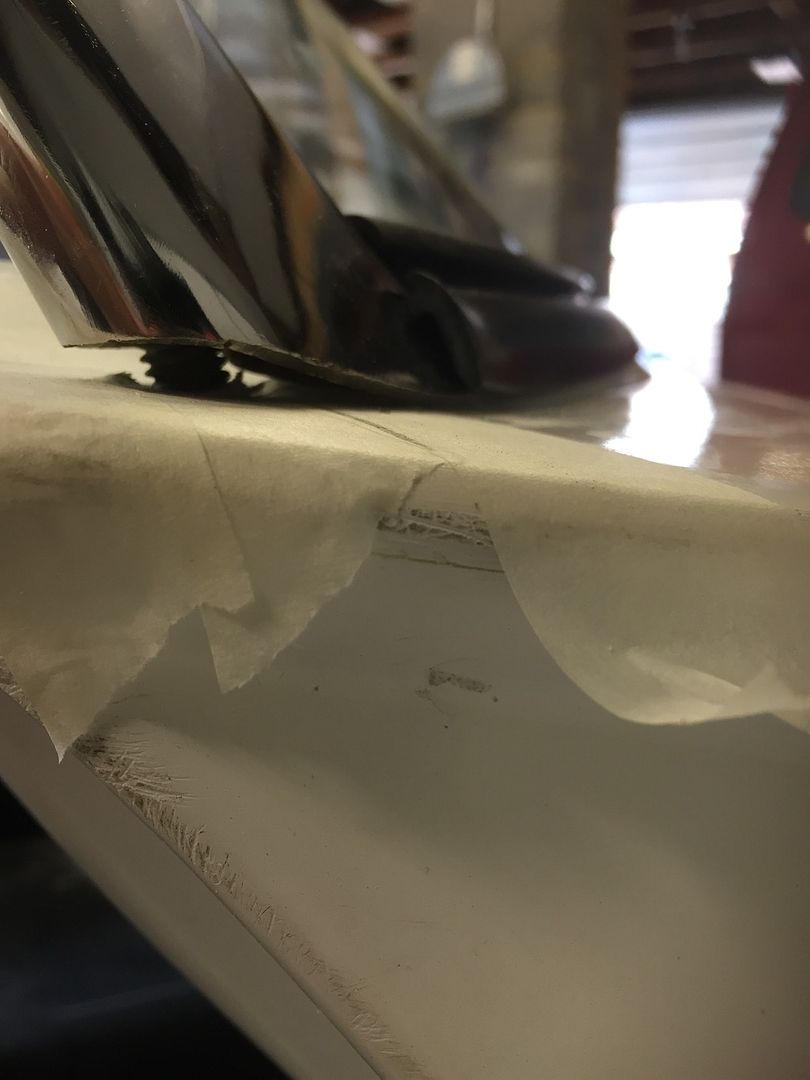

Ive taken these down a bit so that the fit is abetter, but I have some more work before we get to a place that I am going to be happy. There are some rubber gaskets that fit between the screen posts and the body which will take out some of the gap, but I need a better fit before resorting to the gaskets.
I also fitted the centre windscreen tensioning bar which helps to pull everything into place and keep it solid. Before it all gets pulled down tight I need to make up some aluminium sleeves which will spread the load a bot better on the GRP. If we tighten it now, the GRP will crack.
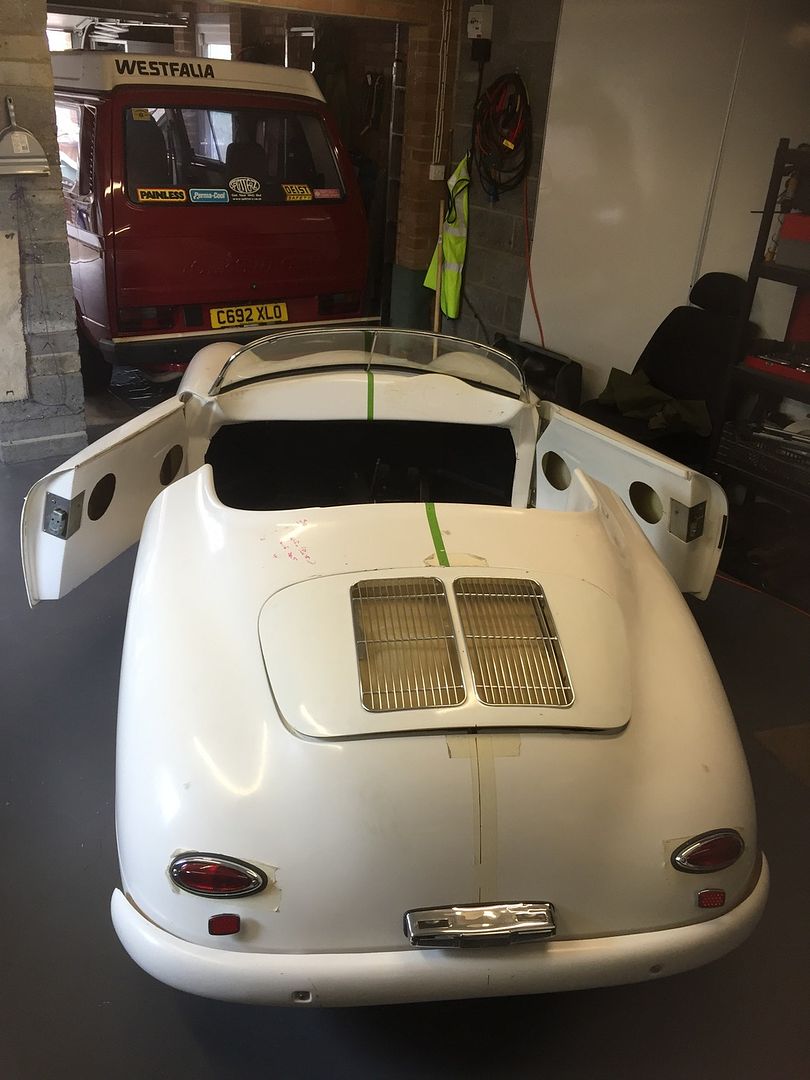
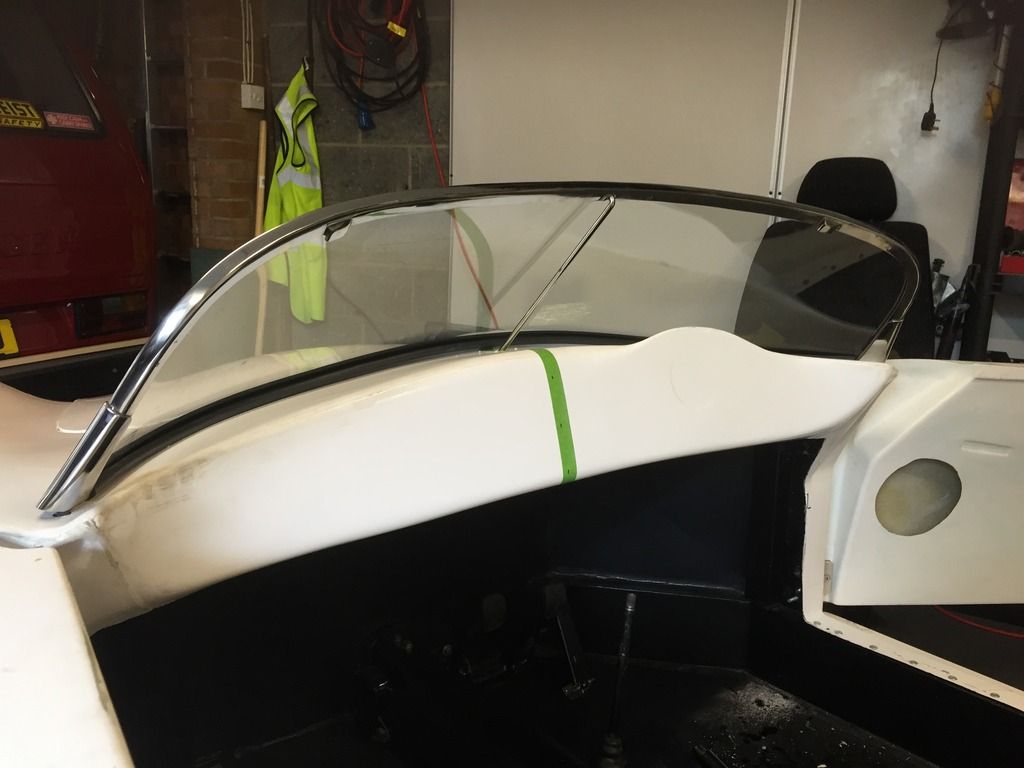
So this was the result of that piece of work and I will return to it when I have a day to spare without distractions as there will be a lot more fit, and trail fit before I am happy with the end result.
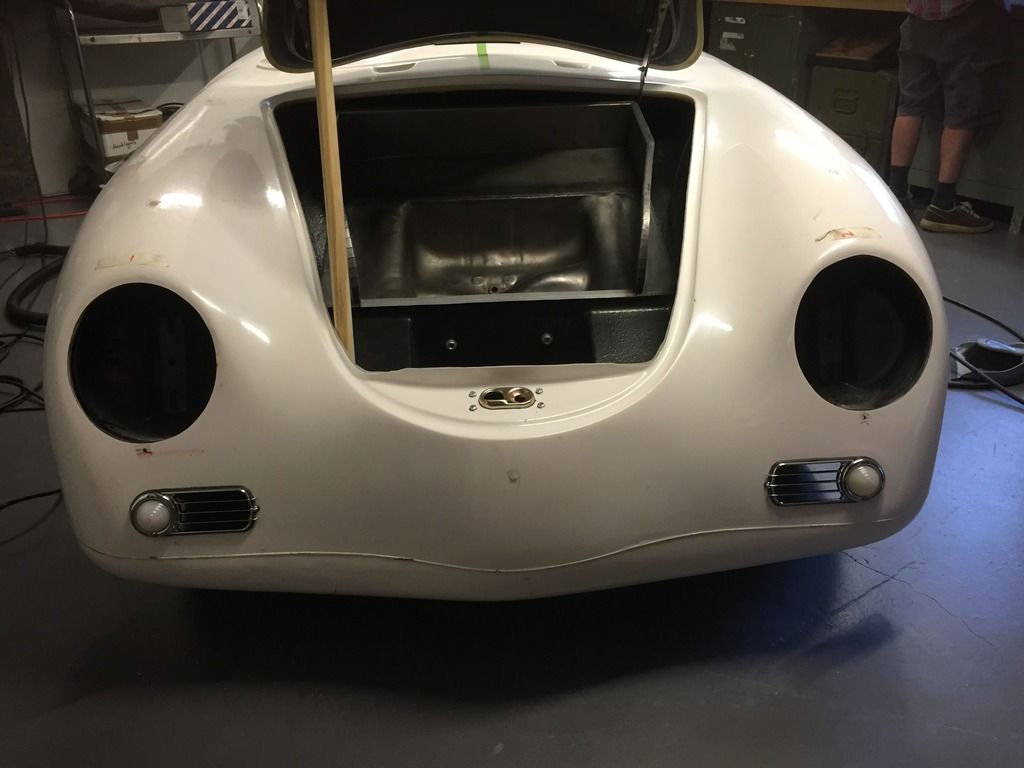
Notwithstanding, this is how the car looks now
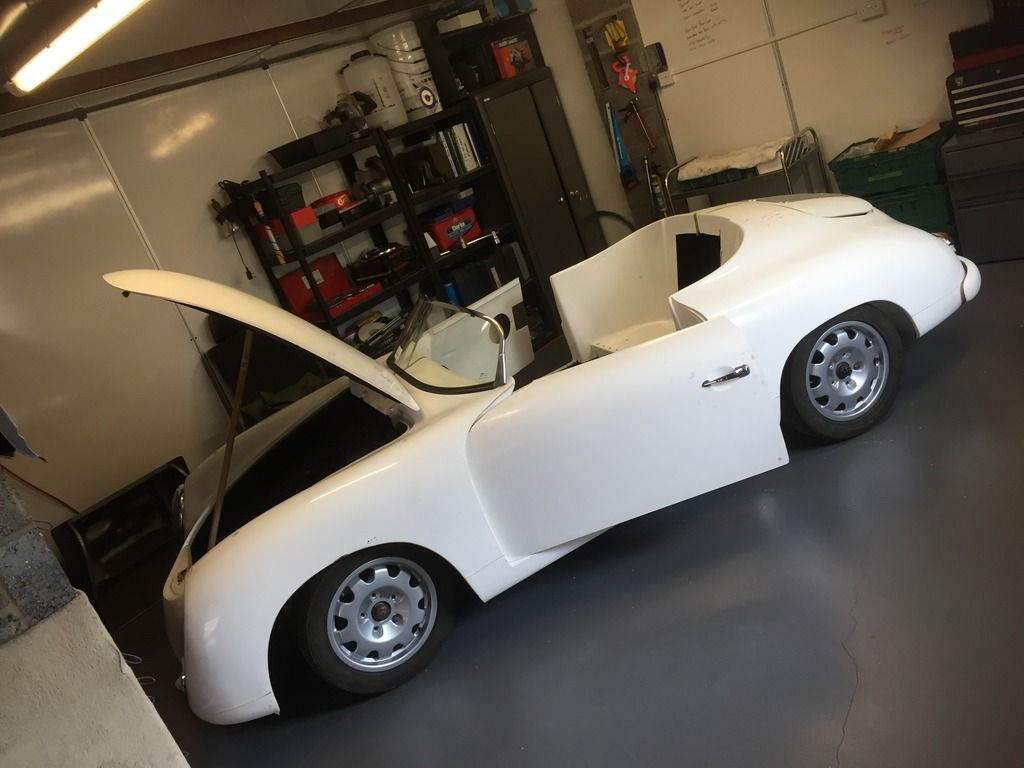
I hope that you all agree that I now have a Porsche 356 (replica) in The Man Cave now rather than a collection of parts :D
I started by trying to fit the glass into the frame - should be straight forward, but I have to say that after about 4 hours of try, i gave up! Instead I've used a little of the excess rubber to allow me to fit the glass into the frame and fit it to the car.
A lot of measuring, marking, checking, measuring, checking and measuring again before out came the trusty drill and two hole were drilled at the top of the A pillars. To my relief the frame slide straight in and was central. With the lower screen rubber inlace, I could see that we will end up with a good fit.
We do have a bit of a challenge where the screen meets the A pillars so I have had to spend some time re-profiling these areas to get a better fit.
Ive taken these down a bit so that the fit is abetter, but I have some more work before we get to a place that I am going to be happy. There are some rubber gaskets that fit between the screen posts and the body which will take out some of the gap, but I need a better fit before resorting to the gaskets.
I also fitted the centre windscreen tensioning bar which helps to pull everything into place and keep it solid. Before it all gets pulled down tight I need to make up some aluminium sleeves which will spread the load a bot better on the GRP. If we tighten it now, the GRP will crack.
So this was the result of that piece of work and I will return to it when I have a day to spare without distractions as there will be a lot more fit, and trail fit before I am happy with the end result.
Notwithstanding, this is how the car looks now
I hope that you all agree that I now have a Porsche 356 (replica) in The Man Cave now rather than a collection of parts :D
Re: H-Gs Project 356
Ok, I fibbed!
There is one more small update - seats.
I have been scratching my head over how to overcome the IVA challenge in both the seat and seatbelt area. I think I have cracked it. I picked a full interior out of a BMW 3 series convertible on the good old Bay of E a week or so ago. A trip to Maidstone and I they were back in The Cave and placed in the 356.
So what's so special about these seats? Not only do they have everything I need seat wise for the IVA, they also incorporate the seatbelt. No more trying to figure out how to mount the shoulder swivel. To make sure that they are secure, they will rest on billet aluminium spacers and I will be fitting 100mm by 100mm 3 mm thick mild steel load spreaders to prevent the bolts (M12 8.8 high tensile jobbies) pulling through the chassis. Fingers crossed, this will tick all of the IVA boxes.
A quick google and I found out how to simply wire them up so they are no fully adjustable using the various buttons, knobs and switches. for height, legs, back angle and even headrest height.
A sneak preview of the seats temporarily placed in the car.
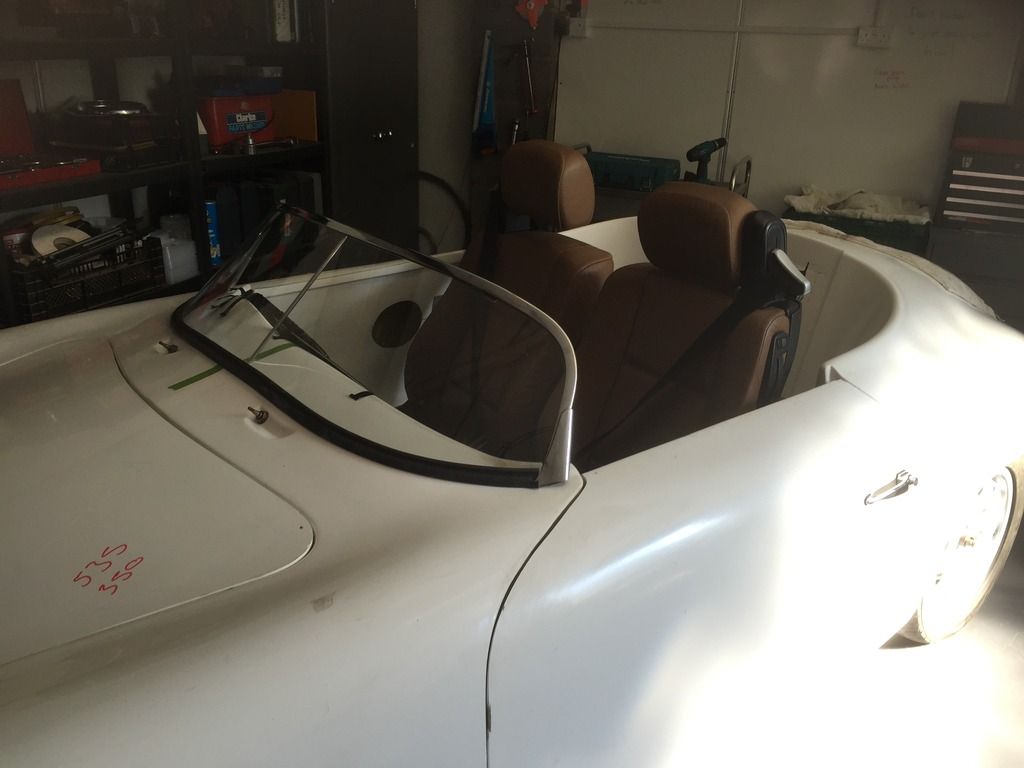
For now at least - that's all folks.
There is one more small update - seats.
I have been scratching my head over how to overcome the IVA challenge in both the seat and seatbelt area. I think I have cracked it. I picked a full interior out of a BMW 3 series convertible on the good old Bay of E a week or so ago. A trip to Maidstone and I they were back in The Cave and placed in the 356.
So what's so special about these seats? Not only do they have everything I need seat wise for the IVA, they also incorporate the seatbelt. No more trying to figure out how to mount the shoulder swivel. To make sure that they are secure, they will rest on billet aluminium spacers and I will be fitting 100mm by 100mm 3 mm thick mild steel load spreaders to prevent the bolts (M12 8.8 high tensile jobbies) pulling through the chassis. Fingers crossed, this will tick all of the IVA boxes.
A quick google and I found out how to simply wire them up so they are no fully adjustable using the various buttons, knobs and switches. for height, legs, back angle and even headrest height.
A sneak preview of the seats temporarily placed in the car.
For now at least - that's all folks.