

1973 911E RHD Light Ivory and ex NZ...another one.
Moderator: Bootsy
Re: 1973 911E RHD Light Ivory and ex NZ...another one.
Bloody amazing skills by mr carter, please keep posting...
-
sladey
- Nurse, I think I need some assistance
- Posts: 8774
- Joined: Sat Apr 23, 2005 9:08 pm
- Location: Nottingham, UK
Re: 1973 911E RHD Light Ivory and ex NZ...another one.
Great post - thanks for that - I especially love the hammer forming stuff
The simple things you see are all complicated
I look pretty young but I'm just backdated yeah
I look pretty young but I'm just backdated yeah
-
Darren65

- Nurse, I think I need some assistance
- Posts: 7873
- Joined: Mon Dec 13, 2010 10:55 pm
- Location: North Wiltshire
- Contact:
Re: 1973 911E RHD Light Ivory and ex NZ...another one.
....and that bulkhead repair is simply delicious! 
Darren
72T 2.5... http://ddk-online.com/phpBB2/viewtopic.php?f=10&t=56183
73 2.4E ... http://ddk-online.com/phpBB2/viewtopic.php?f=10&t=44242
77 Carrera 3.0...to 74 3.0RS ... http://ddk-online.com/phpBB2/viewtopic.php?f=28&t=63389
72T 2.5... http://ddk-online.com/phpBB2/viewtopic.php?f=10&t=56183
73 2.4E ... http://ddk-online.com/phpBB2/viewtopic.php?f=10&t=44242
77 Carrera 3.0...to 74 3.0RS ... http://ddk-online.com/phpBB2/viewtopic.php?f=28&t=63389
Re: 1973 911E RHD Light Ivory and ex NZ...another one.
Amazing skill, I could read metal work threads like these all day, very very cool 
Re: 1973 911E RHD Light Ivory and ex NZ...another one.
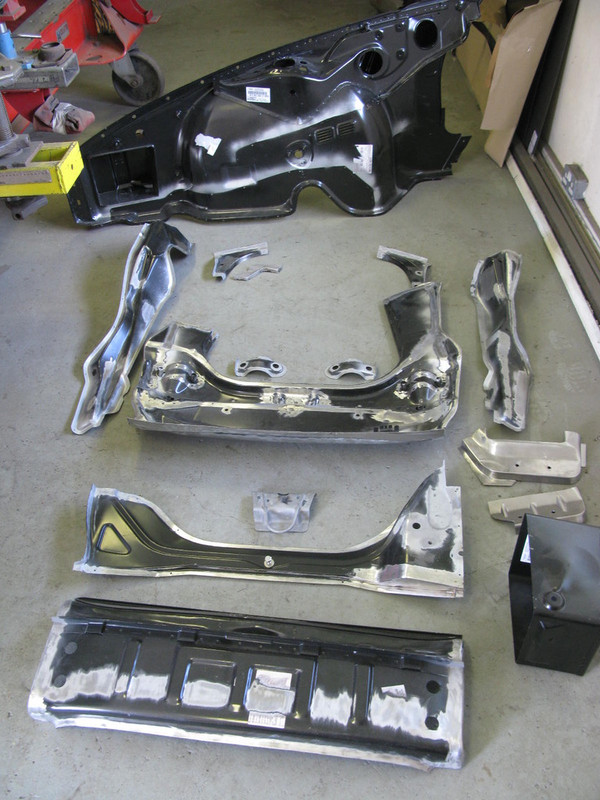
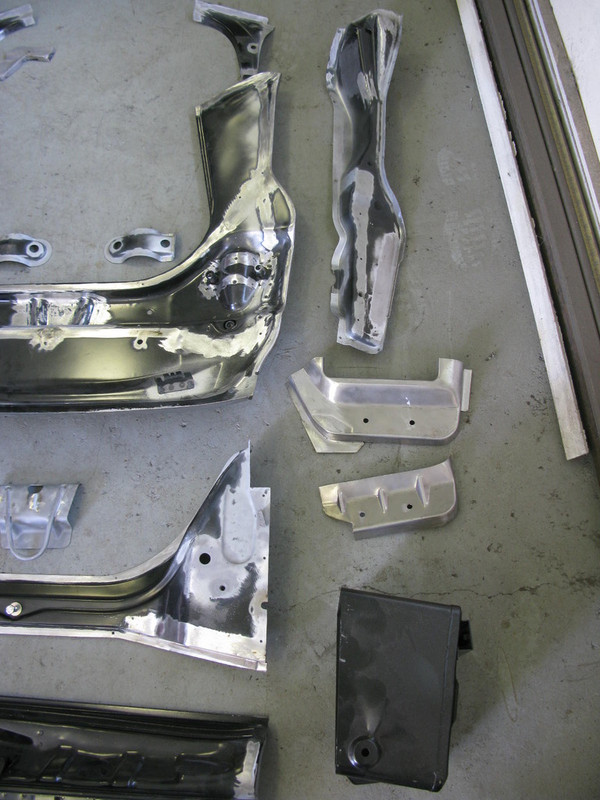
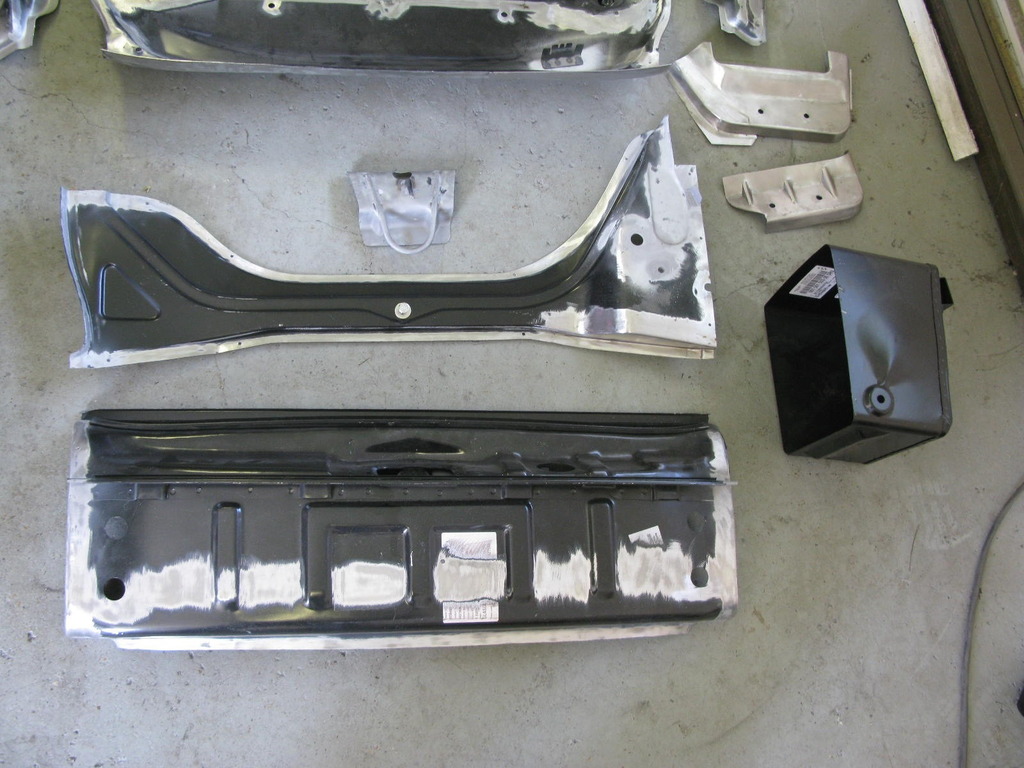
33. Front panel collection
Yes, this represents some serious pocket money, Dr.F's finest... The degree of silver showing illustrates the extent of preparation and modification involved in getting a front end kit ready to fit.

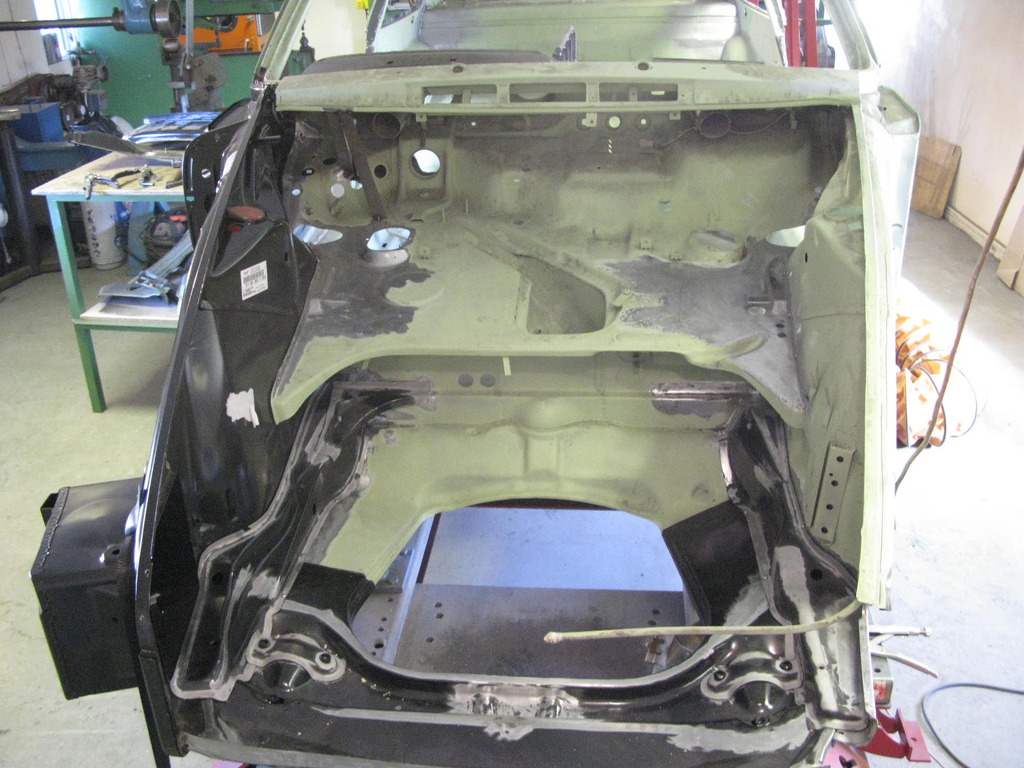
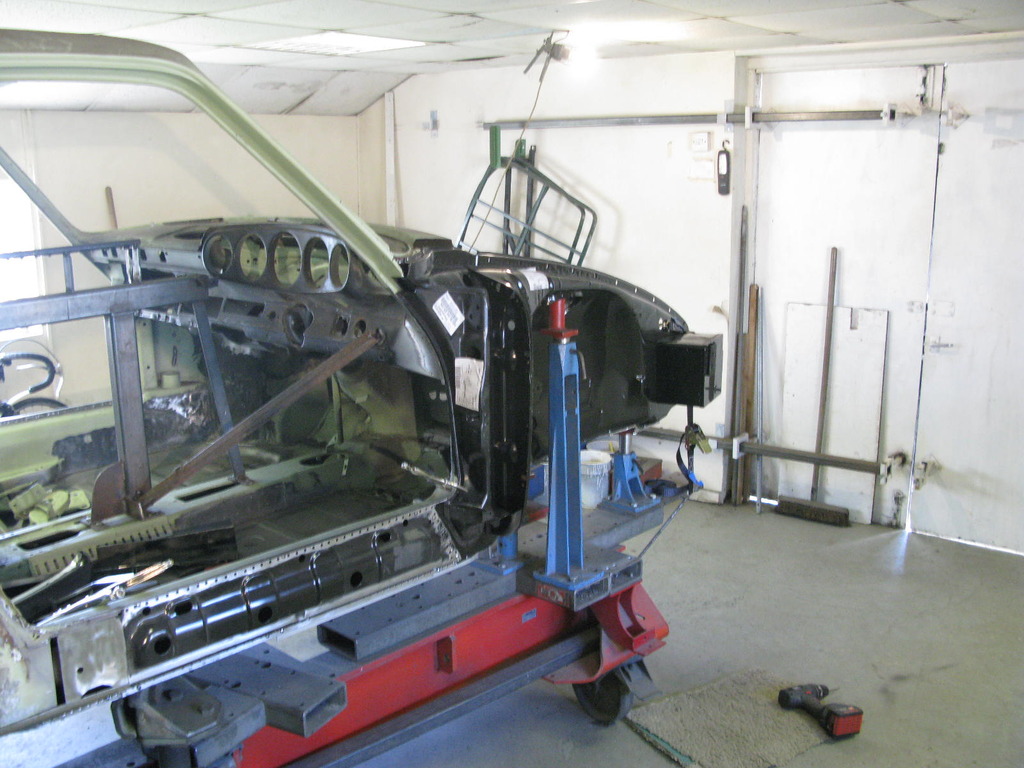
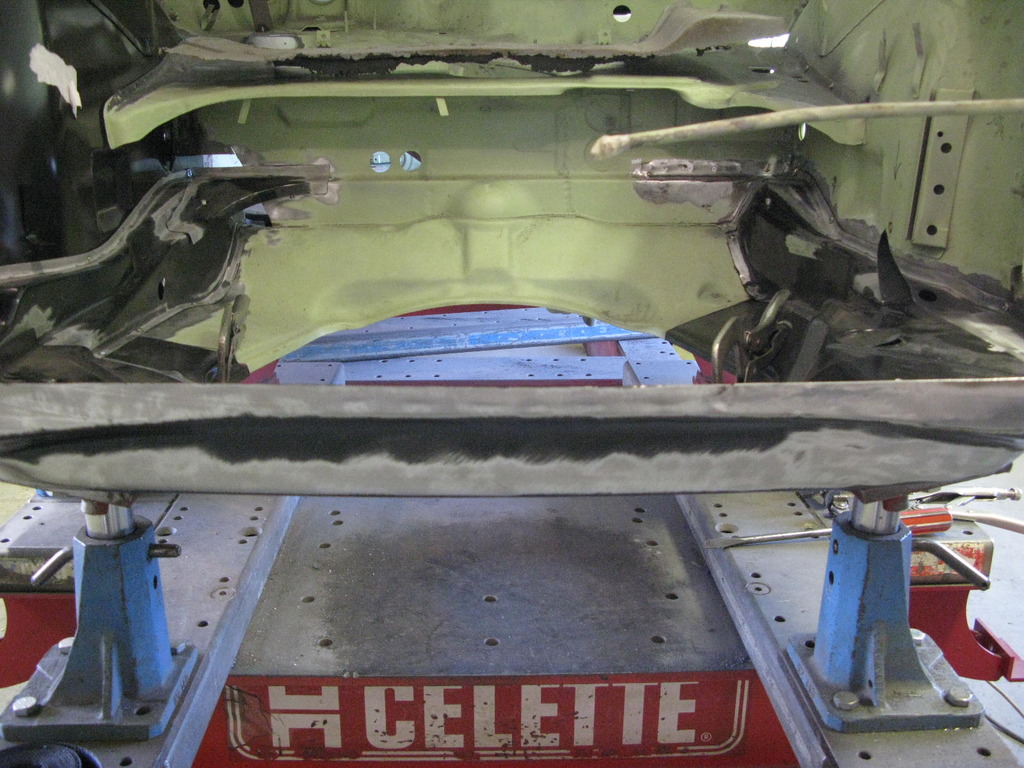
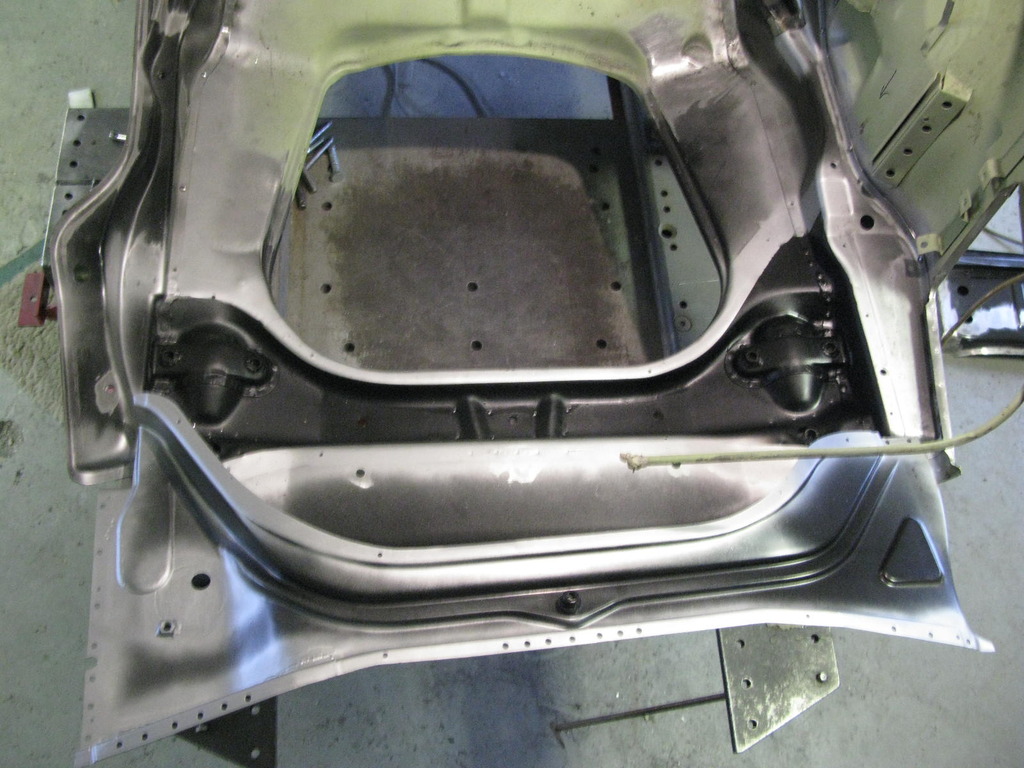
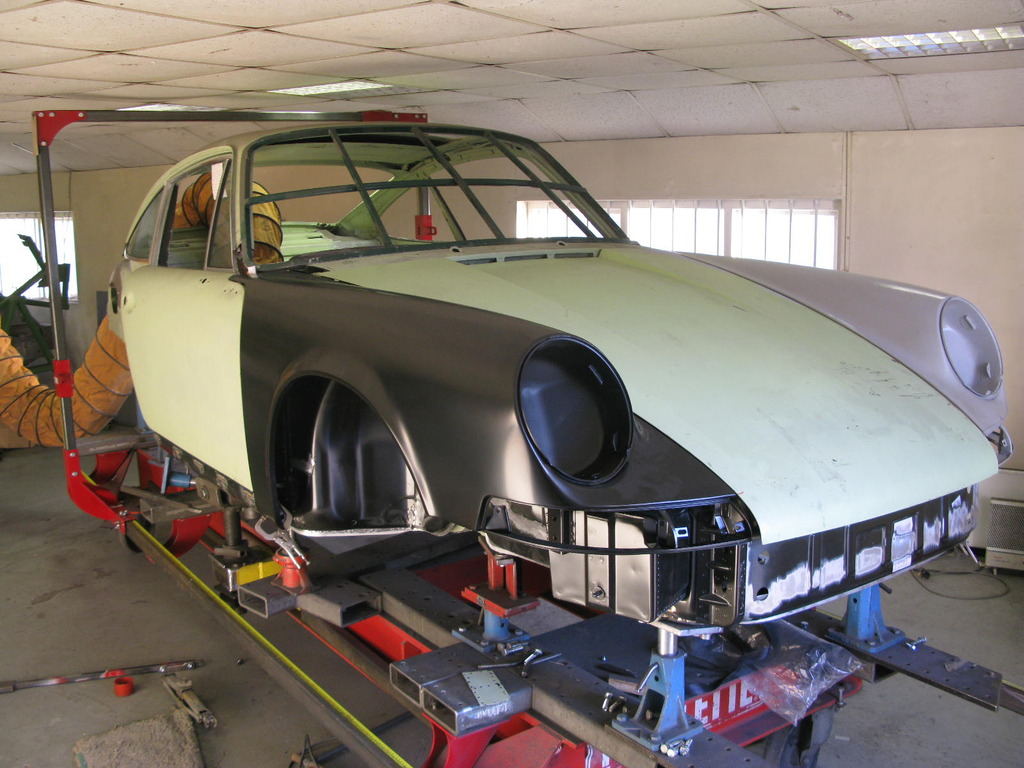
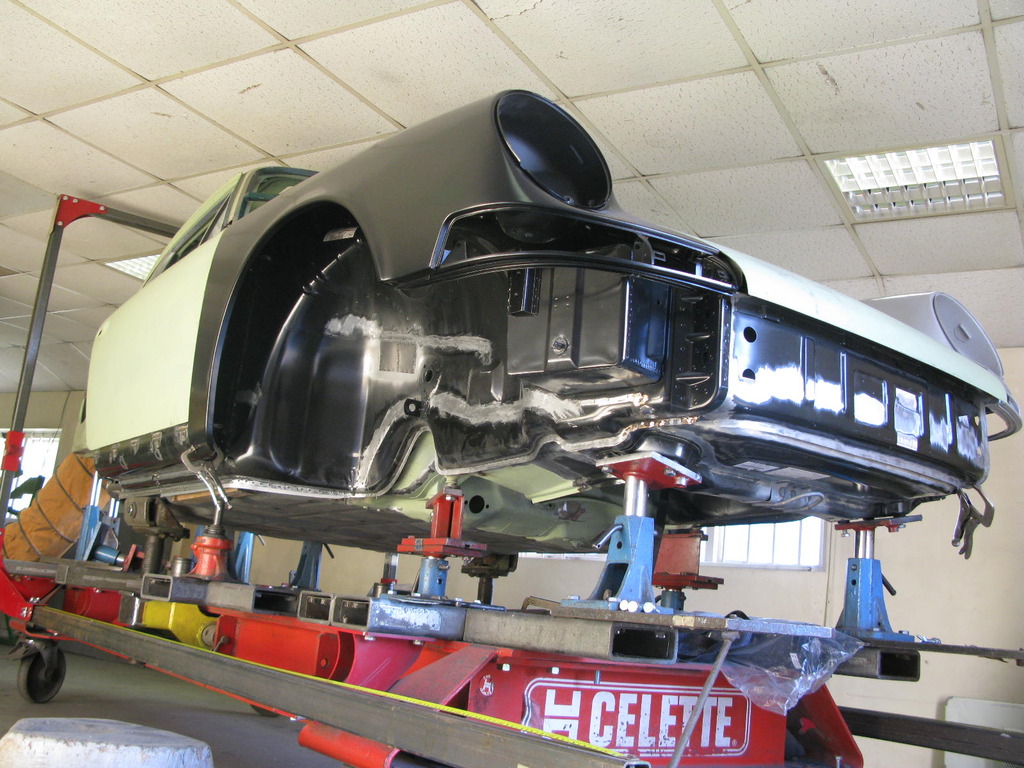
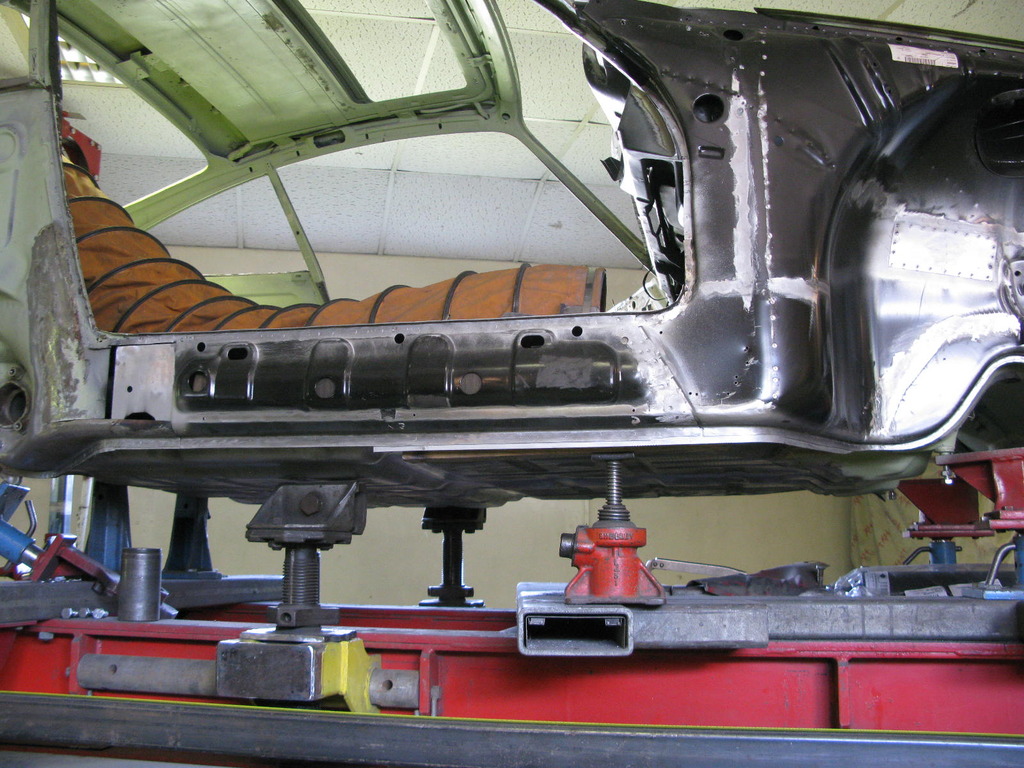
34. Part trial fit of front end.
Other than the new front inner wing, all of the panels have been stripped and blasted ready for welding, and whilst at it, Barry did a few others that were around such as the kidney bowls and jacking points etc.
One thing that Barry has tried to show is one advantage of having the car sitting on a bracket jig during the restoration, rather than visits to a modern quick-pull bench. Because it has lots of cross beams, there is always something you can eye-ball through to make sure everything is sitting straight and true. He tries to make a habit of this all around the car, all through the build. It's a really quick and easy way of making sure you're not building problems into the shell.
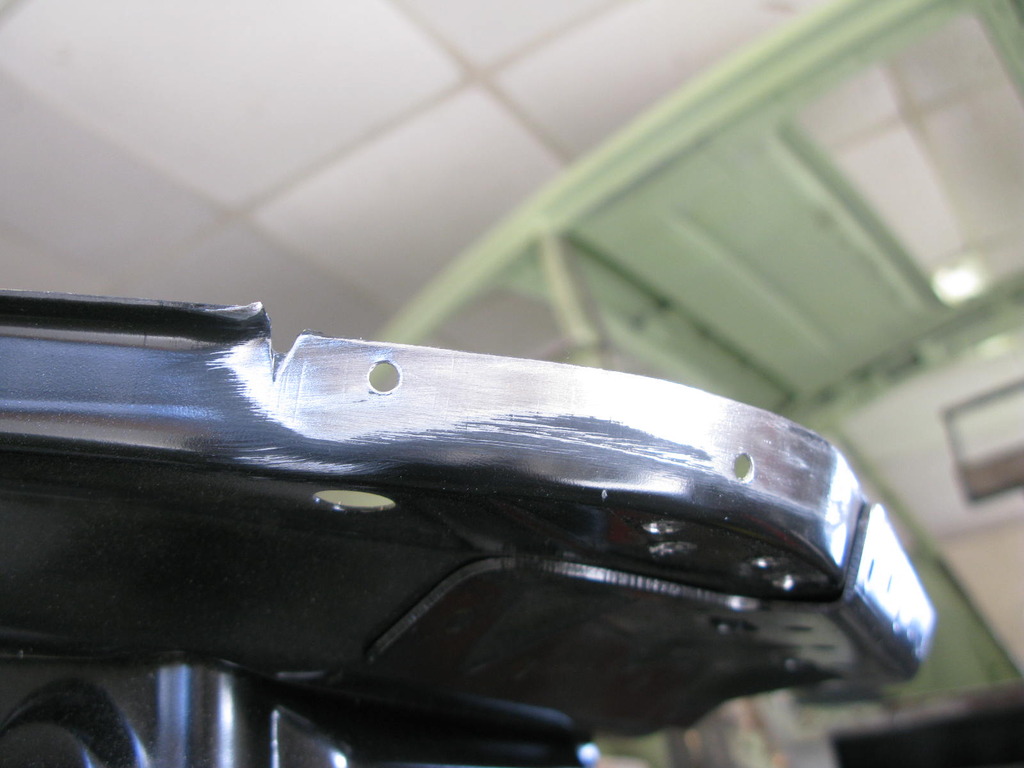
35. Front pan backdate.
Another detail: the front pans supplied are for impact bumper cars, so are different at the top lip. Barry weld's these up, and later on puts in place the missing 'half moons' as per early cars.
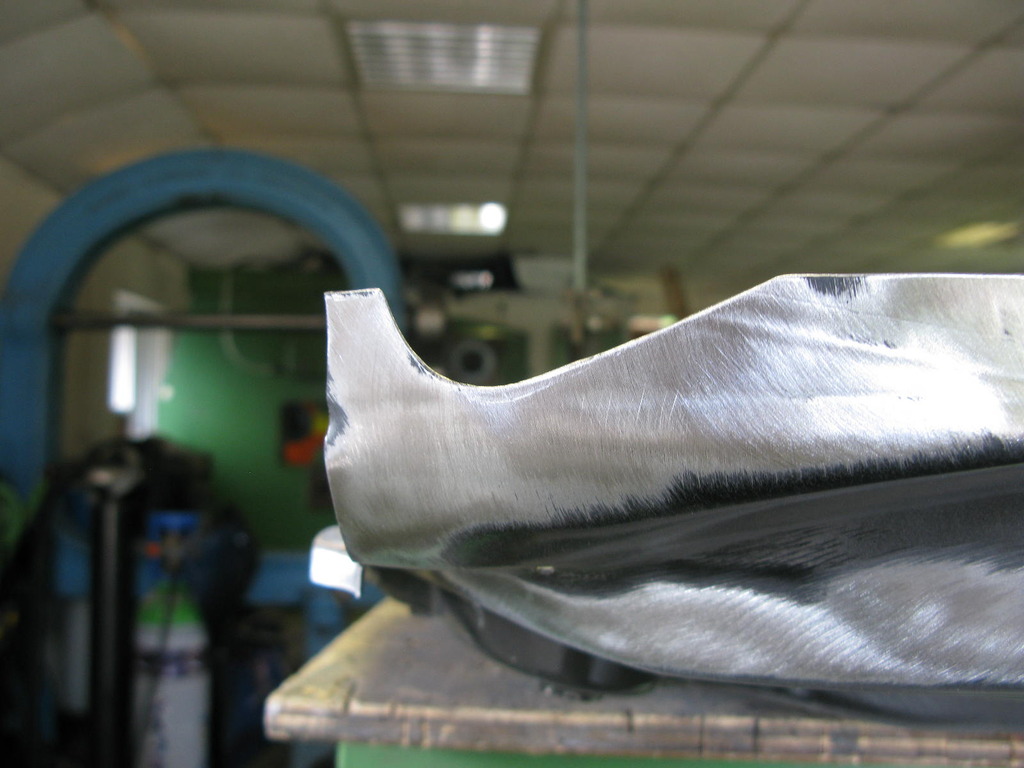
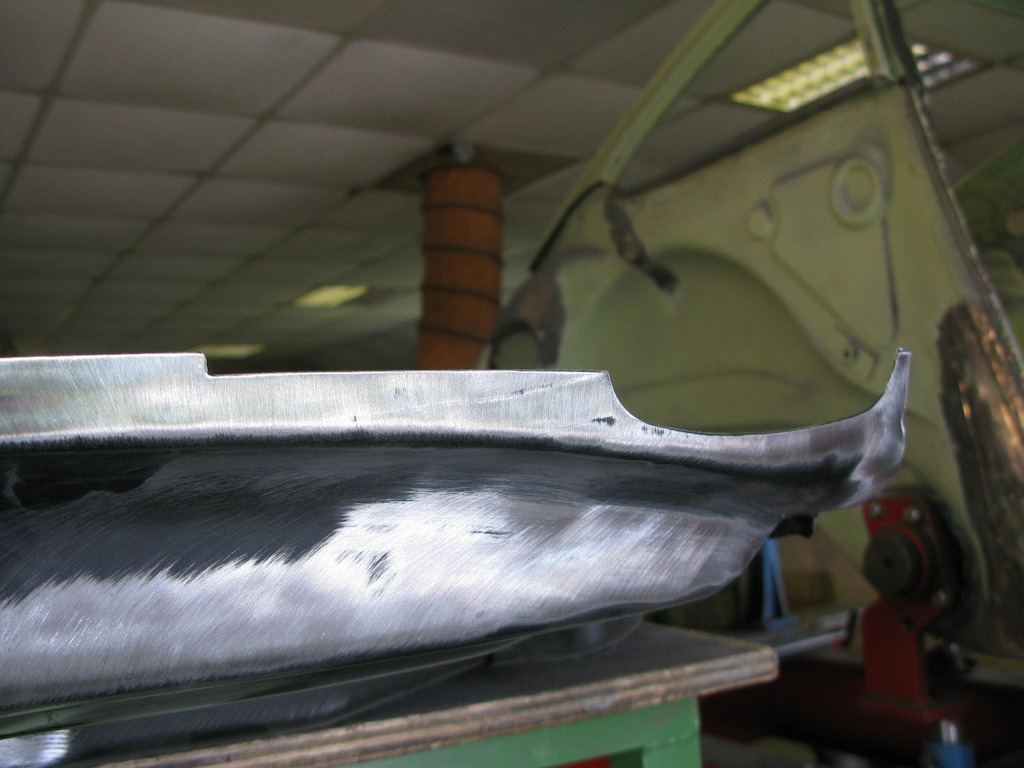
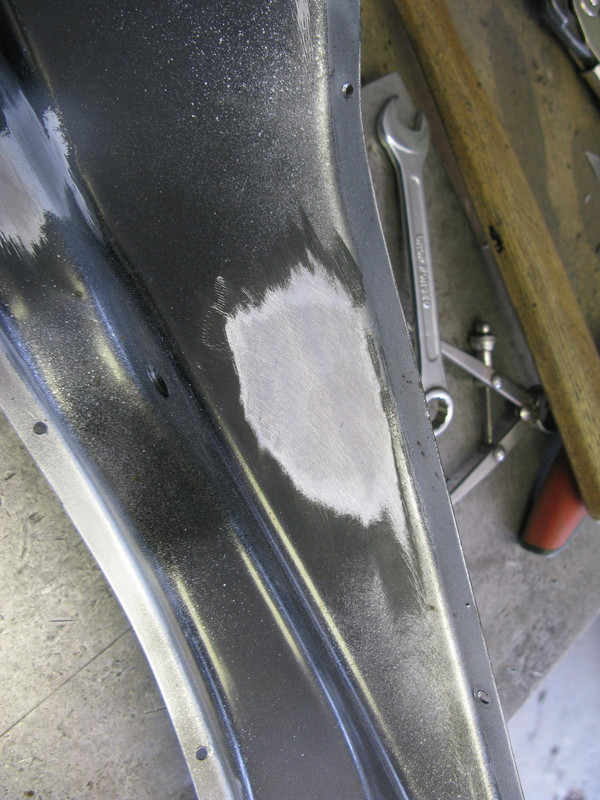
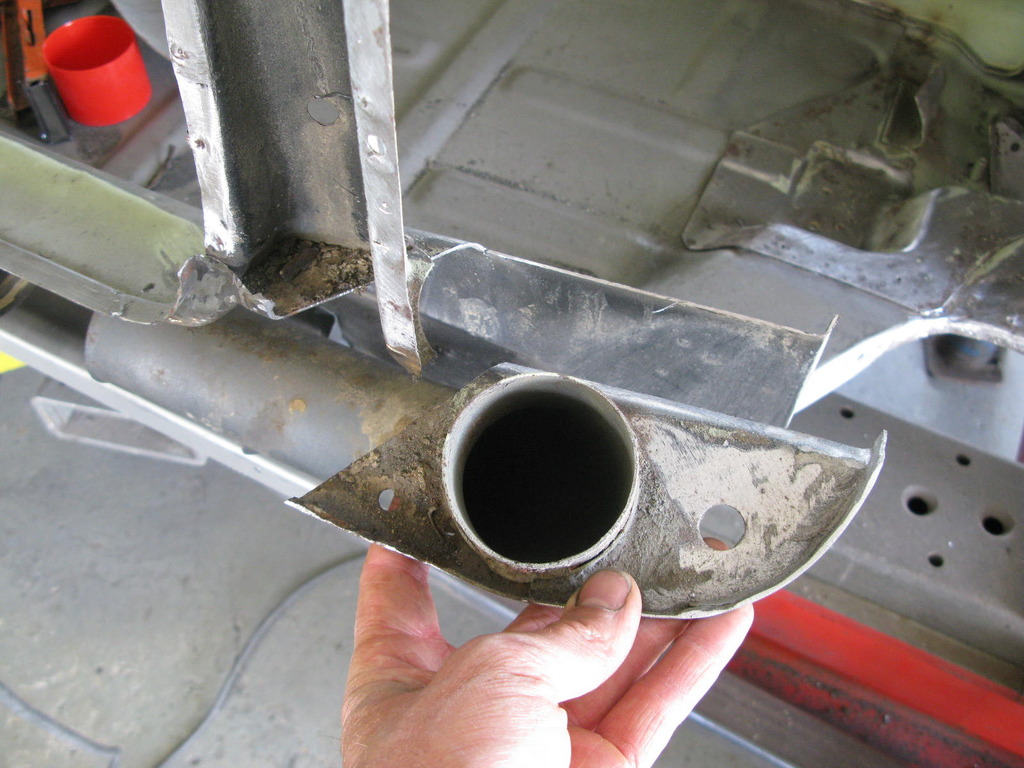
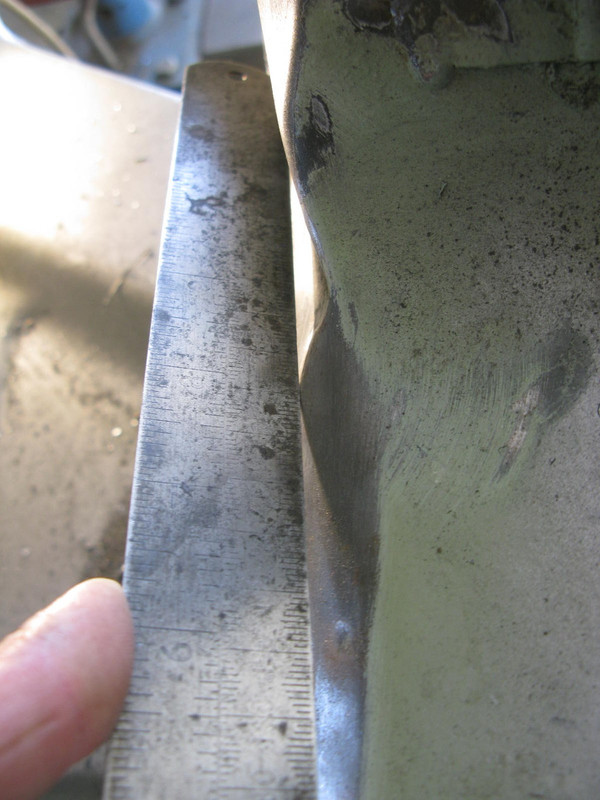
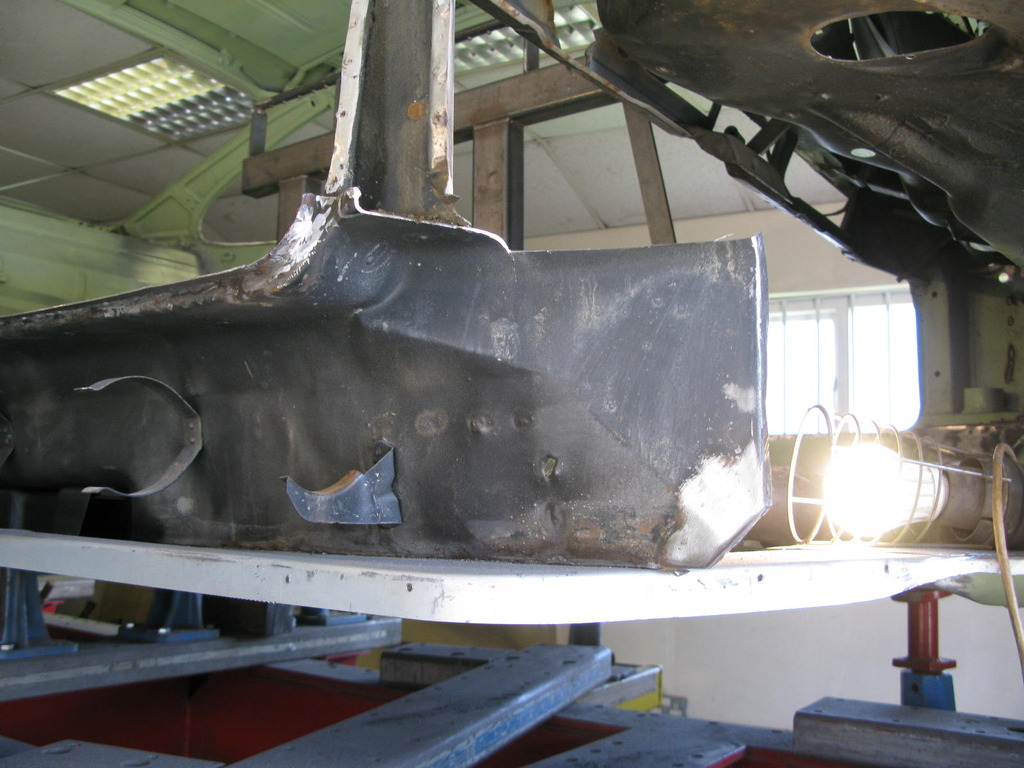
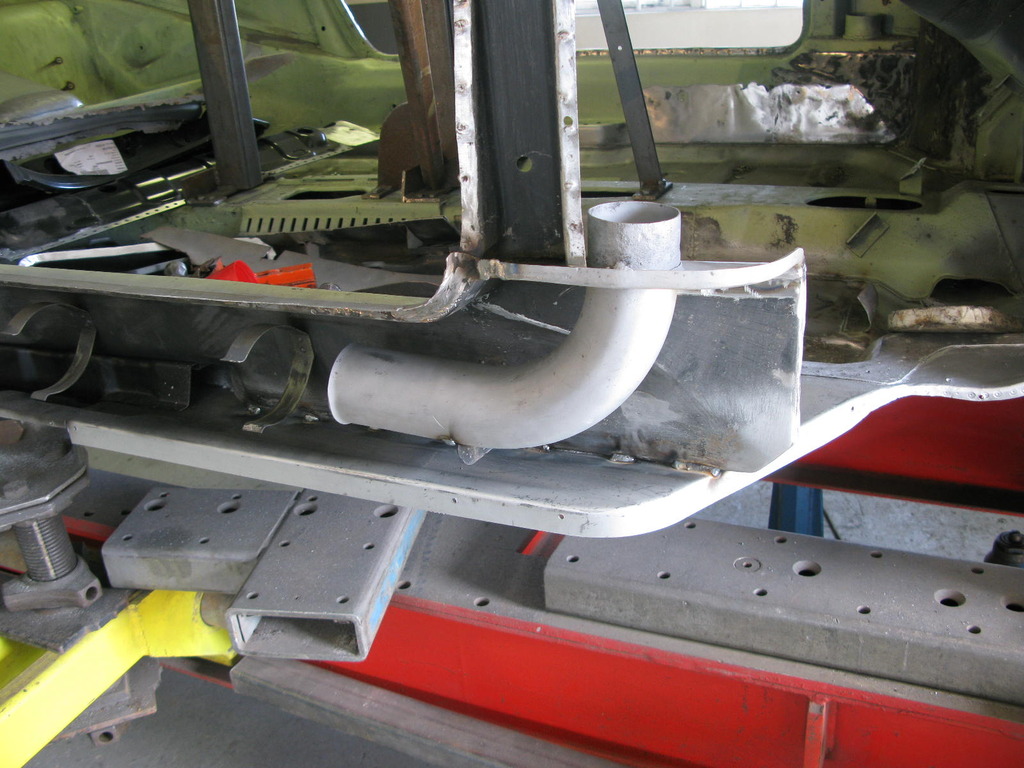
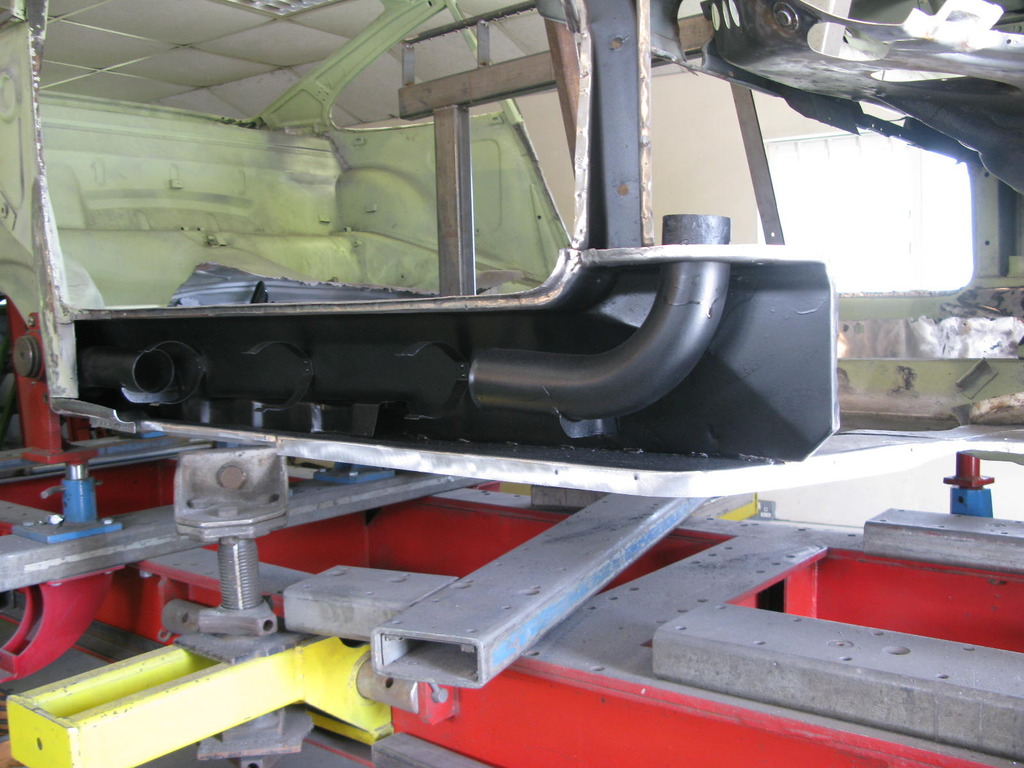
36. Tank support backdate
A work in progress. The tank supports are impact bumper car parts so Barry removes the impact areas, reworks the actual shape, chops a section out, fabricates a new front area, and welds it in. Also shown is some back-date work to the inner wing, both front chassis legs and the front pan (already mentioned).
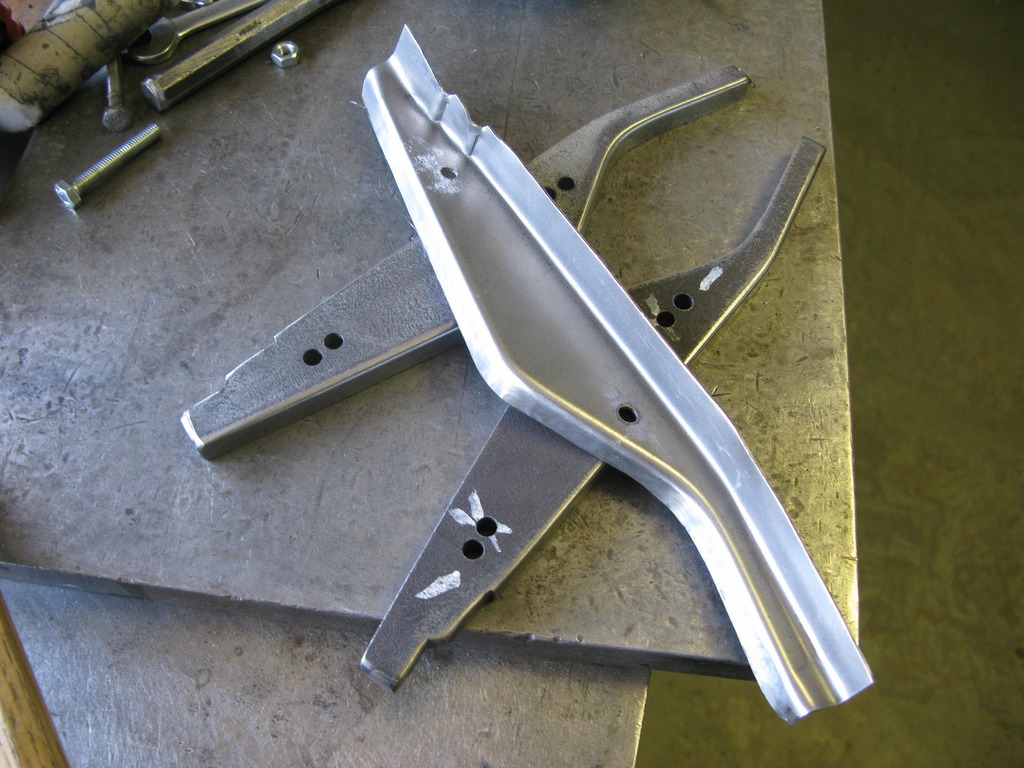
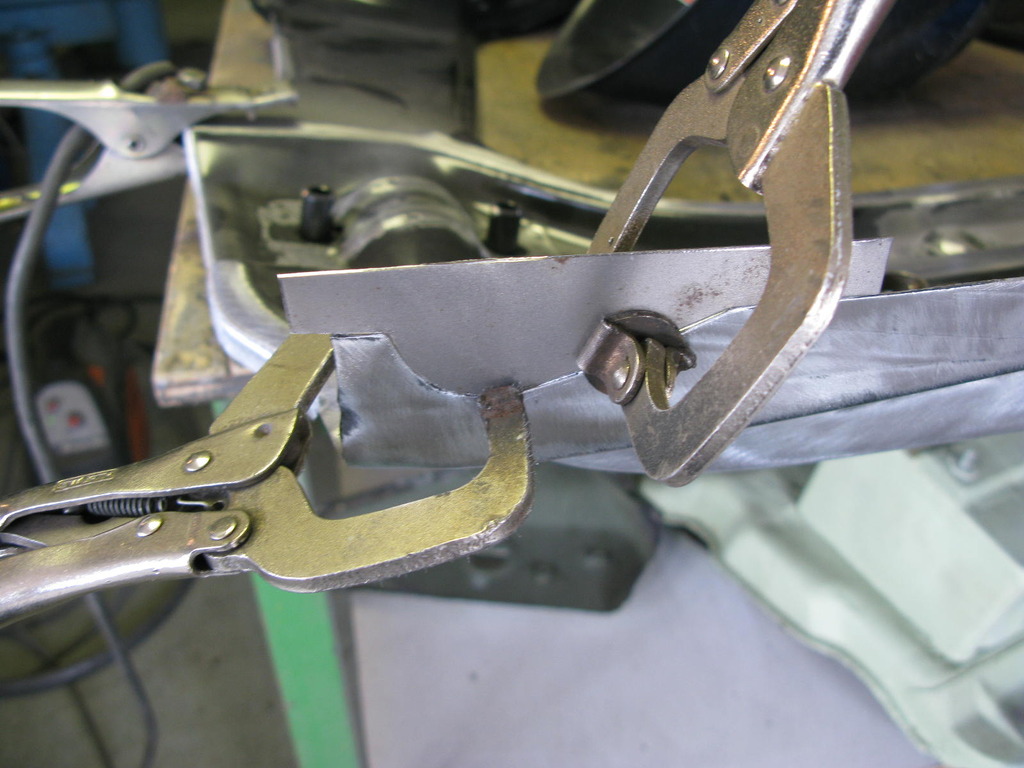
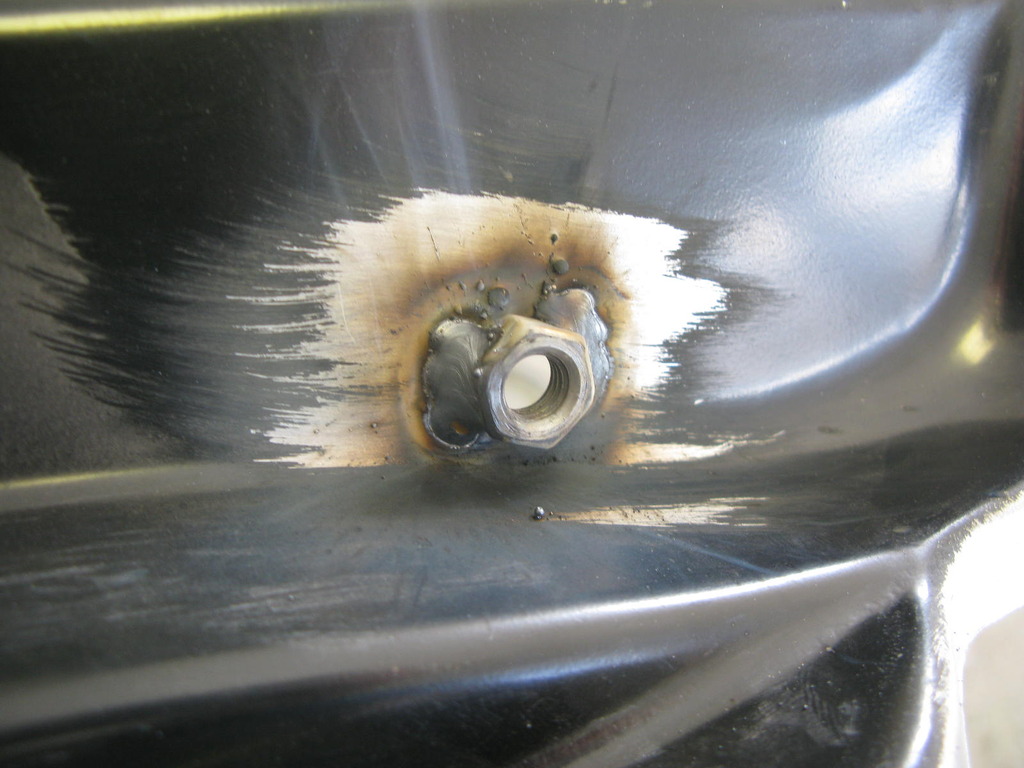
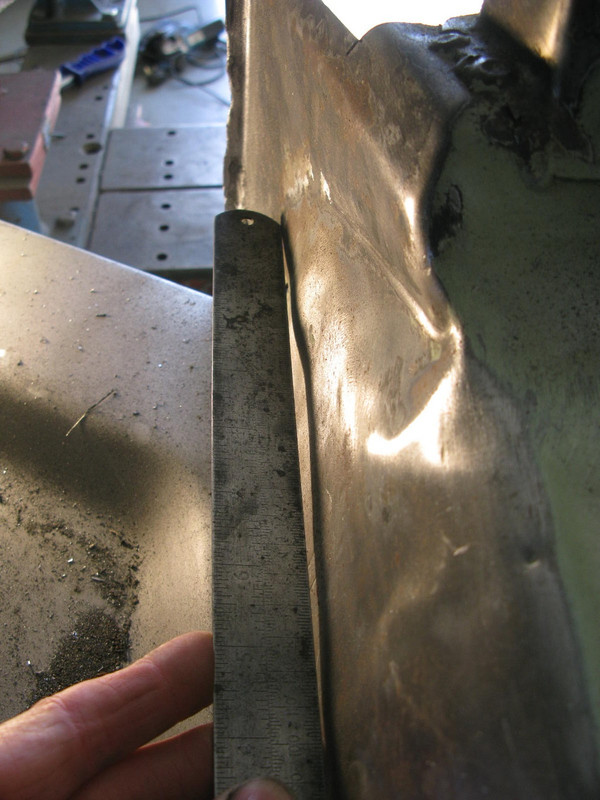
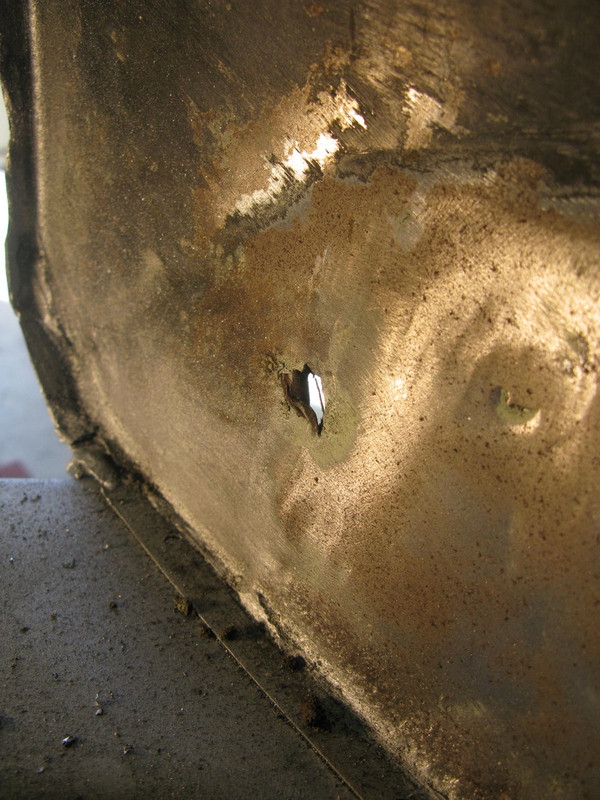
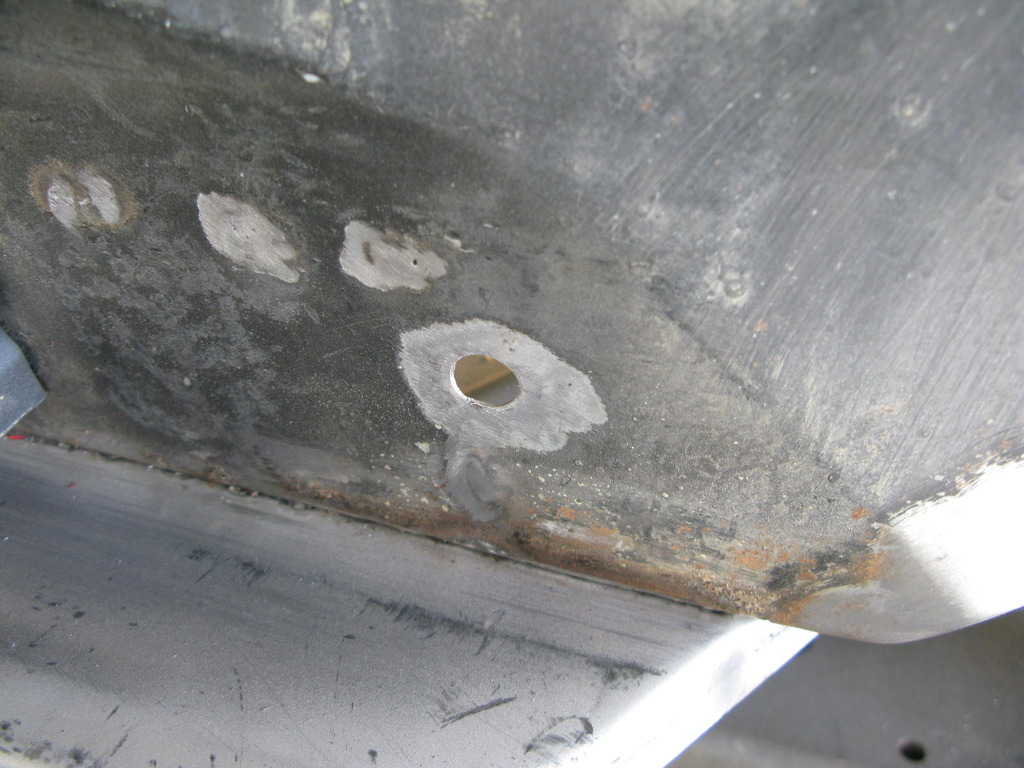
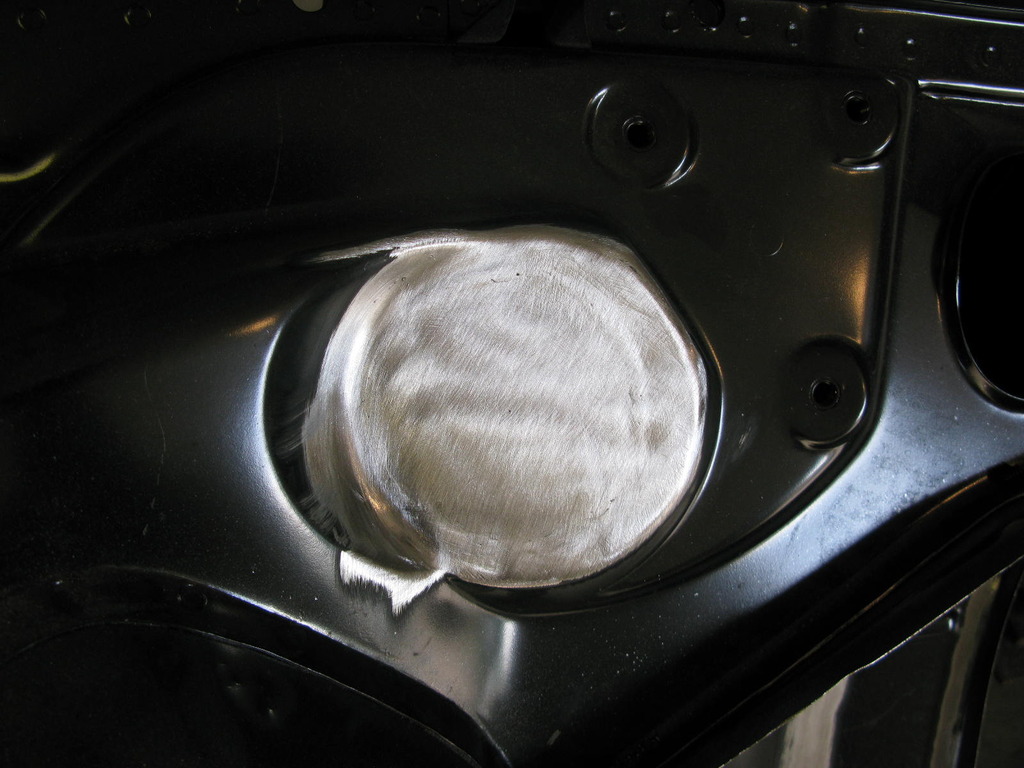
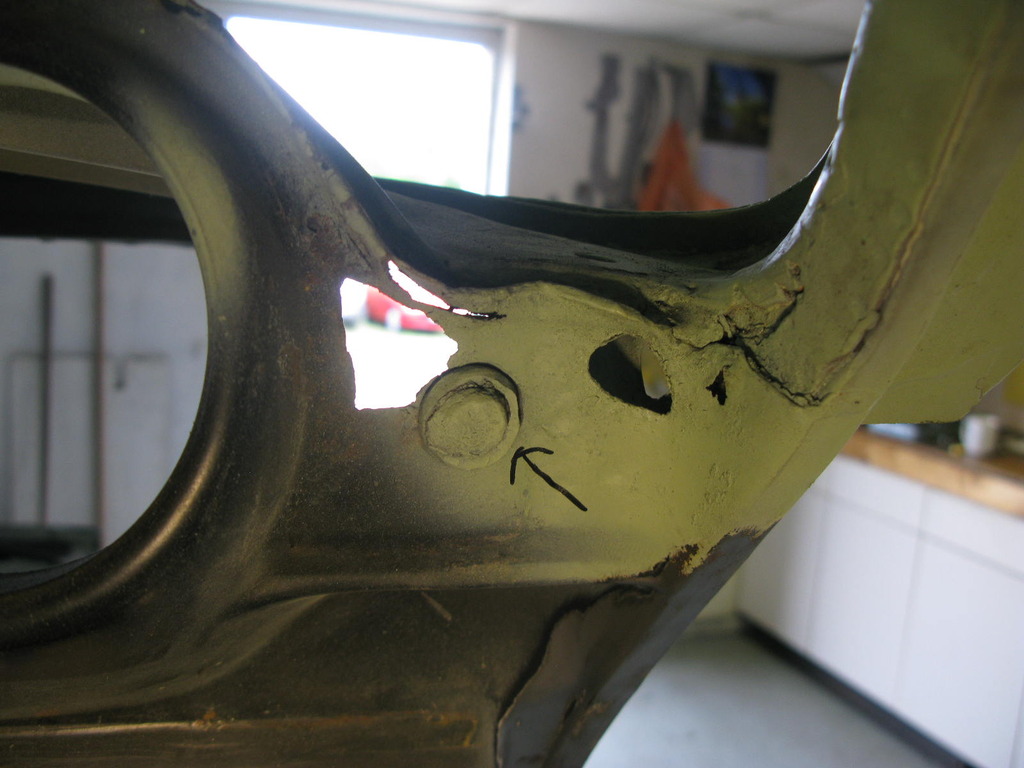
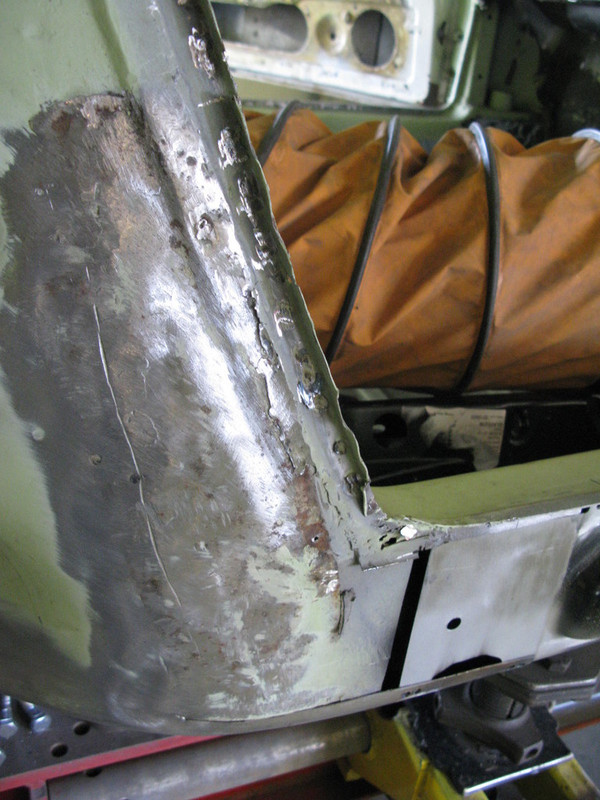
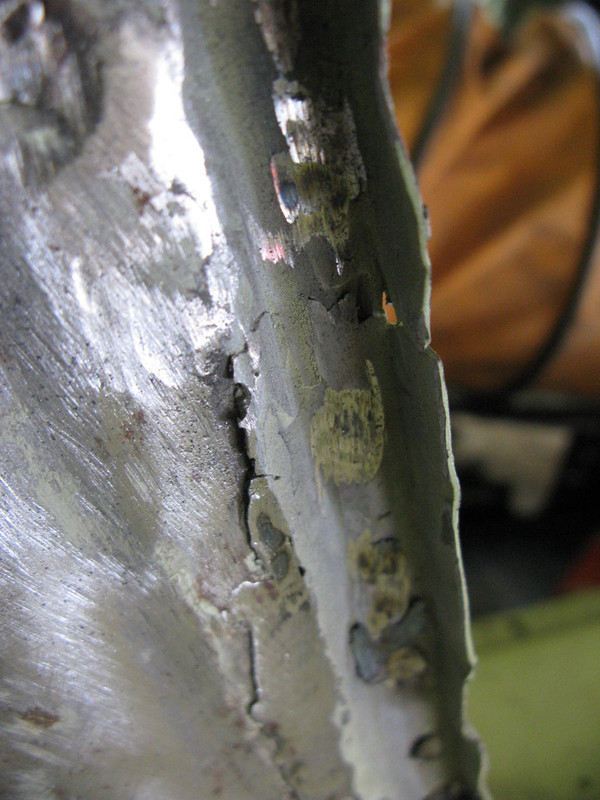
37. Chassis leg backdate.
The nearside chassis leg (technically tank support member) had a hole in it we didn't want, and a missing captive nut that we did.
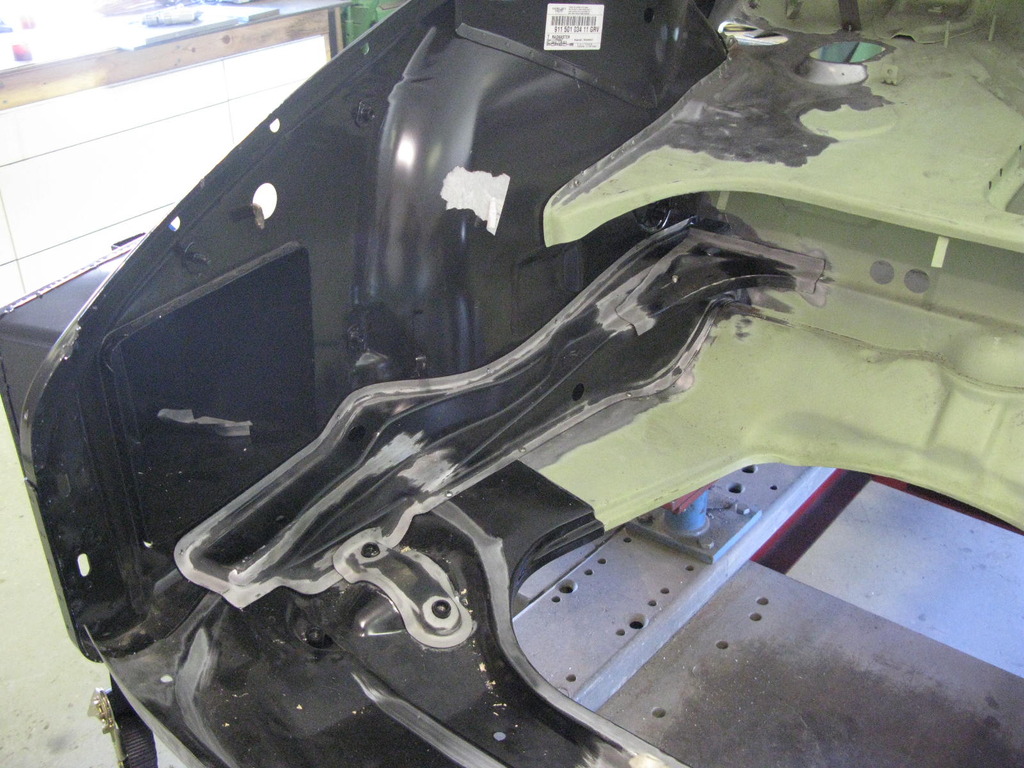
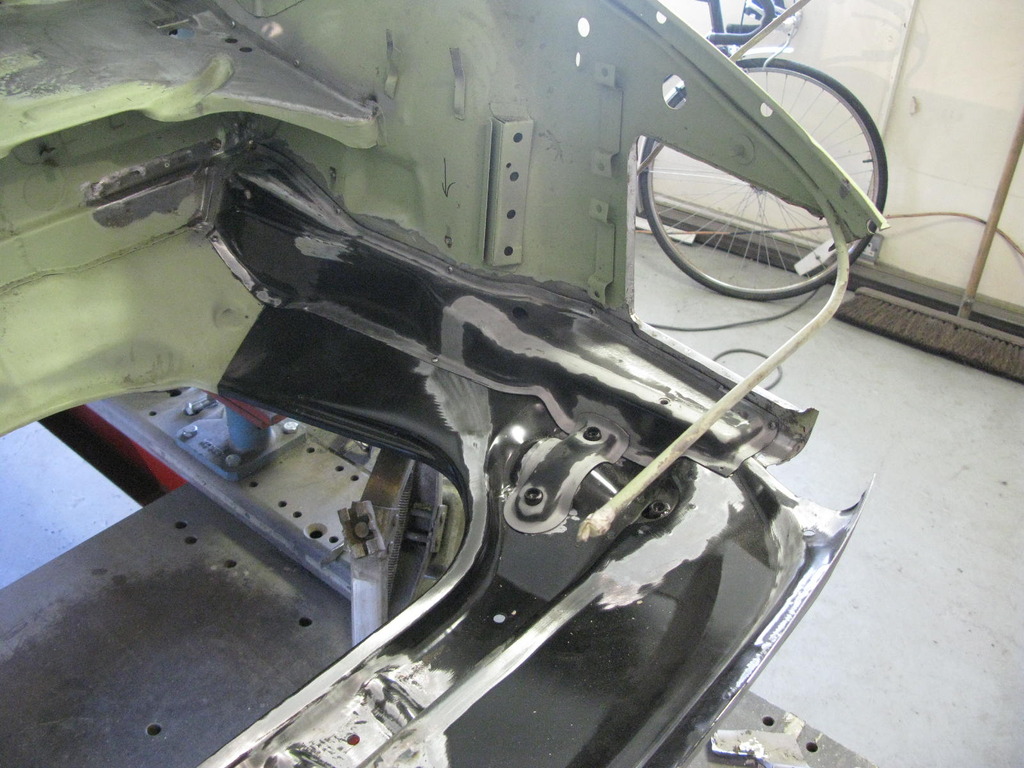
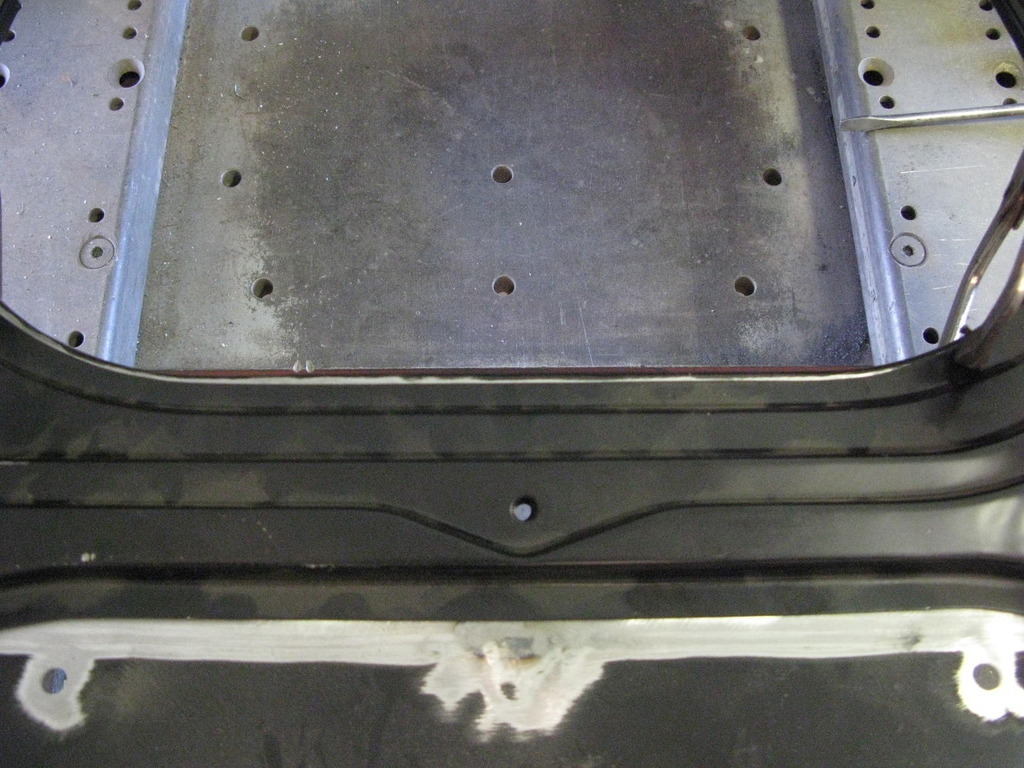
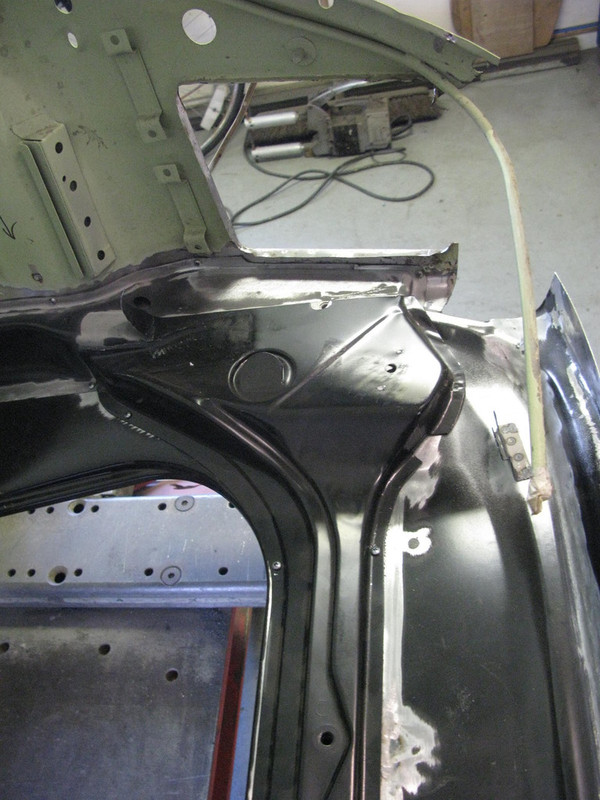
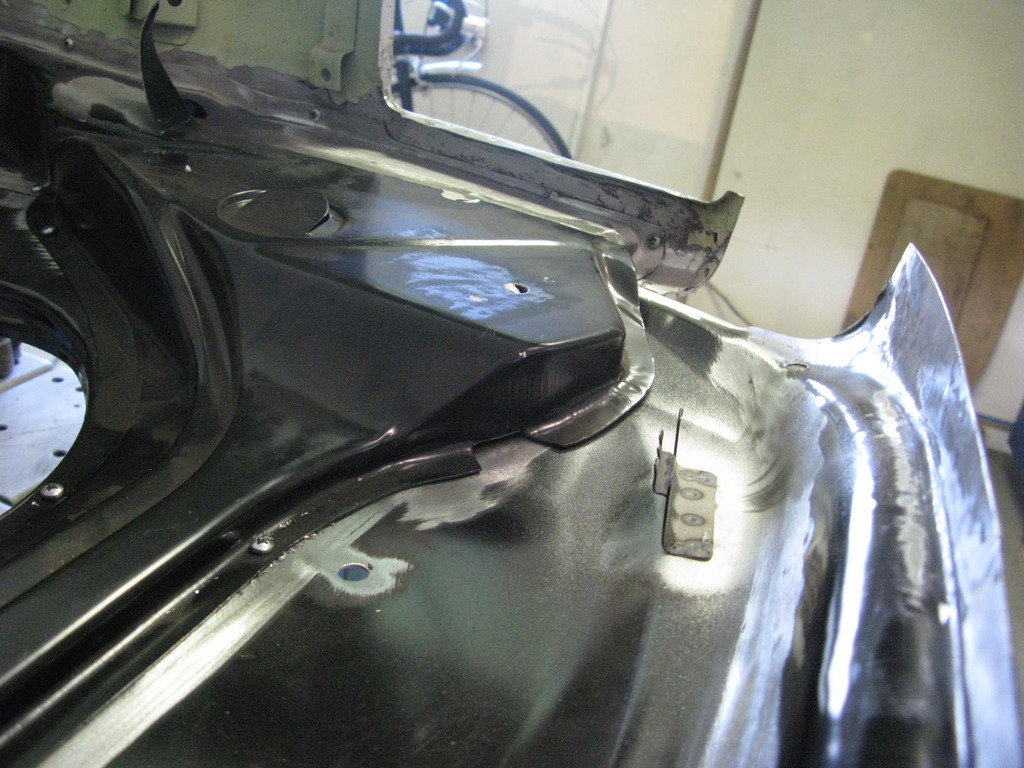
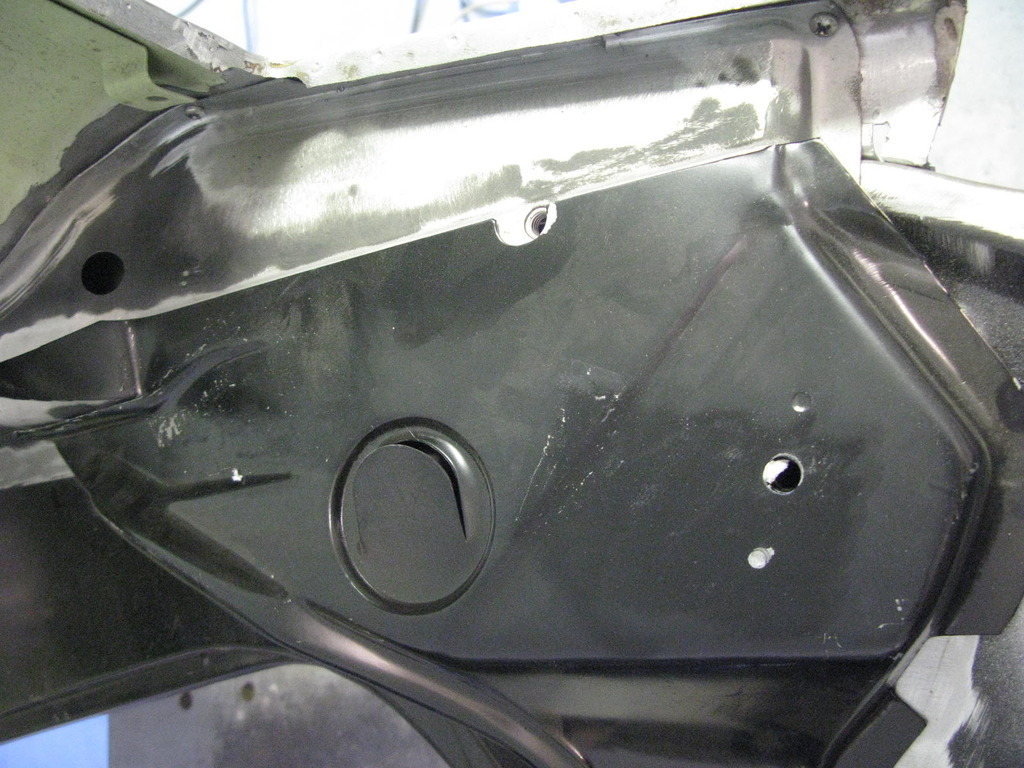
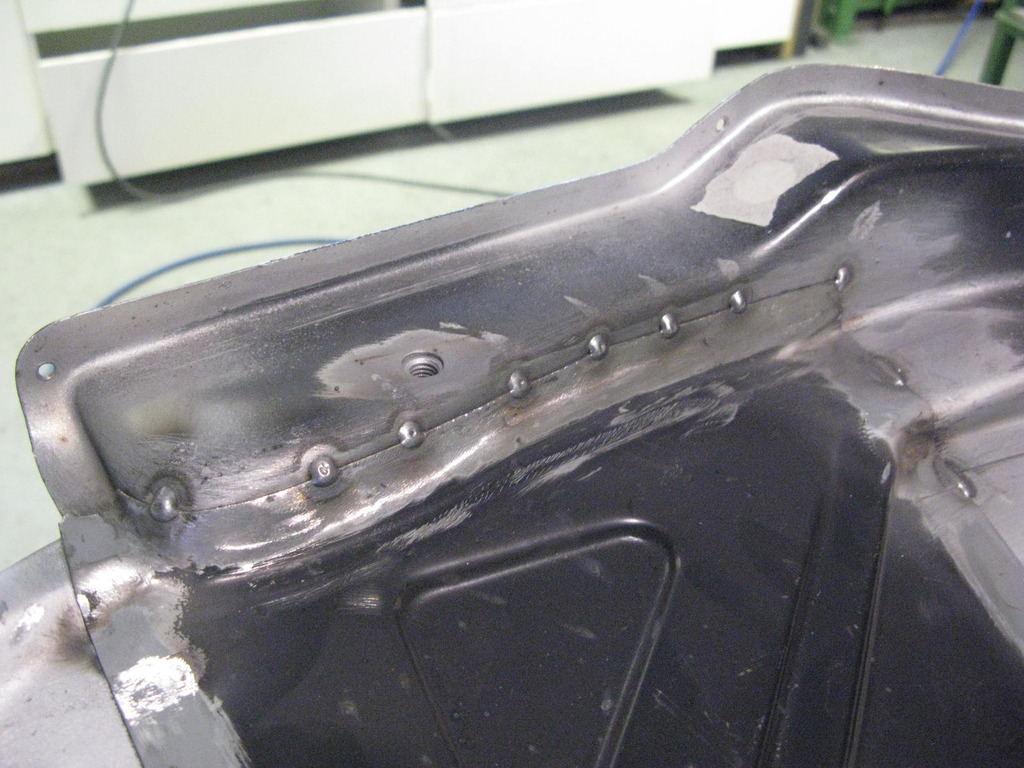
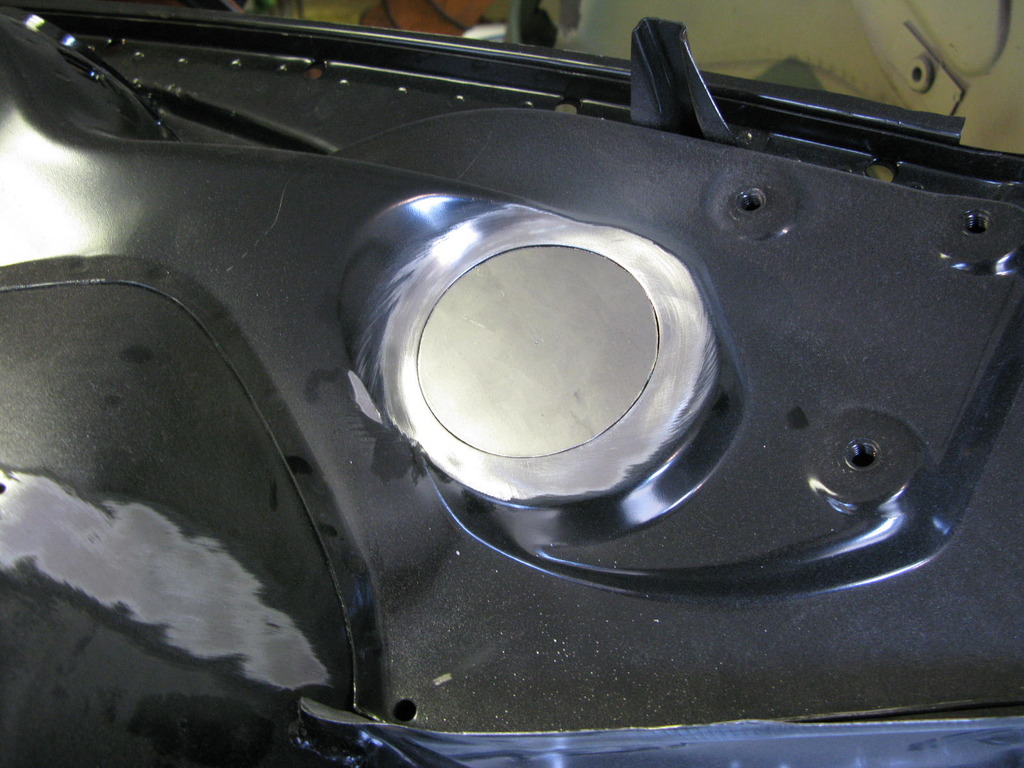
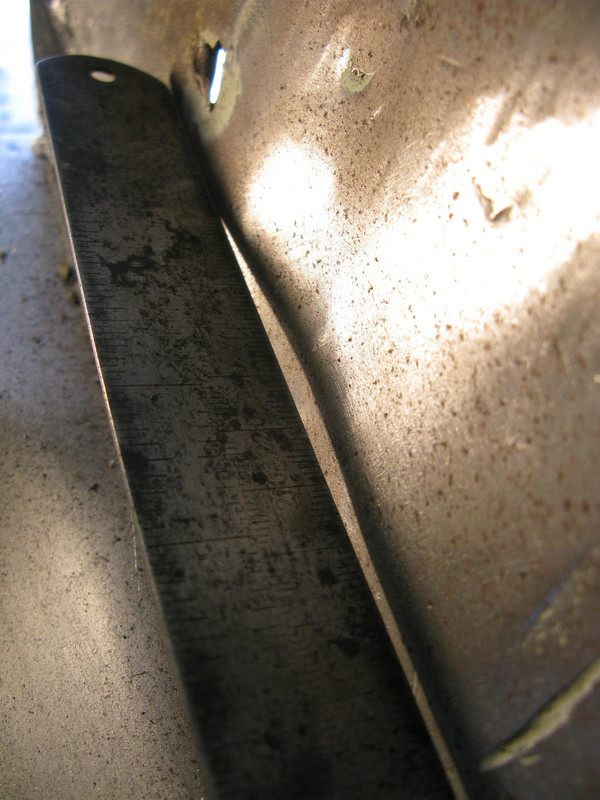
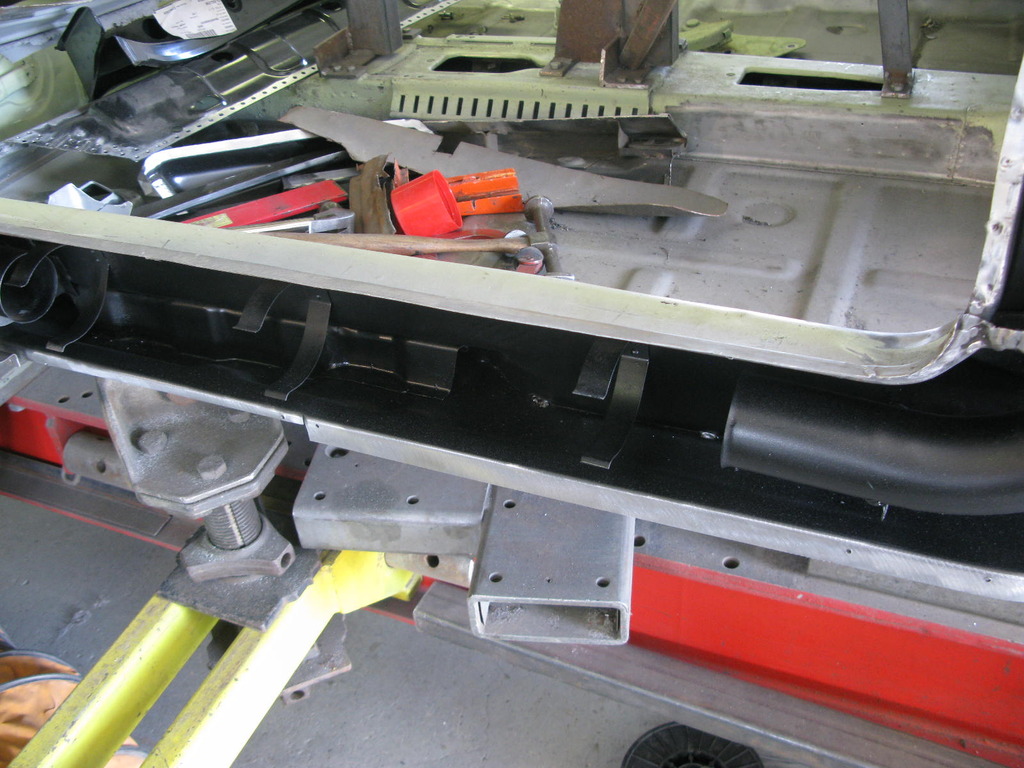
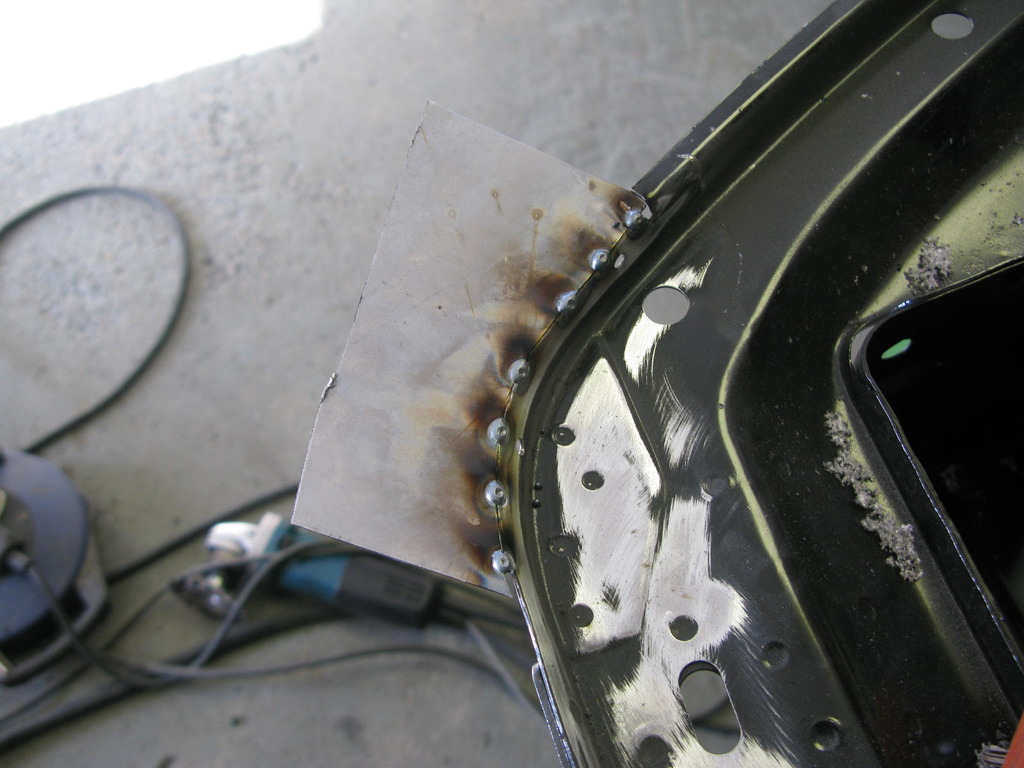
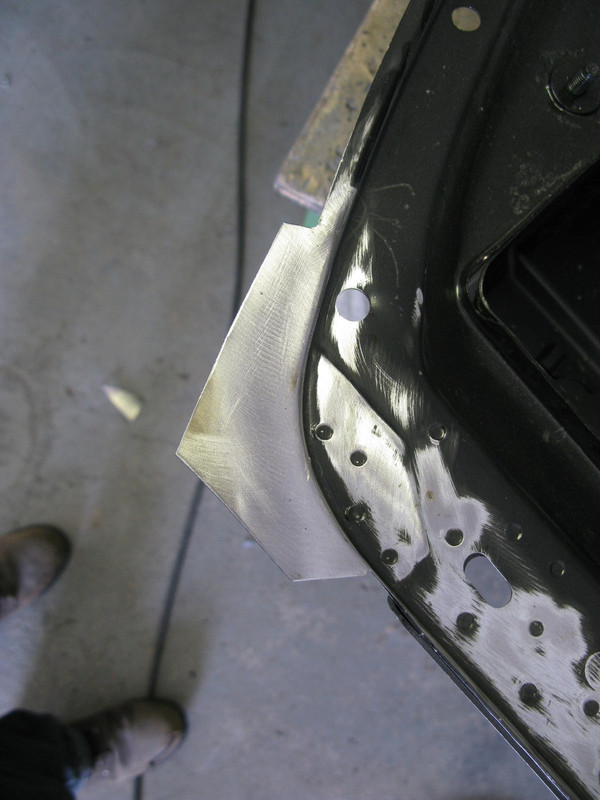
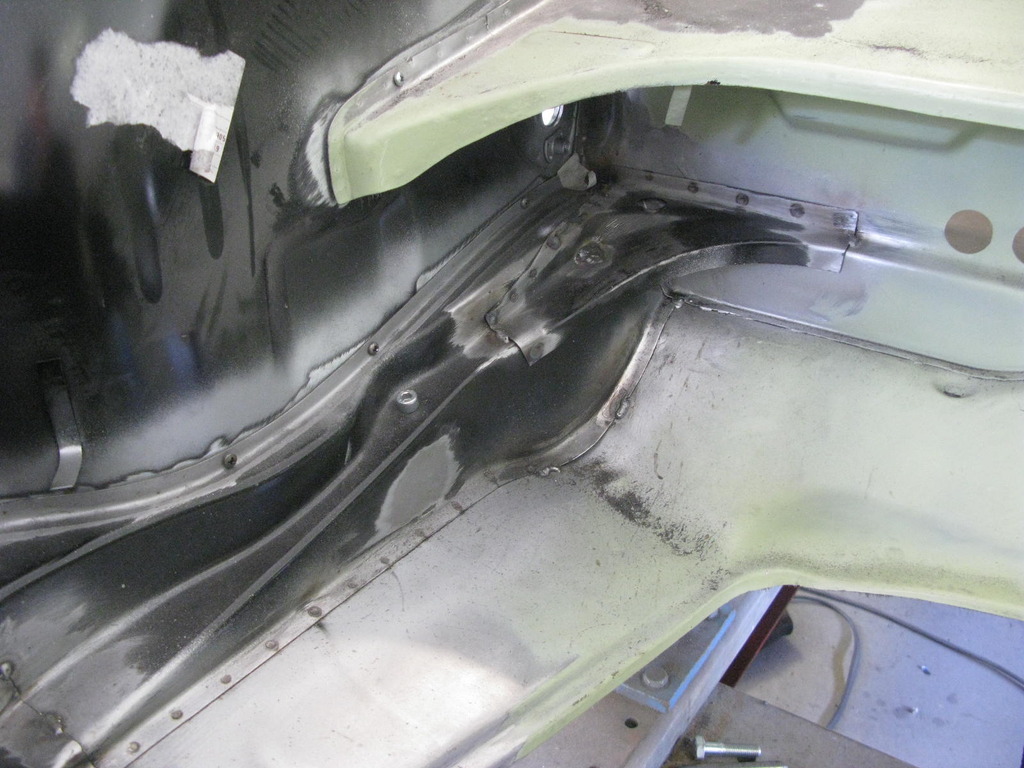
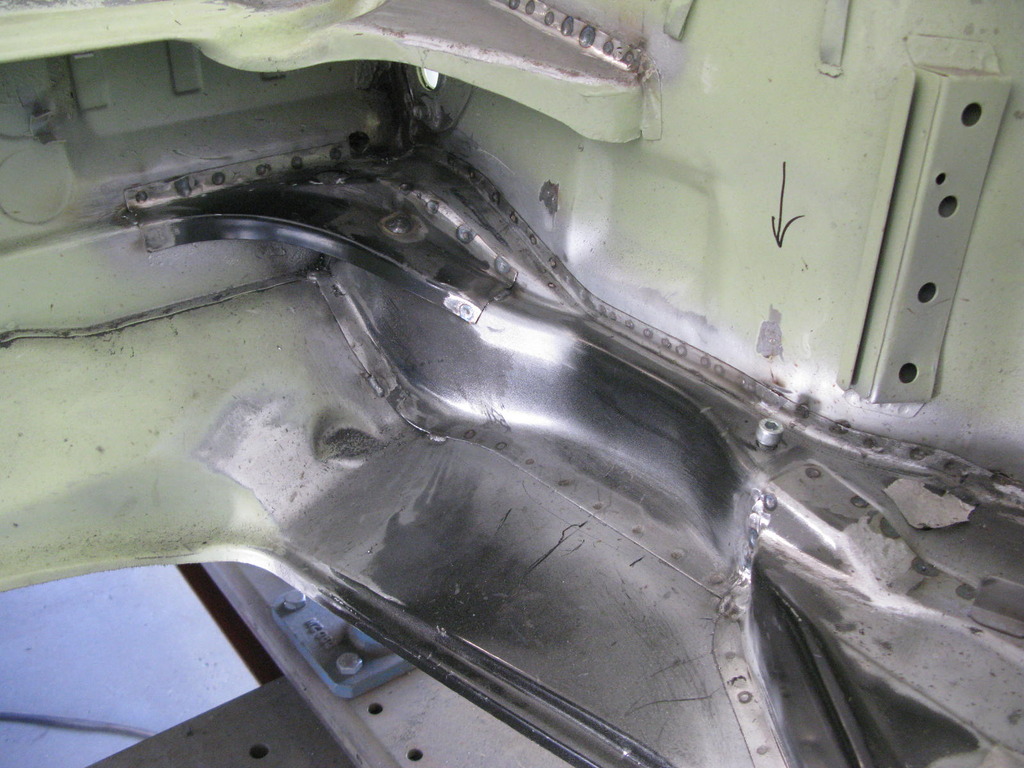
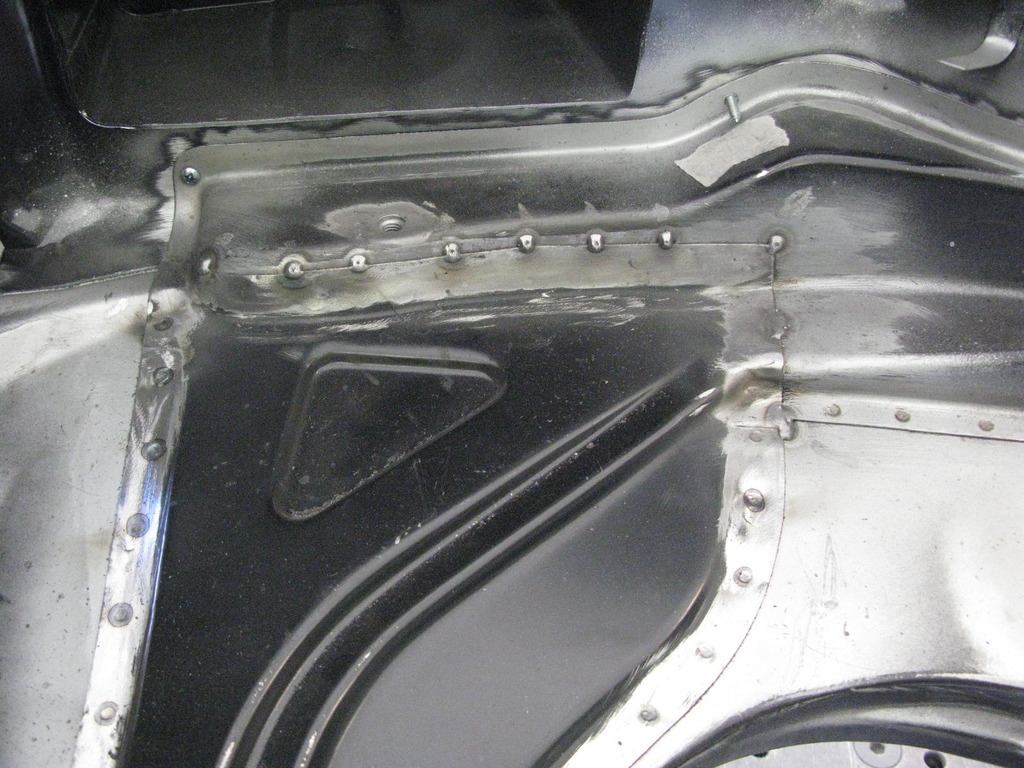
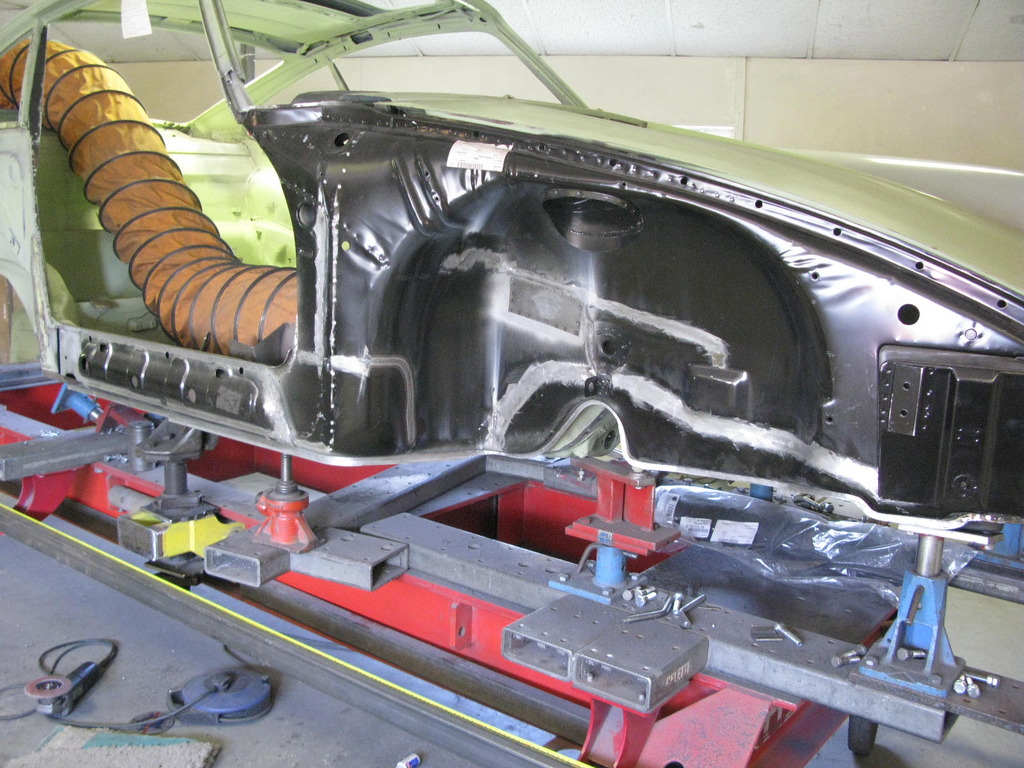
38. Front pan area going in
With the front pan mounted to the jig and scribed into the original metal, it could be butt welded in. Most of Barry's welding time is taken with making sure both sides are nicely aligned. His welder is a gem, and if you get the preparation right, virtually invisible welds with very little linishing become routine. The problems arise if you let the two halves become fractionally misaligned, at which point discreet welds become impossible without over-thinning the metal.
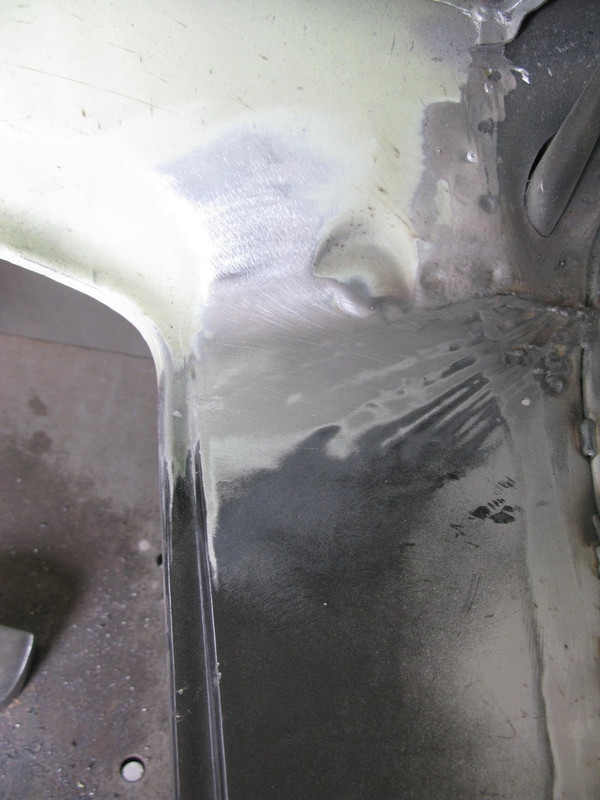
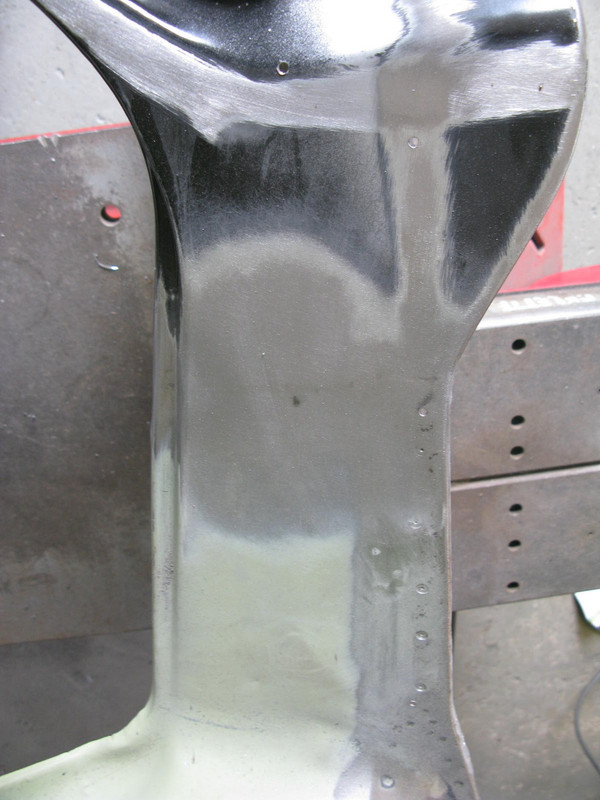
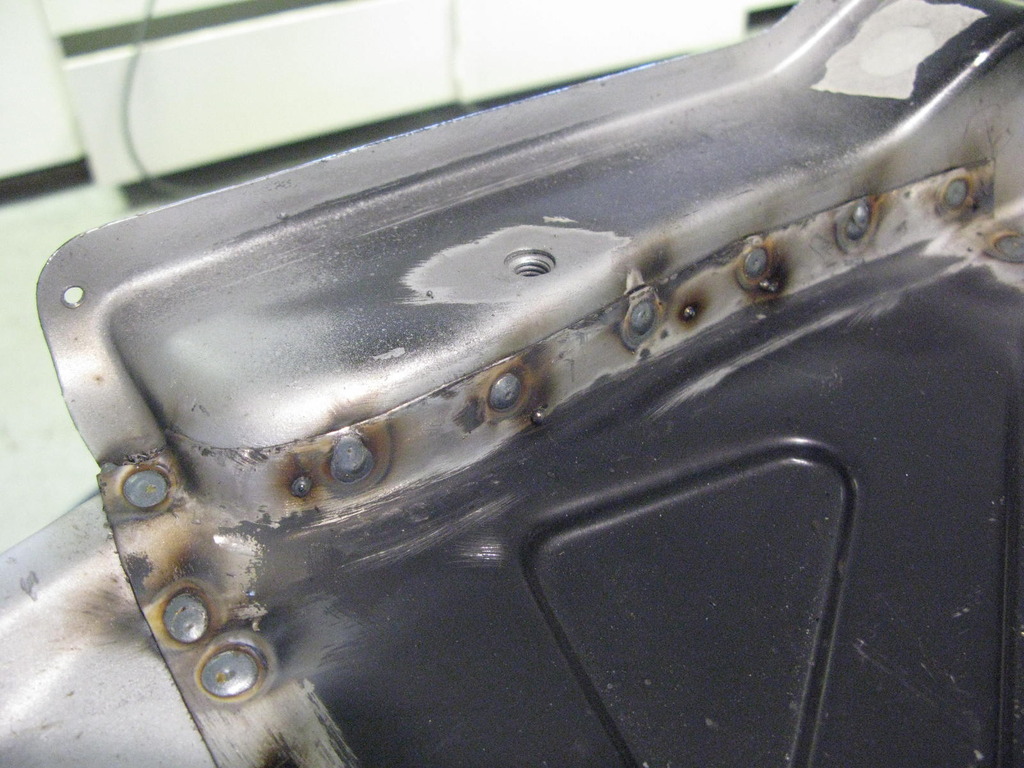
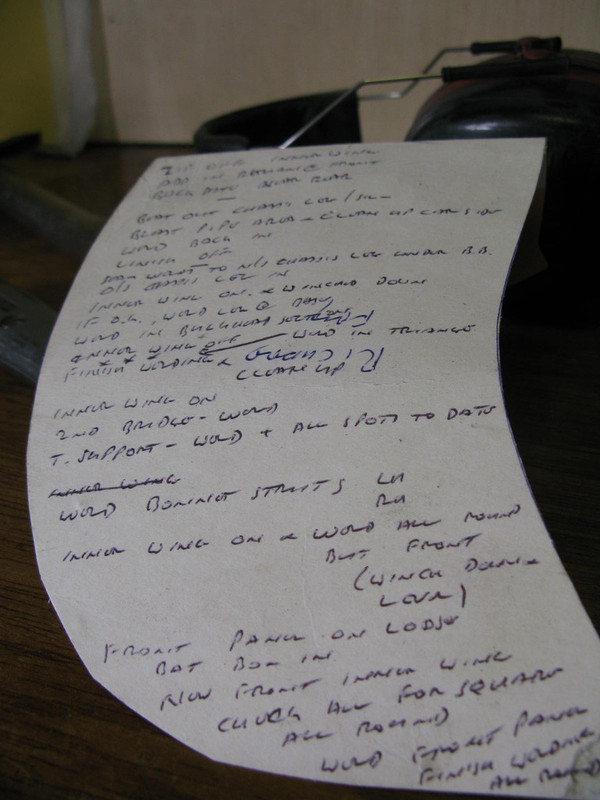
With the pan in, the two reinforcing bridges go in, and the whole area is liberally primed. For cars like this, where the factory welds have been lost, he has a load of reference pictures so that he can mark on where his dog-rough factory welds need to be. In the case of the pan, he actually back's these up with invisible plug welds, so the 'factory' ones are pretty much cosmetic.
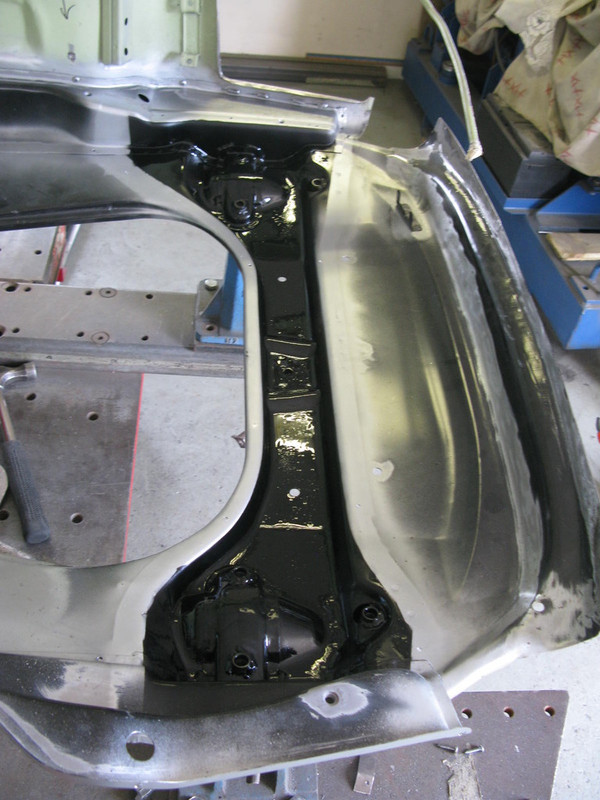

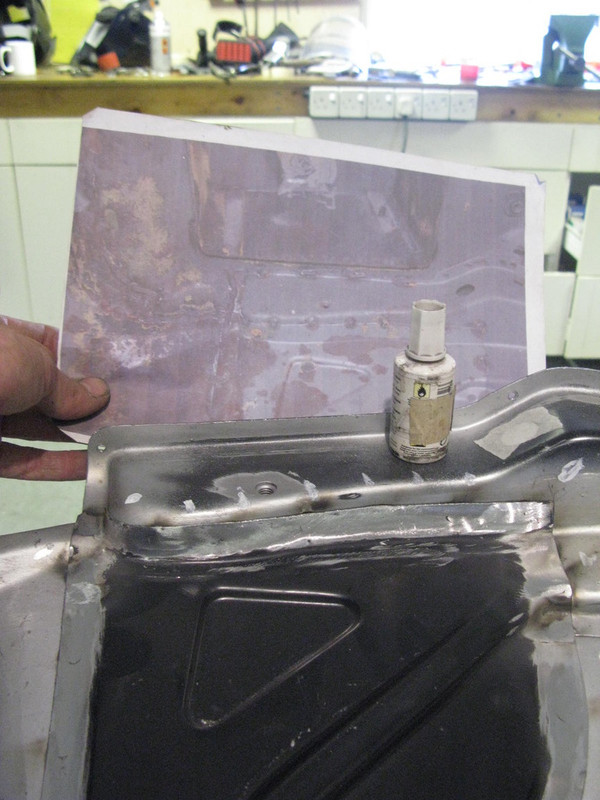
After each spot welding session Barry tests a few spot welds just to make sure they have taken O.K. He doesn't go mad, he just wants to hear the sound is correct, and then just taps them back down. He's especially wary of spot welds that go from old metal to new, and generally prefers to plug weld them as the principle holding method, even if he follows them with spot welds as well, just for appearances. The likelihood then is that you've pretty much ended up with two lots of good welds, but better this way....
Yes, this represents some serious pocket money, Dr.F's finest... The degree of silver showing illustrates the extent of preparation and modification involved in getting a front end kit ready to fit.
34. Part trial fit of front end.
Other than the new front inner wing, all of the panels have been stripped and blasted ready for welding, and whilst at it, Barry did a few others that were around such as the kidney bowls and jacking points etc.
One thing that Barry has tried to show is one advantage of having the car sitting on a bracket jig during the restoration, rather than visits to a modern quick-pull bench. Because it has lots of cross beams, there is always something you can eye-ball through to make sure everything is sitting straight and true. He tries to make a habit of this all around the car, all through the build. It's a really quick and easy way of making sure you're not building problems into the shell.
35. Front pan backdate.
Another detail: the front pans supplied are for impact bumper cars, so are different at the top lip. Barry weld's these up, and later on puts in place the missing 'half moons' as per early cars.
36. Tank support backdate
A work in progress. The tank supports are impact bumper car parts so Barry removes the impact areas, reworks the actual shape, chops a section out, fabricates a new front area, and welds it in. Also shown is some back-date work to the inner wing, both front chassis legs and the front pan (already mentioned).
37. Chassis leg backdate.
The nearside chassis leg (technically tank support member) had a hole in it we didn't want, and a missing captive nut that we did.
38. Front pan area going in
With the front pan mounted to the jig and scribed into the original metal, it could be butt welded in. Most of Barry's welding time is taken with making sure both sides are nicely aligned. His welder is a gem, and if you get the preparation right, virtually invisible welds with very little linishing become routine. The problems arise if you let the two halves become fractionally misaligned, at which point discreet welds become impossible without over-thinning the metal.
With the pan in, the two reinforcing bridges go in, and the whole area is liberally primed. For cars like this, where the factory welds have been lost, he has a load of reference pictures so that he can mark on where his dog-rough factory welds need to be. In the case of the pan, he actually back's these up with invisible plug welds, so the 'factory' ones are pretty much cosmetic.
After each spot welding session Barry tests a few spot welds just to make sure they have taken O.K. He doesn't go mad, he just wants to hear the sound is correct, and then just taps them back down. He's especially wary of spot welds that go from old metal to new, and generally prefers to plug weld them as the principle holding method, even if he follows them with spot welds as well, just for appearances. The likelihood then is that you've pretty much ended up with two lots of good welds, but better this way....
Last edited by aston on Sun Jun 03, 2018 9:00 am, edited 6 times in total.
Kieron.
viewtopic.php?f=28&t=48230
2.4E (1973).
Suzuki DRZ400S (2006).
BMW R1200RS (2018).
Yamaha XT500 (1978).
viewtopic.php?f=28&t=48230
2.4E (1973).
Suzuki DRZ400S (2006).
BMW R1200RS (2018).
Yamaha XT500 (1978).
-
Darren65
- Nurse, I think I need some assistance
- Posts: 7873
- Joined: Mon Dec 13, 2010 10:55 pm
- Location: North Wiltshire
- Contact:
Re: 1973 911E RHD Light Ivory and ex NZ...another one.
Love your posts Kieron, just perfect.....
....best ever!
....best ever!
Darren
72T 2.5... http://ddk-online.com/phpBB2/viewtopic.php?f=10&t=56183
73 2.4E ... http://ddk-online.com/phpBB2/viewtopic.php?f=10&t=44242
77 Carrera 3.0...to 74 3.0RS ... http://ddk-online.com/phpBB2/viewtopic.php?f=28&t=63389
72T 2.5... http://ddk-online.com/phpBB2/viewtopic.php?f=10&t=56183
73 2.4E ... http://ddk-online.com/phpBB2/viewtopic.php?f=10&t=44242
77 Carrera 3.0...to 74 3.0RS ... http://ddk-online.com/phpBB2/viewtopic.php?f=28&t=63389
Re: 1973 911E RHD Light Ivory and ex NZ...another one.
Just to mention that the longish gaps between updates is not because Barry is slowing up but because he is currently working on two shells at once 
39. Chassis Member Ripples.
Whilst the side of the car was open Barry went ahead and improved access to the various kinks and ripples to the inner chassis member / sill. The heater tube and member top were removed and later blasted, and all the kinks and defects beaten out, together with a small repair to a hole left by the removal of the roll cage mounting. After this the heater tube area was re-fitted and the whole cavity treated to a good dose of black etch primer. This stuff is an absolute swine if it gets near a weld, but sticks on unbelievably and experience shows it gives excellent protection. It dries to a satin sheen, so allows subsequent waxes to adhere very well.
40. Inner Wing Mods.
The later inner wings have an extra large hole punched out, which Barry then welds back up. One irritation is that they also chop off the lip at the front, which if we were being very correct (and we are), we'd want back on. A replacement is welded in, and will get it's final treatment later on once the inner wing is in place.
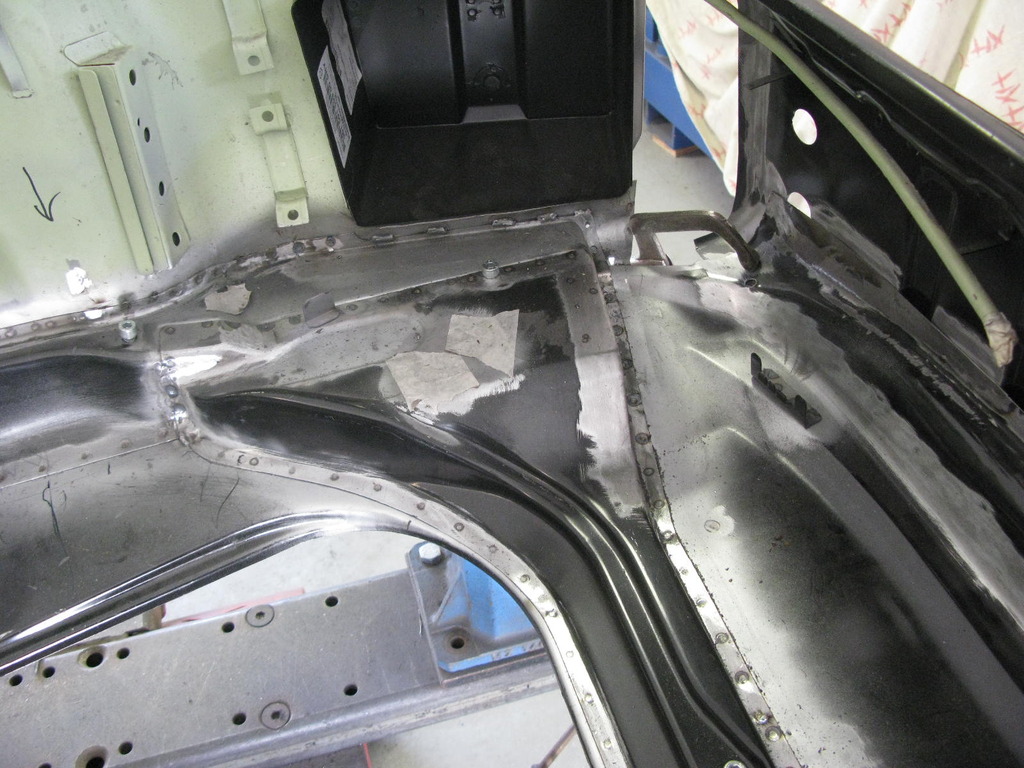
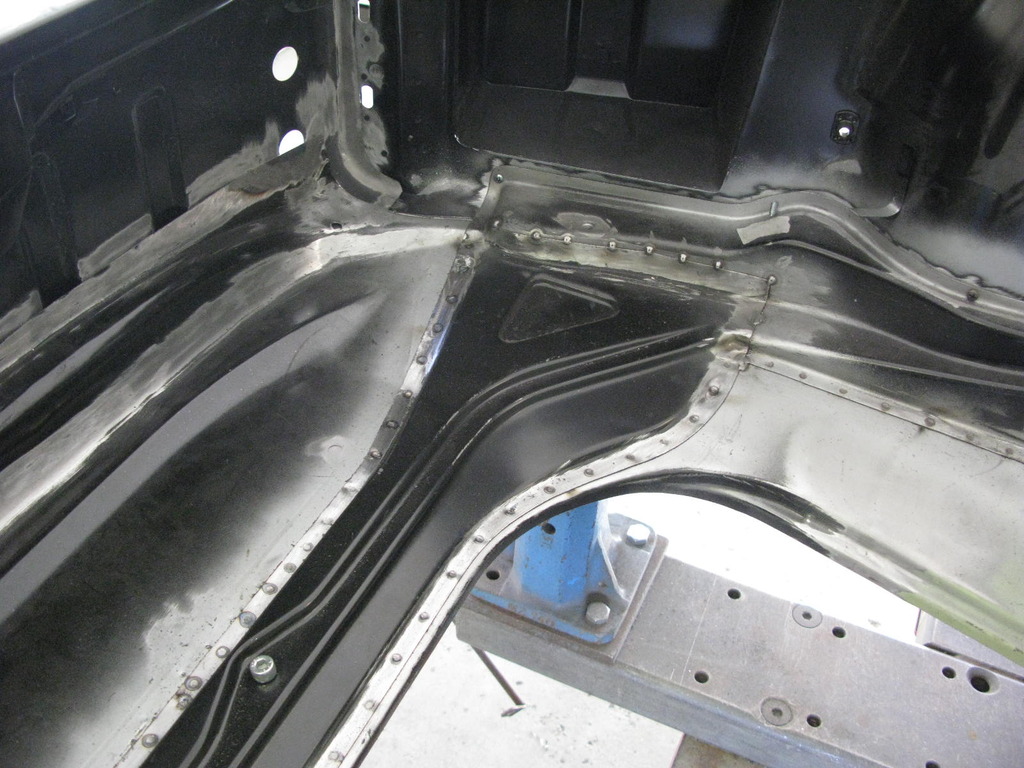
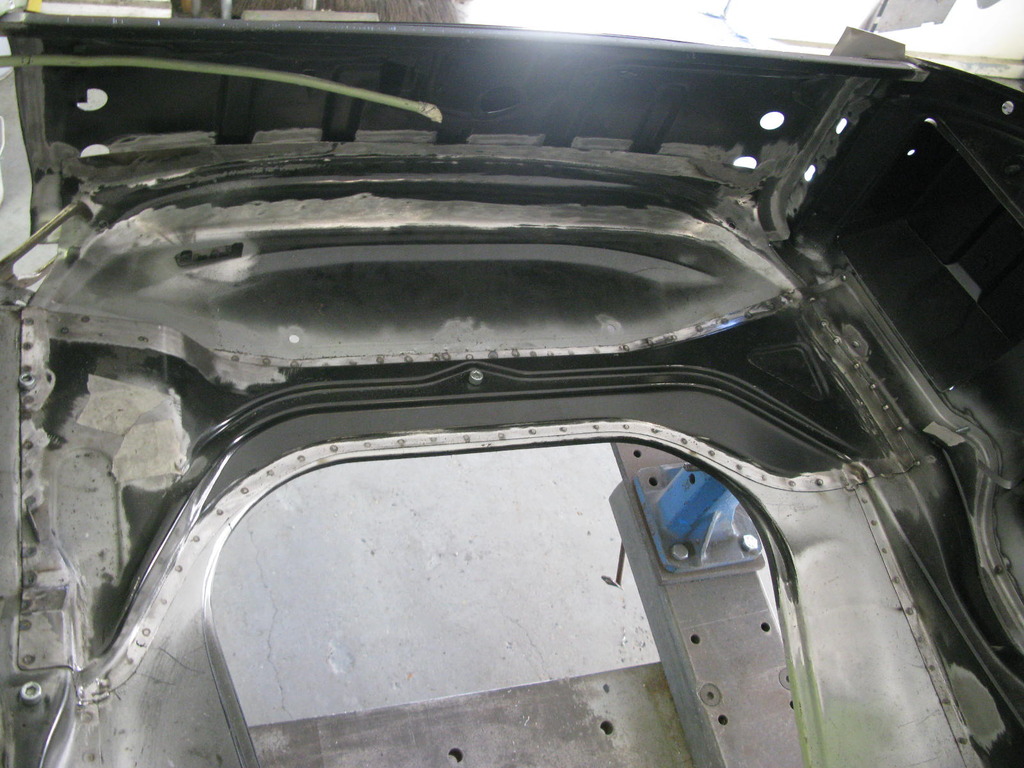
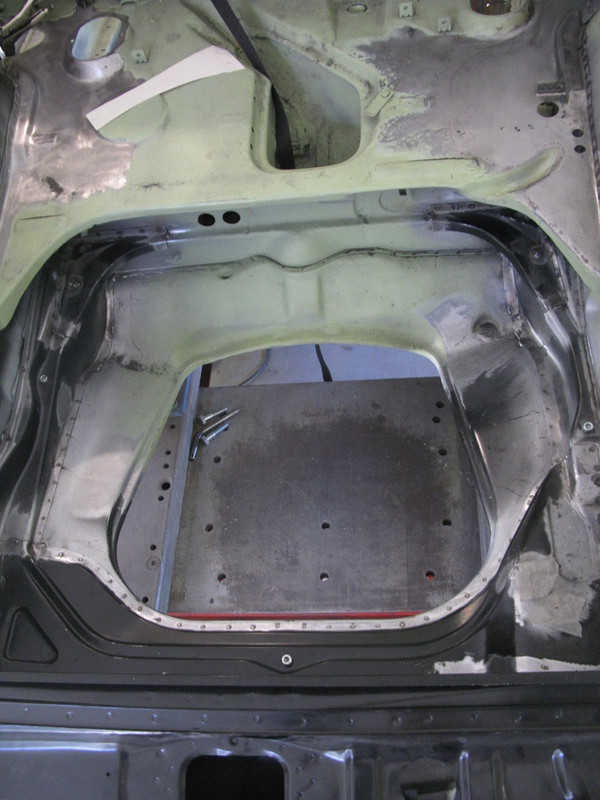
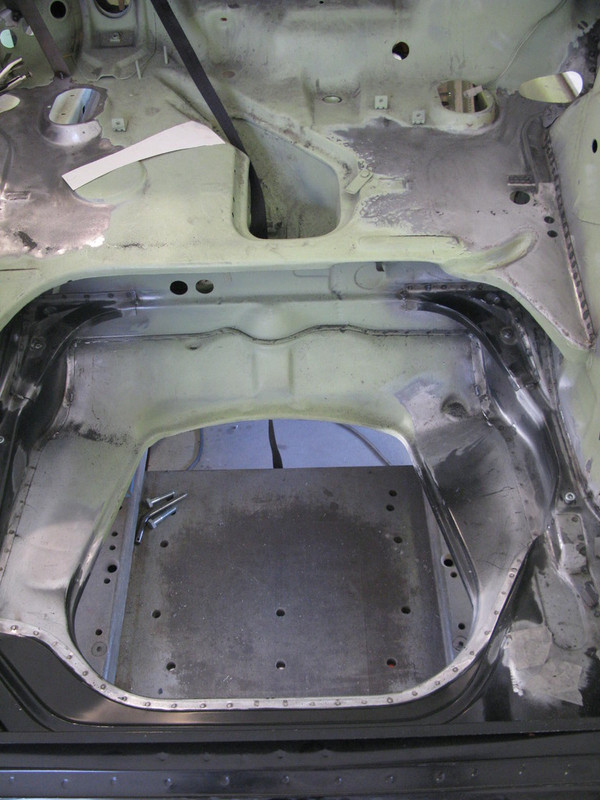
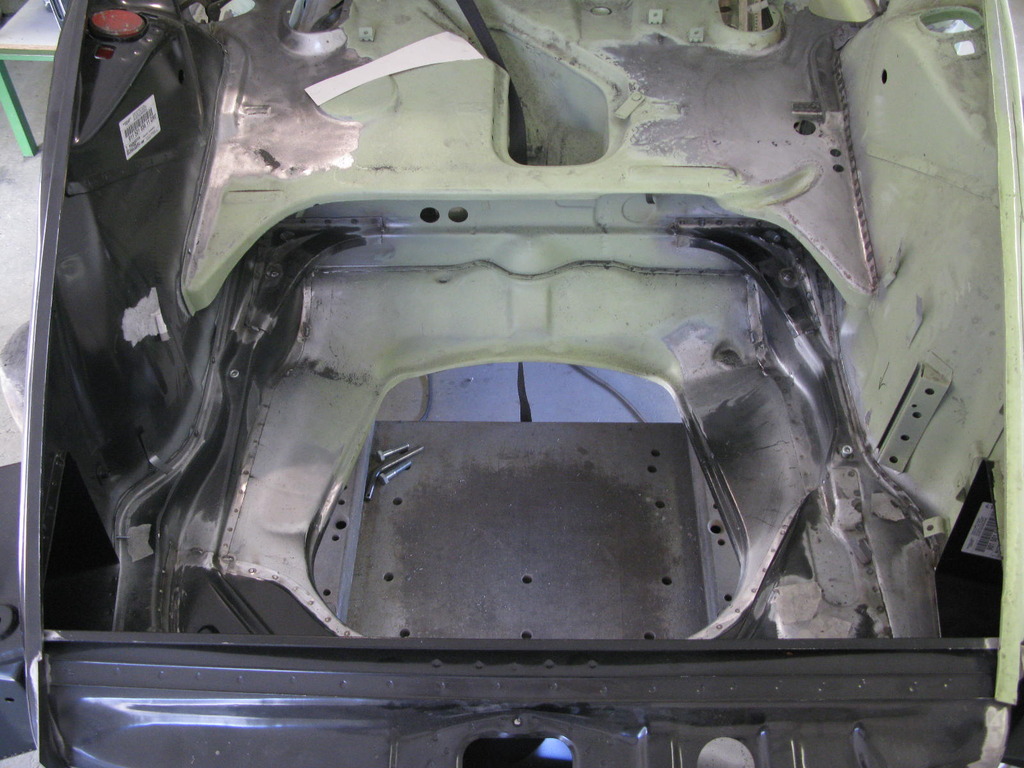
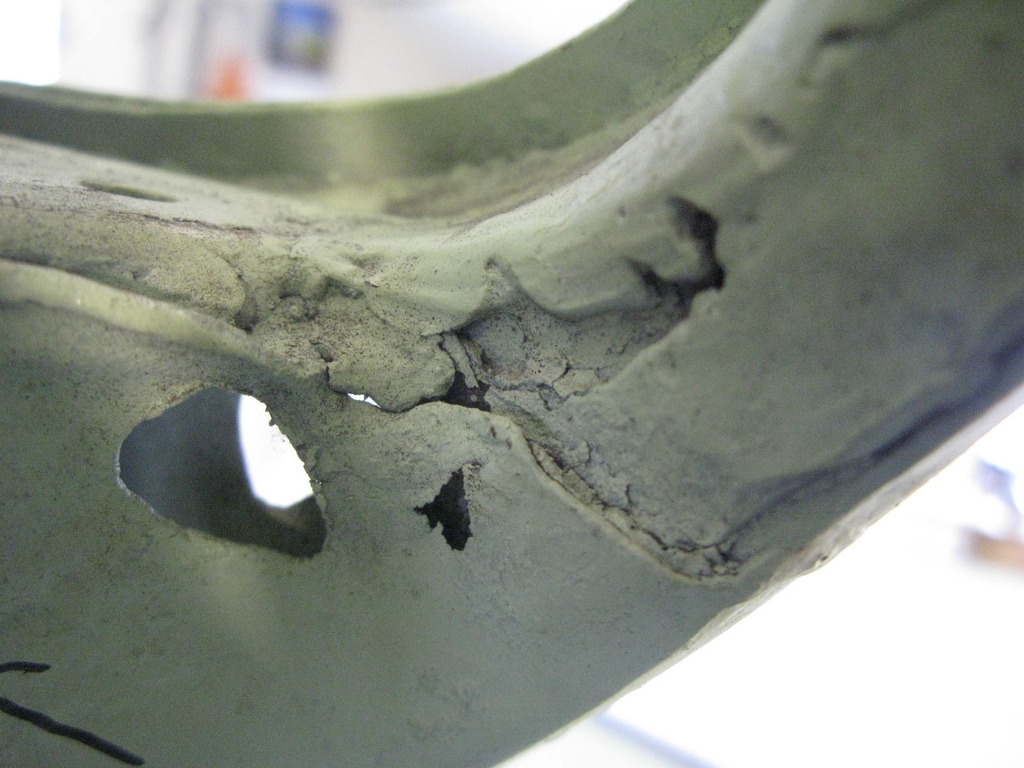
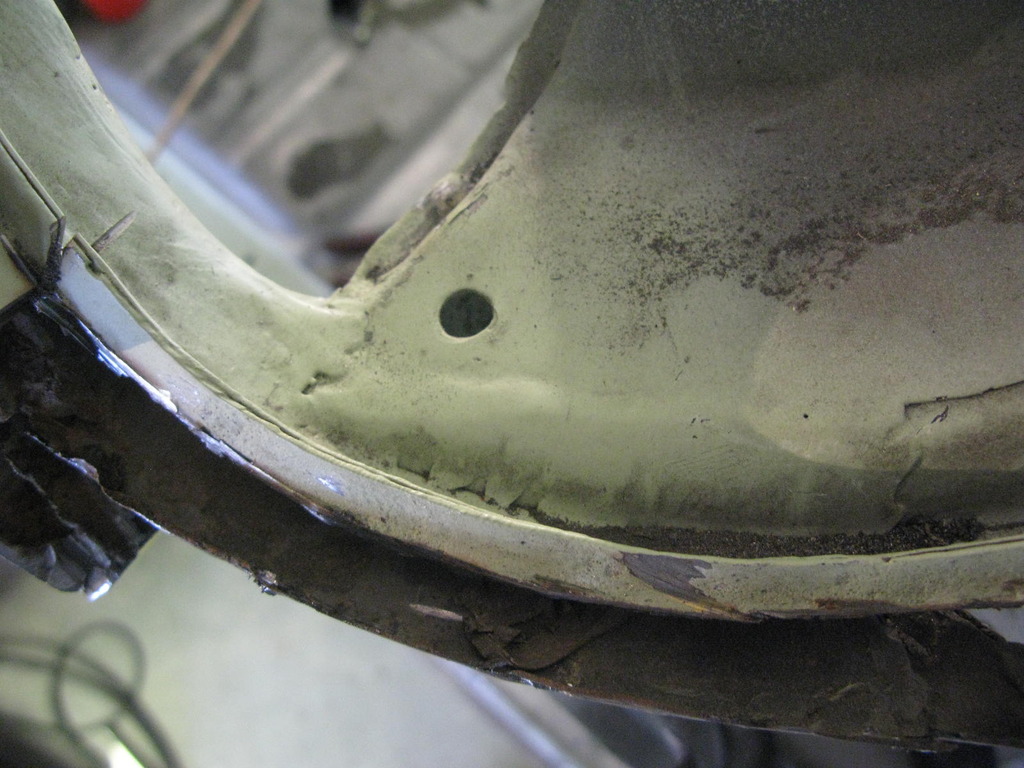
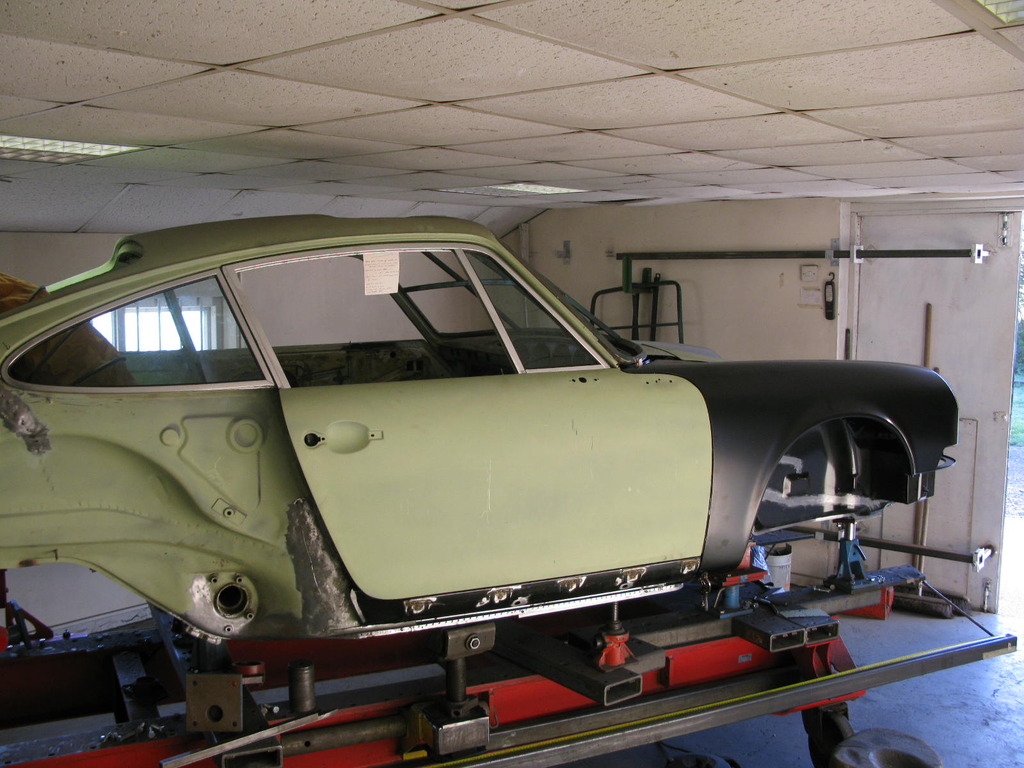
41. Front End Welding.
Front slam panel and inner wing will get welded in next time once the A-pillar and dash repairs have been completed, but the following images give a nice over-view of the front end, complete with all of the bulkhead repairs, various backdates and welding details.
39. Chassis Member Ripples.
Whilst the side of the car was open Barry went ahead and improved access to the various kinks and ripples to the inner chassis member / sill. The heater tube and member top were removed and later blasted, and all the kinks and defects beaten out, together with a small repair to a hole left by the removal of the roll cage mounting. After this the heater tube area was re-fitted and the whole cavity treated to a good dose of black etch primer. This stuff is an absolute swine if it gets near a weld, but sticks on unbelievably and experience shows it gives excellent protection. It dries to a satin sheen, so allows subsequent waxes to adhere very well.
40. Inner Wing Mods.
The later inner wings have an extra large hole punched out, which Barry then welds back up. One irritation is that they also chop off the lip at the front, which if we were being very correct (and we are), we'd want back on. A replacement is welded in, and will get it's final treatment later on once the inner wing is in place.
41. Front End Welding.
Front slam panel and inner wing will get welded in next time once the A-pillar and dash repairs have been completed, but the following images give a nice over-view of the front end, complete with all of the bulkhead repairs, various backdates and welding details.
Last edited by aston on Fri Oct 20, 2023 2:50 pm, edited 6 times in total.
Kieron.
viewtopic.php?f=28&t=48230
2.4E (1973).
Suzuki DRZ400S (2006).
BMW R1200RS (2018).
Yamaha XT500 (1978).
viewtopic.php?f=28&t=48230
2.4E (1973).
Suzuki DRZ400S (2006).
BMW R1200RS (2018).
Yamaha XT500 (1978).
Re: 1973 911E RHD Light Ivory and ex NZ...another one.
Hi Kieron
Kust catching up on your thread, car is looking lovely....Makes me excited!! Have you sorted out where you are getting paint done?
Kust catching up on your thread, car is looking lovely....Makes me excited!! Have you sorted out where you are getting paint done?
Adam
1973 911 2.4E
1974 911 2.7 Ratrod
1973 911 2.4E
1974 911 2.7 Ratrod
Re: 1973 911E RHD Light Ivory and ex NZ...another one.
Hi Adam - yes painter is sorted, details to follow..
Kieron.
viewtopic.php?f=28&t=48230
2.4E (1973).
Suzuki DRZ400S (2006).
BMW R1200RS (2018).
Yamaha XT500 (1978).
viewtopic.php?f=28&t=48230
2.4E (1973).
Suzuki DRZ400S (2006).
BMW R1200RS (2018).
Yamaha XT500 (1978).
Re: 1973 911E RHD Light Ivory and ex NZ...another one.
OK boys and girls plump up your cushions, another picture heavy update is coming...
I think I might have mentioned that Barry is running two restorations in parallel but is now on mine to the end....
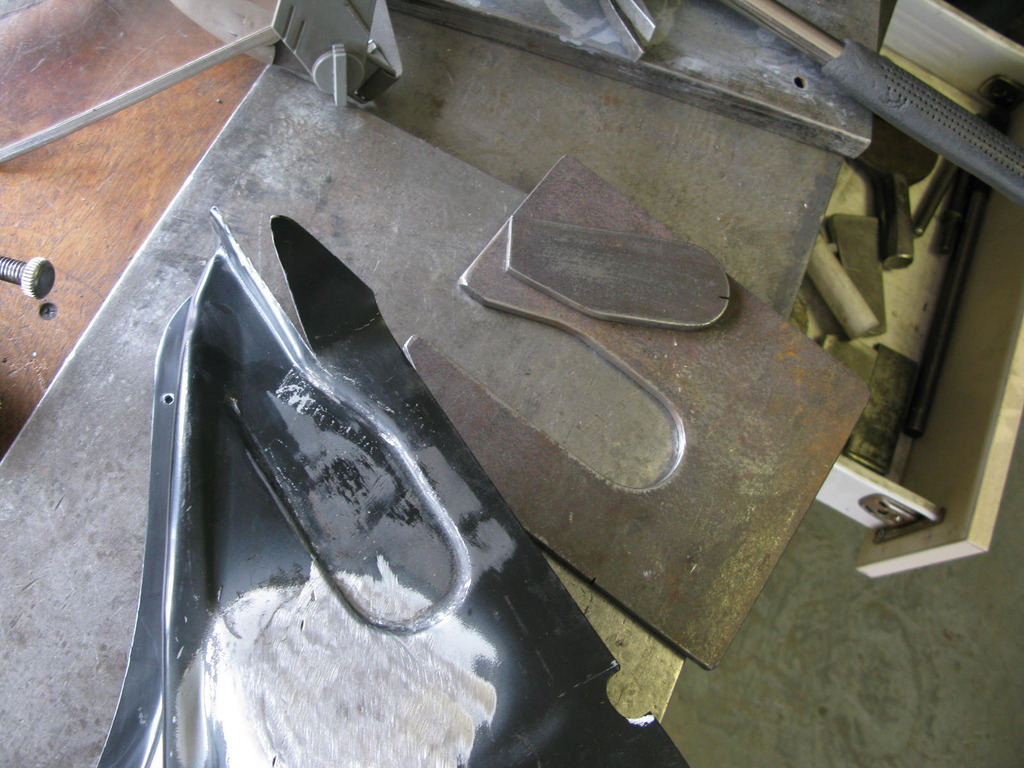
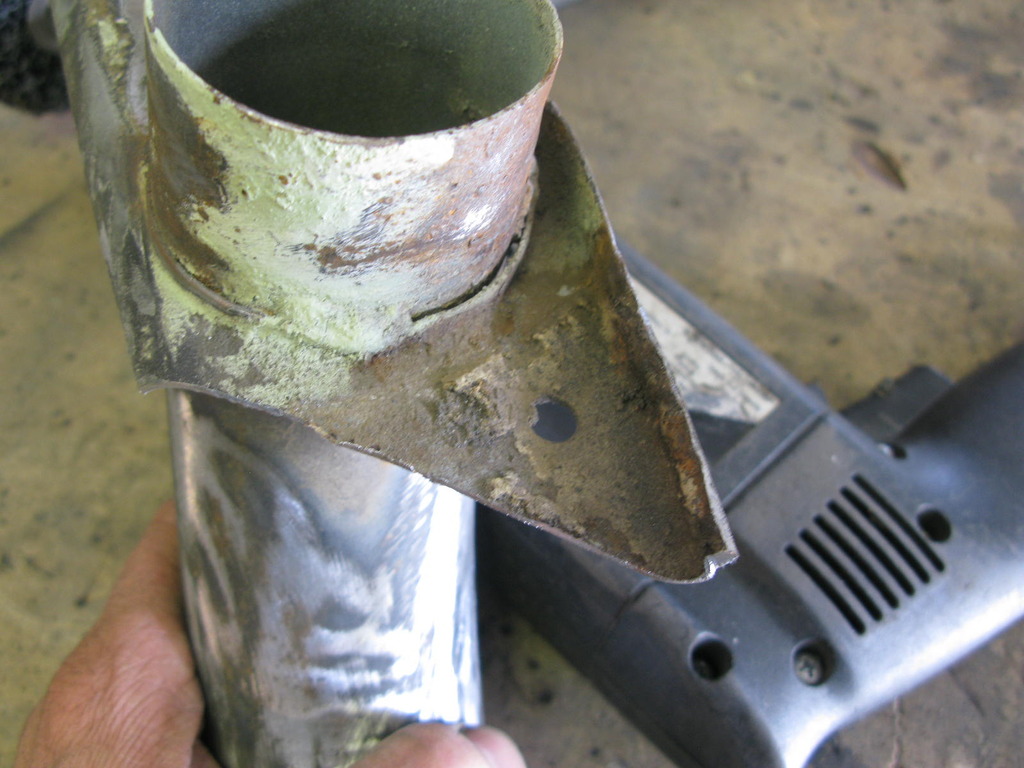
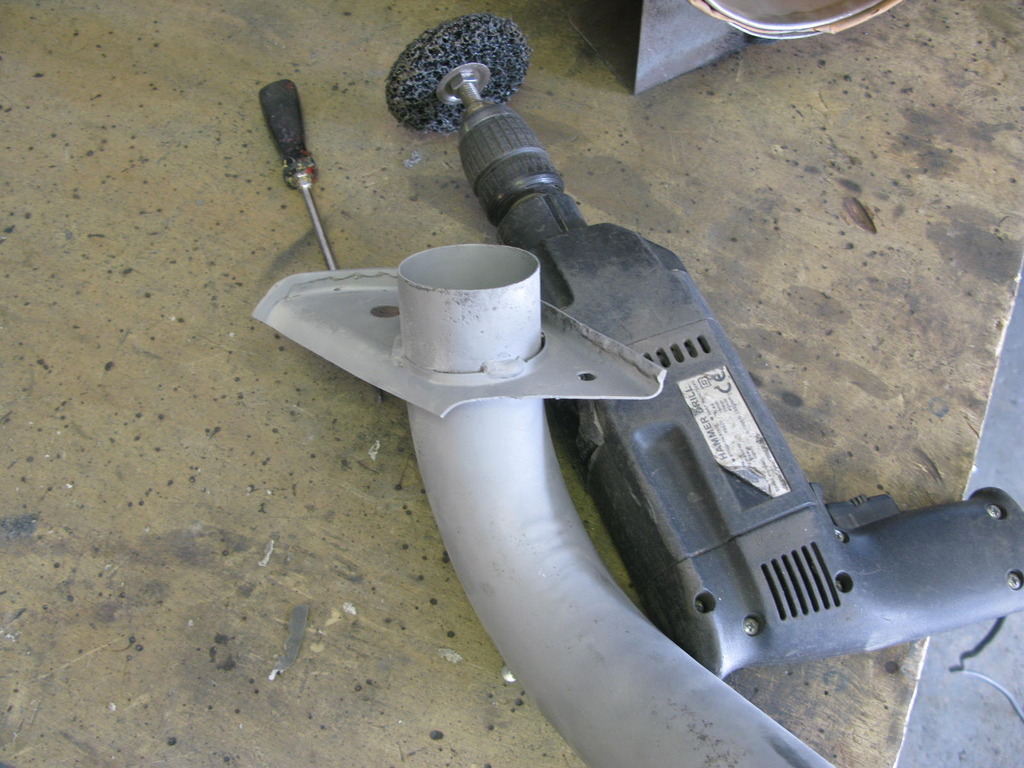
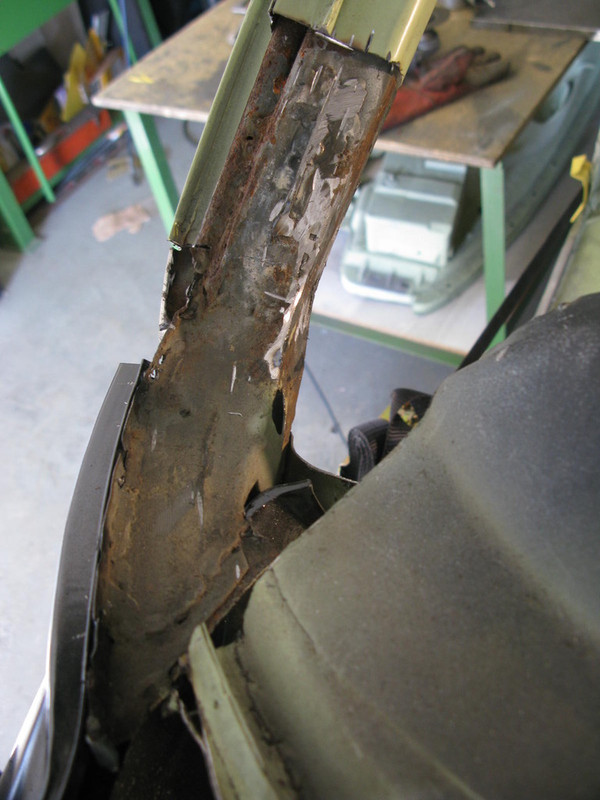
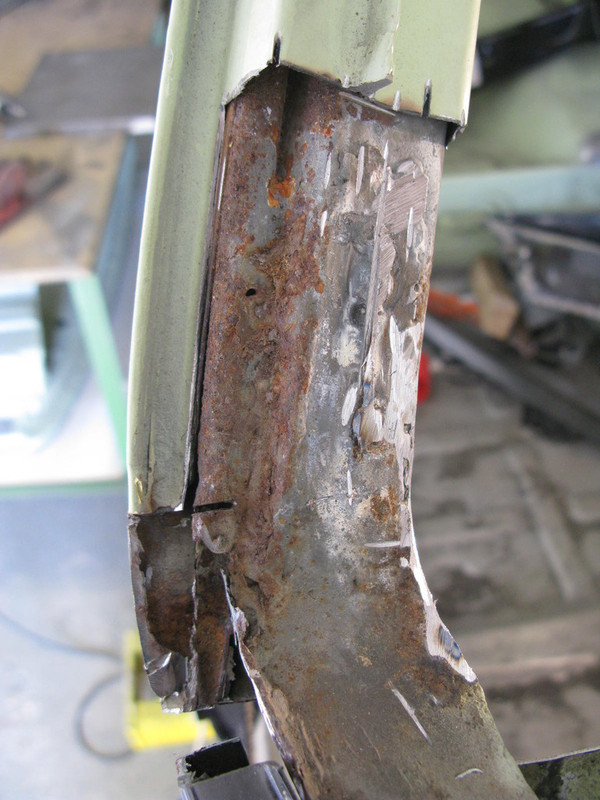
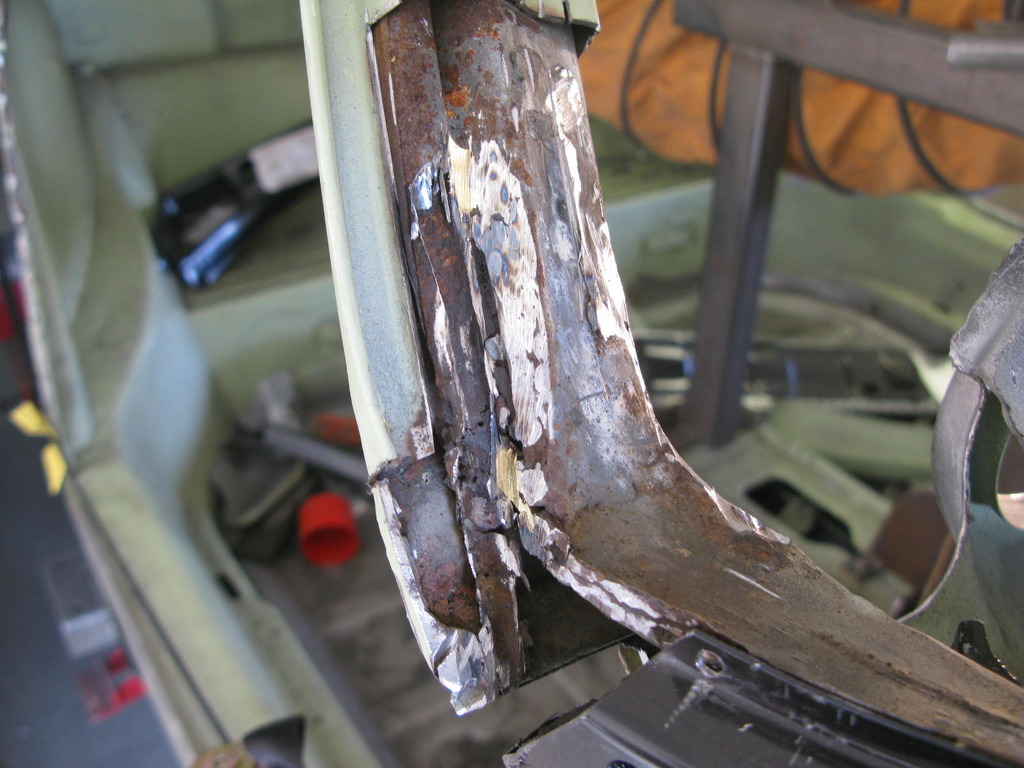
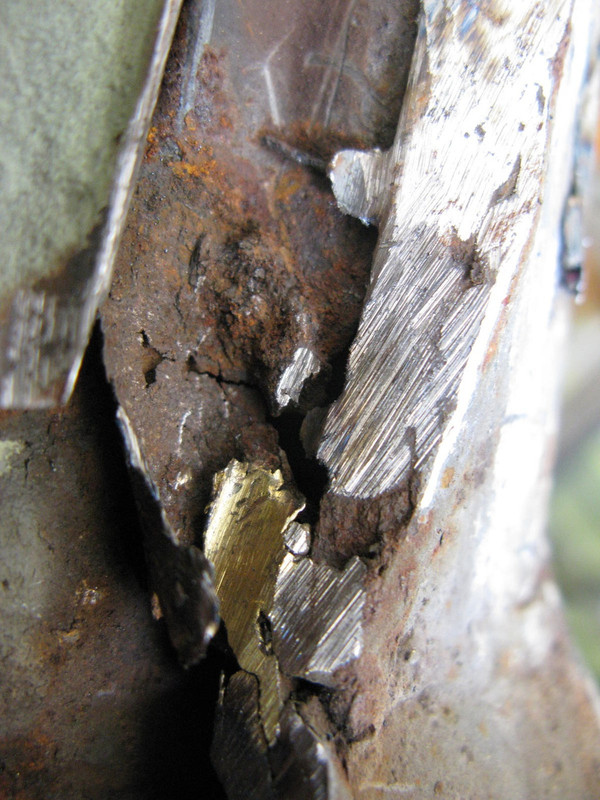
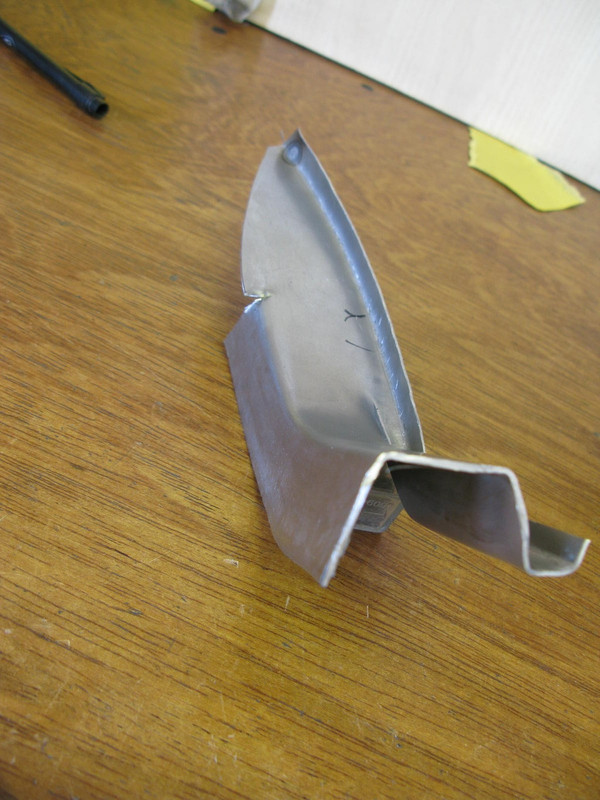
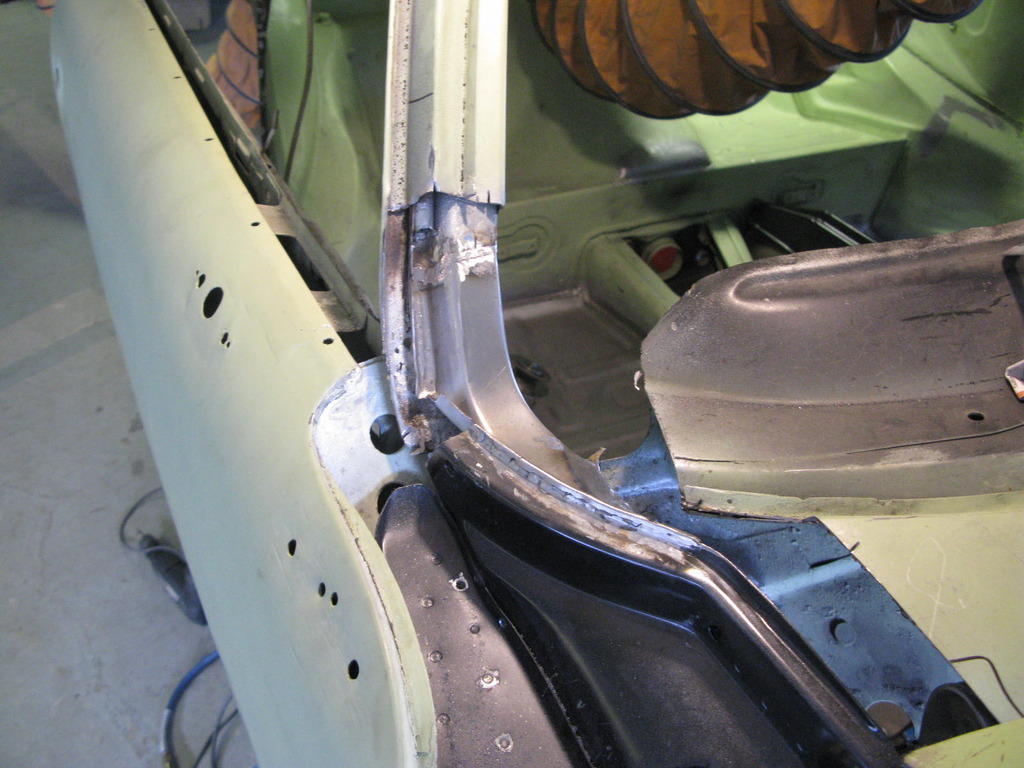
42. Offside dash end and screen pillar base.
This area needed some attention as you can see from the 'before' images. The vertical dash end had taken a battering and the actual pillar had been poorly repaired. Once Barry had stripped this away it was clear that the sunroof drain would have been very unlikely to have got water out of the car

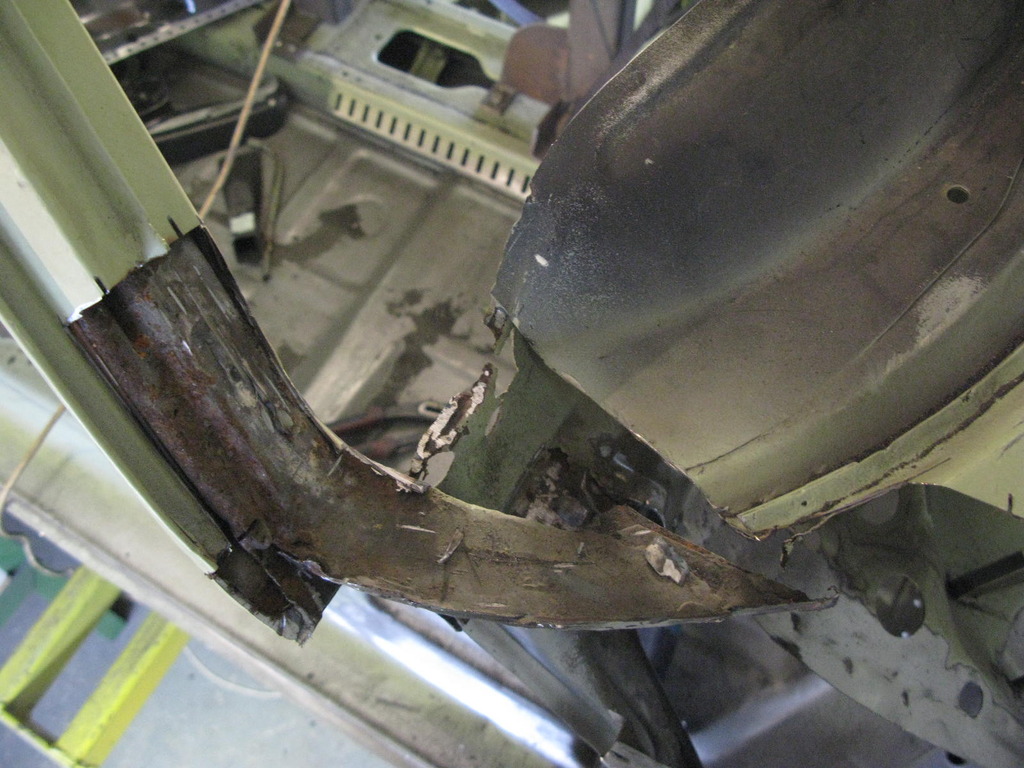
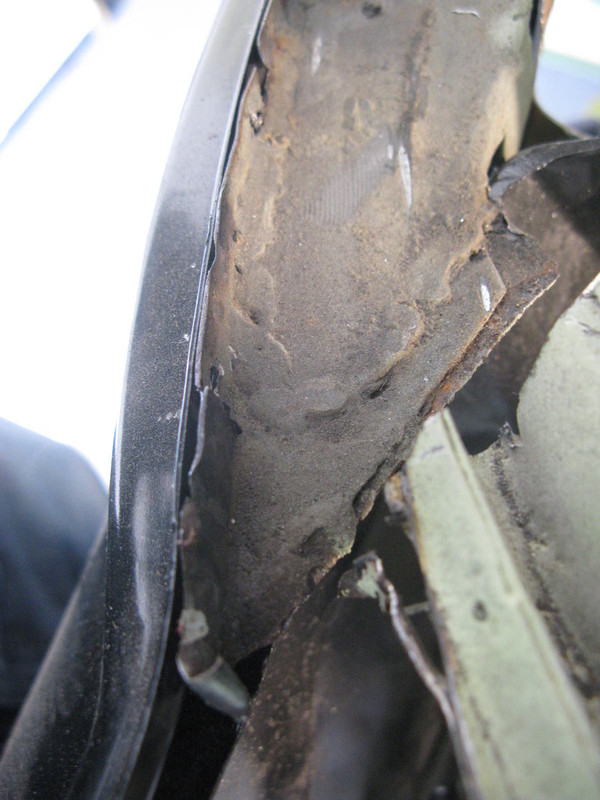
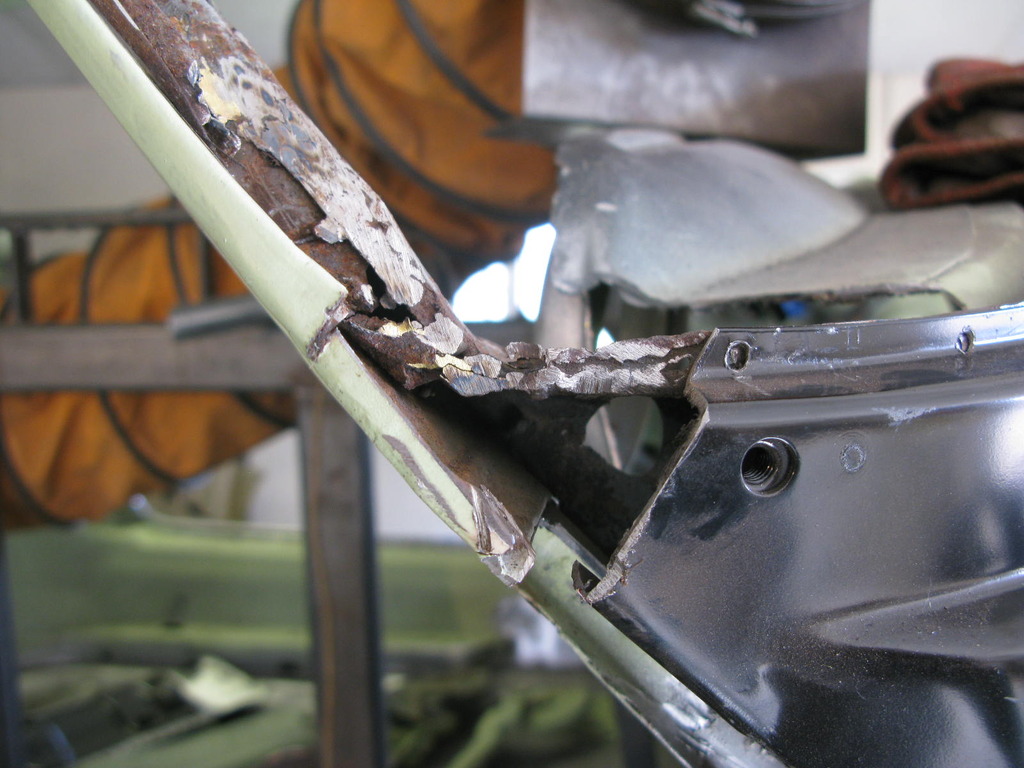
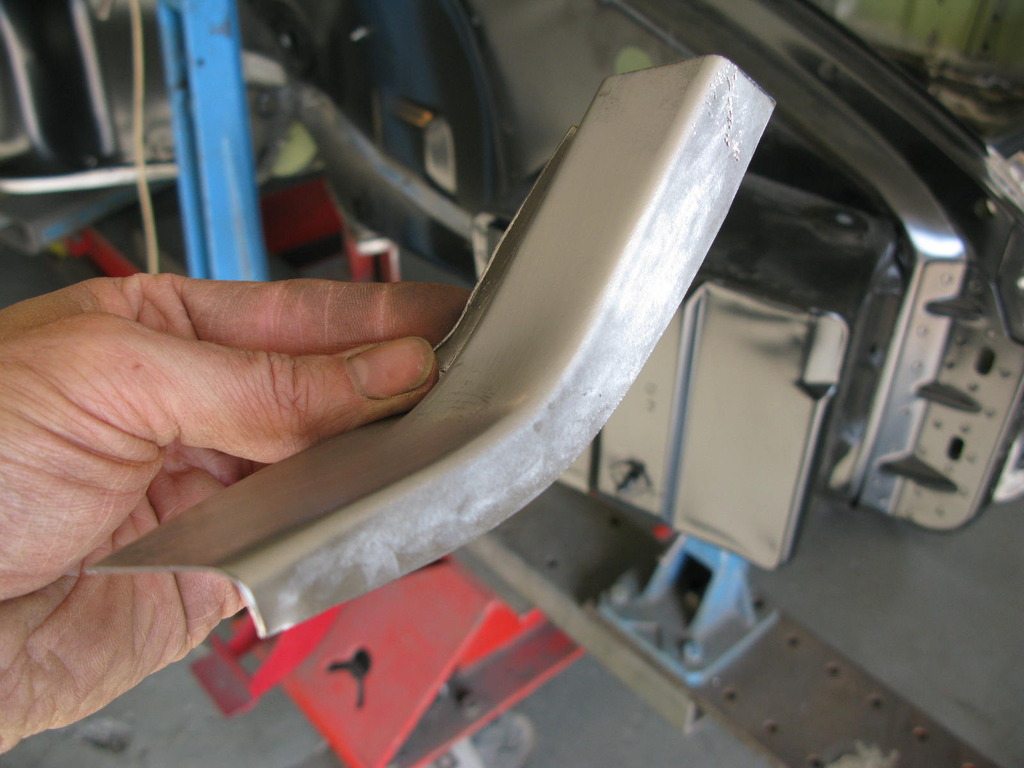
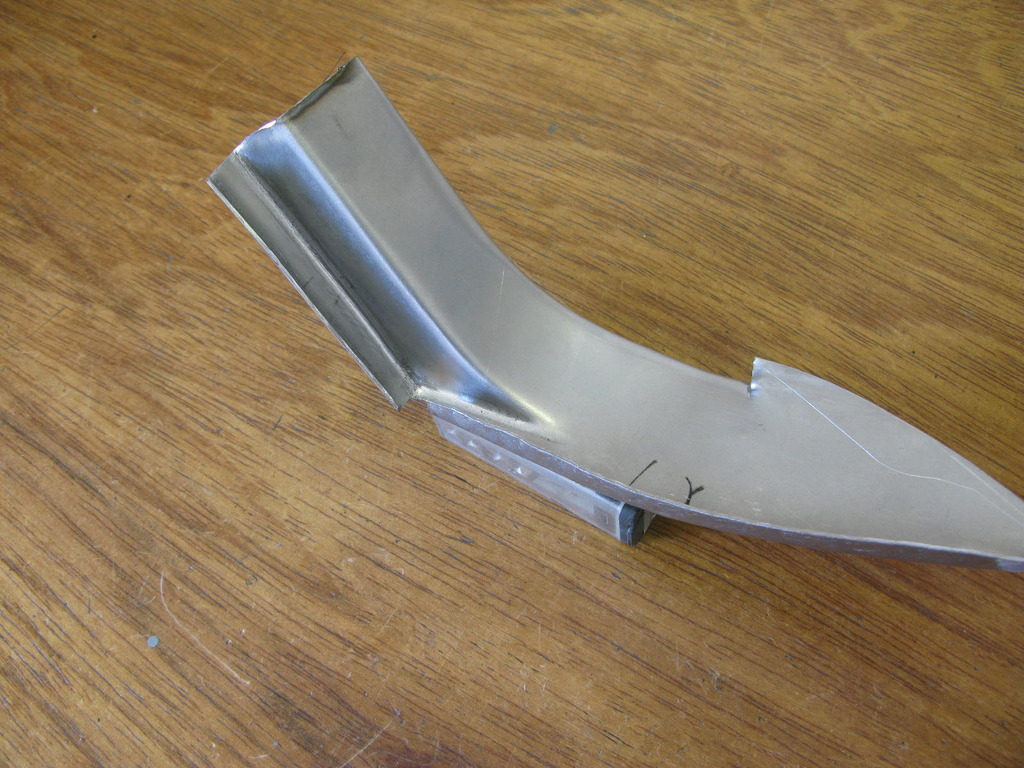
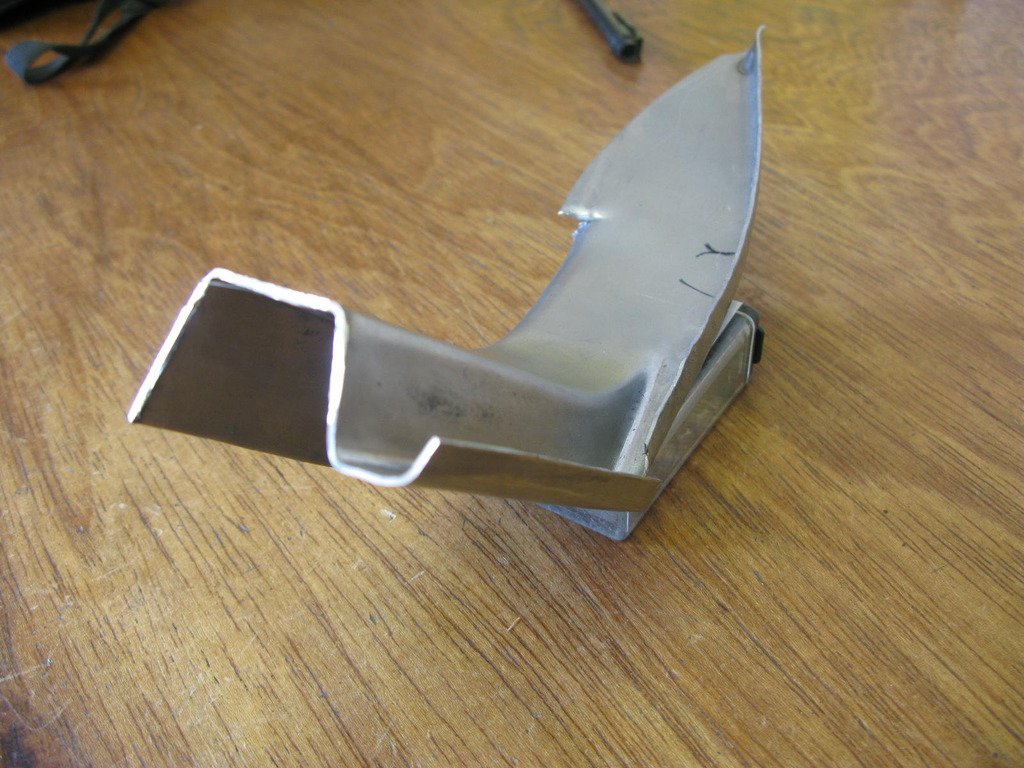
The first attempt at forming a repair section was close but a bit small and the shape wasn't quite there.
Attempt number two was pretty good and Barry was able to tweak it to where he needed it to be. By comparison, the new vertical bit of the dash was rather easier!

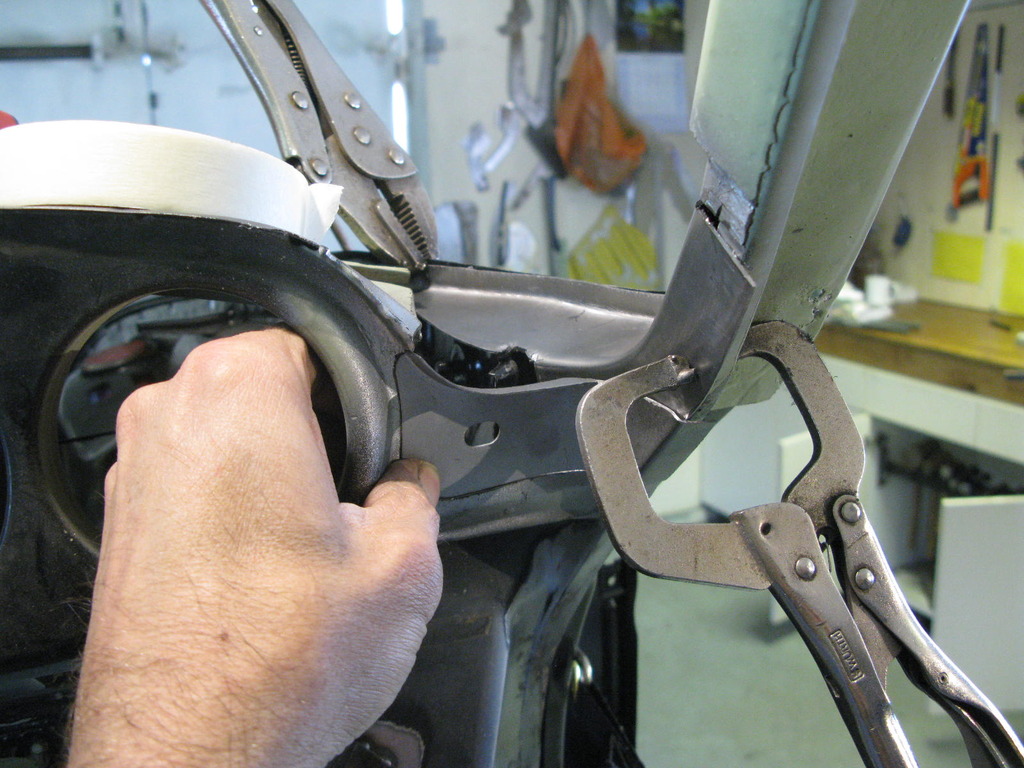
43. Trial fit trials..
At the end of the last phase I showed photo's of the front with much welding done. Barry had left the welding of the new inner wing until later, as he wanted to trial fit the whole front end of the car (both sides) before fully committing to the inner wing position.
These are a nasty panel to get right as somehow you need to reconcile the strut top position, A-post position, centre sill height, outer wing height (and relationship with the scuttle), outer wing fore and aft position and front panel position in relation to the scuttle gutter. Plus, outer wing to bonnet gap. If you factor in a/ that these modern inner wings are of awful quality with many parts welded on, in incorrect positions, b/ an old car with previous accident damage and repairs, c/ and old door and d/ a new wing that may, or may not be shaped perfectly, you can end up with a real head scratcher....and we did.
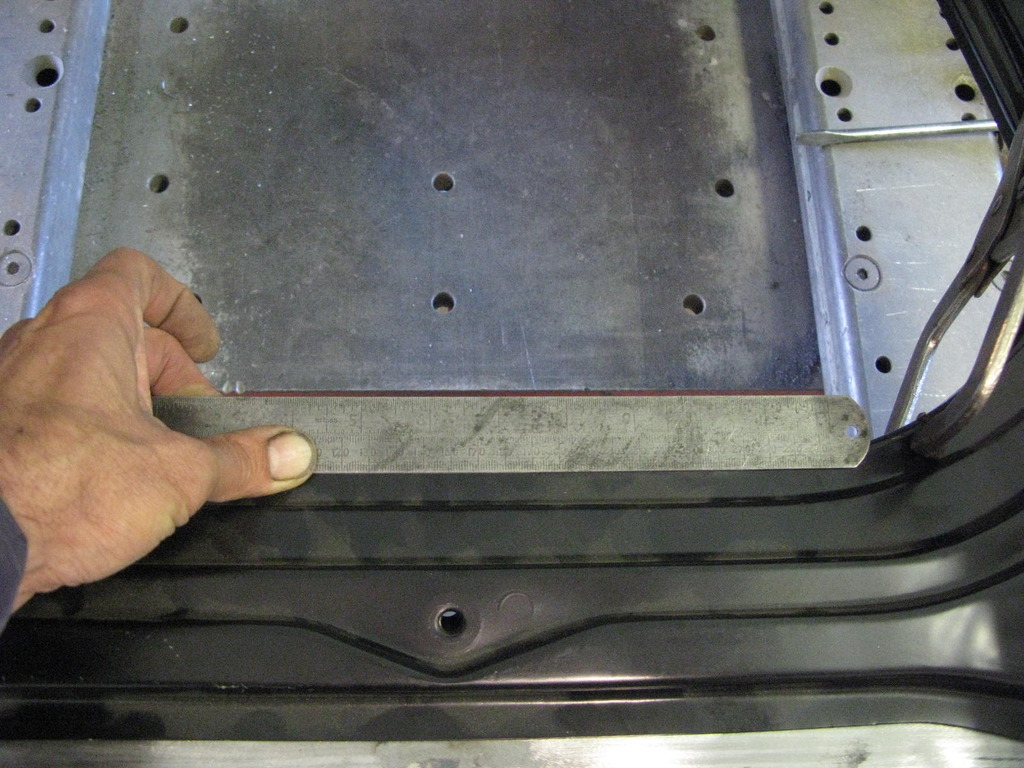
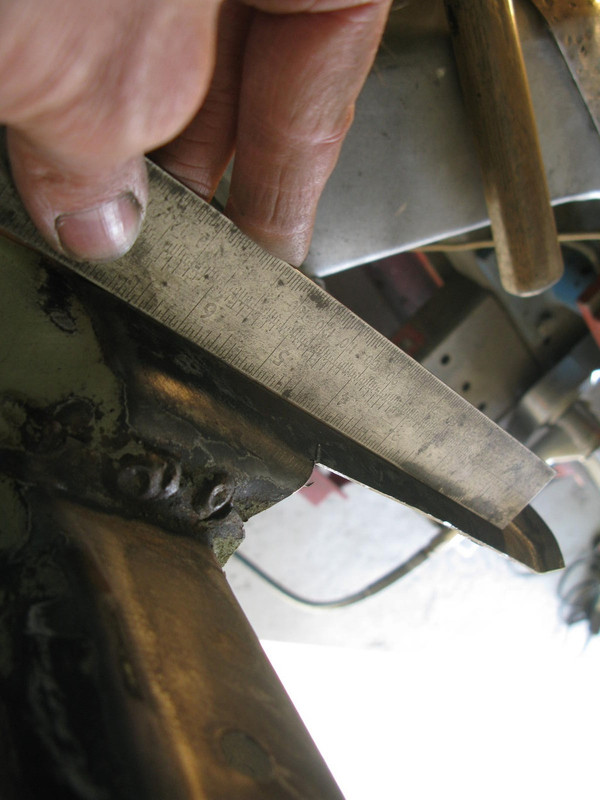
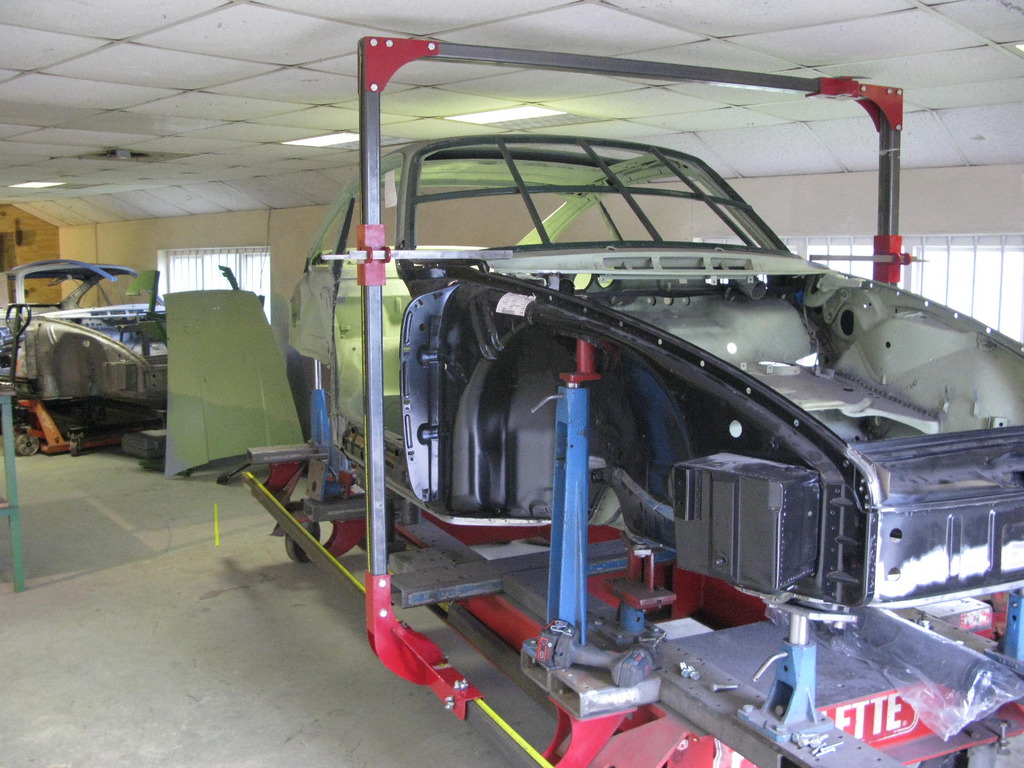
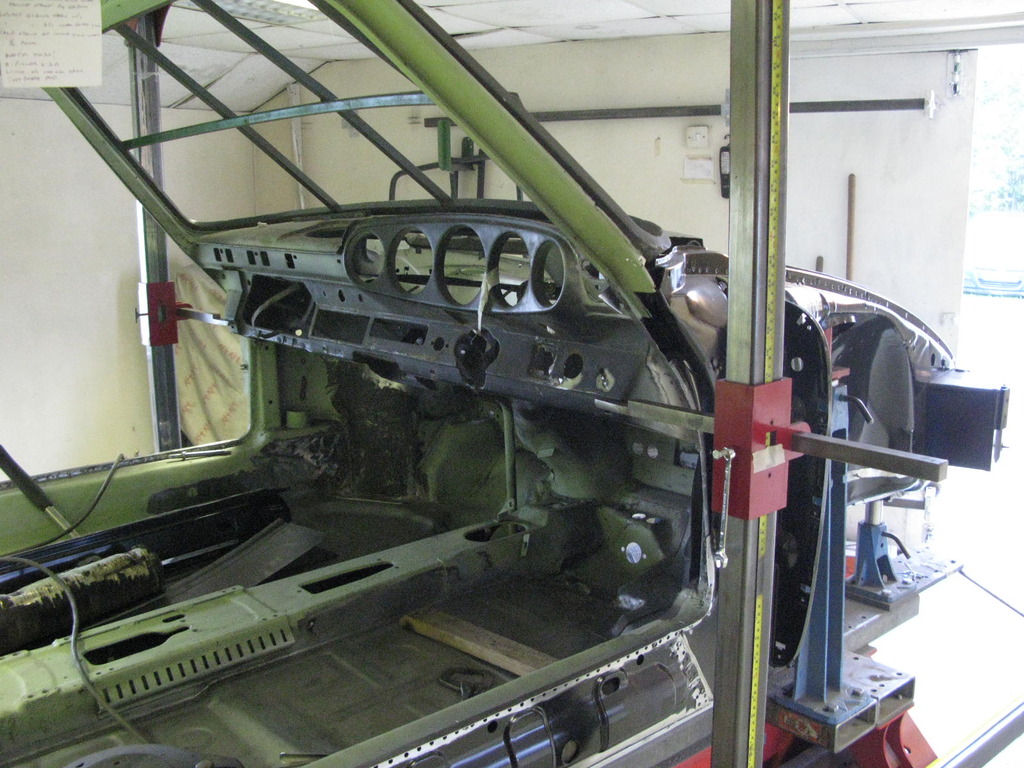
After quite a while of trying various options Barry, in the end, elected to set up his external measuring rig. Apparently he hasn't used this for a while because the sill clamps used in tugging the cars interfere with the measuring rig. It would obviously be sensible to be able to tug and measure at the same time, so he took a brave pill and cut down the sill clamp brackets (he'd paid £1000 for the full set) and some other parts of the clamps. It definitely looks a bit odd, but at least the two systems can now work at the same time.
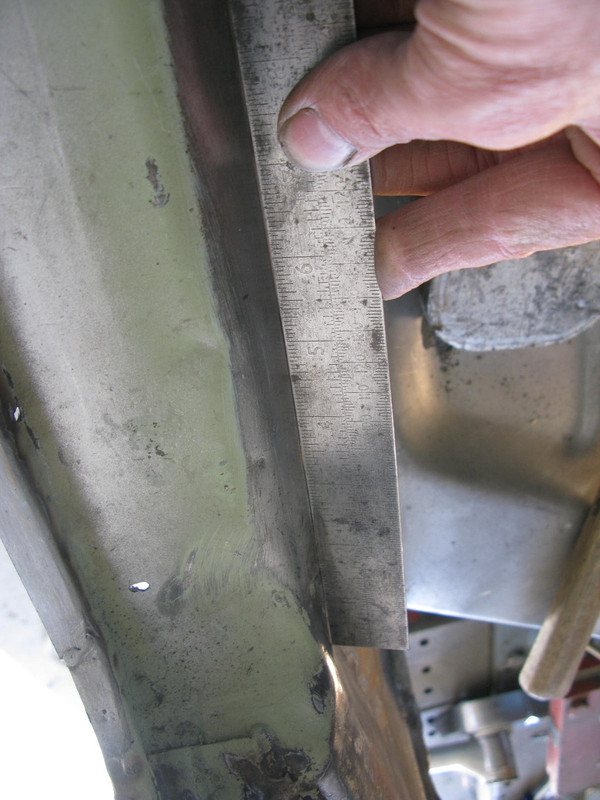
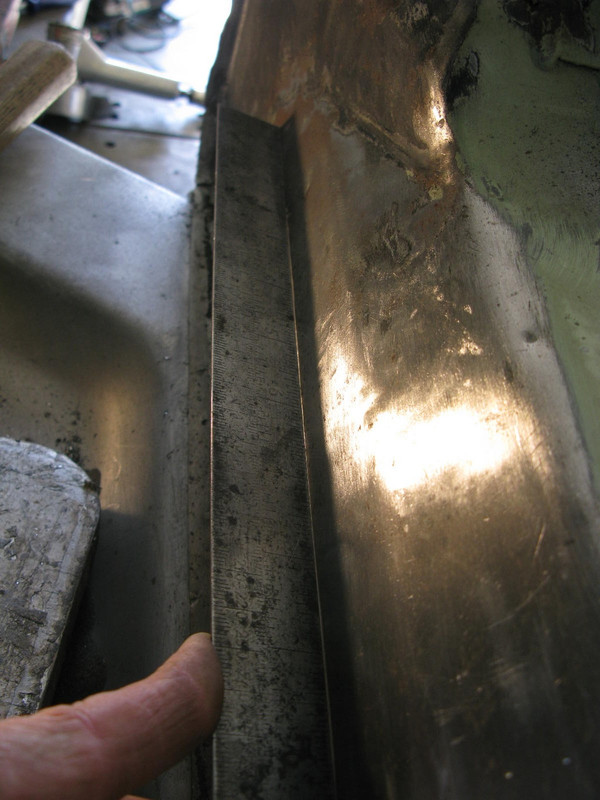
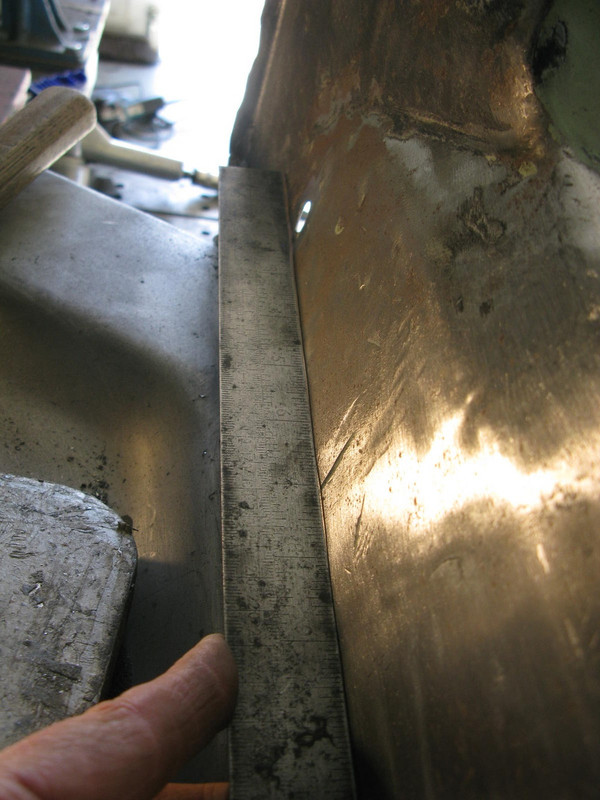
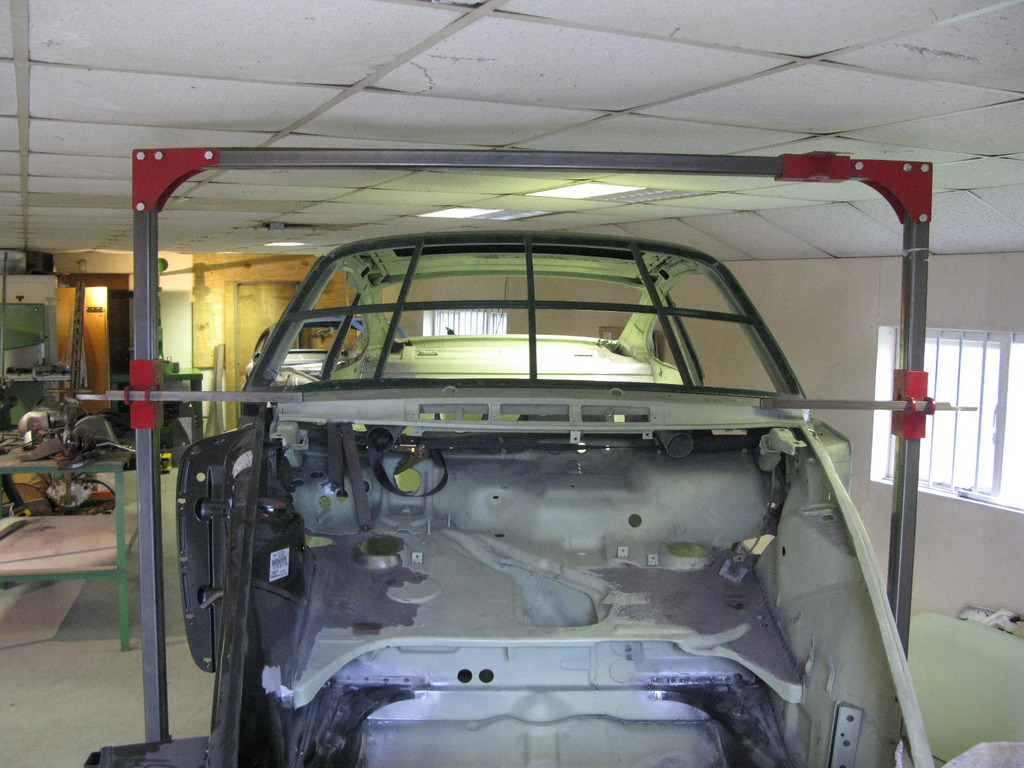
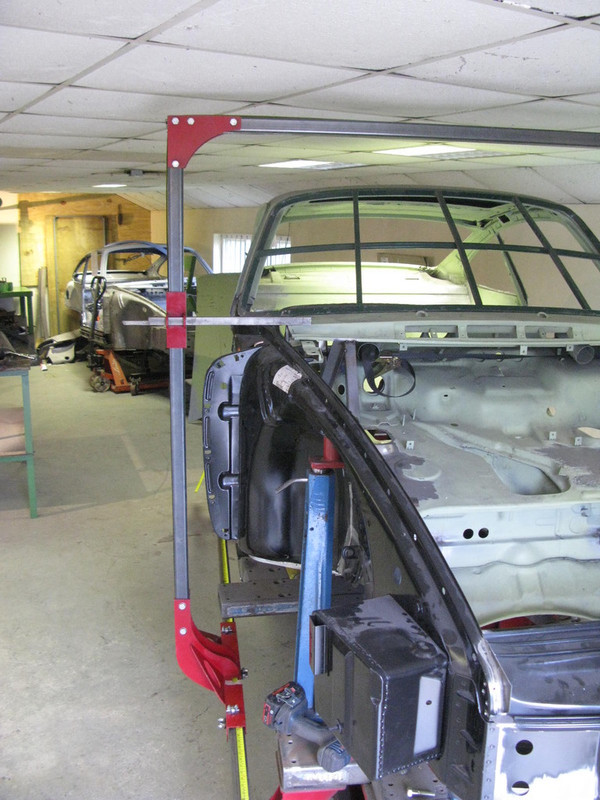
The external measuring rig overcomes one problem found with many car jigs, that of measuring the upper areas of the outside bodywork and getting inside the car to measure internally. As you can see in the pictures a carriage runs on two rails. This carries two vertical pointer holders, and one horizontal one. Finally, there is a pair of pointers that can be placed in different positions, as required. The main rails are aligned to the main jig base to an accuracy of just under 1mm in-out, up-down over the length of the whole jig and everything is very simple to calibrate.
The beauty of the system is you can simply run down both sides of the car and compare them. Similarly, you can measure and record the position of any part (let's say the A-post door hinge holes) in three dimensions, record it, and then replicate the same when a new part gets fitted. Usually, any errors quickly show up making it extremely effective. The final shot shows the measurement of both dash end heights.
The various battles Barry was having with this section originally pointed to the whole front bulkhead being twisted very slightly (i.e. higher on one side than the other). In fact after checking on the jig it was found to be fine, so this theory could be 100% discounted. Previously, and before making the mods described earlier, he would have had to jury rig some way of measuring out of the car, down to jig bed height, then back into the jig, so along, down and along again. So if you're chasing say a 3.5mm error and actually find that error, you'll always wonder whether you've found zero error on the car and 3.5mm error on your measuring setup. Similarly, even if something seems to measure the same, there's always the niggle it was simply two errors cancelling each other out. Anyway, Barry's pleased to have his rig up and running again and indeed it did the business on my shell because he was able to trace about eight very small discrepancies totting up to a couple of tricky problems. Once spotted things could be corrected and life could go on ...easy really

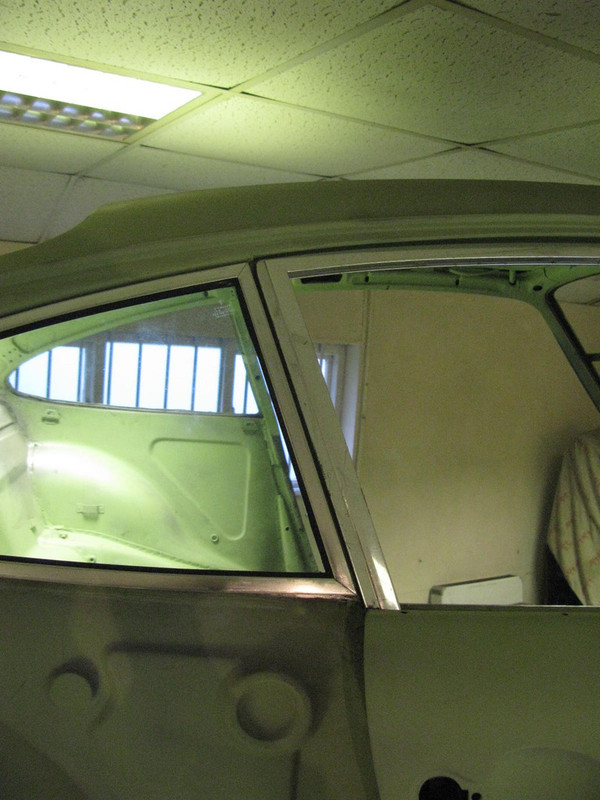
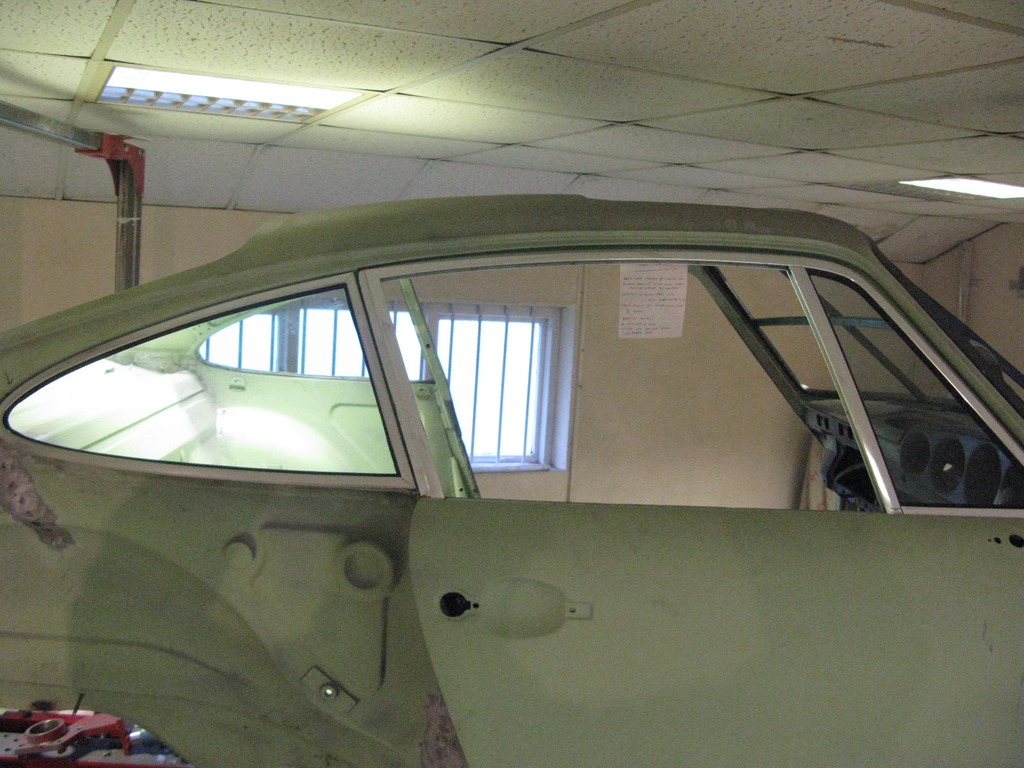
44. Trials fits..continued
So following that rather taxing section the outer body alignment got well underway ...
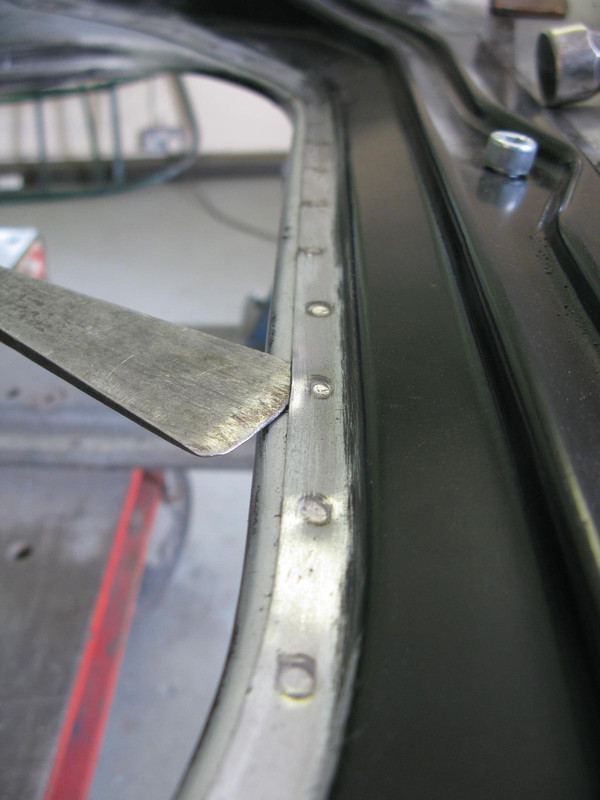
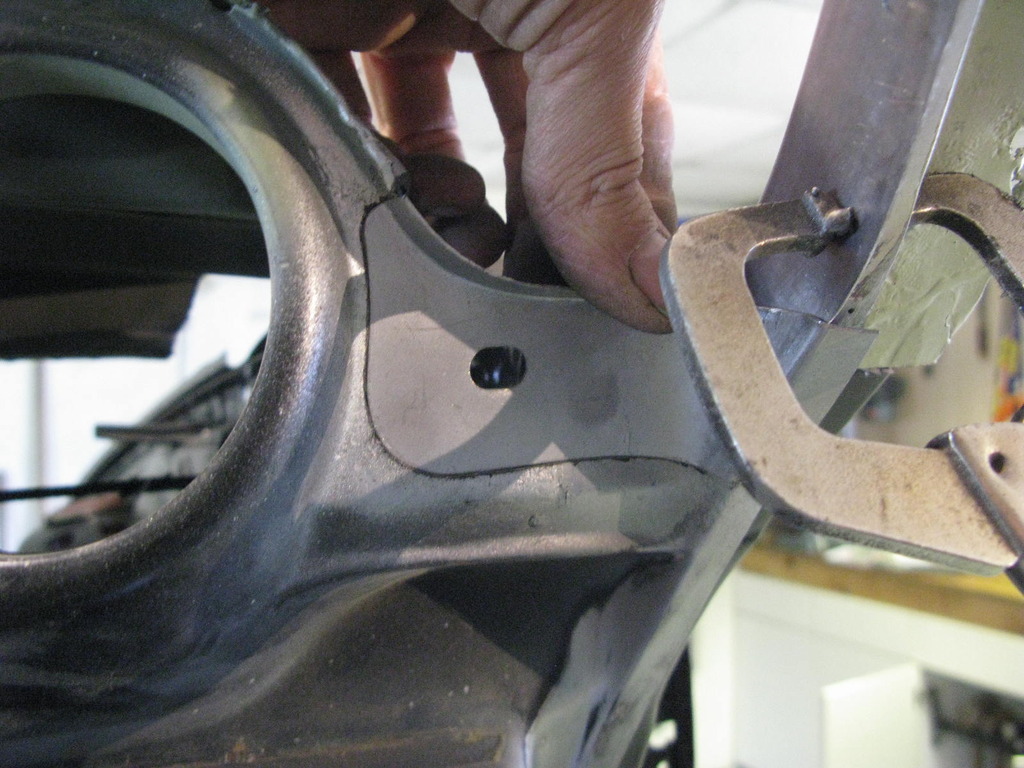
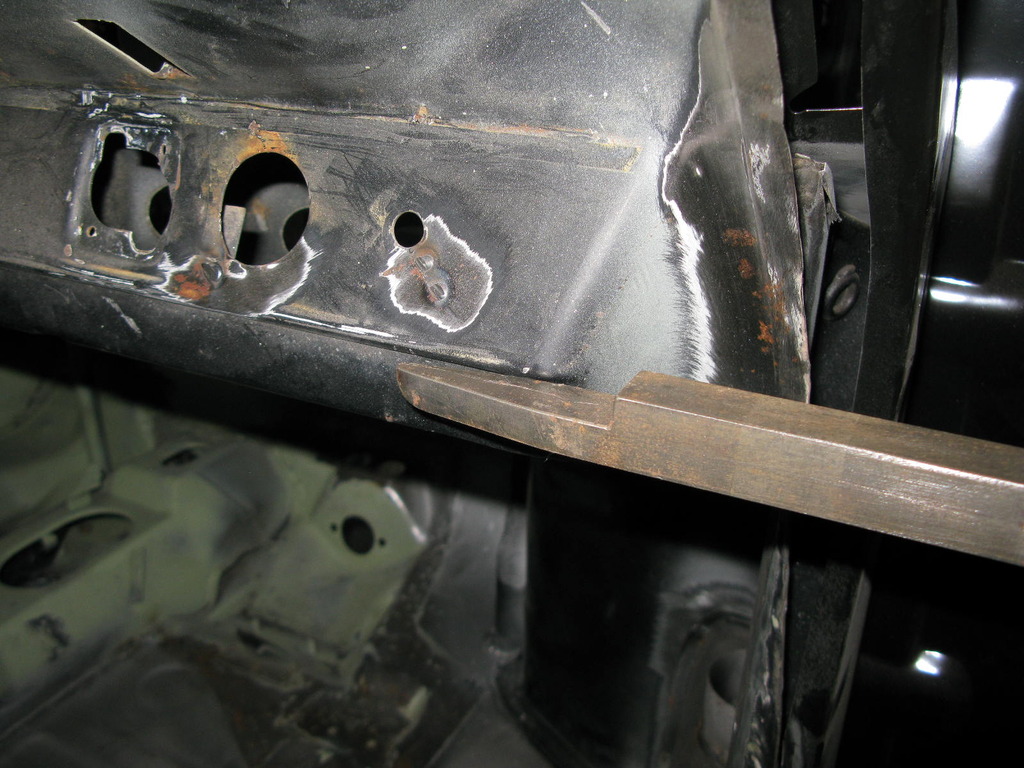
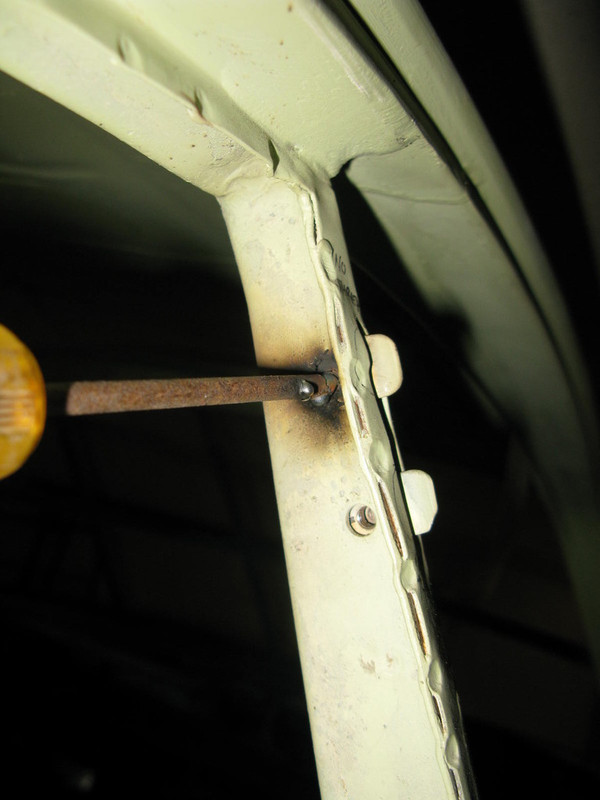
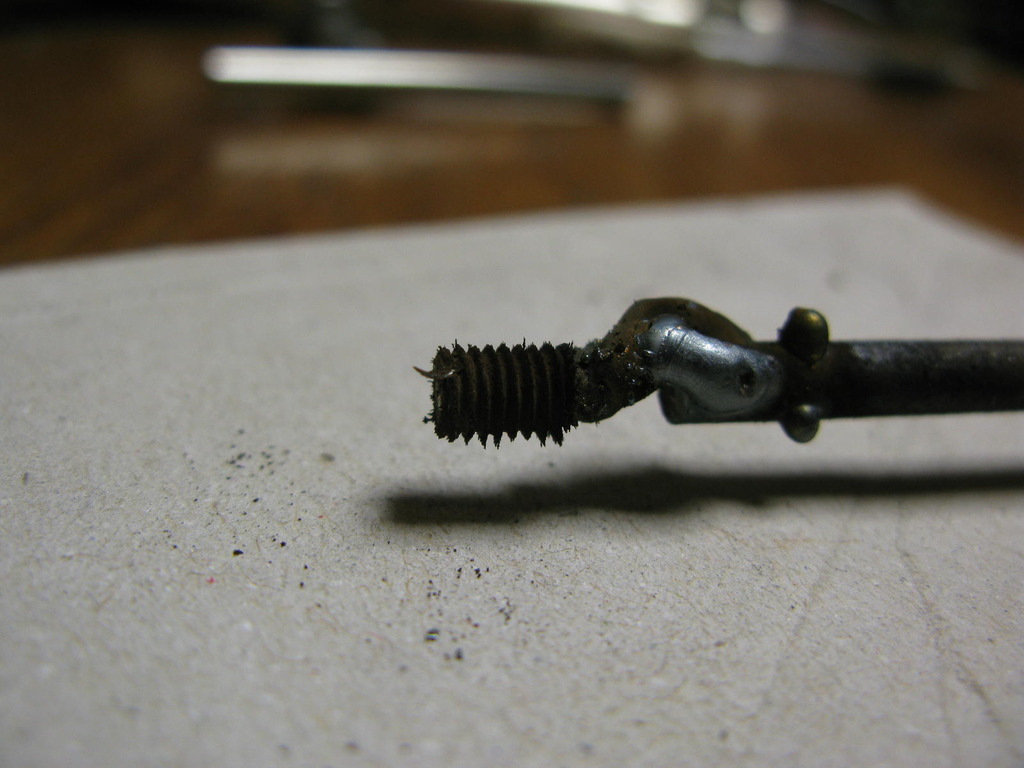
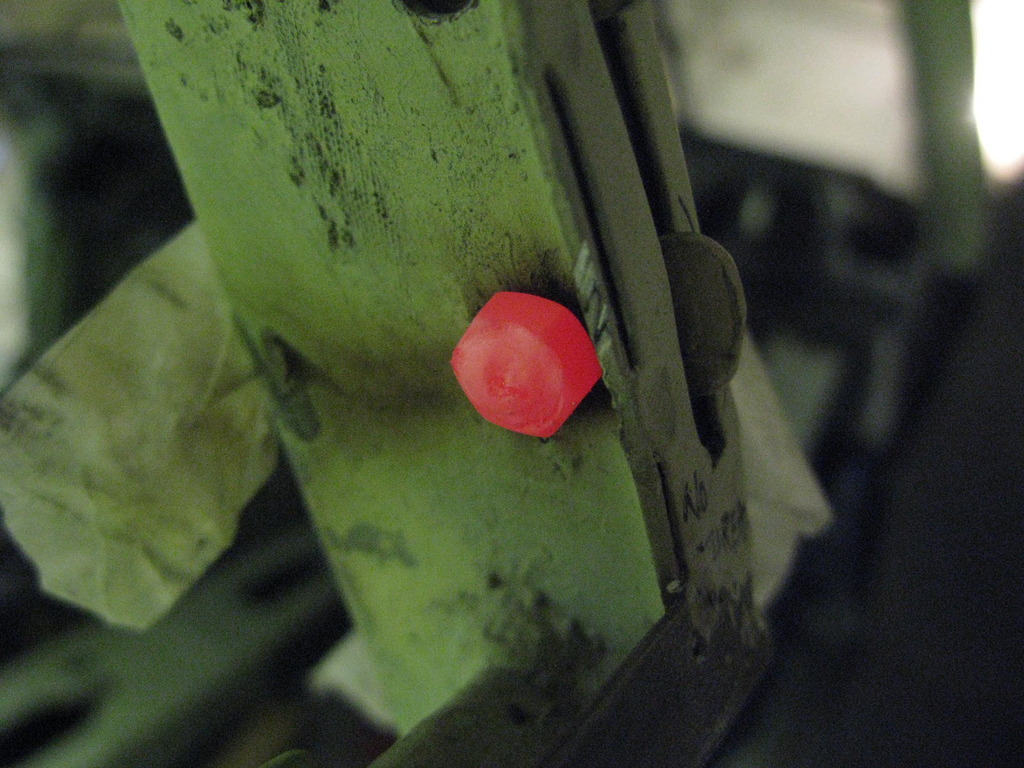
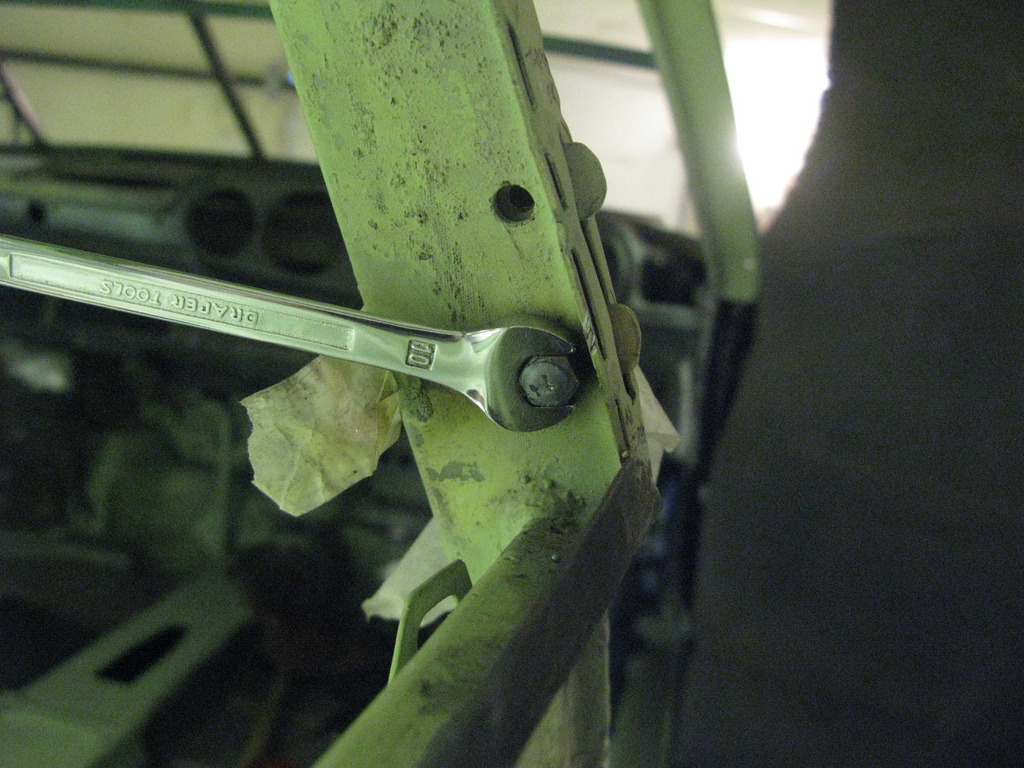
45. Quarterlight fixing bolts
Before the shell went off to Barry I had spotted that the captive nuts in the 'B' pillar were buggered, but this wasn't a section Barry was intending to cut out or change as a matter of course, so was causing a little concern. However, quite by chance he spotted that two of three problem threads were because of sheared screws rather than stripped threads.
These were the smallest and most awkward extractions using the welder he has ever done, but pleasingly his 100% success rate with this method has been maintained. That just leaves one stripped thread to tackle.... I'm sure he'll manage


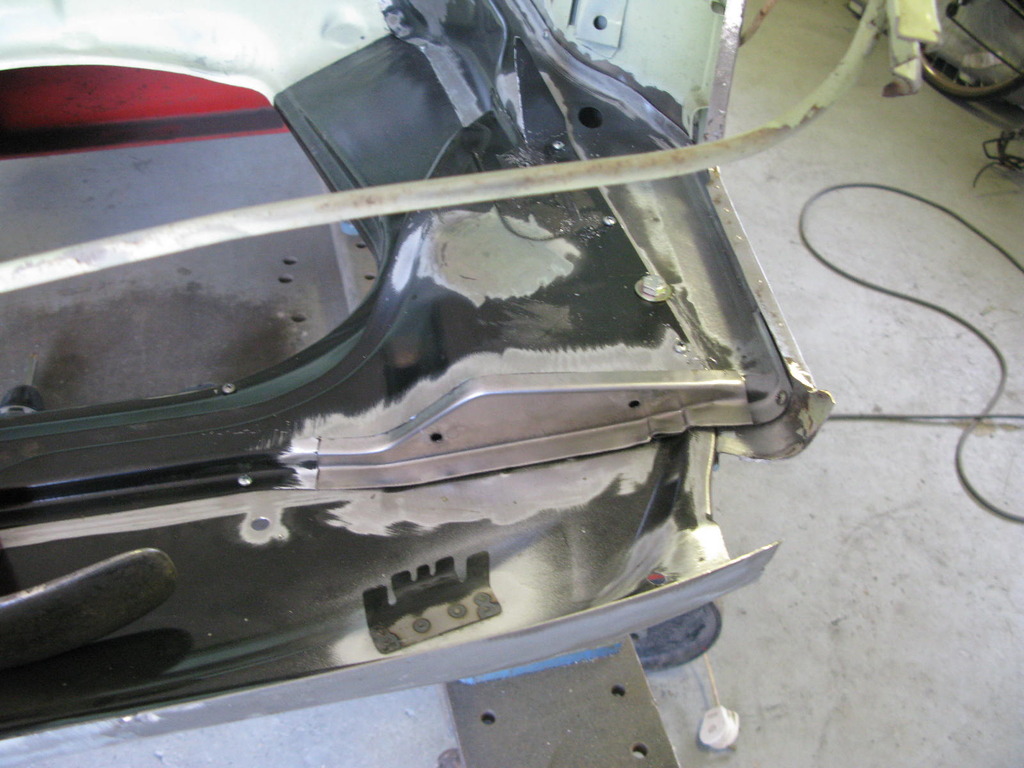
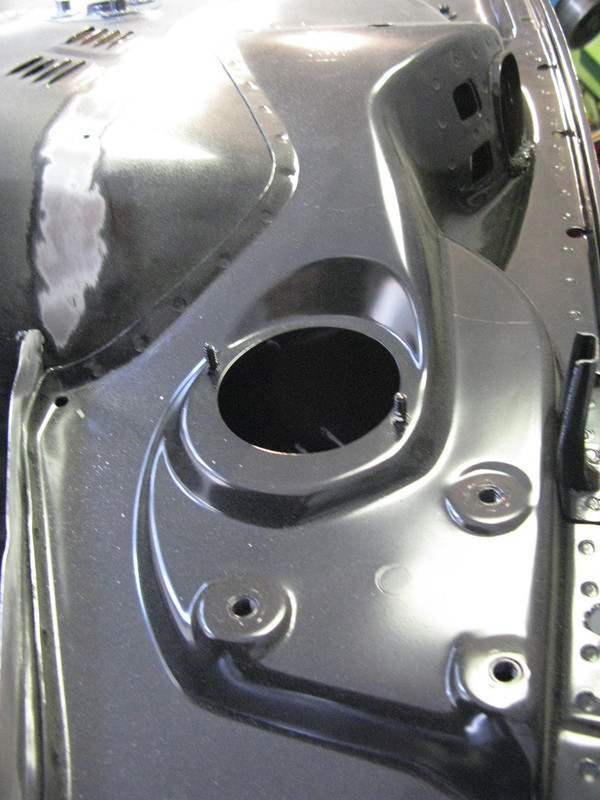
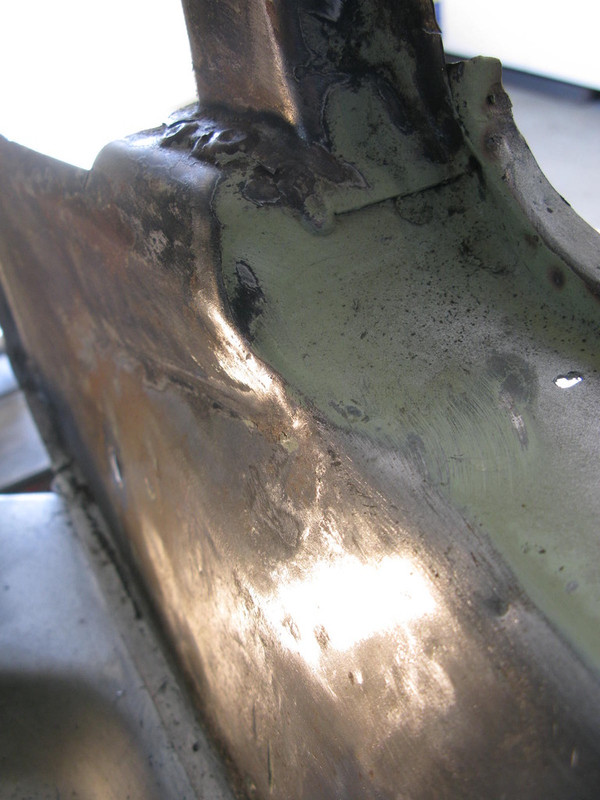
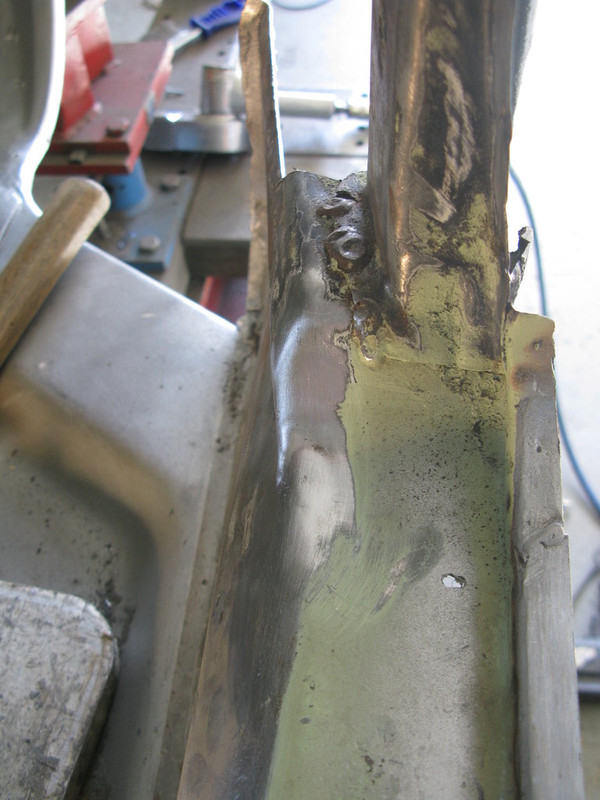
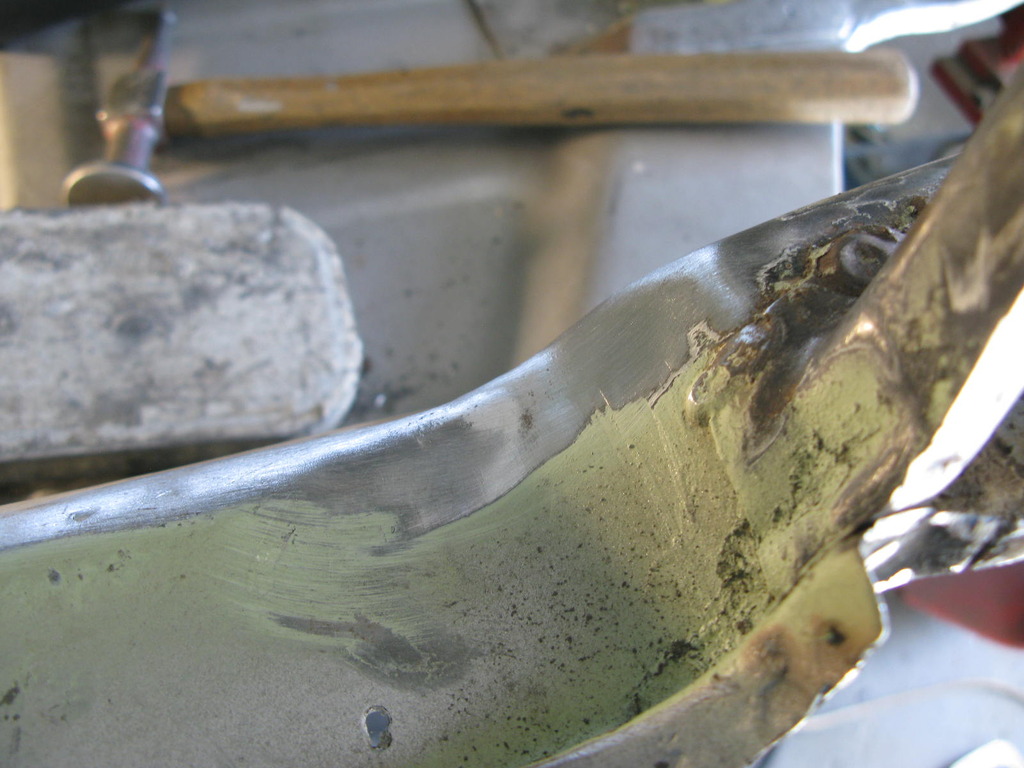
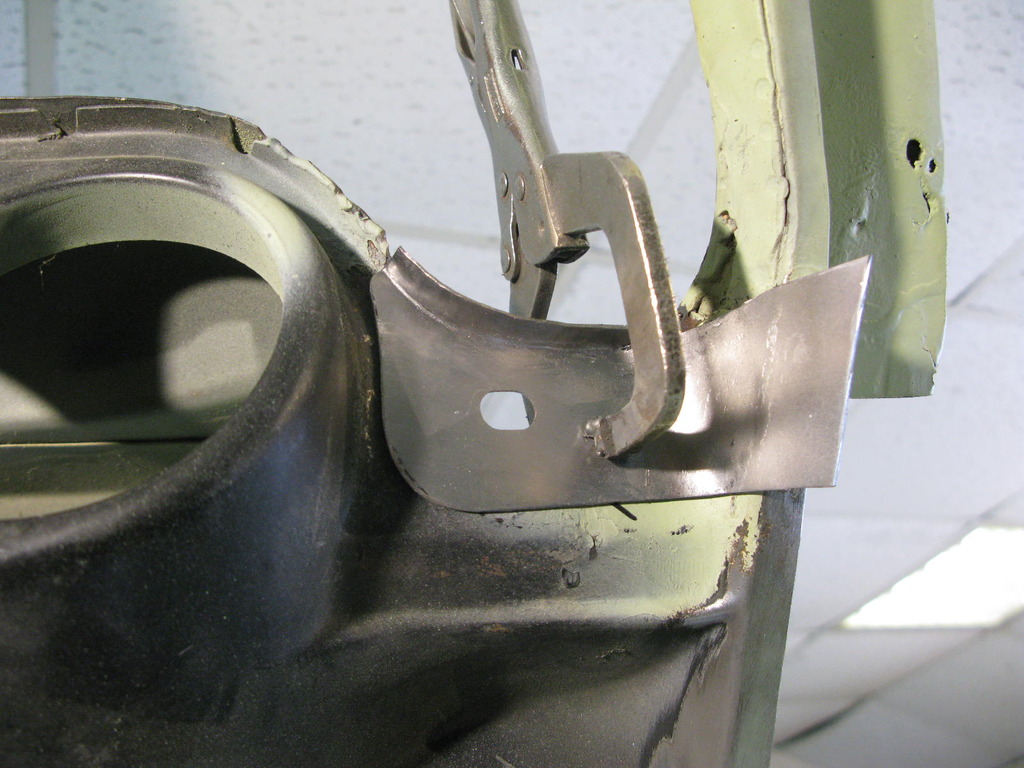
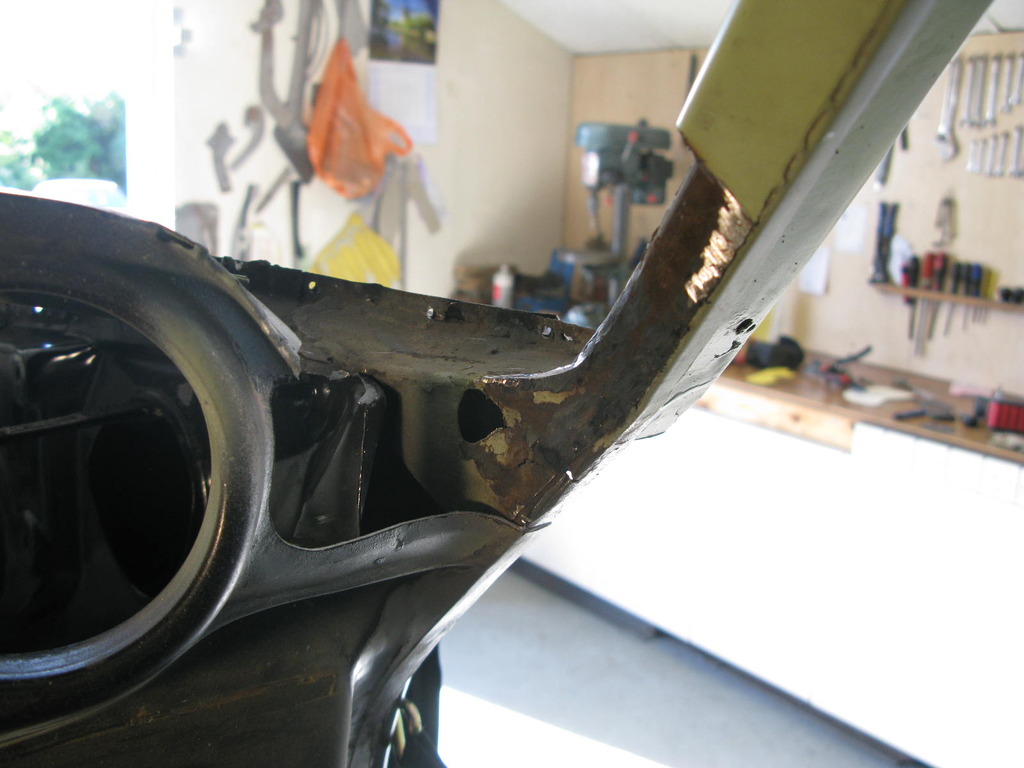
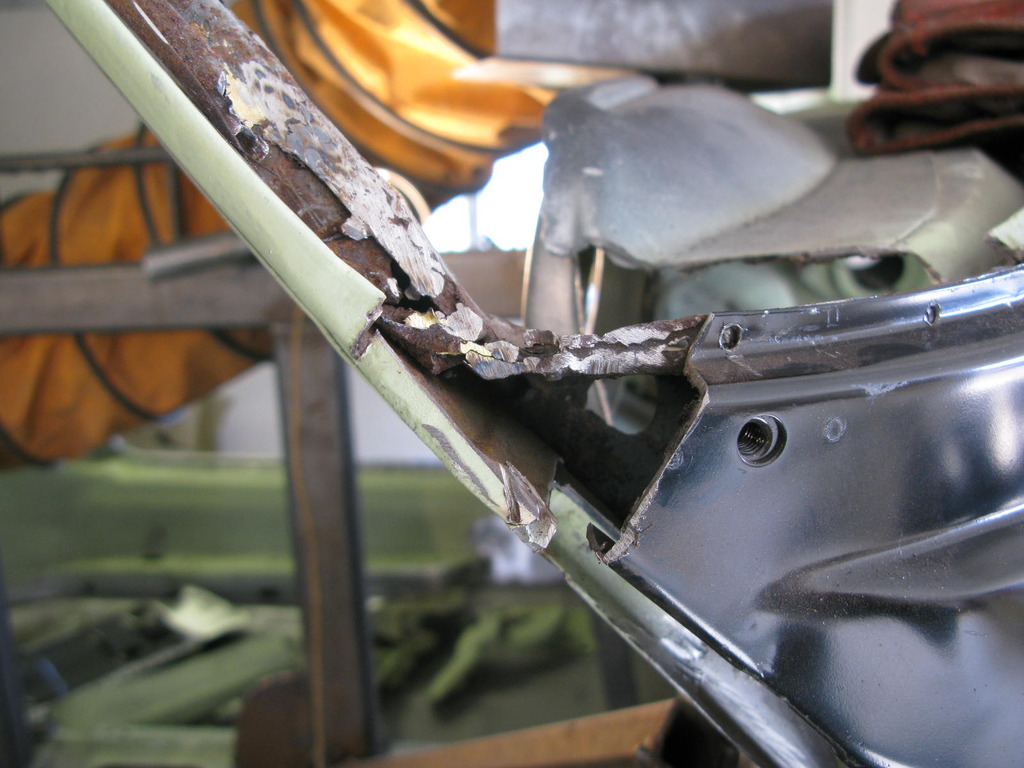
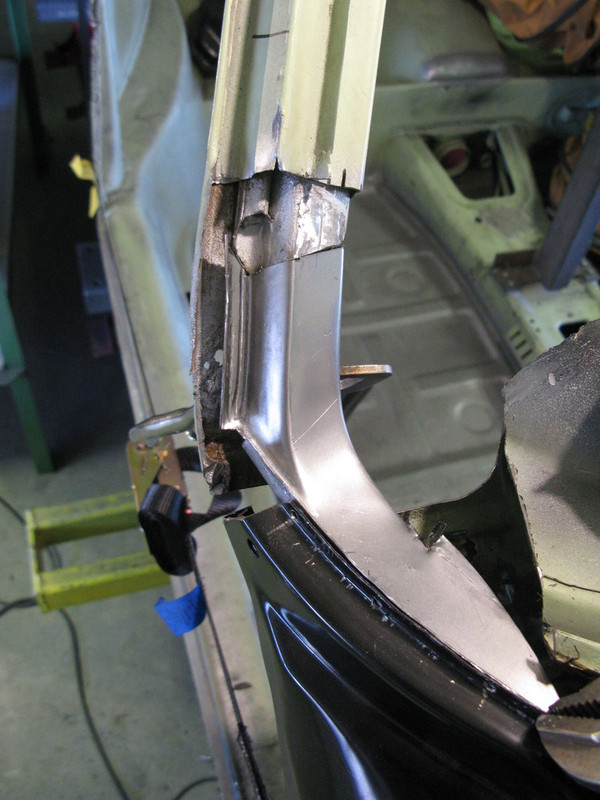
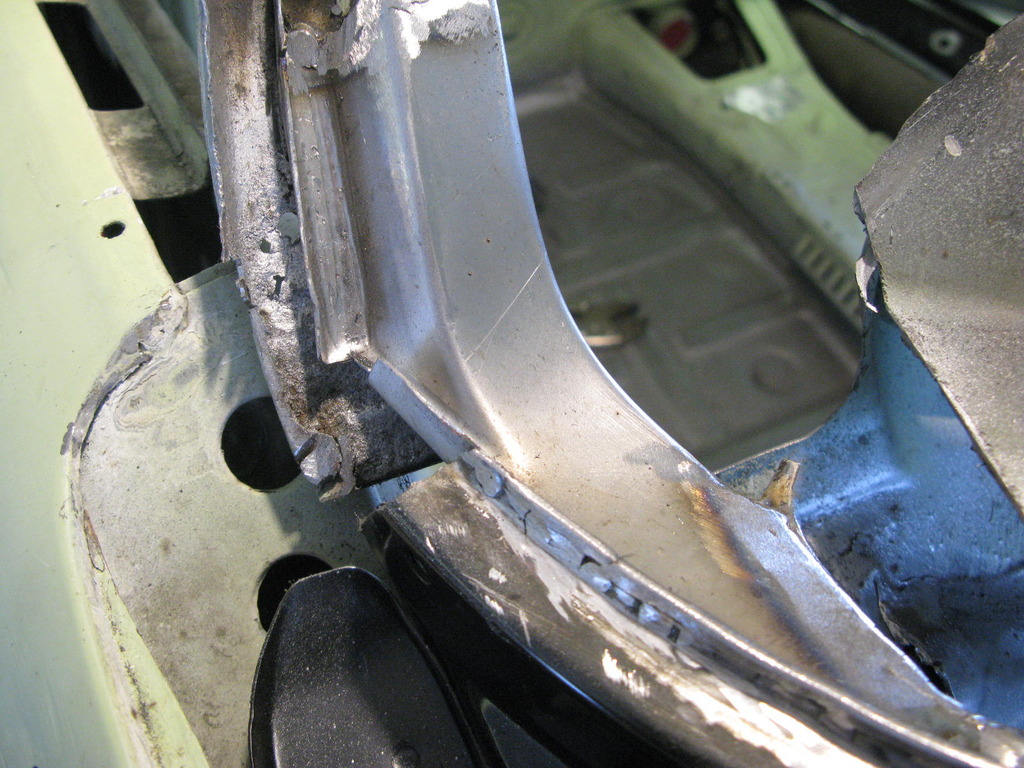
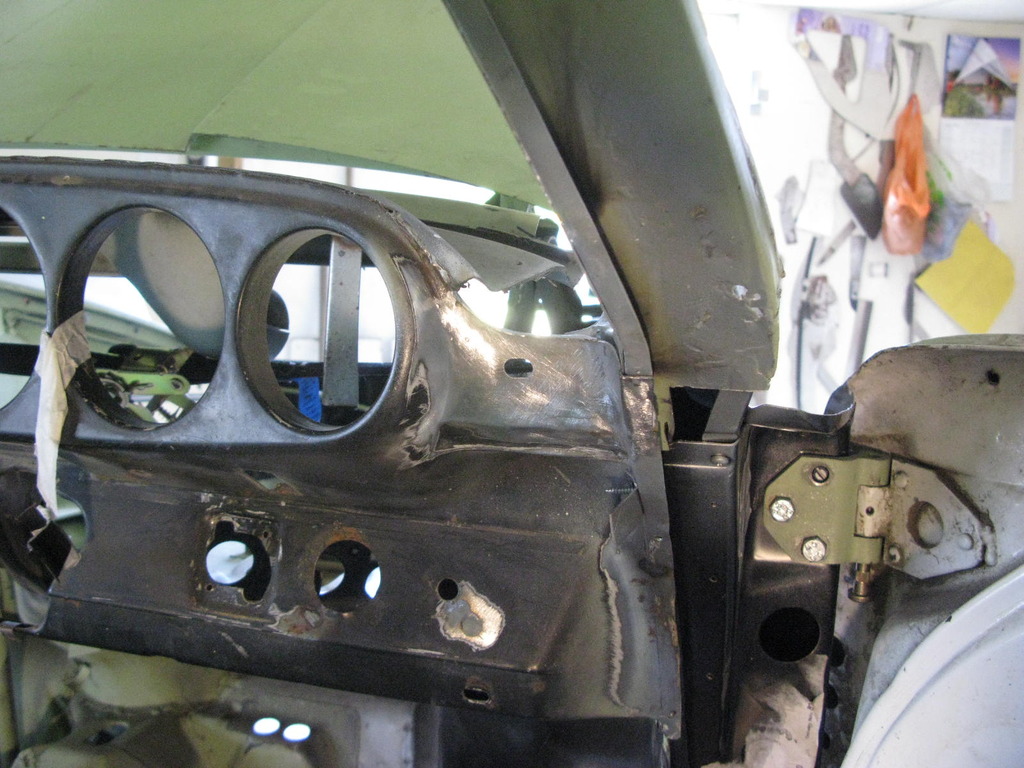
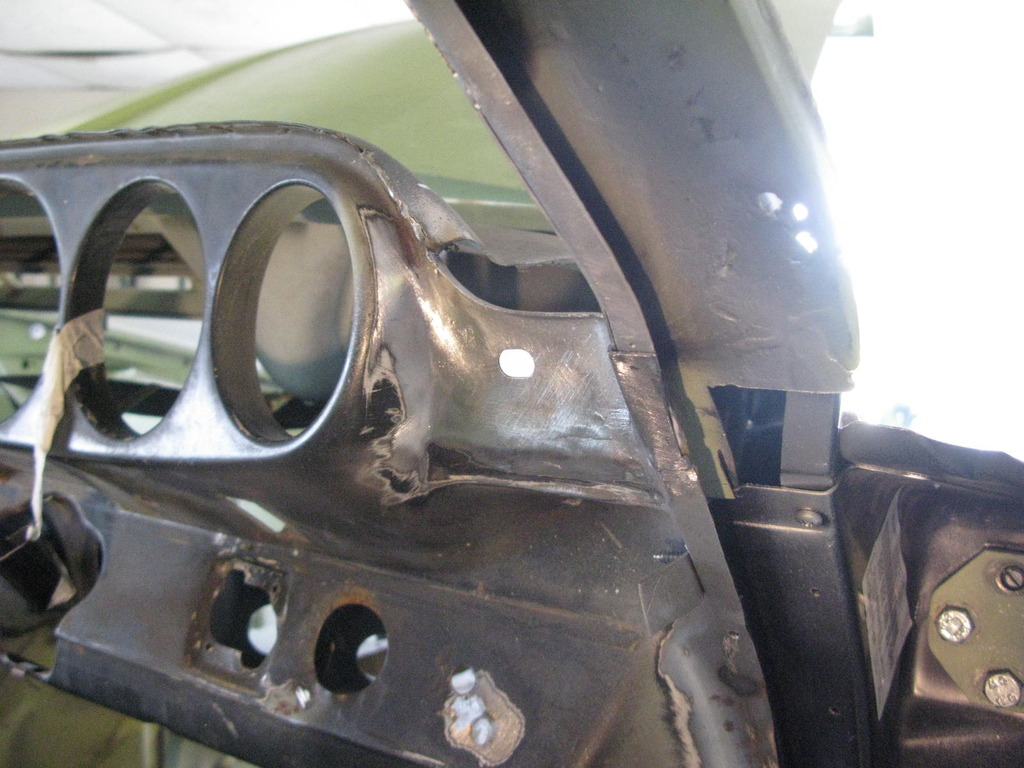
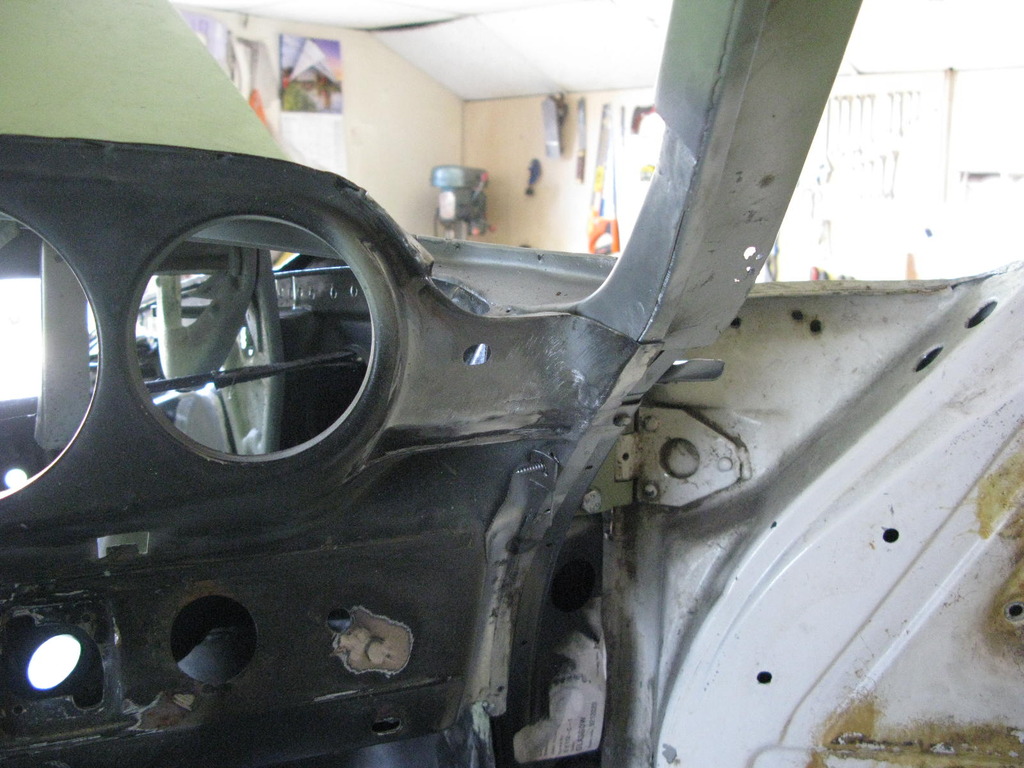
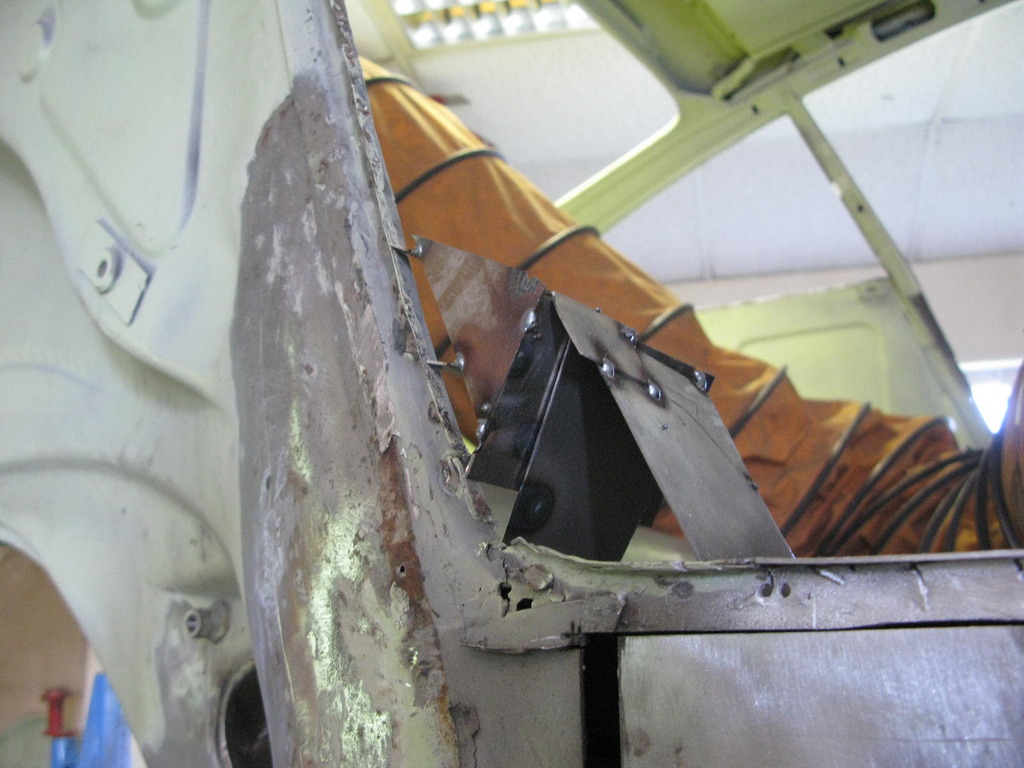
46. And back to the offside 'A' pillar and dash end.
Barry says this looks better in real life and the area that the new A-pillar base is sitting on will come out later. As ever it's sensible to leave as much used metal in place for as long as possible, and ratty as it may look, it still holds tons of information.
There's some tidying of welding to do as well, but for now he'll concentrate on getting that sunroof drain sorted, but I've been warned it won't be pretty but should be very effective.
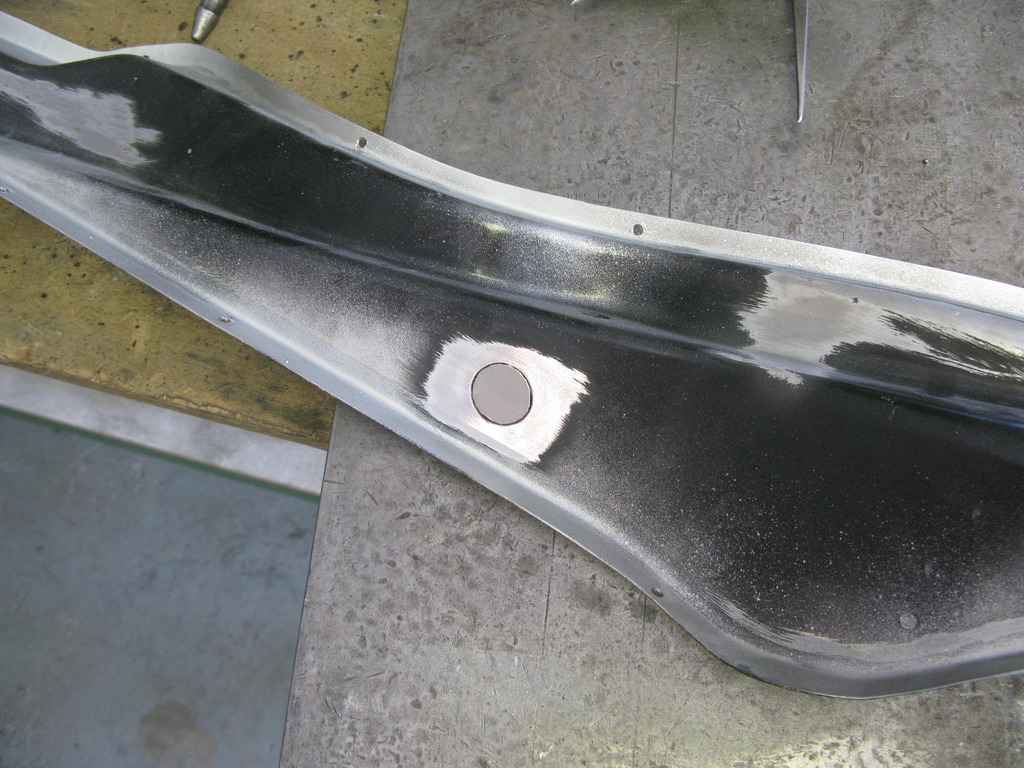
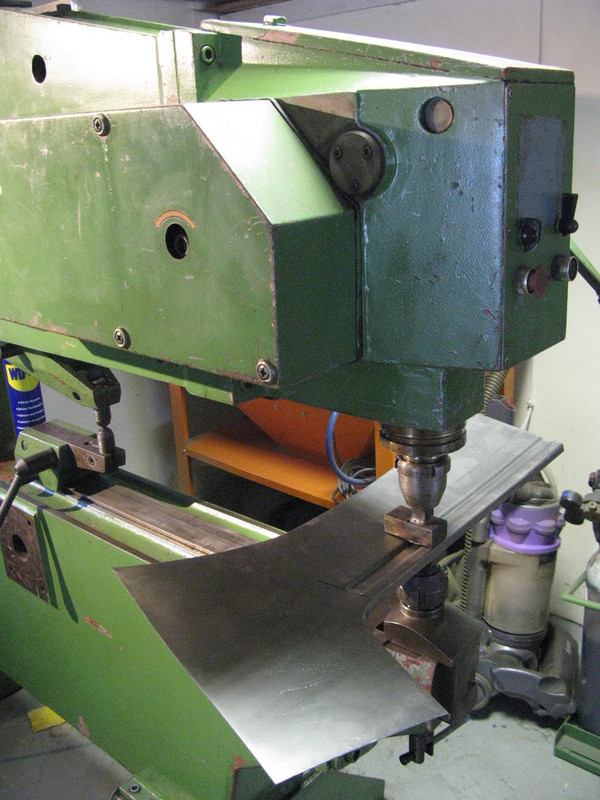
47. Offside front inner wing and sill welded.
Front inner wing welded, inner sill prepped and welded in, and new areas for front of rear inner wings fabricated, although still need shaping to fit the compound curves of the inner wing. The green machine is Barry's Pullmax and he used it with some tooling he made to form the 'pressing' that this area requires.
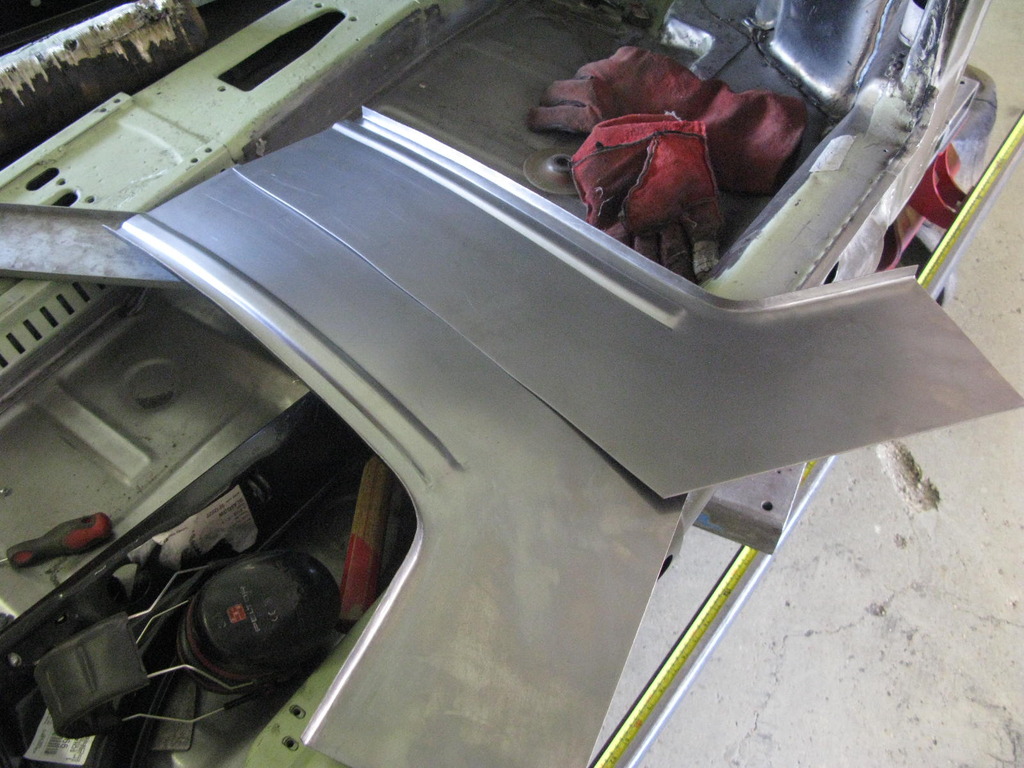
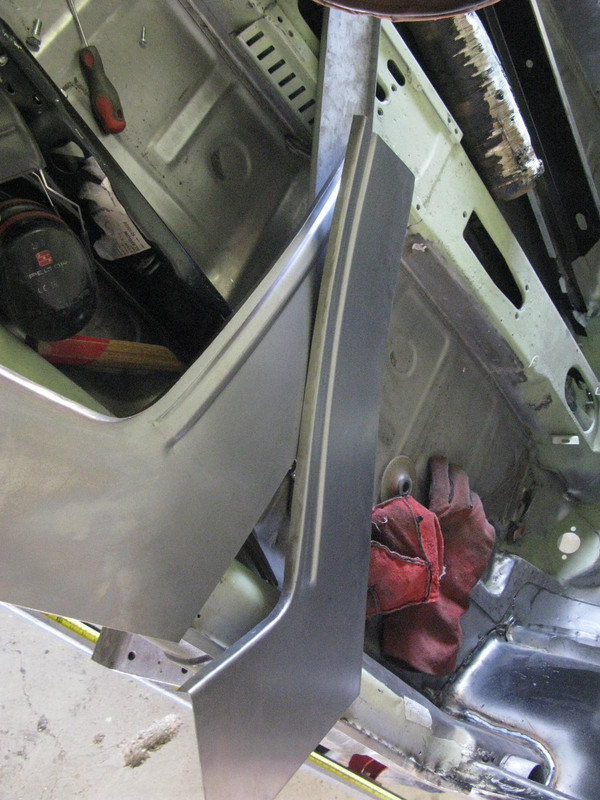
The scabby looking assembly at the back of the inner sill is just an impromptu 'jig' to capture the position of the inner wing flange. With the old metal cut out, it would be very easy to lose that information and have real trouble placing the new metal back in the right position.
I think I might have mentioned that Barry is running two restorations in parallel but is now on mine to the end....
42. Offside dash end and screen pillar base.
This area needed some attention as you can see from the 'before' images. The vertical dash end had taken a battering and the actual pillar had been poorly repaired. Once Barry had stripped this away it was clear that the sunroof drain would have been very unlikely to have got water out of the car
The first attempt at forming a repair section was close but a bit small and the shape wasn't quite there.
Attempt number two was pretty good and Barry was able to tweak it to where he needed it to be. By comparison, the new vertical bit of the dash was rather easier!
43. Trial fit trials..
At the end of the last phase I showed photo's of the front with much welding done. Barry had left the welding of the new inner wing until later, as he wanted to trial fit the whole front end of the car (both sides) before fully committing to the inner wing position.
These are a nasty panel to get right as somehow you need to reconcile the strut top position, A-post position, centre sill height, outer wing height (and relationship with the scuttle), outer wing fore and aft position and front panel position in relation to the scuttle gutter. Plus, outer wing to bonnet gap. If you factor in a/ that these modern inner wings are of awful quality with many parts welded on, in incorrect positions, b/ an old car with previous accident damage and repairs, c/ and old door and d/ a new wing that may, or may not be shaped perfectly, you can end up with a real head scratcher....and we did.
After quite a while of trying various options Barry, in the end, elected to set up his external measuring rig. Apparently he hasn't used this for a while because the sill clamps used in tugging the cars interfere with the measuring rig. It would obviously be sensible to be able to tug and measure at the same time, so he took a brave pill and cut down the sill clamp brackets (he'd paid £1000 for the full set) and some other parts of the clamps. It definitely looks a bit odd, but at least the two systems can now work at the same time.
The external measuring rig overcomes one problem found with many car jigs, that of measuring the upper areas of the outside bodywork and getting inside the car to measure internally. As you can see in the pictures a carriage runs on two rails. This carries two vertical pointer holders, and one horizontal one. Finally, there is a pair of pointers that can be placed in different positions, as required. The main rails are aligned to the main jig base to an accuracy of just under 1mm in-out, up-down over the length of the whole jig and everything is very simple to calibrate.
The beauty of the system is you can simply run down both sides of the car and compare them. Similarly, you can measure and record the position of any part (let's say the A-post door hinge holes) in three dimensions, record it, and then replicate the same when a new part gets fitted. Usually, any errors quickly show up making it extremely effective. The final shot shows the measurement of both dash end heights.
The various battles Barry was having with this section originally pointed to the whole front bulkhead being twisted very slightly (i.e. higher on one side than the other). In fact after checking on the jig it was found to be fine, so this theory could be 100% discounted. Previously, and before making the mods described earlier, he would have had to jury rig some way of measuring out of the car, down to jig bed height, then back into the jig, so along, down and along again. So if you're chasing say a 3.5mm error and actually find that error, you'll always wonder whether you've found zero error on the car and 3.5mm error on your measuring setup. Similarly, even if something seems to measure the same, there's always the niggle it was simply two errors cancelling each other out. Anyway, Barry's pleased to have his rig up and running again and indeed it did the business on my shell because he was able to trace about eight very small discrepancies totting up to a couple of tricky problems. Once spotted things could be corrected and life could go on ...easy really
44. Trials fits..continued
So following that rather taxing section the outer body alignment got well underway ...
45. Quarterlight fixing bolts
Before the shell went off to Barry I had spotted that the captive nuts in the 'B' pillar were buggered, but this wasn't a section Barry was intending to cut out or change as a matter of course, so was causing a little concern. However, quite by chance he spotted that two of three problem threads were because of sheared screws rather than stripped threads.
These were the smallest and most awkward extractions using the welder he has ever done, but pleasingly his 100% success rate with this method has been maintained. That just leaves one stripped thread to tackle.... I'm sure he'll manage
46. And back to the offside 'A' pillar and dash end.
Barry says this looks better in real life and the area that the new A-pillar base is sitting on will come out later. As ever it's sensible to leave as much used metal in place for as long as possible, and ratty as it may look, it still holds tons of information.
There's some tidying of welding to do as well, but for now he'll concentrate on getting that sunroof drain sorted, but I've been warned it won't be pretty but should be very effective.
47. Offside front inner wing and sill welded.
Front inner wing welded, inner sill prepped and welded in, and new areas for front of rear inner wings fabricated, although still need shaping to fit the compound curves of the inner wing. The green machine is Barry's Pullmax and he used it with some tooling he made to form the 'pressing' that this area requires.
The scabby looking assembly at the back of the inner sill is just an impromptu 'jig' to capture the position of the inner wing flange. With the old metal cut out, it would be very easy to lose that information and have real trouble placing the new metal back in the right position.
Last edited by aston on Fri Oct 20, 2023 3:53 pm, edited 3 times in total.
Kieron.
viewtopic.php?f=28&t=48230
2.4E (1973).
Suzuki DRZ400S (2006).
BMW R1200RS (2018).
Yamaha XT500 (1978).
viewtopic.php?f=28&t=48230
2.4E (1973).
Suzuki DRZ400S (2006).
BMW R1200RS (2018).
Yamaha XT500 (1978).
Re: 1973 911E RHD Light Ivory and ex NZ...another one.
Just remembered, the inner wing and sill shown welded on look a bit plain as they are currently plug welded on. Those welds will be duplicated with the spot welder later on, making the whole thing look a lot more factory. Also, the seams under the sill area will get trimmed at some point as well.
Kieron.
viewtopic.php?f=28&t=48230
2.4E (1973).
Suzuki DRZ400S (2006).
BMW R1200RS (2018).
Yamaha XT500 (1978).
viewtopic.php?f=28&t=48230
2.4E (1973).
Suzuki DRZ400S (2006).
BMW R1200RS (2018).
Yamaha XT500 (1978).
-
911hillclimber
- Nurse, I think I need some assistance
- Posts: 18970
- Joined: Mon Mar 10, 2008 6:26 pm
- Location: West Midlands
Re: 1973 911E RHD Light Ivory and ex NZ...another one.
What does 'duplicated' mean in practice?
Does Barry spot weld in-between the plug weld spaces?
That windscreen section looks a real tight complicated corner to resolve, just great to see.
Thanks as ever for doing these picture posts.
Does Barry spot weld in-between the plug weld spaces?
That windscreen section looks a real tight complicated corner to resolve, just great to see.
Thanks as ever for doing these picture posts.
73T 911 Coupe, road/hillclimber 3.2L
Lola t 492 / 3.2 hillclimb racer
Boxster 987 Gen II 2.9
Lola t 492 / 3.2 hillclimb racer
Boxster 987 Gen II 2.9
Re: 1973 911E RHD Light Ivory and ex NZ...another one.
I really appreciate all the detail in this thread, amazing skills! Pls keep it coming!
Magnus
1971 911 2.2T
1995 993
681
1971 911 2.2T
1995 993
681
-
Gary71
- Nurse, I think I need some assistance
- Posts: 10303
- Joined: Wed Mar 31, 2004 1:27 pm
- Location: Cheshire
- Contact:
Re: 1973 911E RHD Light Ivory and ex NZ...another one.
Brilliant stuff as ever and makes me realise my money should be going right here and not in the engine!
Re: 1973 911E RHD Light Ivory and ex NZ...another one.
'Duplicated' welds..
Hi Graham - yes, invisible plug welds between 'cosmetic' spot welds. Barry has a number of reference photos showing how the cars left the factory, so he is able to replicate the original position of spot welds.
If you scroll back a bit on this page (page 5) to the section headed 'Front pan area going in' there are some pictures and further explanation there.
Kieron.
viewtopic.php?f=28&t=48230
2.4E (1973).
Suzuki DRZ400S (2006).
BMW R1200RS (2018).
Yamaha XT500 (1978).
viewtopic.php?f=28&t=48230
2.4E (1973).
Suzuki DRZ400S (2006).
BMW R1200RS (2018).
Yamaha XT500 (1978).