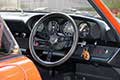
Wot, not another '79 Targa resto thread

Ongoing and archived Porsche (and other marques) restoration threads from DDK members

Moderator: Bootsy

Post Reply
911hillclimber
Nurse, I think I need some assistance
Posts: 20694
Joined: Mon Mar 10, 2008 6:26 pm
Location: West Midlands

Re: Wot, not another '79 Targa resto thread

Post by 911hillclimber »

So good to read of normal DIY restoration mini-adventures, you are not at all alone, but it makes it so much better when you have cracked it and made so many other (friends) smile!

You are going to town on this car!
Your middle name must be the same as mine, 'obedient'. Changed my middle name a day after getting married.... :lol:

Can't wait until you paint it and your story of that and the glowing feeling of 'I Did That'.
Onwards and upwards. :)
73T 911 Coupe, road/hillclimber 3.2L
Lola t 492 / 3.2 hillclimb racer
Boxster 987 Gen II 2.9
Phill

Re: Wot, not another '79 Targa resto thread

Post by Phill »

PeterK wrote:What a plonker Rodney ! – it will just be a smidgen harder to sand.
A smidgen you say? I admire your optimism. Post lockdown sanding party methinks - bring your orbitals :lol:
911hillclimber
Nurse, I think I need some assistance
Posts: 20694
Joined: Mon Mar 10, 2008 6:26 pm
Location: West Midlands

Re: Wot, not another '79 Targa resto thread

Post by 911hillclimber »

It will be his daily exercise I think.. :bounce:
73T 911 Coupe, road/hillclimber 3.2L
Lola t 492 / 3.2 hillclimb racer
Boxster 987 Gen II 2.9
User avatar
PeterK
DDK rules my life!
Posts: 1274
Joined: Mon Sep 01, 2014 3:04 pm
Location: GU51 - Fleet, Hampshire, UK

Re: Wot, not another '79 Targa resto thread

Post by PeterK »

Well, in good news, the engine tin-ware and a couple of bumper shox went black, as intended (hanging to dry overnight)
Image

And the replacement pressure switch for the compressor arrived.


The less good news (but providing a learning opportunity) is that having mullered the old pressure switch to get it off, replaced with the new (modifying small-bore pipework), it still leaks air :( . In better news I now know how compressors work, recognise that the venting I have (not me personally, just the compressor) is not due to a cracked pressure switch, but to a failed non-return valve. The small-bore pipe that runs to the base of the pressure switch is there to unload the compressor after the motor stops & make it easier for the compressor to restart. Pulled the NRV apart, fiddled with it (not the type that you can disassemble) and put it back in the compressor, I have now ordered a new NRV.

So, having spent £12 and time on a pressure switch, I still have to wait 2-3 weeks to get the £6 NRV that I needed all along :oops: .

Good job that I intended to let the epoxy go off a bit before filling and flatting. Aside from the ever-increasing list of ‘little chores’ that SWMBO is inventing, I now have time to dismantle the OS door lock and striker. The NS works fine, with a gentle double click to shut the door, whereas the OS needs a damn good slam. Better to fix that and be sure the doors are properly adjusted before I try and make the sides of the car flat.
'79 Targa - restoration now mainly complete & being driven
http://www.ddk-online.com/phpBB2/viewto ... 28&t=59756

and now CIS to EFI
viewtopic.php?t=72921
The Garage Bitch
DDK Fanatic
Posts: 63
Joined: Thu Feb 07, 2019 4:37 pm

Re: Wot, not another '79 Targa resto thread

Post by The Garage Bitch »

That's a bit of a shitter with the compressor but, as you say, you now have some time to sort the door and flatten the sides before spraying

Clouds, silver linings, yadda yadda

Will be glad when this business is over and can pop down to see her again and do 'stuff'.

Keep up the good work mate
User avatar
PeterK
DDK rules my life!
Posts: 1274
Joined: Mon Sep 01, 2014 3:04 pm
Location: GU51 - Fleet, Hampshire, UK

Re: Wot, not another '79 Targa resto thread

Post by PeterK »

Sent to the Naughty Boy’s room again for a few hours. Not much to update, but I’m 6 reads away from 11k, so please indulge me.

I have 3 compressors, with one poorly as noted above, currently awaiting a NRV. I also have a big one (oh-er missus). Not sure the air volume but it is very old and sits on a very large (200l ??) tank. Got it for nix, as it was left at a friend’s house for years and he needed the space when he converted his garage space. It didn’t compress when I got it, so stripped and rebuilt the valve set. Unfortunately when I tried it again yesterday, it took ages to build up any pressure and the air sander soon depleted it. I also have a baby one, but not sure that will give enough umphh for the air sander, so bit the bullet, found a UK supplier and paid silly money for a NRV for the first compressor. Typical of life that the NRVs that don’t fit my compressor are ten a penny and available yesterday.

Next job of the day – the OS door latch. Took it out, sprayed copious amounts of WD40, refitted and readjusted. Result - working as it should, with a nice double click close. It sticks a bit when opening, but the springy, plastic bit inside the striker is a little cracked. I'm sure I've seen replacement plastic bits for sale somewhere.

On a roll now, and on with the front wings.
Image

Without the assistance of my air tools, I had to break out the sanding blocks and do things manually. First I sanded all of the orange peel away using 180 grit, then followed up on the dings, dents and other areas that needed filling with 80 grit.

Lots of faffing around, then followed getting the wing and door properly aligned, up/down, left /right and in/out, but got reasonably close in the end. Ran masking tape down the door edge and ran filler down the rear of the wing to cover where I have built it up.
Image

Feeling smug, I taped a couple of razor blades to a wooded paint stirring stick and then before the filler was hard, I ran them down the joint between the wing and the door.
Image

What did we learn – it works better in the movies, although it did work. I also managed to pull a small chunk of filler out midway down the wing, so had to refill. I forgot that I had also filled the scuttle and covered the scuttle to wing joint. The filler was very hard when I realised :oops: .

Left filler to harden properly and retired for a sneaky beer.
'79 Targa - restoration now mainly complete & being driven
http://www.ddk-online.com/phpBB2/viewto ... 28&t=59756

and now CIS to EFI
viewtopic.php?t=72921
User avatar
Darren65
Nurse, I think I need some assistance
Posts: 8161
Joined: Mon Dec 13, 2010 10:55 pm
Location: North Wiltshire
Contact:

Re: Wot, not another '79 Targa resto thread

Post by Darren65 »

Love your thread Peter and your exploits always bring a smile to my face :)

Keep up the great effort and look forward to seeing your car at CLM 2021 :thumbleft:
sladey
Nurse, I think I need some assistance
Posts: 9377
Joined: Sat Apr 23, 2005 9:08 pm
Location: Nottingham, UK

Re: Wot, not another '79 Targa resto thread

Post by sladey »

Thanks for sharing Peter - I can relate to the cock-ups
The simple things you see are all complicated
I look pretty young but I'm just backdated yeah
User avatar
PeterK
DDK rules my life!
Posts: 1274
Joined: Mon Sep 01, 2014 3:04 pm
Location: GU51 - Fleet, Hampshire, UK

Re: Wot, not another '79 Targa resto thread

Post by PeterK »

Not updated for a while, although have been escaping (being sent) into the man cave for a few hours every day (except one). Pretty much as anticipated though – not much to show for it. The car has been going various shade of grey, with the odd bit of shiny thrown in. I’ve been filling dings, dents and depressions, then rubbing most of the filler off again, along with my nice epoxy in numerous places.

On the NS door / wing join, I wasn’t happy. Trying to get the NSF wing and door to line up required the wing to be set out a bit – basically all of the bolts that join the wing to the inner fitch panel all were at least half a hole off, maybe more. I tried building up the front of the door and rear of the front wing with filler, but there seemed much too much. Then the door wouldn’t open. As the front edge of the door closes the gap when opening, it did it so much that the outer edge of the door hit the front wing. Deciding that I was chasing my tail, probably bodging one thing which then caused a second issue, that in turn needed a bodge. So nothing for it – I ground all of the filler away and took a long hard look. The back edge of the front wing was bent inwards slightly, with a bulge in front of that, where the inner stiffener / panel that mounts to the fitch panel is. I guess that in building up the rear edge of the wing, I had got too much heat int it, resulting in distortion. So, wing off, BFH called in to tickle (together with a bit of pipe wrench massaging of the trailing edge), and the wing looked a lot better. When it was bolted back on, I could then get all of the bolts to mate up and very little filler needed on the door or wing.
Image
I managed to remove yet more of the filler after this photo, so there’s not much needed at all now. Result.


Still haven’t received my square foam, intended to go on the front of the door, so that when I fill over the join, the filler doesn’t disappear and get stuck to everything. Nett result, lots of gouging filler from where it shouldn’t be.
Image
That isn't a 1/4" of filler on the door, just filler on the return. The filler is less than an mm thick :compress:

Doors (drifting out hinge pins, so that the door alignment remains set for now) and wings have been on and off so many times now, but at last, all seems straight enough for another coat of epoxy. When this is done, I can try a guide coat and see just how flat I’ve got things so far.
Image
Image


First, noticing this
Image

It was clearly time to clean the garage floor a bit. It still isn’t clean enough to spray topcoat, still but will do for epoxy spraying for now.
Image

So, a couple of very thin skims on the rear edge of 1 door, a slight skim where I tapped a high spot down on a front wing, and all put to bed, ready for another epoxy spraying day.
Image
'79 Targa - restoration now mainly complete & being driven
http://www.ddk-online.com/phpBB2/viewto ... 28&t=59756

and now CIS to EFI
viewtopic.php?t=72921
911hillclimber
Nurse, I think I need some assistance
Posts: 20694
Joined: Mon Mar 10, 2008 6:26 pm
Location: West Midlands

Re: Wot, not another '79 Targa resto thread

Post by 911hillclimber »

This week looks to be dry and warm, Thursday being particularly so.
Do you have the paint to hand?
Good you are getting some solid hours in, preparation will always pay off. :)
73T 911 Coupe, road/hillclimber 3.2L
Lola t 492 / 3.2 hillclimb racer
Boxster 987 Gen II 2.9
User avatar
PeterK
DDK rules my life!
Posts: 1274
Joined: Mon Sep 01, 2014 3:04 pm
Location: GU51 - Fleet, Hampshire, UK

Re: Wot, not another '79 Targa resto thread

Post by PeterK »

Paint is ready, but no way it will be in colour this week. Epoxy, flatting, filler/primer, more flatting, etc before topcoat (I don’t like sanding :( )
'79 Targa - restoration now mainly complete & being driven
http://www.ddk-online.com/phpBB2/viewto ... 28&t=59756

and now CIS to EFI
viewtopic.php?t=72921
Phill

Re: Wot, not another '79 Targa resto thread

Post by Phill »

Lots of good progress there :hello1: :hello1:
Gary71
Nurse, I think I need some assistance
Posts: 10731
Joined: Wed Mar 31, 2004 1:27 pm
Location: Cheshire
Contact:

Re: Wot, not another '79 Targa resto thread

Post by Gary71 »

Another horrible, demotivating ‘hundred hours for no visible progress’ stage.

Full credit for taking on paint and filler yourself
The Garage Bitch
DDK Fanatic
Posts: 63
Joined: Thu Feb 07, 2019 4:37 pm

Re: Wot, not another '79 Targa resto thread

Post by The Garage Bitch »

Gary71 wrote:Another horrible, demotivating ‘hundred hours for no visible progress’ stage.

Full credit for taking on paint and filler yourself Image
I was lucky to see the end product of Peter's previous restoration project. His patience and attention to detail was very impressive. If I had a hat I'd be doffing it like a good 'un.

The car looked fantastic.
User avatar
PeterK
DDK rules my life!
Posts: 1274
Joined: Mon Sep 01, 2014 3:04 pm
Location: GU51 - Fleet, Hampshire, UK

Re: Wot, not another '79 Targa resto thread

Post by PeterK »

Thanks guys.

In a surprise move, and just for a change, all the bits went grey
Image

At first look, just a couple of areas that need some attention, but then might spray the primer filler and use the guide coat on that. Getting ever closer.

On an associated note – Sod’s Law that the foam rubber I desperately needed to prevent build-up of filler in all the wrong places (door jams, etc), has just arrived, now that I’ve finished the doors and front wings. Never mind, it may well be needed when I play with the froot lid.


To avoid re-assembling the heating system, only to have to remove it to fit Jonny’s aircon system, I’ve got just the blower/airbox to start with.
Image
I’ll add the bigger alternator when I rebuild the engine, but everything else is an easy fit, that doesn’t require me to do any dismantling.

Fitting the airbox could be a lockdown project for those that are minding the pennies during these strange times, but want aircon sometime – do it in chunks. I realise that this would normally be more expensive (double shipping) but for me, the man maths is simple – go and visit Jonny and collect, saving shipping. Simples :lol: .
'79 Targa - restoration now mainly complete & being driven
http://www.ddk-online.com/phpBB2/viewto ... 28&t=59756

and now CIS to EFI
viewtopic.php?t=72921
Post Reply