

Project Blue Book
Moderators: drummerboytom, MdR
-
sladey
- Nurse, I think I need some assistance
- Posts: 8774
- Joined: Sat Apr 23, 2005 9:08 pm
- Location: Nottingham, UK
Re: Project Blue Book
Yep great work as always - many thanks for sharing
The simple things you see are all complicated
I look pretty young but I'm just backdated yeah
I look pretty young but I'm just backdated yeah
Re: Project Blue Book
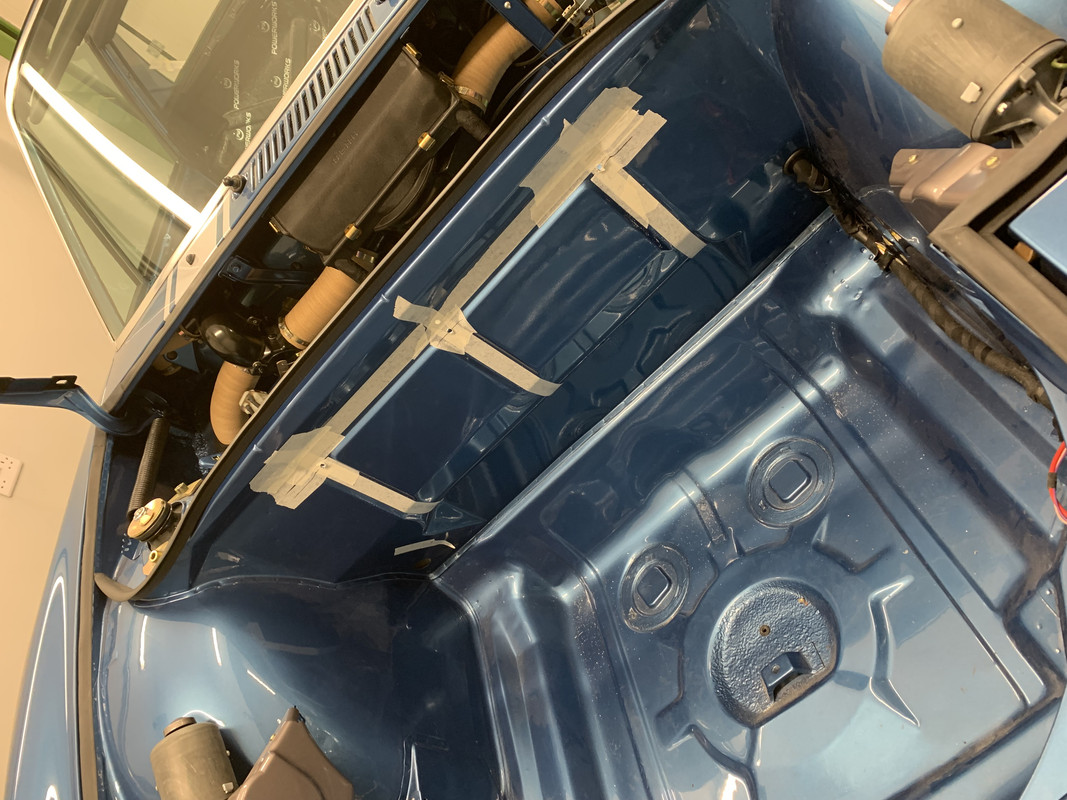
Managed to get a bit of time in the garage. I thought I would try to finish up the washer system and last bit of the brown paper/ foil tubing.
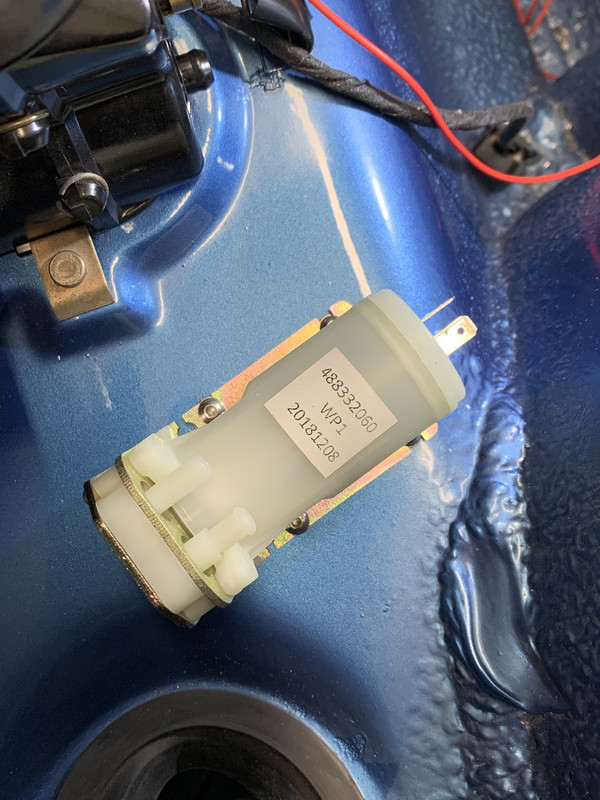
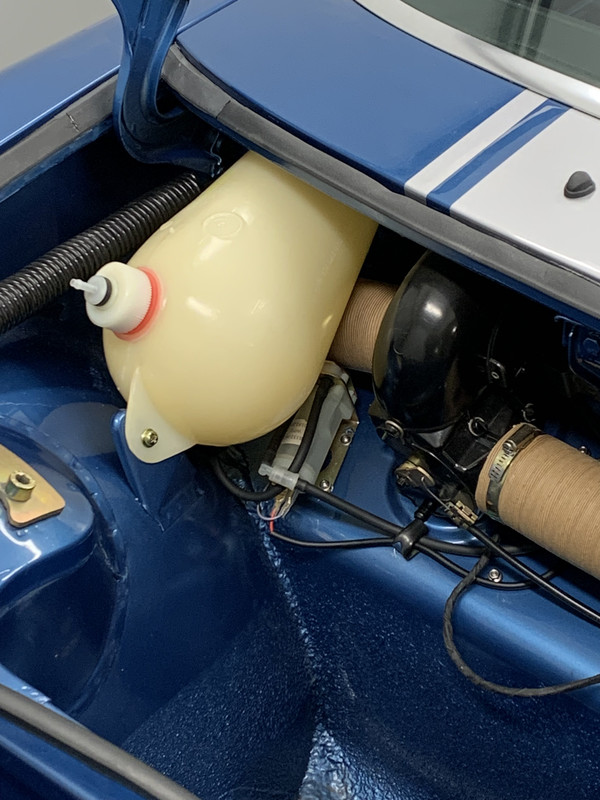
The original sytem hooked up the the spare tyre to get pressure to spit the water at the windscreen. So that wouldn't do. I managed to get a proper Porsche pump as fitted to just about all their models back in the day. I needed to get a nice factory looking spot to fit the pump. Not easy as the space is a little restricted under there. I fitted the paper hose to see what space was left. I fitted the cleaned washer bottle and lined up the pump to mirror.
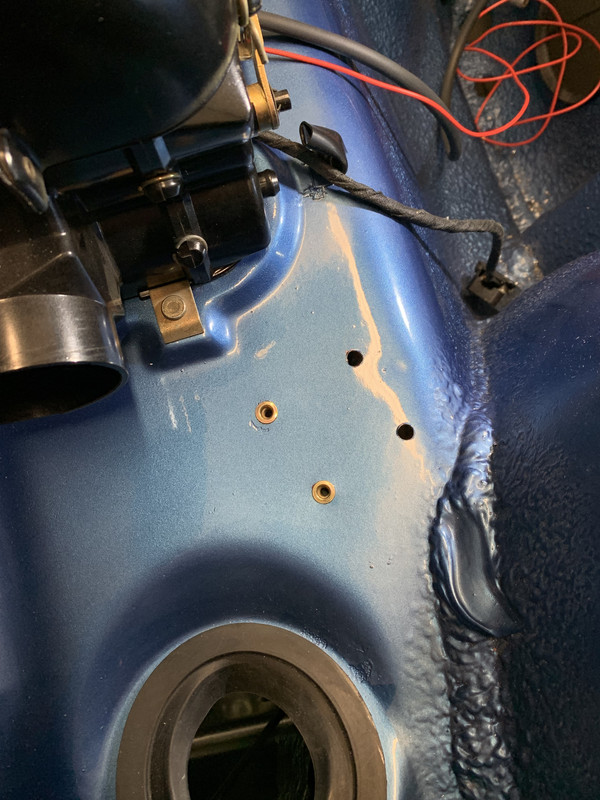
The thought of self tappers made me shudder, so out with the rivnutter!
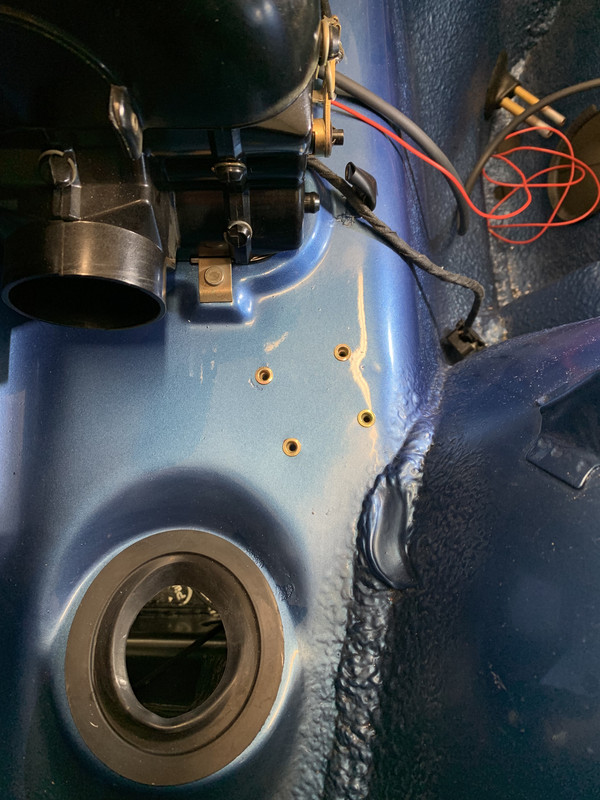
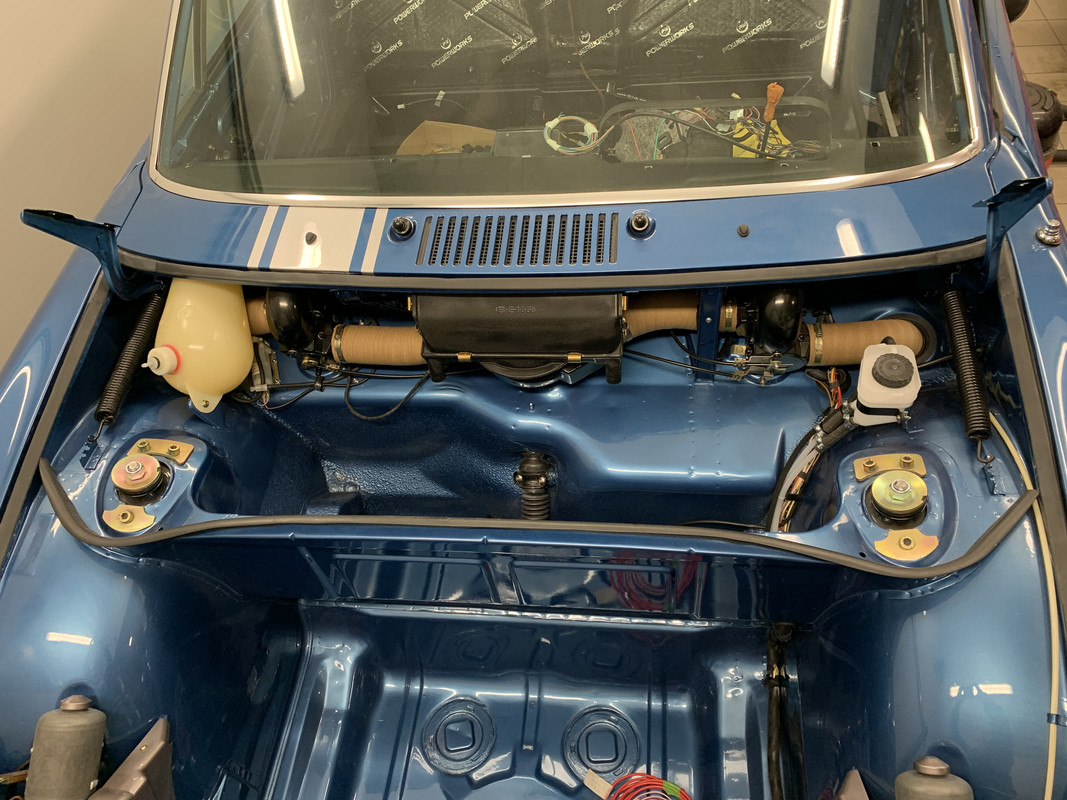
As the system is pressurised by the tyre I needed to add a one way breather so as to not stall the pump when operated.

This is off a BMW and is just one of there generic breathers for pipework. Just a case of drilling a hole in the top the pushing through. The end is the same as shown so I just pushed a short bit of washer tube to keep it in situ. I just need some more pipe to finish off the top.
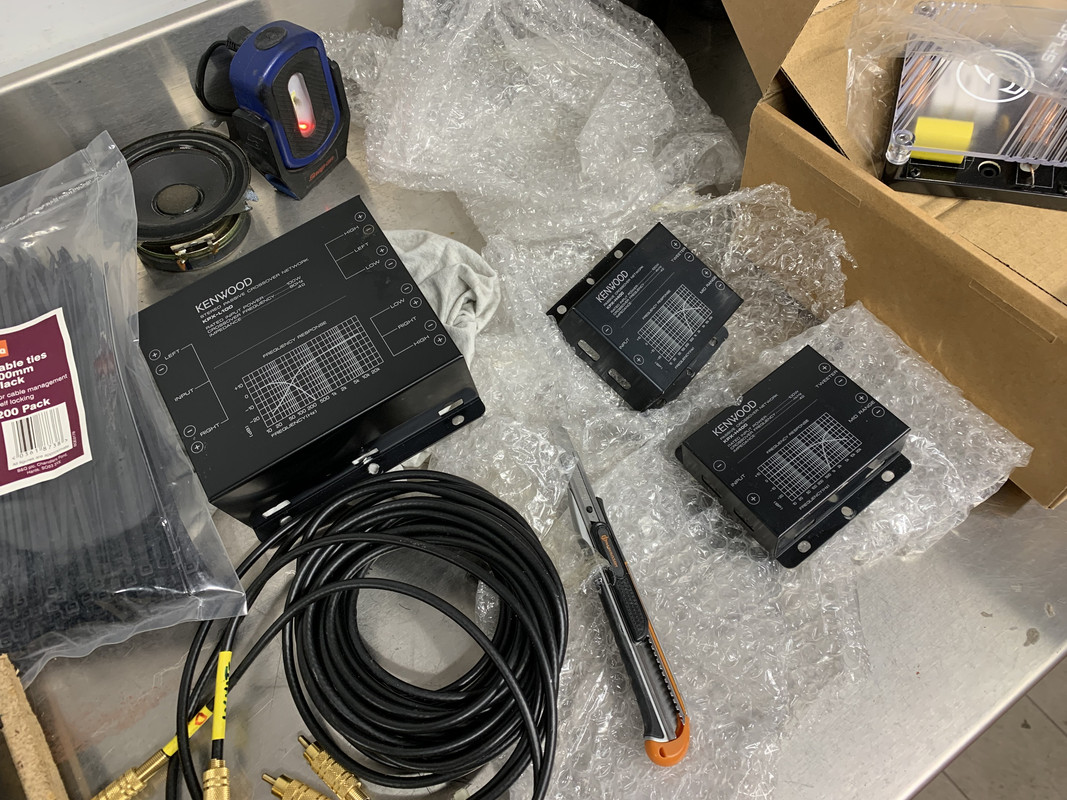
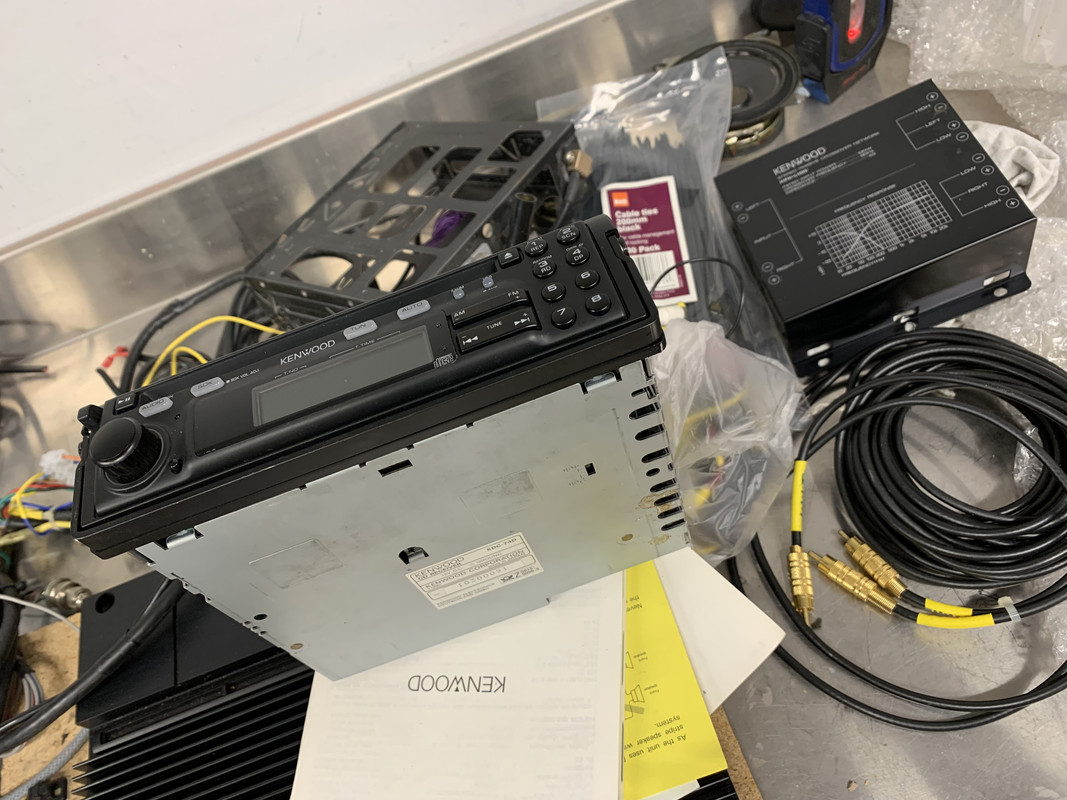
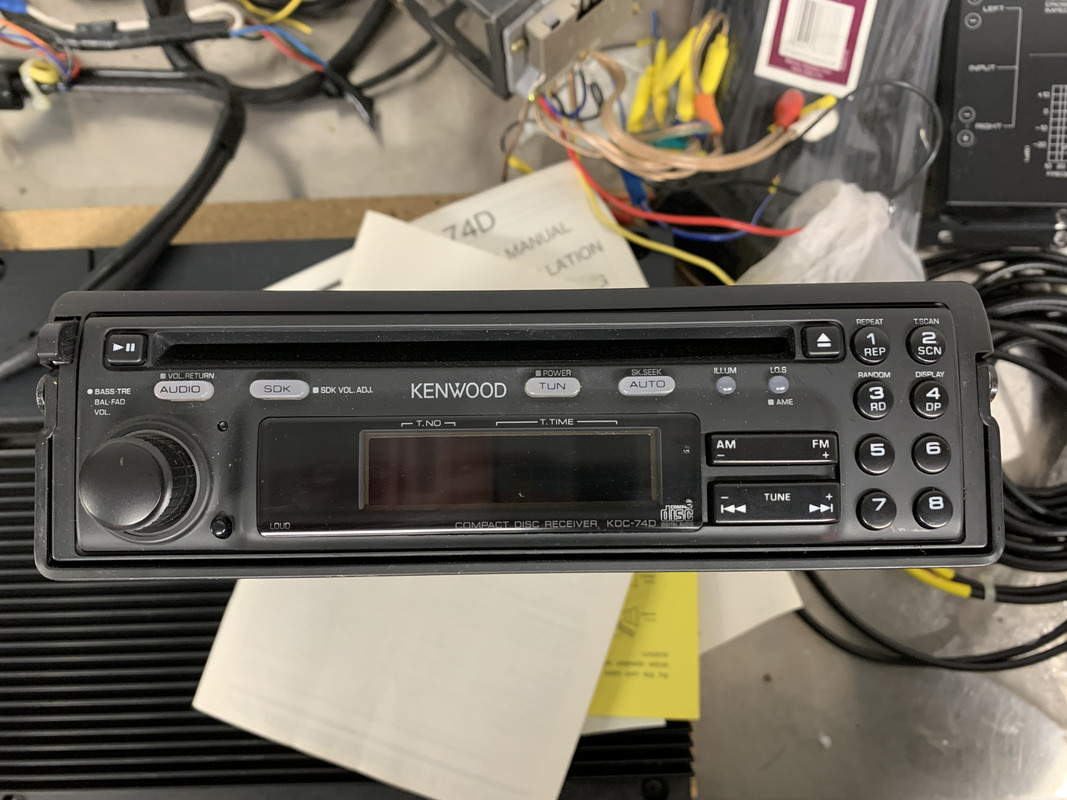
New project, which is quite refreshing. I have what some would call VINTAGE! audio gear from 1986/7. I have never installed a complete audio set up before, so am really interested in this next project. I have a huge list of stuff arriving to complete this. So more later. Should be fun....

Do any of your remember when we used to have these carriage head units that pulled out and came with us????
Well Happy New Year all and I hope it's a healthy and peaceful one.
The original sytem hooked up the the spare tyre to get pressure to spit the water at the windscreen. So that wouldn't do. I managed to get a proper Porsche pump as fitted to just about all their models back in the day. I needed to get a nice factory looking spot to fit the pump. Not easy as the space is a little restricted under there. I fitted the paper hose to see what space was left. I fitted the cleaned washer bottle and lined up the pump to mirror.
The thought of self tappers made me shudder, so out with the rivnutter!
As the system is pressurised by the tyre I needed to add a one way breather so as to not stall the pump when operated.
This is off a BMW and is just one of there generic breathers for pipework. Just a case of drilling a hole in the top the pushing through. The end is the same as shown so I just pushed a short bit of washer tube to keep it in situ. I just need some more pipe to finish off the top.
New project, which is quite refreshing. I have what some would call VINTAGE! audio gear from 1986/7. I have never installed a complete audio set up before, so am really interested in this next project. I have a huge list of stuff arriving to complete this. So more later. Should be fun....
Do any of your remember when we used to have these carriage head units that pulled out and came with us????
Well Happy New Year all and I hope it's a healthy and peaceful one.
h'Project Blue Book' - 'The Red Baron' - Amber Alert!
-
rhd racer
- DDK 1st, 2nd and 3rd for me!
- Posts: 2060
- Joined: Wed Jun 23, 2004 9:47 pm
- Location: Nottinghamshire
Re: Project Blue Book
Cool development! Remember those well - not so convenient for going to the pub / walking round the shops!!
Sent from my iPhone using Tapatalk
Sent from my iPhone using Tapatalk
93 964 C2
99 Boxster 2.5 > 2.7 hill climber
71 914/6 3.0 - gone
'You see Paul, hill climbing is like making love to a beautiful woman. You get your motor running, check your fluids, hang on tight and WHOA..30 seconds later it's all over!' Swiss Tony
99 Boxster 2.5 > 2.7 hill climber
71 914/6 3.0 - gone
'You see Paul, hill climbing is like making love to a beautiful woman. You get your motor running, check your fluids, hang on tight and WHOA..30 seconds later it's all over!' Swiss Tony
Re: Project Blue Book
Thank you evero much fellas. I really appreciate the comments!
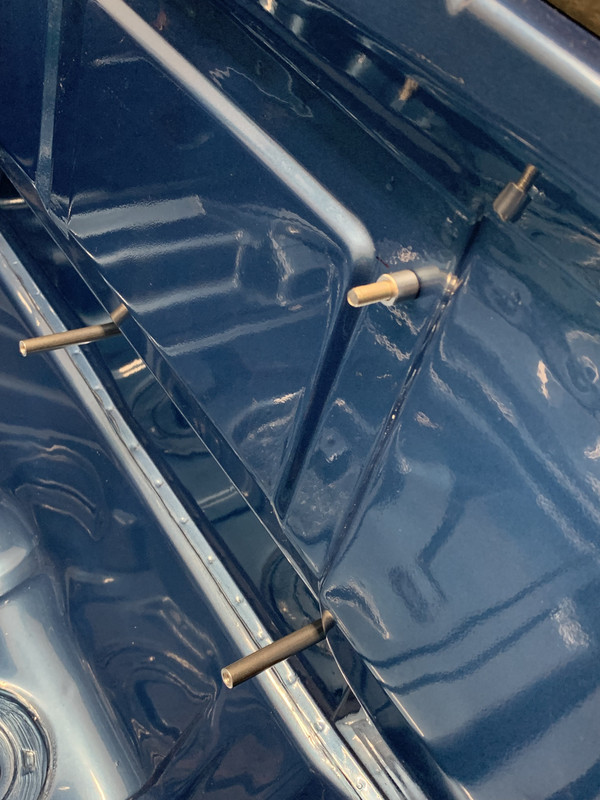
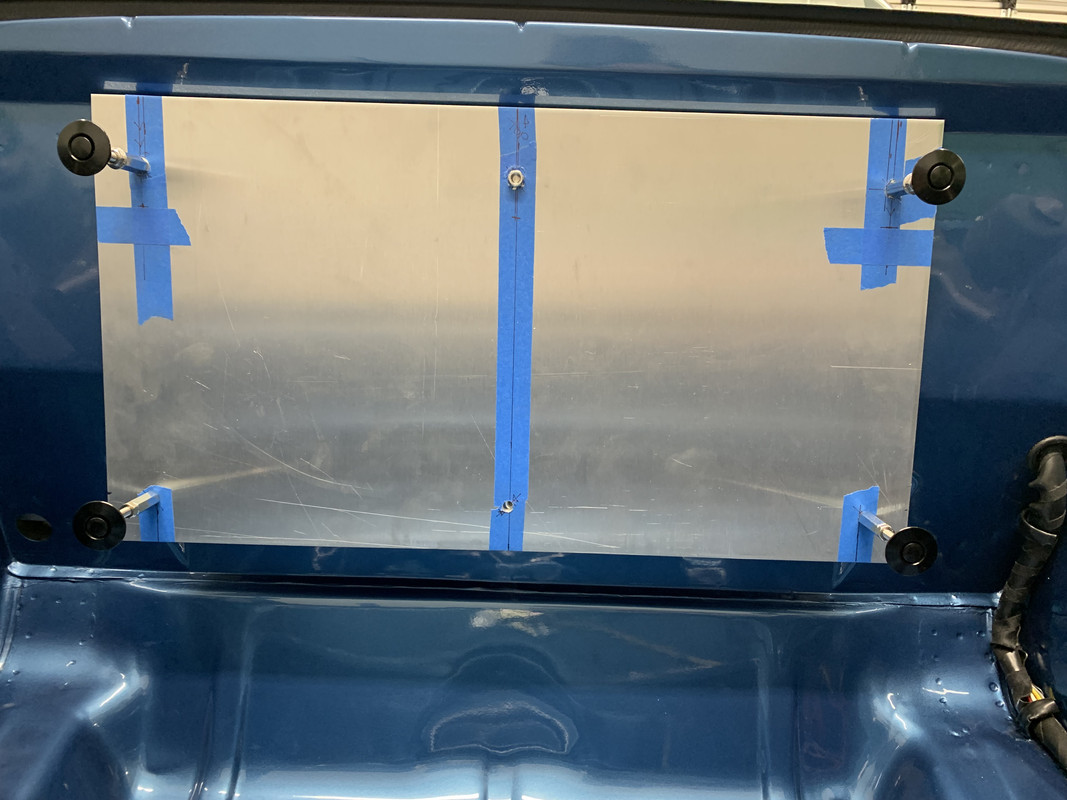
I have been busy in the garage with lots of things going on at the same time. But to get up to date, let's carry on with the Stereo install. I have to say it's a work in progress and by no means finished. There has been a lot to learn.
A lot of measuring with this one. Measure twice and cut once!
The firewall was the obvious place to put everything as there isn't much room in the cabin. The firewall isn't even all the way down so I have had to machine some threaded stand off's to get the mounting plate parallel.
The next image show how I am going to conceal the amp and crossovers.
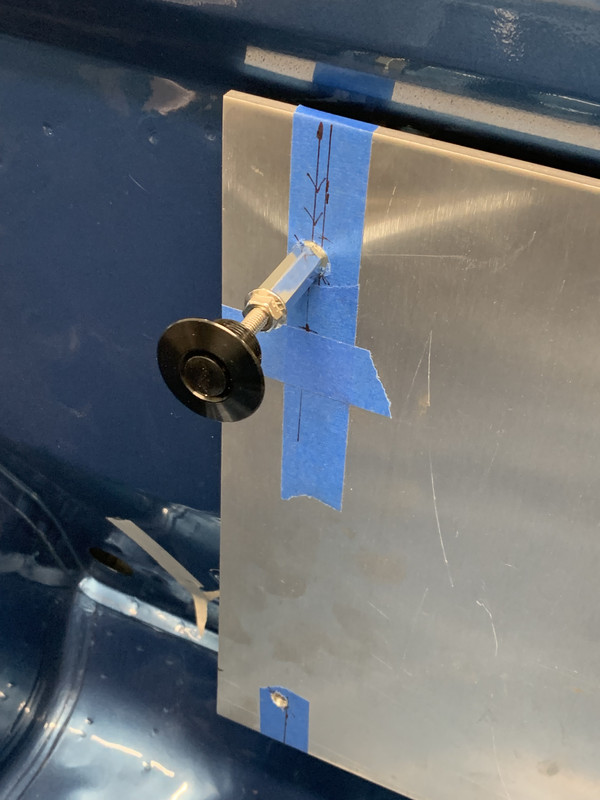
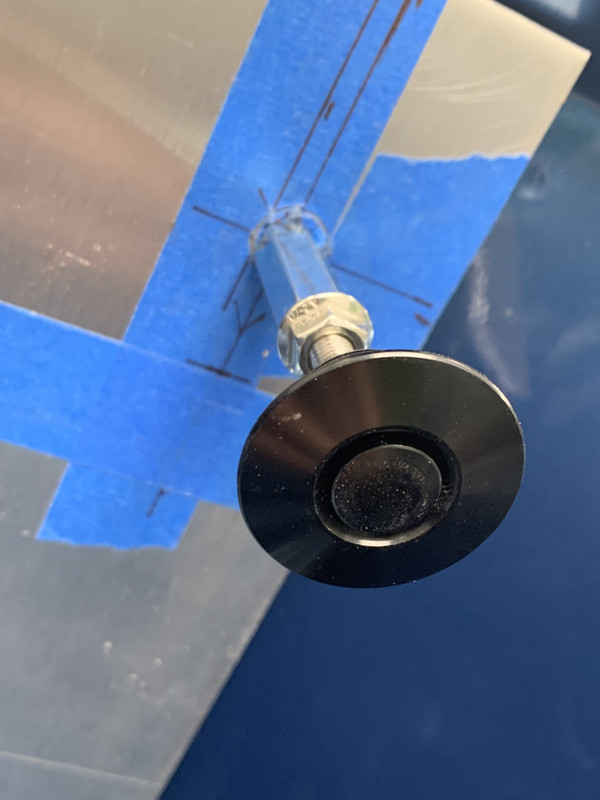
You just press the centre of the button and they pop off.
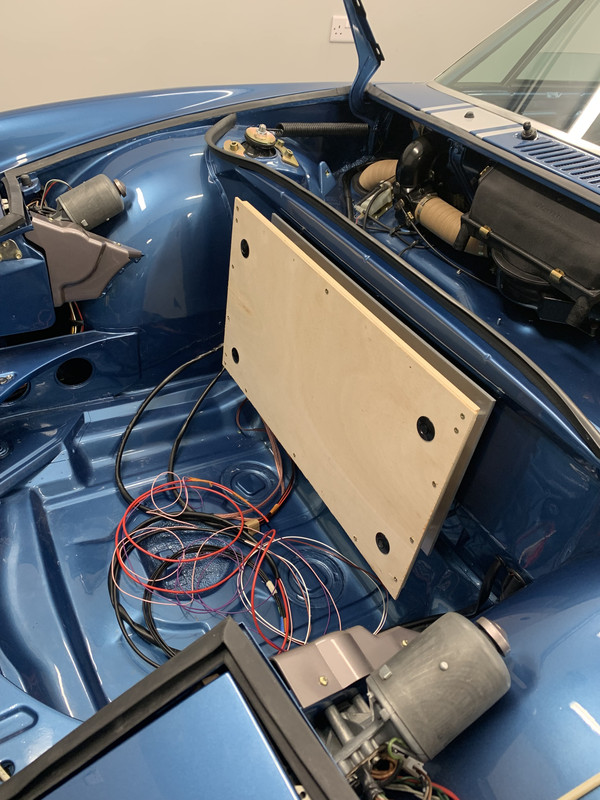
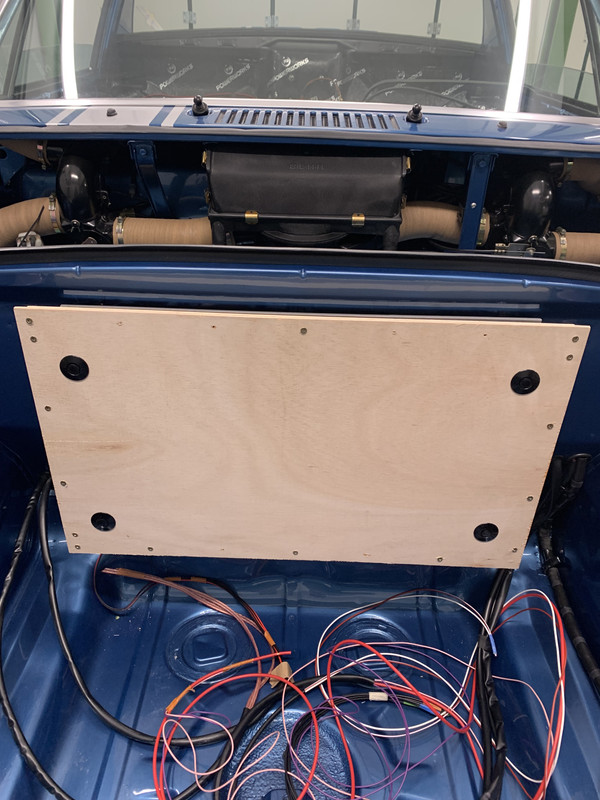
So I went back to my woodworking routes and started to put together the cover. This will be trimmed after.
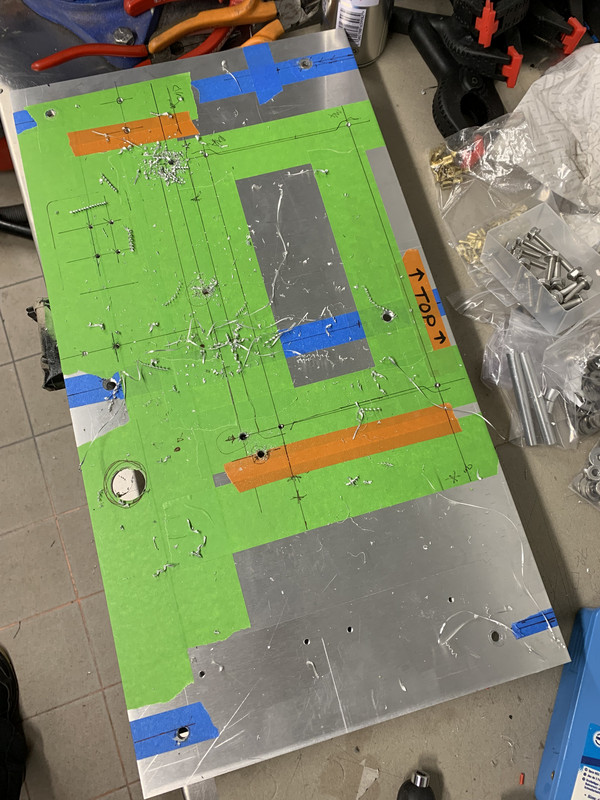
Lots of drilling and tapping threads to fit everything.

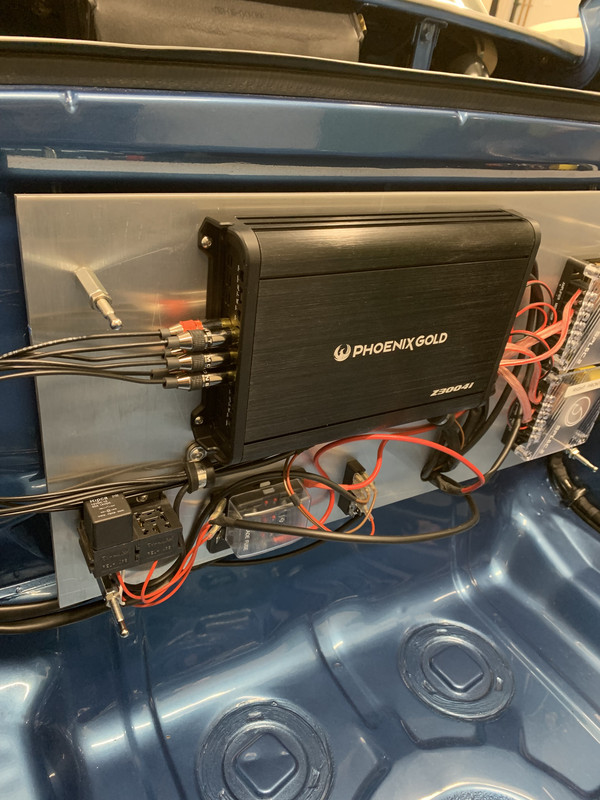
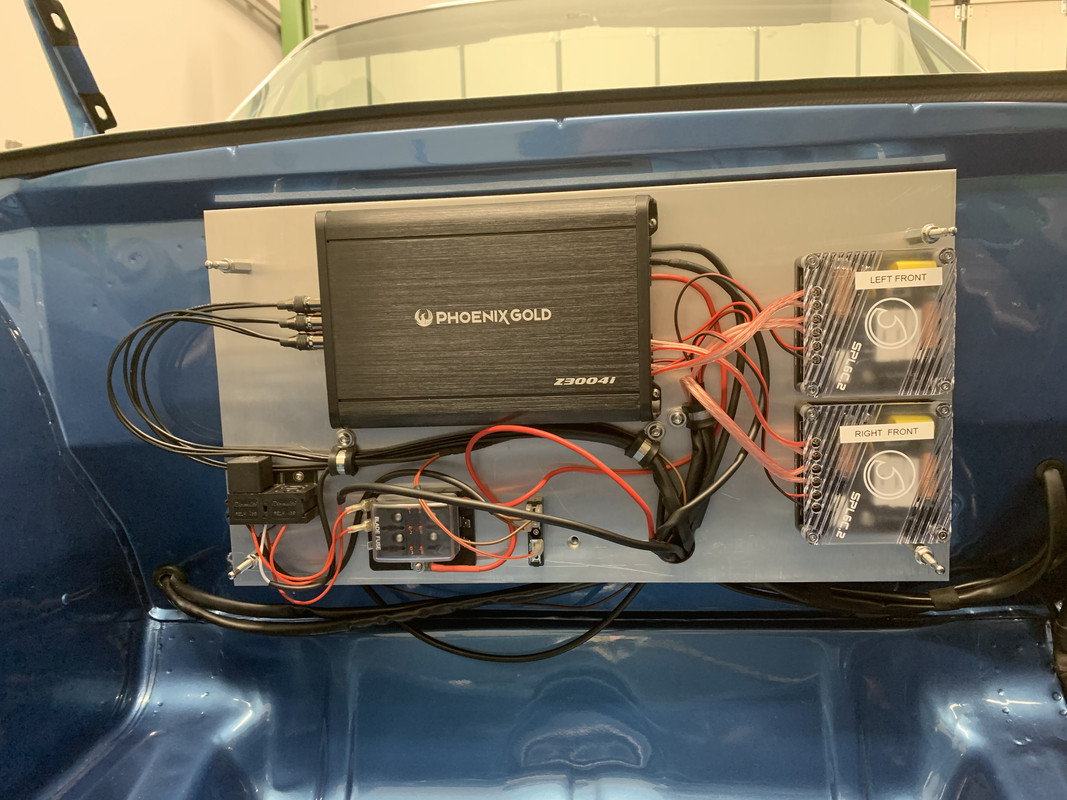
Taking shape. Lots of cabling to bring through from the cabin. I used a clean line from the battery to the fuseboard. This should cut down on interference noise.
The realys are for spot lights and a spare for anything else I want to install.
The eagle eyed of you will see that I did not use my old amplifier. I wnr for a new one with pre outs to fit a driven base box to go in the passenger foot well.
Just seemed an easier option.
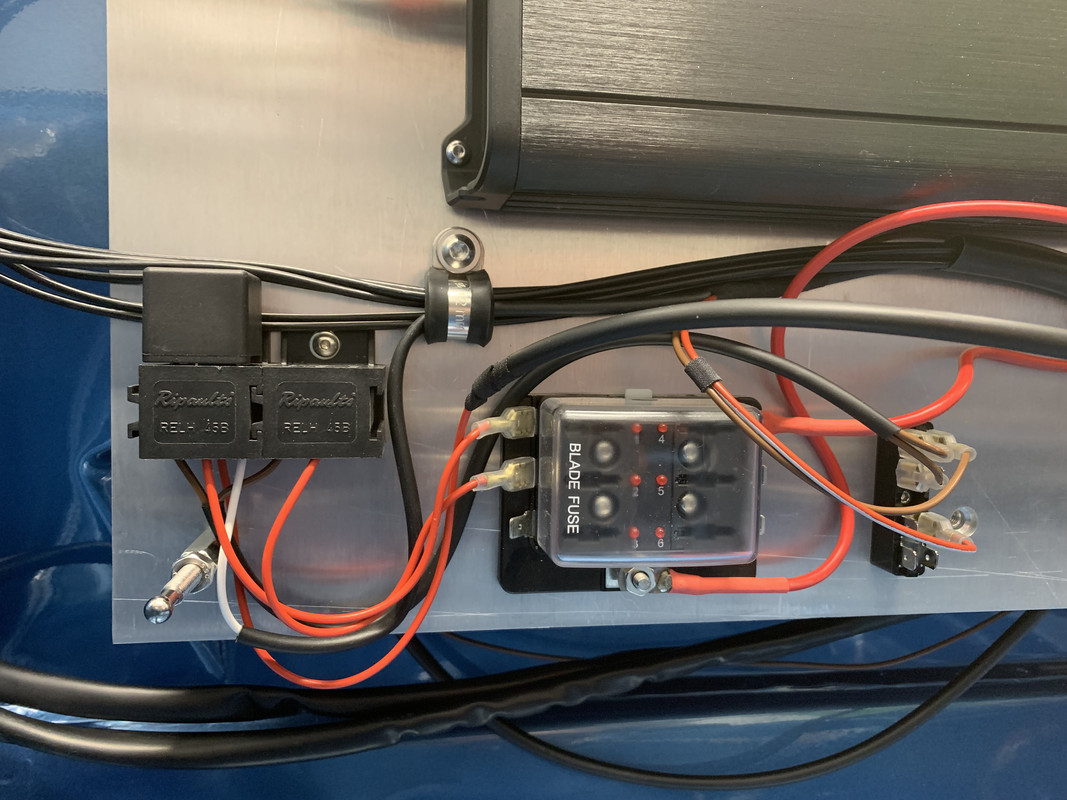
Shown here are the relay for spot lights plus a spare and a set of 'Switched Lives' if needed along with tsome earths.
So with the main infrastucture sorted I could get back to fitting the petrol tank. I will revisit the stereo once i'm a bit further on with other stuff.
I will sign off now....
I have been busy in the garage with lots of things going on at the same time. But to get up to date, let's carry on with the Stereo install. I have to say it's a work in progress and by no means finished. There has been a lot to learn.
A lot of measuring with this one. Measure twice and cut once!
The firewall was the obvious place to put everything as there isn't much room in the cabin. The firewall isn't even all the way down so I have had to machine some threaded stand off's to get the mounting plate parallel.
The next image show how I am going to conceal the amp and crossovers.
You just press the centre of the button and they pop off.
So I went back to my woodworking routes and started to put together the cover. This will be trimmed after.
Lots of drilling and tapping threads to fit everything.
Taking shape. Lots of cabling to bring through from the cabin. I used a clean line from the battery to the fuseboard. This should cut down on interference noise.
The realys are for spot lights and a spare for anything else I want to install.
The eagle eyed of you will see that I did not use my old amplifier. I wnr for a new one with pre outs to fit a driven base box to go in the passenger foot well.
Just seemed an easier option.
Shown here are the relay for spot lights plus a spare and a set of 'Switched Lives' if needed along with tsome earths.
So with the main infrastucture sorted I could get back to fitting the petrol tank. I will revisit the stereo once i'm a bit further on with other stuff.
I will sign off now....
h'Project Blue Book' - 'The Red Baron' - Amber Alert!
-
rhd racer
- DDK 1st, 2nd and 3rd for me!
- Posts: 2060
- Joined: Wed Jun 23, 2004 9:47 pm
- Location: Nottinghamshire
Re: Project Blue Book
Looks cool
The amp will generate a lot of heat in a closed box though won’t it? Might hit the thermal cut off and cut out on you, and you know that will always happen when you are in the middle of LFO…..
Sent from my iPhone using Tapatalk
The amp will generate a lot of heat in a closed box though won’t it? Might hit the thermal cut off and cut out on you, and you know that will always happen when you are in the middle of LFO…..
Sent from my iPhone using Tapatalk
93 964 C2
99 Boxster 2.5 > 2.7 hill climber
71 914/6 3.0 - gone
'You see Paul, hill climbing is like making love to a beautiful woman. You get your motor running, check your fluids, hang on tight and WHOA..30 seconds later it's all over!' Swiss Tony
99 Boxster 2.5 > 2.7 hill climber
71 914/6 3.0 - gone
'You see Paul, hill climbing is like making love to a beautiful woman. You get your motor running, check your fluids, hang on tight and WHOA..30 seconds later it's all over!' Swiss Tony
Re: Project Blue Book
Very good point. I’m hoping that the aluminium plate being 6mm with quite a bit of air gap behind will suffice.
Thank you for the ‘Heads up’ though. I’ll keep it in mind.
Thank you for the ‘Heads up’ though. I’ll keep it in mind.
h'Project Blue Book' - 'The Red Baron' - Amber Alert!
Re: Project Blue Book
Morning All.
Easter gave some time to shuffle along with the Project Blue Book build. All about the details now.
First off Angus, Sam and the chaps at 'Greatworth Classics' have been moving at some considerable pace with the build.

Some lovely 'Amberglas' on show. This was molded from my fiberglass engine shroud. I have spent a long time getting this to fit as it allows the original oil cooler to remain. These are quite a rare find!
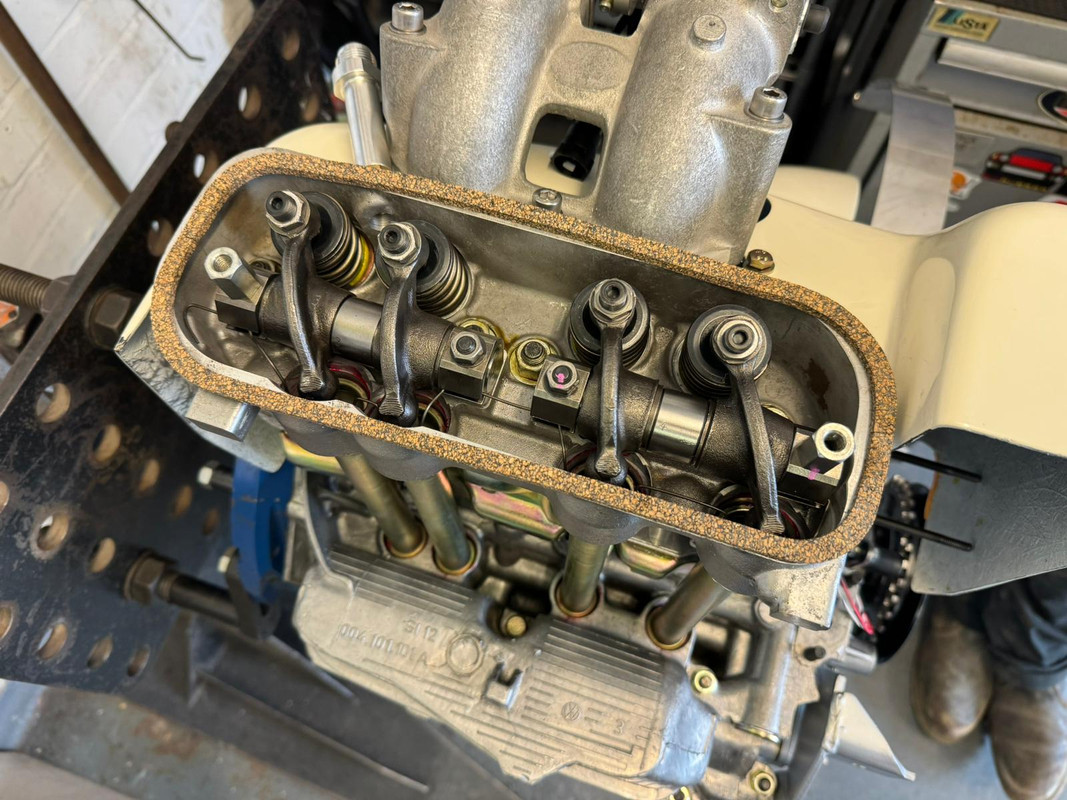
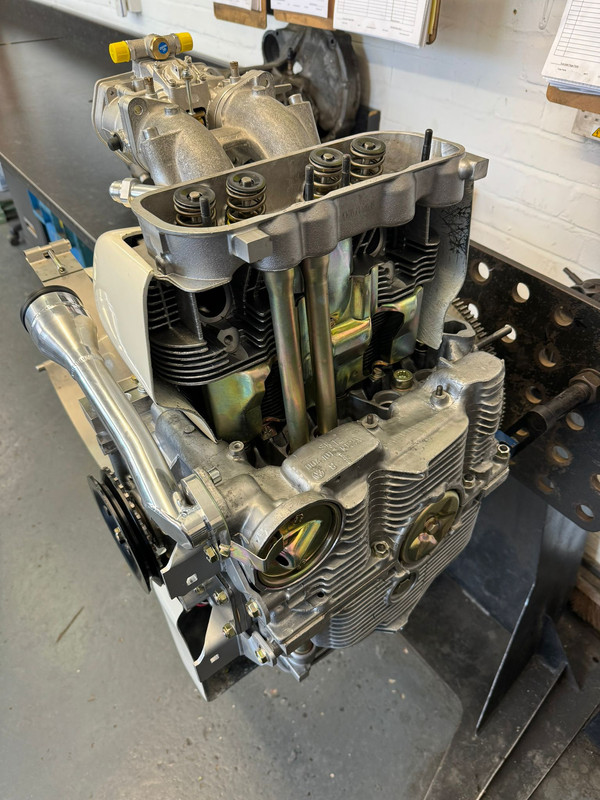
Starting to take shape now.
Whilst they are busy in Banbury i'm playing catch up a home.
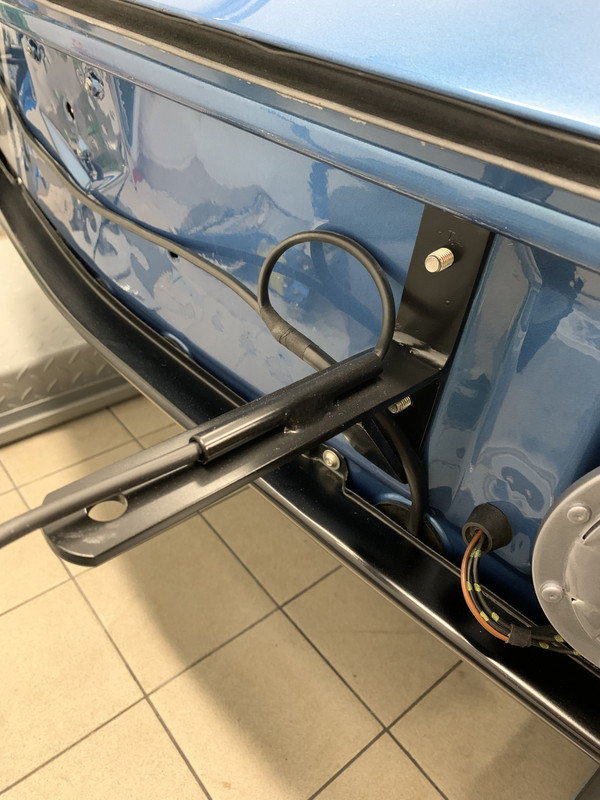
We left last time with my bumper project. So here is where we are at....
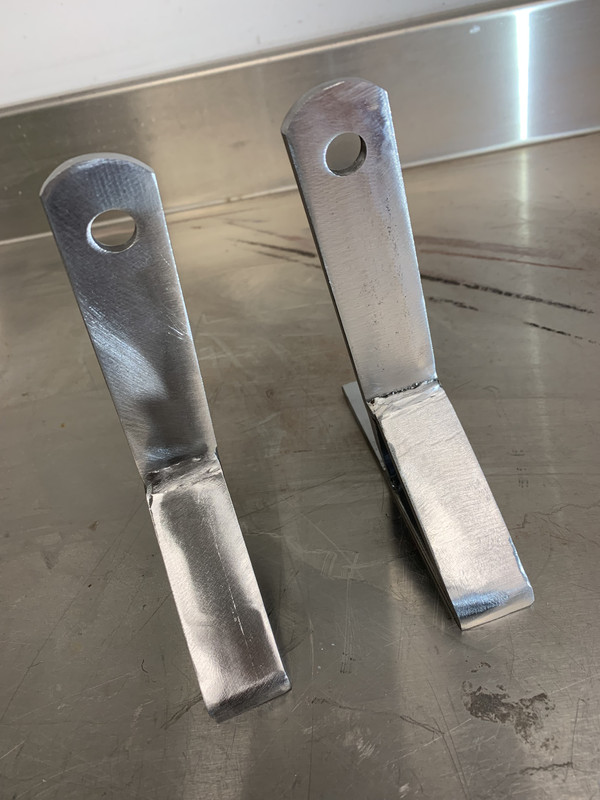
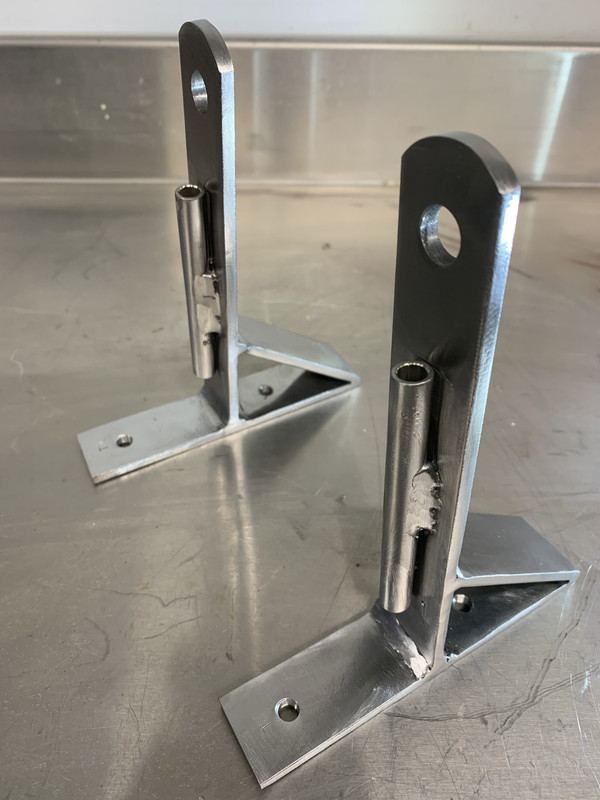
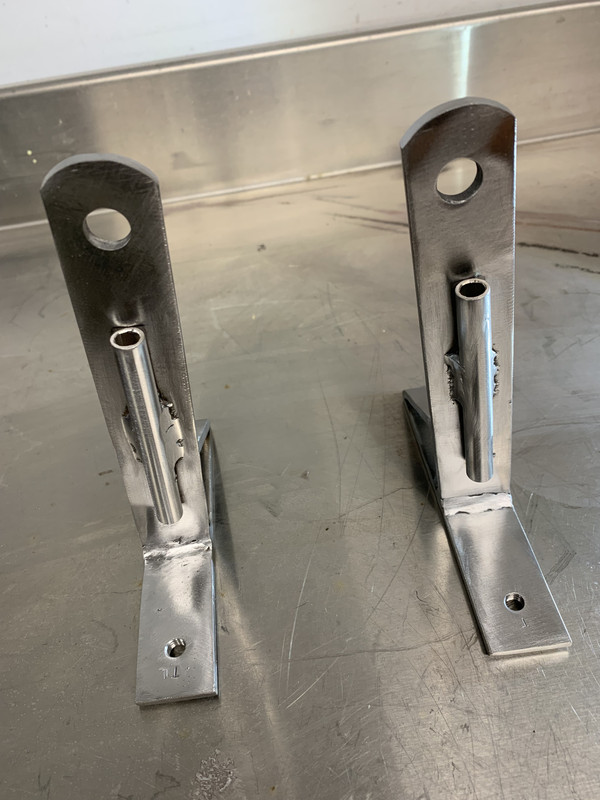
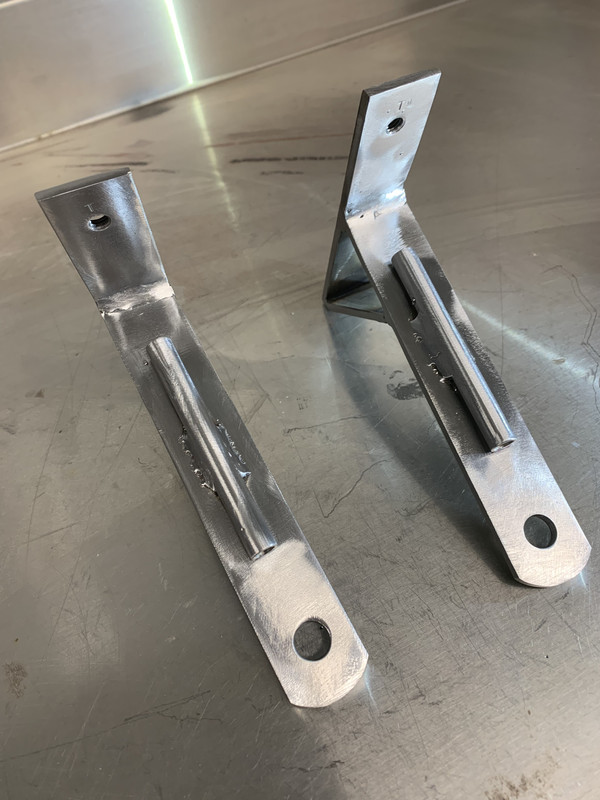
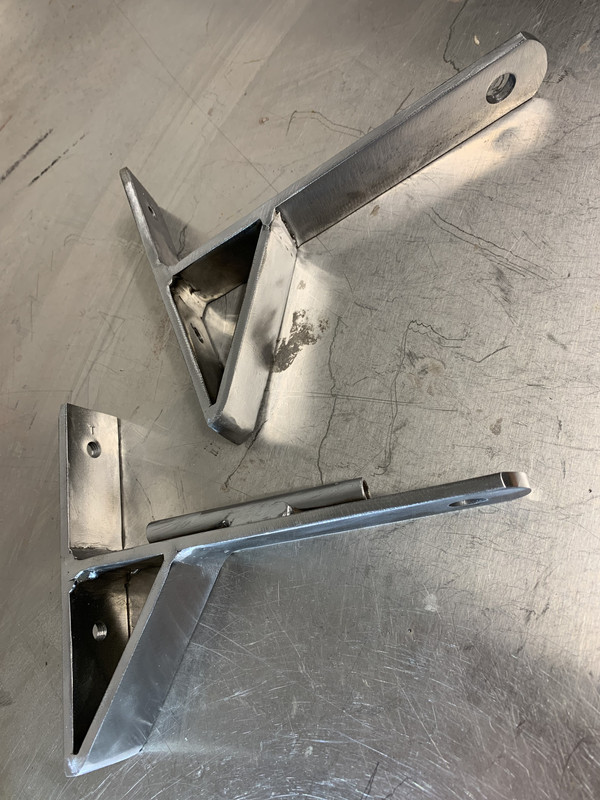
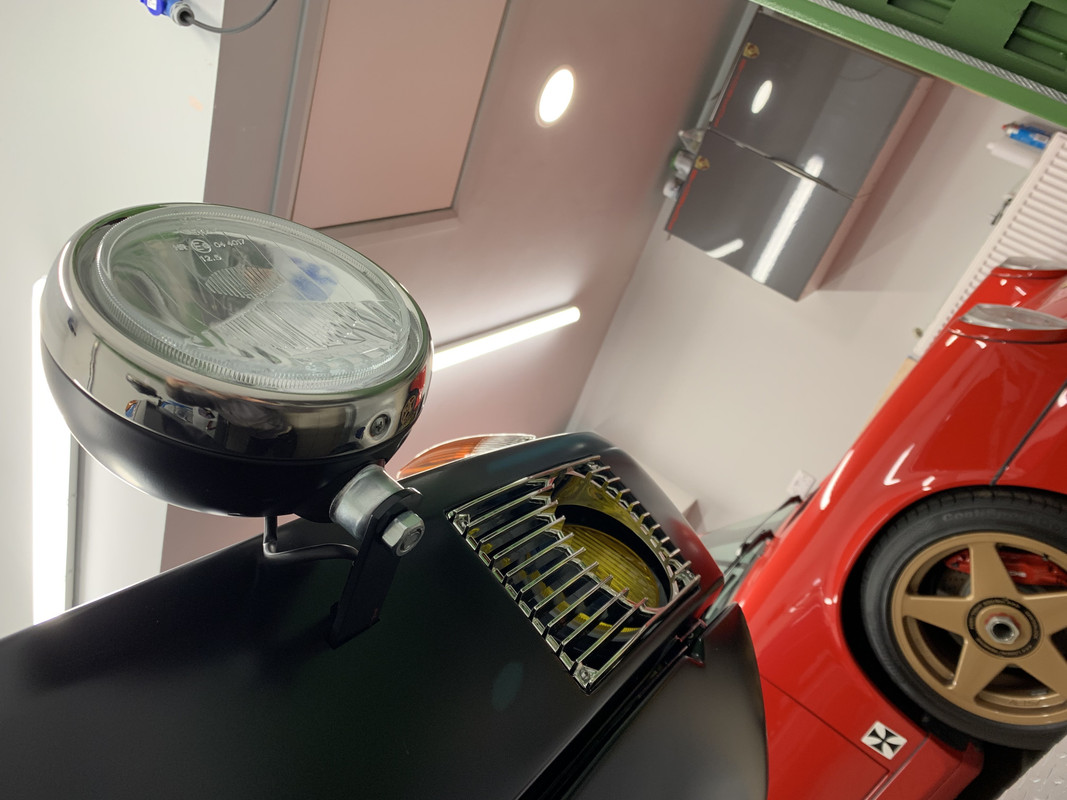
SPOT LIGHT brackets were a right pain to make as the body shell is kinda boat pointy at the front so the brackets needed to be made at an angle to come through the bumper straight. This also meant threading them to be able to pop long cap head set screws loosely through to get through the bumper holes and then be tightend up at the same time as the bumper. This was because I only wanted the bumper holes to be a couple of 'mm' bigger than the bracket to keep it looking tight.
Here is one of the many trial fits and mock-up.

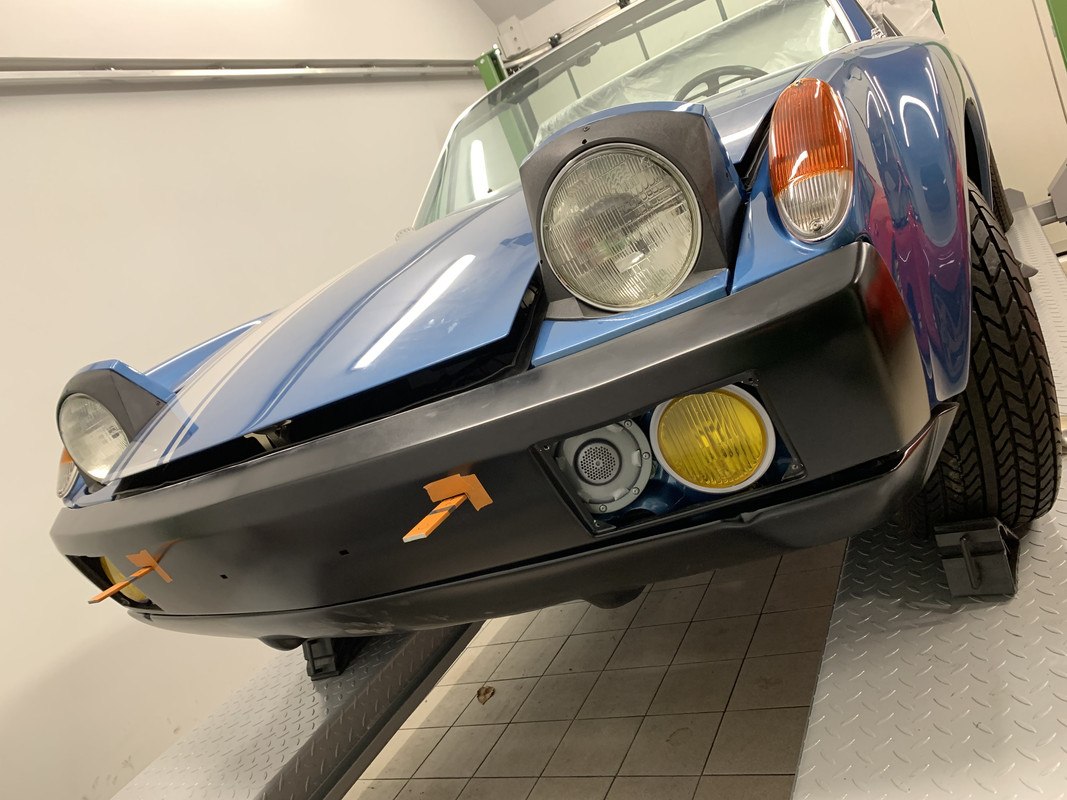
And finally...

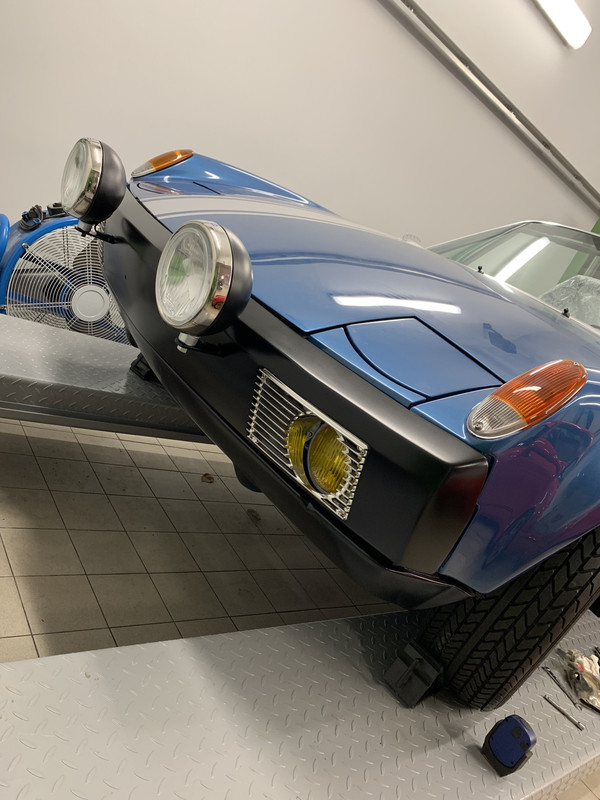
So just the covers to pop on, but not go around to that bit and photos, so more later.
Thank for looking in!
Easter gave some time to shuffle along with the Project Blue Book build. All about the details now.
First off Angus, Sam and the chaps at 'Greatworth Classics' have been moving at some considerable pace with the build.
Some lovely 'Amberglas' on show. This was molded from my fiberglass engine shroud. I have spent a long time getting this to fit as it allows the original oil cooler to remain. These are quite a rare find!
Starting to take shape now.
Whilst they are busy in Banbury i'm playing catch up a home.
We left last time with my bumper project. So here is where we are at....
SPOT LIGHT brackets were a right pain to make as the body shell is kinda boat pointy at the front so the brackets needed to be made at an angle to come through the bumper straight. This also meant threading them to be able to pop long cap head set screws loosely through to get through the bumper holes and then be tightend up at the same time as the bumper. This was because I only wanted the bumper holes to be a couple of 'mm' bigger than the bracket to keep it looking tight.
Here is one of the many trial fits and mock-up.
And finally...
So just the covers to pop on, but not go around to that bit and photos, so more later.
Thank for looking in!
h'Project Blue Book' - 'The Red Baron' - Amber Alert!